
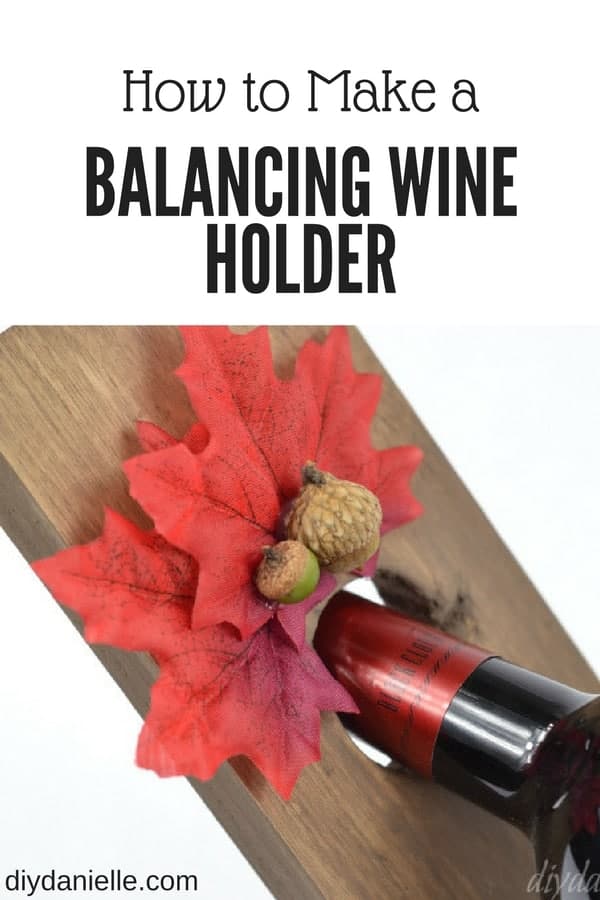
How to make a balancing wine holder using wood and some wood working tools.
This post may contain affiliate links which may earn me commissions should you click through them and take certain actions. As an affiliate for Amazon, Cricut, xTool, Home Depot, and other sites, I earn from qualifying purchases. Please DIY carefully. View my full legal disclosures here.
The majority of my content is generated by me, as are 99% of the photos and videos, but I utilize technology for titles, descriptions, video editing out all of my ums, and occasionally for text overlay on images.
Please read the whole post so you don’t miss any important information!
Pure Bond provided the wood for this project and Old Fashioned Milk Paint Company provided the paint.
I won’t lie. This was sort of my, “I have this wood and need to do another one of these gift posts so let’s just combine the two” half-@$$ projects.
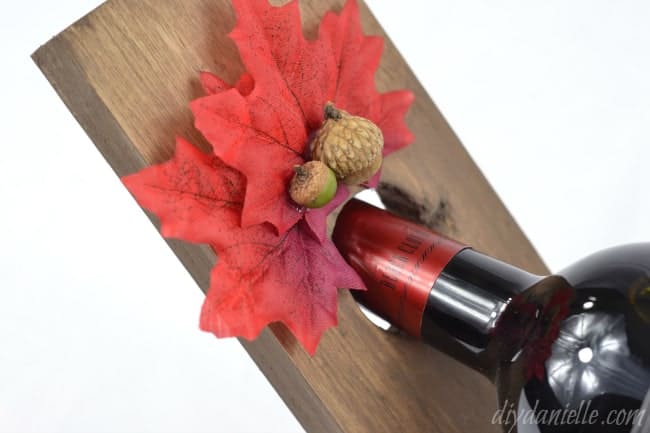
It was the VERY last 30 day grab & go gift series video that I was filming and I was exhausted. So we started to cut the wood. The edge got screwed up a bit. Ugh. I was irritated and thinking this would be junk. But I persevered. Painted it. Hated the color. Wiped the paint… then… OH! OHHHHH! It looks like a tree now! I LOVE IT! Haha… so I rolled with the tree theme and made this a fun Fall themed wine holder. I am SO glad I did. The end result is super cute.
The funniest part of this project was going to the local park to find acorns. I thought this would be a fun project with the kids because “Yay! Nature hunt!”
All I have to say is this. People. Pick up after your dogs. Because it’s apparently very difficult for an almost 3 year old to tell the difference between a pine cone and aged dog poop. LOL!
Supplies
Supplies listed below may include affiliate links to the products.
- Pure Bond: The wood cut is 3.5×10″
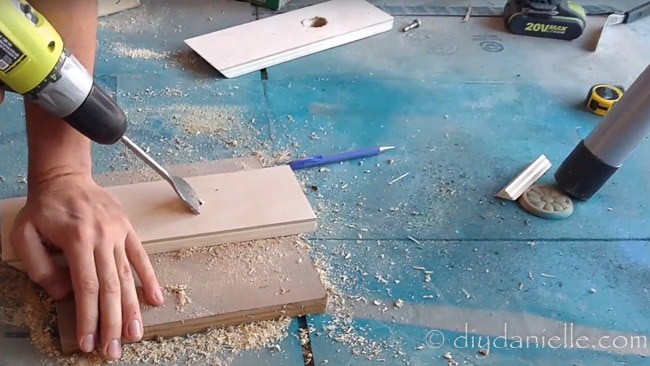
- Something to cut your wood with. We used a miter saw and then we used a drill with a spade bit. Probably want to be like… 100x more careful than my husband was with his spade bit. Please.
- Sand paper or a sander
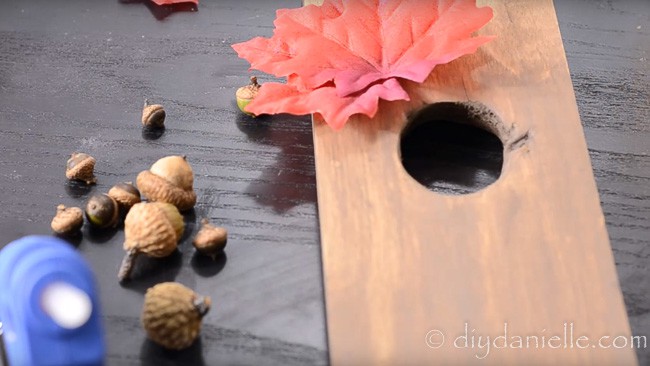
- Fall Leaves and Acorns (from the ground)
- Old Fashioned Milk Paint, Driftwood and a wet rag
- Optional: Wood burning kit, Carving kit
How to Build a Balancing Wine Holder
Cut the edges of your wood with a miter saw.

Drill your hole with a spade bit.
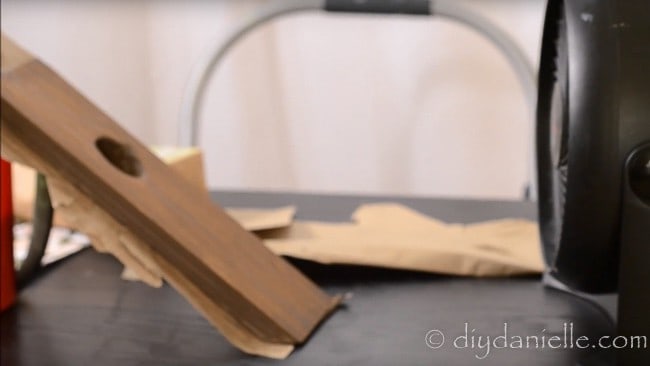
Test to make sure the wine bottle holder can balance the wine bottle properly. Then paint. Let dry.
Adding embellishment.
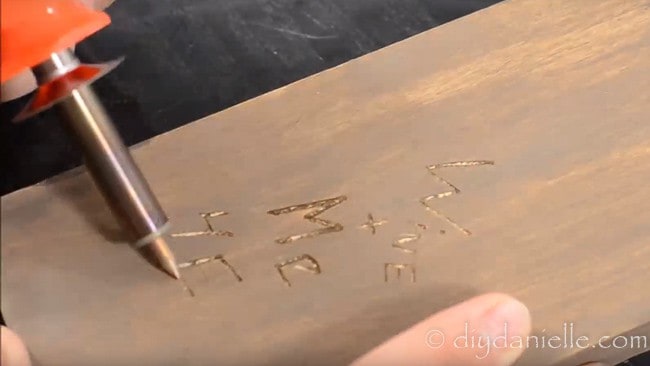
This part made me giggle. I used a carving knife to carve this, then I went over it with my wood burner.
Here’s the more detailed tutorial, in video format.
Love it? Pin it!
Here is a list of all the gift tutorials in this series:
- DIY Grocery Bag Holders
- How to Make Homework or Art Displays
- Easy to Make Cloth Napkins or Wipes
- Mint Extract Recipe
- Reusable Bread Bag DIY (to give with fresh bread)
- MYO Braided Dog Toy
- Make your own Paper Mache Pokeball
- Peach Infused Liquor Recipe
- Sewing Pattern: Extra Large Pot Holder
- Make a Fabric and Wood Cross
- Adult Women’s Apron Pattern
- DIY Cake Mix Cookies in a Mason Jar
- Pillowcase DIY
- How to Make a Library Tote Bag
- Craft Easy Tile Coasters
- Free Coffee Sleeve Pattern
- Craft an Essential Oil Storage Box
- Learn to Make Reusable Bowl and Casserole Dish Covers
- Make your own Dry Oil Perfume
- FREE Lunch Bag Pattern
- DIY Wall Decals
- How to Make Ice Packs Shaped like Pokeballs!
- Cement Candle Holders DIY
- Build Easy Wood Step Stools
- Make Easy Soy Candles
- DIY Cutting Boards
- How to Make T-Shirt Stencils Using Freezer Paper
- How to Make Easy Concrete Planters
- Sew Easy Reusable Gift Bags