
How to make a simple no mess DIY duck waterer.
This post may contain affiliate links which may earn me commissions should you click through them and take certain actions. As an affiliate for Amazon, Cricut, xTool, Home Depot, and other sites, I earn from qualifying purchases. Please DIY carefully. View my full legal disclosures here.
The majority of my content is generated by me, as are 99% of the photos and videos, but I utilize technology for titles, descriptions, video editing out all of my ums, and occasionally for text overlay on images.
Please read the whole post so you don’t miss any important information!
If you have ducks, you might know that they love water. They love to splash in it and get it dirty. They love to tip it over.
They also NEED to get their bills in the water to eat. It’s part of their deal. So you can’t just use a nipple waterer like you would with chickens.
Most duck owners fight the constant battle to keep their water clean- and fail. They’re out changing water twice a day which is a large time commitment for animals that are otherwise fairly easy to care for.
I decided to make our own DIY waterer, based on what I’ve seen other duck owners doing. It works well and keeps the muck in the water down to a minimum. I can change it once a day (3 ducks) without an issue.
Note that they also have access to other sources of water during the day to swim in and in the winter we use a heated water bucket so the water won’t freeze.
Supplies for a Duck Waterer
- 5 gallon bucket with lid
- Something to cut with: A hole saw or jig saw should work. We tried a number of different tools
- Safety equipment: Steel toed boots , safety glasses, gloves
- Sandpaper
- Sander
DIY Duck Water Bucket Tutorial
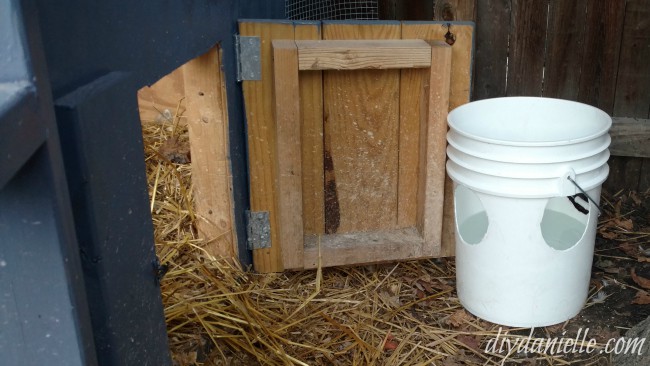
For this project, you’ll want a clean 5 gallon bucket with lid. I use a top on the finished product to keep debris from getting into the bucket (our bucket is under a tree so I didn’t want leaves in it).
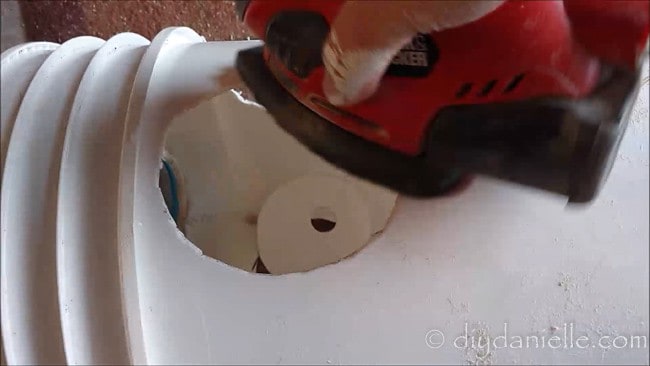
We cut three holes around the top portion of the bucket. You want them to be high enough that you have room at the bottom for water, but low enough that the ducks can reach inside to get the water.
If you have a smaller breed of duck, you may want the holes to be lower than I put mine.
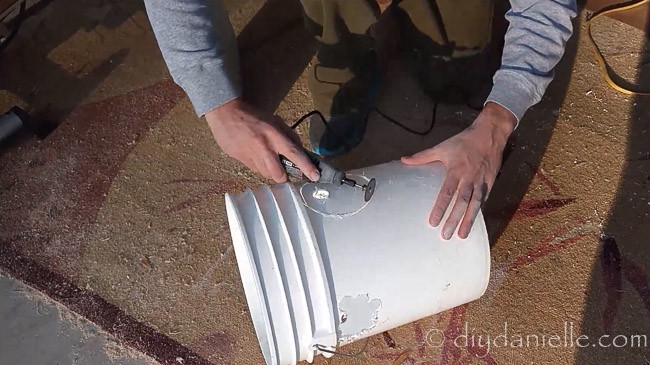
Cutting was dangerous. The bucket is awkward to hold and you’ll want a good tool for the job. We tried a spade bit, but didn’t have a large enough one to do the job.
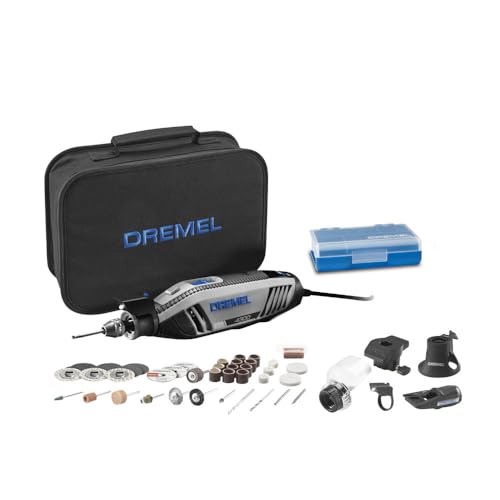
We finished up with a Dremel… I edited the part of the video where the blade fell off because we put it on wrong. Nobody got hurt, but I will re-emphasize to be careful when cutting. BE CAREFUL. Wear protective gear- including steel toed boots, safety glasses, and gloves. You may also want a respirator if you are sanding.
I think a hole saw or jig saw might be better options.

We added three holes. I accidentally put one where the handle falls. I’d recommend avoiding the spots where the handle falls (both sides), otherwise the handle will end up blocking the holes.
Afterwards, I sanded down the edges so they weren’t sharp. So far it’s worked well. We haven’t had poop in their water. They get some food debris in there, but it’s not nearly as bad as before.
The water DOES get dirty on its own if left- it’s still standing water. But it’s far cleaner than it is otherwise and I change the water out once a day.
If you’re a bit scared to try this, you can try this other option for a Duck Waterer Solution with purchased items that don’t require a lot of changes.
Interested in other duck tutorials? We used this easy fencing for an open run around the secure run. Our smaller DIY run is secure against predators and this is our duck house. This is how we setup our duckling brooder.
Need an easy shelter and don’t want to DIY? Here’s what you can buy.
Omlet makes a ton of chicken shelters and runs that are movable and have lots of accessories available. You can add wheels and handles to move the run as needed which is nice. The cages look like they’re well predator-proofed, and you can get an attached run up to 13′. They even sell an automatic coop door that opens and closes when the sun rises and sets. The Eglu Go is their easily movable shelter and run. They have perches to add on, swings, treat holders, and even chicken clothing. Totally worth checking out if you like to geek out over your poultry.
Here are some products in my store that you might be interested in!
Video Instructions for a Duck Waterer
Love it? Pin it!

How To Make A No Mess Duck Waterer
Make your own DIY duck waterer. It's easy and inexpensive to make and also saves time on keeping up with refilling the ducks water.
Instructions
Recommended Products
As an Amazon Associate and member of other affiliate programs, I earn from qualifying purchases.

Great idea. I’m going to make this today with an old plastic bucket. My ducks are almost ready to go outside. Thank goodness as the mess indoors is getting pretty intense!
Haha. Yes they’re not that much fun to keep indoors after a week or two!
Thanks for putting this online! Just made mine using a five gallon bucket with lid from Tractor Supply. Cost $5. Used a drill bit that came in a kit we had never even used before that makes holes in doors for door knobs. Worked great… Then sanded it down and just put it out for the ducks. Great, easy project and just what we needed for our very messy ducks.
Isn’t it great! It’s not perfect but it’s a huge improvement!
Just added a small float valve and quick release connector. Hooked it up to a hose, so now its self filling. Still need to rinse it out every couple days though. Never knew ducks were so messy!
Brilliant! And yes, they’re ridiculously messy lol. We kicked them out of the real pond and gave them their own after a while because the pond was out of control dirty.
Had several baby ducks in the house that I kept in a large tote type container. But I wanted the ducks to be very tame so I also gave them a lot of attention everyday . I let them lay on my lap while sitting in my recliner. But since you never know when a duck will have to release themselves? Best have a large towel or some other type of material to lay over you for the duck to lay on! Otherwise you may not be happy when your ducks leave a present on your lap! Anyway, my ducks got older where they could go outside and be normal ducks doing what Ducks do outside including swimming in their ponds and pools. Still if the front door of the house is open my ducks will help themselves to come in the house and jump up on my lap when I’m sitting in my recliner. They think their lap dog Ducks! Have a video of one of the ducks jumping up on my recliner with me. But I don’t think I can add it here to let anyone watch?
@Danielle, I put an outlet at bottom of bucket attached to fish tank hose with clamp. I can empty the bottom out and flush without taking bucket out.
Hate to be Capitan Obvious, but hopefully you’ve learned the way you did it was not the greatest. As someone else used, a hole saw would have been a much better and safer(if properly assembled) tool for cutting the holes. The Dremel could’ve been used, but not with a cutoff wheel. Hopefully your experience motivated you to learn more about the tools you use, and didn’t scare you away from them.
@Joe, You sound like a jerk! Not every one has a drill and if they do, I don’t know many people who have hole saws, let alone one big enough to do this project. They can be pretty expensive and to buy one just to use it once is stupid. I just made a bucket feeder with the pvc 45s and I used a box cutter, even though I have access to a giant work shop with tons of tools in it. I was comfortable with making my template, tracing it on to the bucket, scoring it and then carefully using a box cutter to cut it. Much easier than trying to hold a vibrating bucket as I attempted to drill holes into it. Sometimes patience is safer than speed.
I didn’t think he was a jerk at all, honestly You turned out sounding like the jerk! All he did was share an idea he had and how he thought was the best way to accomplish getting the project done. No time did he say you have to do this exactly how he did it! When people share their ideas it’s to help others and even inspire others to come up with ideas of their own to do similar projects! How they do them is just suggestions not demands or absolutes! You took a man’s kindness and attempted to turn him into some kind of bad man. But all you accomplished if showing who you really are yourself and it put you being a negative person instead of this man showing his project!
I cut a hole in an empty and washed gallon milk jug. I use a pair of good scissors to get the job done at the ‘corner’ opposite the handle. This allows me to put 1/2 gallon of water in the jug daily and carry it by its own handle. When it gets too yucky with mold that’s impossible to clean inside the handle, I just make a new one. Our kids go thru 2 gallons of milk a week.
@Emily, Good idea. I threaded my hose at bottom of bucket to the outside so I can easily flush.