Patterns and printables available free to subscribers on diydanielle.com.
I regularly add new patterns and printables to my blog. If you don’t want to miss them, make sure to subscribe to my blog. Subscribers have access to a Resource Library with over 40 sewing patterns, printables, plans, and more.
These patterns are for personal use only. Please do not distribute these patterns directly to others or sell the patterns.
I’m an amateur at creating sewing patterns and woodworking plans so please keep that in mind. If you have any questions, feel free to email me or leave a comment on the relevant blog post. I try to respond as soon as I can.
You can sign up for access to the resource library and mailing list below.
How to Assemble Sewing Patterns
I consider myself a pretty amateur pattern designer. I have exclusively used patterns that I buy online so when I make my own patterns, I’m using a similar style to what I’ve seen other online pattern makers use.
It was brought to my attention that I haven’t really explained how to use any of my patterns. Whoops. A big thank you to the follower who sent me an email.
So let me show you how I put together my patterns and hopefully it will help you assemble yours.
Smaller Patterns
For the smaller items, the entire pattern is on one sheet. Cut out, use like you normally would.
Multiple Page Patterns
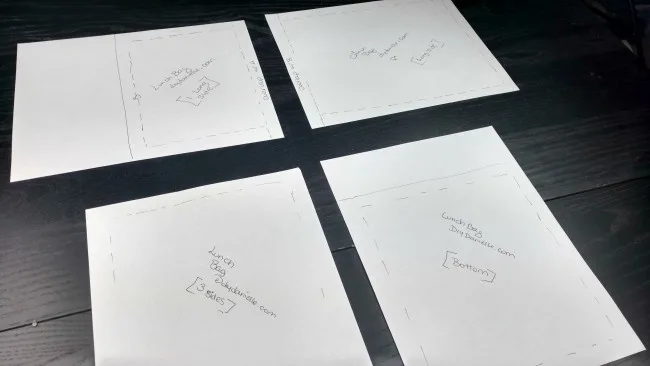
Print all of the pages. Make SURE that you print one sided and do NOT fit to size. You want it at the original size. Here are my pattern pieces for the lunch bag laid out. Someday I’ll figure out how to make patterns on the computer, but right now it’s all handwriting. Sorry y’all. I am new to this.
Now you’ll notice the bottom two pieces are stand alone pieces. For the right piece, you’ll cut on the solid line. Your paper edges are the edge on the other sides. For the left bottom piece, it says this is the pattern for three of the sides. You’ll need three cuts of this for exterior, interior, and lining. Here’s where it gets a little weird. For patterns that take more than one piece of paper, you have overlap areas which will be marked. It states to overlap A/B. The overlap area is the area between the paper edge and the dotted line.
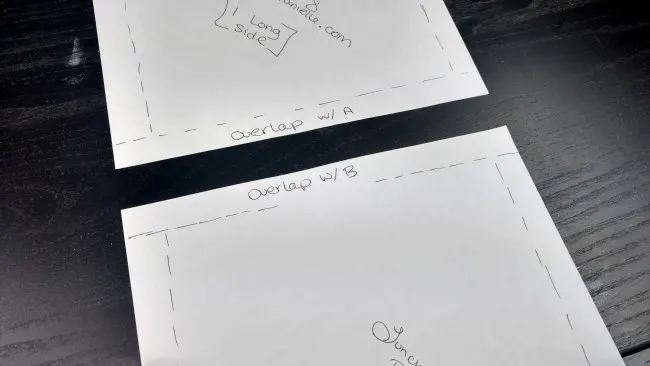
You just need to tape it together like this. As you can see, you are unable to see the seam allowance area for one of those papers. That’s because it’s overlapping now.
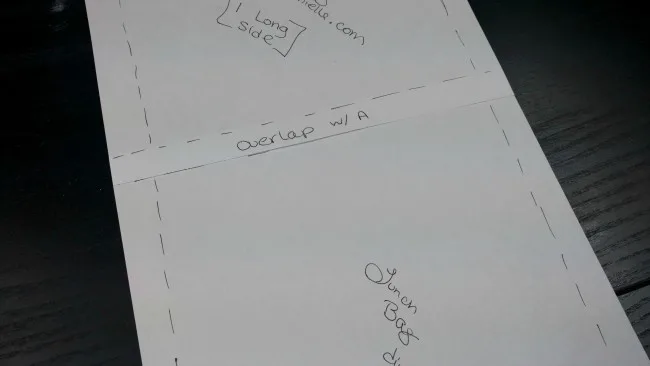
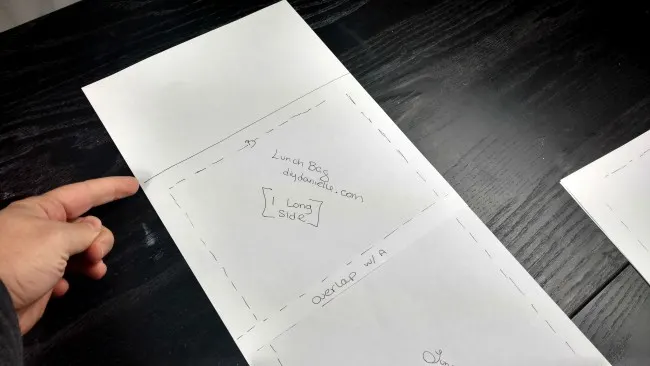
To finish, just cut along the top solid line (where I’m pointing) and you have your pattern piece for the long side of the lunch bag.
Hope this helps! Happy sewing!

