This rashguard pattern and swim shorts pattern are the “Swimmers” set from Boo! Designs. It’s a great pattern for boys and girls.
This post contains affiliate links. If you make a purchase using these links, I may receive a small commission. This does not affect your price for the product. Thank you!
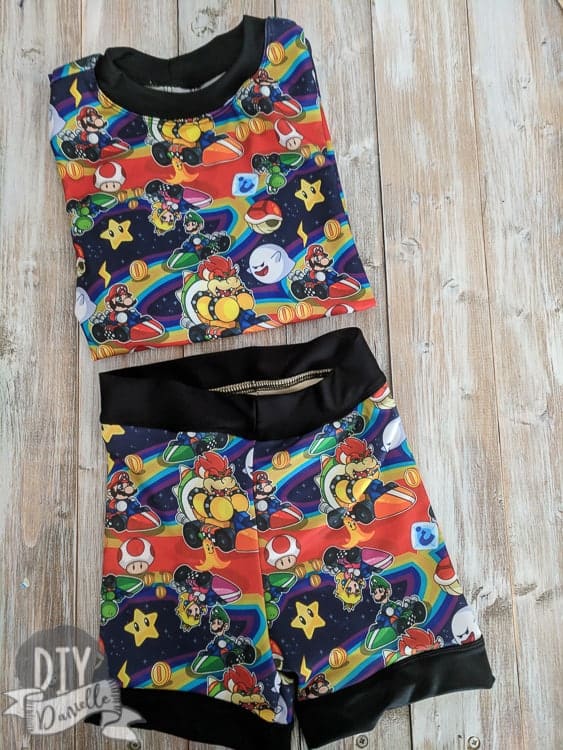
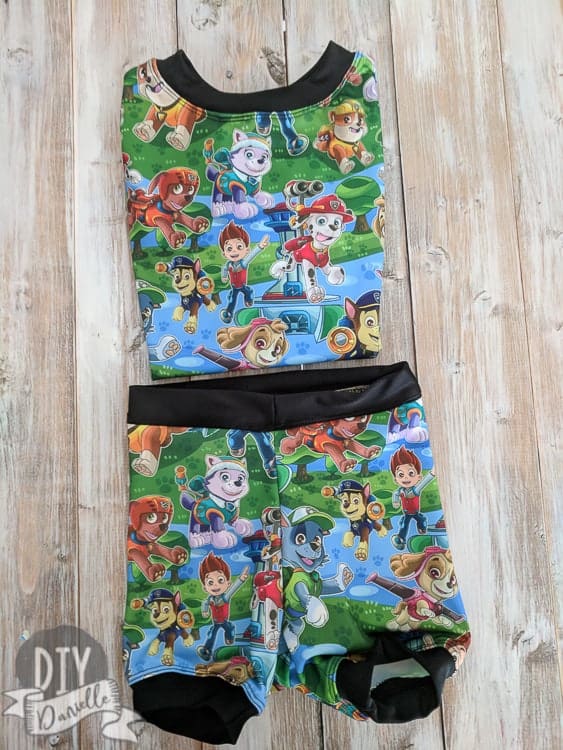
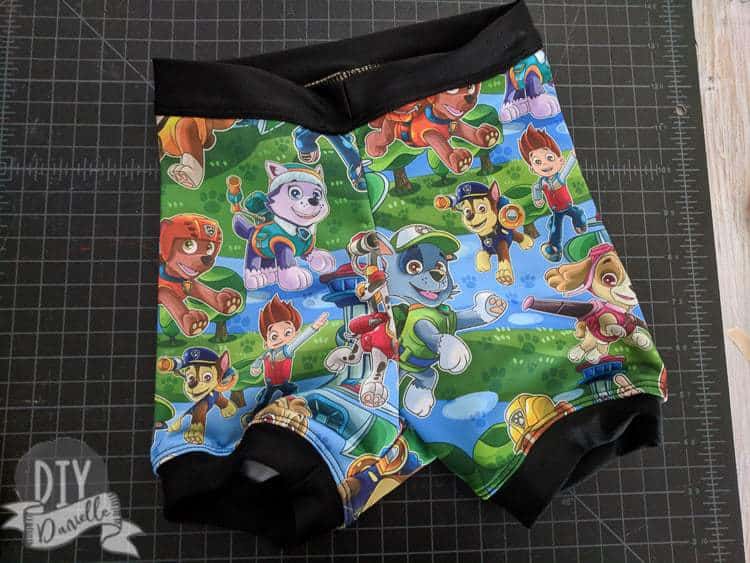
I found some super cute Paw Patrol and Mario Kart swim fabric through a co-op I belong to so I ordered a couple yards to make swim suits for the boys. The problem was that the fabric was made for tight fitting items like a rashguard and not for board shorts. I decided to make them the sets from Boo! Designs. This is an Australian company and you can order the PDF pattern online, then print it from home. I really like using PDF patterns and prefer them over the store designs. The one downfall is that the tight fitting shorts aren’t typical for kids in the USA and my kids will only wear their swim suits at home. Wahhh.
Also my 4 year old, previously ‘into’ Paw Patrol when I ordered the fabric, immediately decided Paw Patrol is for babies once I made this. Ugh. So he won’t wear it in public because ‘I not a baby.’
When I make this again, I’ll probably try to find a neutral color for the shorts and do normal board shorts with the rashguard in this pattern with the custom fabric.
The other issue that I ran into with this pattern is finding the right size swim elastic for it. I couldn’t find it in the stores I was searching online, but Boo! Designs sells it in their store… but I didn’t want to get it shipped from Australia. So I ended up making some adjustments instead to avoid using swim elastic. Honestly I probably did the whole pattern wrong except for the shirt because I had to make so many adjustments, haha.
Supplies Needed for Rashguard and Swimmers
- Swim fabric: Some swim fabrics have different SPF ratings which is worth checking into.
- Swim elastic (optional) or coordinating swim fabric
- Pattern: Boo! Swimmers (Sizes 2-10) or Pattern: Boo! Baby Swimmers (Sizes NB-2)
Need fabric? Try Online Fabric Store® Up to 70% off Fabric + Free Ship $60+. Great Selection, Low Prices or check out Fabric.com.
If you love sewing, don’t forget to check out the Sew Organized phone app!

Rashguard Pattern Adjustments
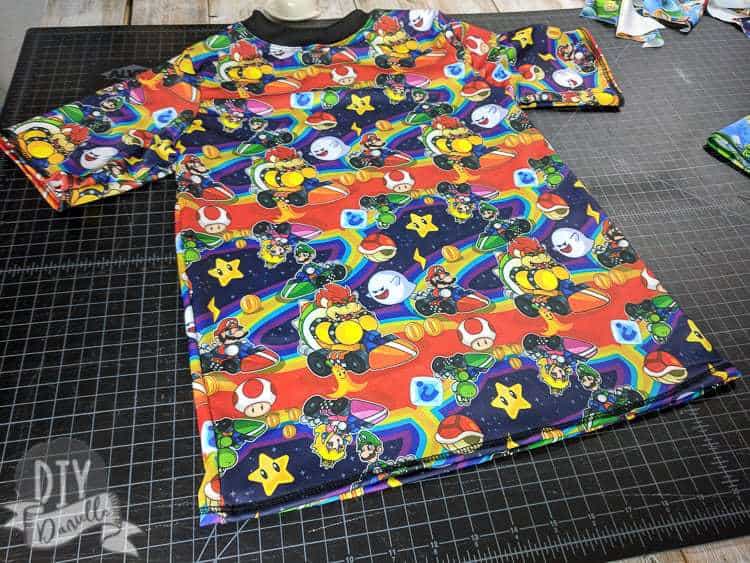
I used my coverstitch machine to finish the bottom and the sleeves on my rashguards. I stuck to the pattern for the rashguard pattern which was very easy to follow. I LOVE how these rashguards came out. This stitch is what you get from a coverstitch machine and it’s similar/same to what you’d get on store bought items.
The opposite side had a double straight stitch… some people opt to use this on the right side of the fabric and some use the thick stitch on the right side. It’s personal preference and I switch this up depending on the project.
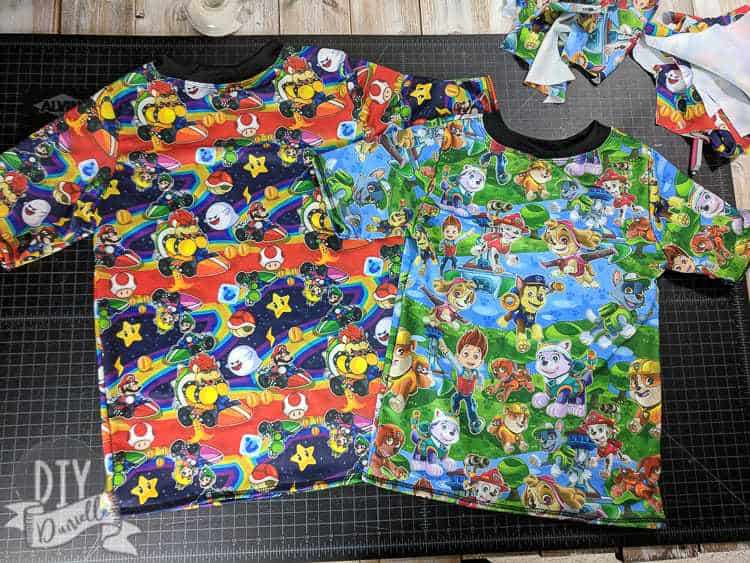
Here are both of the finished rashguards together.
Swim Shorties Adjustments
As I mentioned, my kids didn’t like the tightness of the shorts because it’s not typical for kids in the USA. At least not boys. I’d be tempted to try to lengthen the shorties though to resemble surfing shorts and see if that would work for them. It would certainly be less to apply sunscreen to.
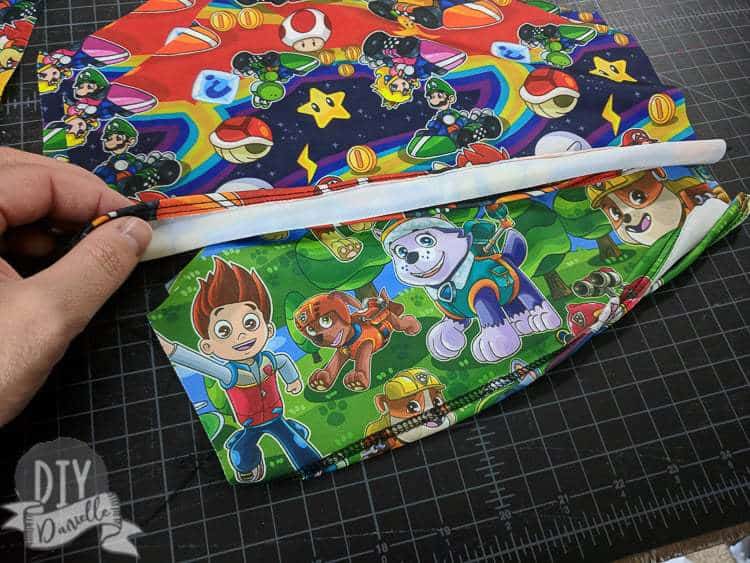
This was also my first time sewing with swim fabric and I just COULD NOT understand how to combine the liner and exterior pieces. I sat staring at the pattern for such a long time. Slept on it. Woke up the next morning… still couldn’t figure it out. Everyone says it’s easy, but my brain just couldn’t wrap around it.
So this is what I did instead, lol.
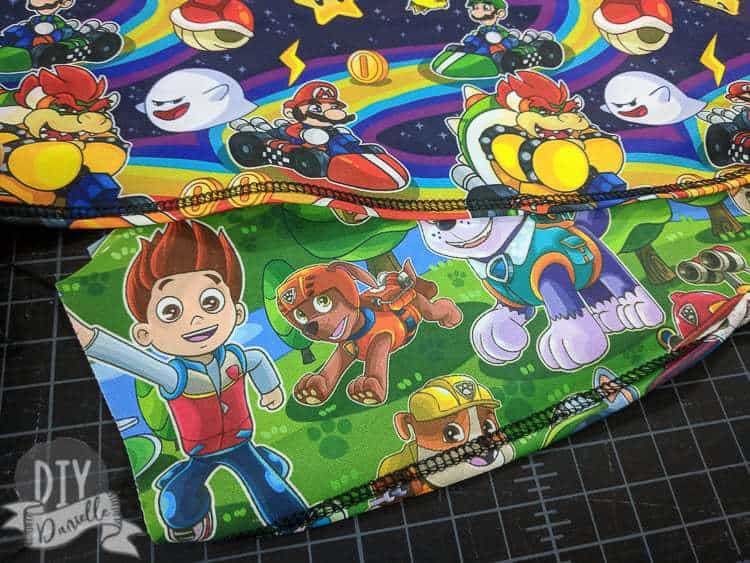
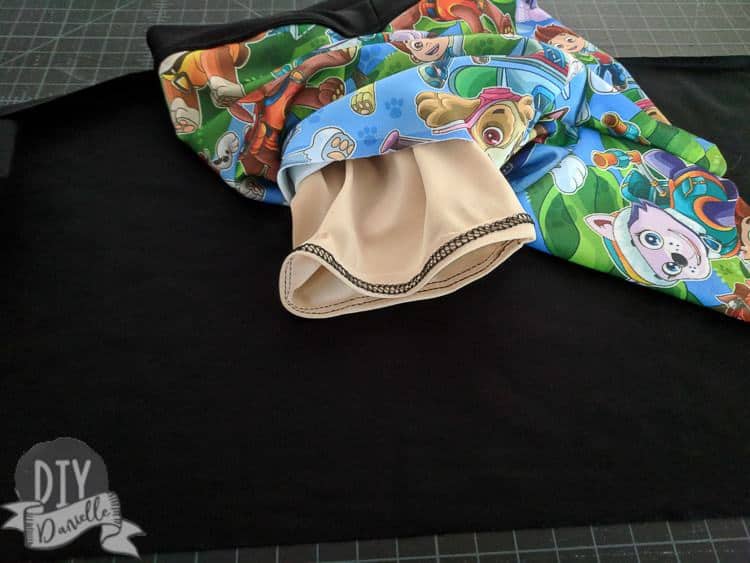
I made both the liner and exterior shorties separately, then tucked the liner piece into the exterior, wrong sides together. Keep in mind that the scratchy part of the seam is the wrong side.

Then I made a waistband with coordinating swim fabric. I used the typical measurements for a waistband for my sons’ sizes. You measure their waist, then subtract some fabric. This allows the fabric to stretch around their belly and hold the swimsuit up. Too loose = bathing suit falling down. Make sure you cut the fabric so the stretch goes along the long part.
K, the one with the Paw Patrol bathing suit, has a 21″ waist and I cut a 18″ x 3″ waistband. G has a 24″ waist so I did 21×3.” I subtracted 2-4″ from the waist measurement.
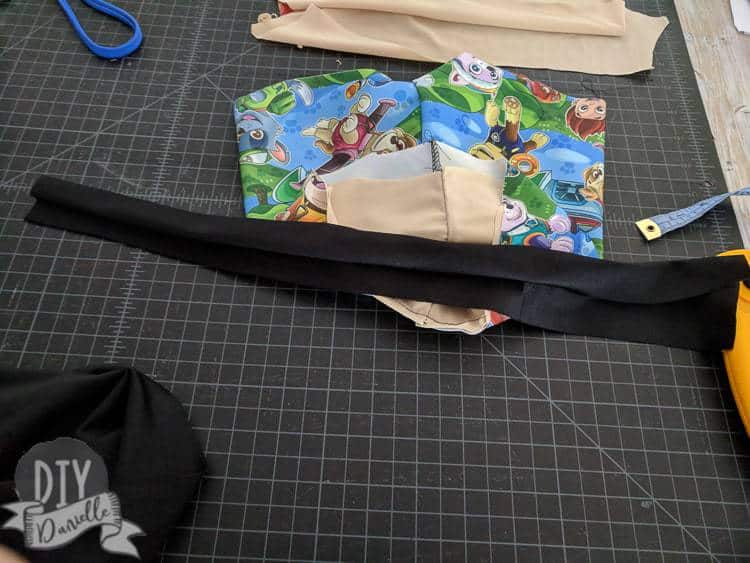
To create the waistband, I folded it so the short ends were right sides together and sewed them together (I used my serger, but a stretch stitch works too). Then I turned right sides out. Fold the band in half wrong sides together so the raw edges meet. Now you need to put pins every 1/4 of the way around your band. Repeat with the swim bottoms. Match those markings up with the raw edges of the band and the raw edges of the swimsuit/liner meeting. Pin. The band will need to stretch as you sew it on.
YOU MUST USE A STRETCH STITCH OR A SERGER.
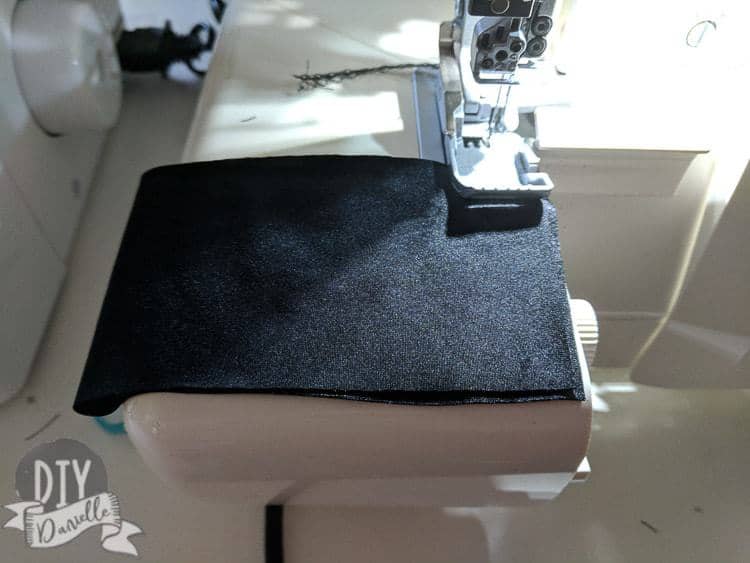
Once I finished sewing it on, I flipped right sides out and top stitched using my coverstitch- again, you could use a stretch stitch on your sewing machine if you like.
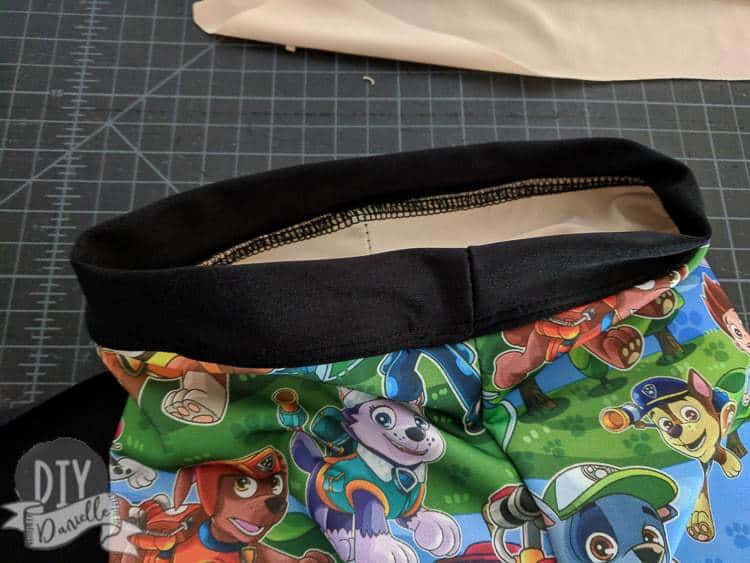
With the band finished, I needed to finish the leg openings on my shorts. I ended up finishing the liner edges with my coverstitch.
Then I created bands for the legs. I had the boys try the swimsuit on, then measured their thighs where the bottom of the shorts fell. I didn’t stress with my older son’s shorts to make his bands tight but with my younger son, I made the bands a bit tighter for fear of accidents. He’s potty trained, but you just never know and the idea of a pool accident really stresses me out!
K’s leg bands were (2) 2×9.” I didn’t write down what my older son’s were, but I think I made his just slightly shorter than the leg was.
Here’s the band process, same as I made the waistband.
Sewing the short sides of the band, right sides together.
Pinning band to the bottom of the shorties.
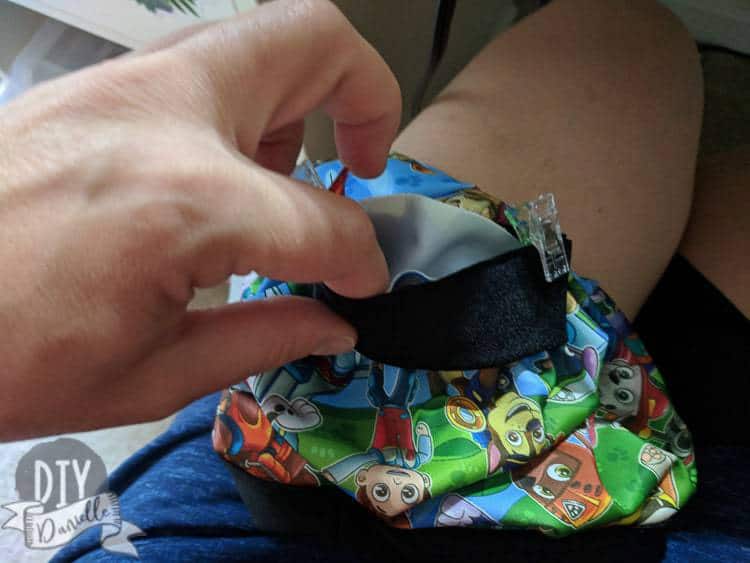
Like I said, the bands on my 4 year olds are smaller/tighter than my older son’s. I did this intentionally.
The bottoms ended up being a little tight on my older son (like tighter than they were supposed to me) so I’ll size up next time if I do this again. Like I said, I might just skip the shorties and do board shorts.
Want more fun sewing ideas? Check out these other fantastic sewing posts:
Baby Taylor Tee with Fabric Scraps | Paw Patrol Ryder Vest Costume or Jacket | Reversible Baby Romper | DIY Nerf Vest | Angel Gowns
How to Babyproof a Sewing Room | How to Thread a 1034 D Serger | Sewing Tools | How to Choose a Sewing Machine | Sewing Tips and Tricks for Beginners
Please pin this! Thank you!
These are the finished sets. I am SO BUMMED that they won’t wear them.