
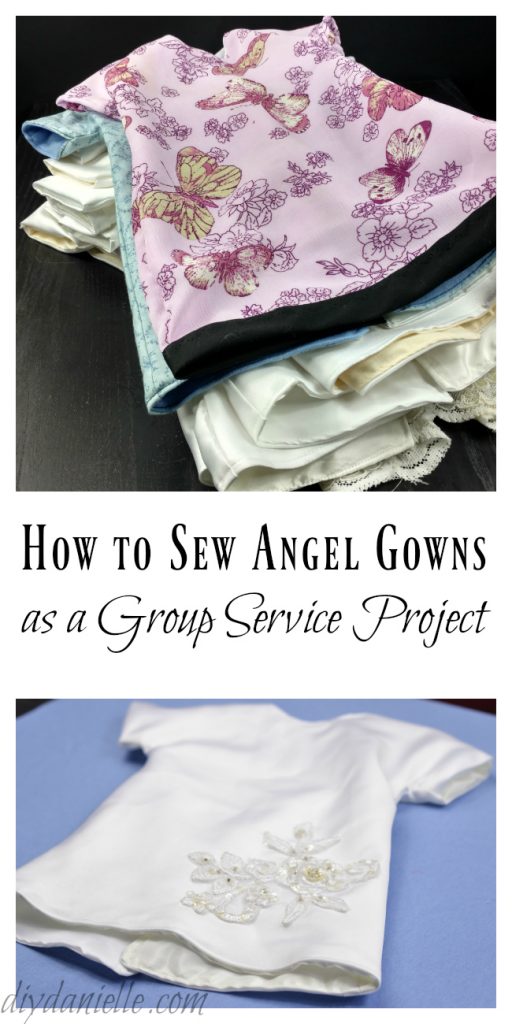
Tutorial on how to sew Angel Gowns from Upcycled Wedding Dresses. This makes a great group service project.
A few years ago I went through my closet to declutter bridesmaid gowns and my wedding gown. They didn’t have resale value from what I could tell, particularly after alterations. I wasn’t quite sure what to do with them and I hated the thought of them going to waste.
I heard about a program called Angel Gowns.
People in the program sew small gowns using upcycled wedding dresses or bridesmaid gowns. These gowns are donated to the hospital and if a baby passes, the parents are offered the gowns for burial. I thought this was a great cause so I donated my gown to the program.
Fast forward a couple of years and my MOPS group needed a service project for the year. I suggested we make these angel gowns as the seamstresses for the program have difficulty keeping up with the need. A few women donated their gowns and we made 13 angel gowns.
If you’re able to donate a dress and can sew the angel gowns yourself, that would be so helpful to your local Angel Gowns program. Our local program always has more dresses than they have people to sew them. If you make the gowns yourself, you can use some of the fabric to make something meaningful to keep for yourself (such as a wreath with tulle, a small purse, use a small piece of the fabric for a backdrop to your wedding photo in a shadow box, etc).
Here’s a tutorial about how to make angel gowns. I used the free angel gown pattern and instructions from 7 Pine Design (please note: she doesn’t have a website anymore, but she offers the free pattern in her Facebook group) to make this, but I wanted to include a video tutorial to explain how to sew the side seams so I hope this helps.
Here’s a couple of products you might be interested in from my store. Keep scrolling for the Angel Gown tutorial!
This post may contain affiliate links which may earn me commissions should you click through them and take certain actions. As an affiliate for Amazon, Cricut, xTool, Home Depot, and other sites, I earn from qualifying purchases. Please DIY carefully. View my full legal disclosures here.
The majority of my content is generated by me, as are 99% of the photos and videos, but I utilize technology for titles, descriptions, video editing out all of my ums, and occasionally for text overlay on images.
Please read the whole post so you don’t miss any important information!
Supplies for Angel Gowns
- Wedding and/or bridesmaids dresses
- Snaps, buttons, velcro, or ribbon to add for closing the angel gowns
- Sewing machine and other sewing equipment. You’ll want a seam ripper.
Upcycling the Dress
More material is key. You want to make sure you have as big of cuts of fabric as possible. I cut along seams that were already there. I removed the tulle (not sure what to reuse the tulle for, but I’m keeping it because I hate to see anything be wasted). I removed the bodice from the bottom portion of the gown.
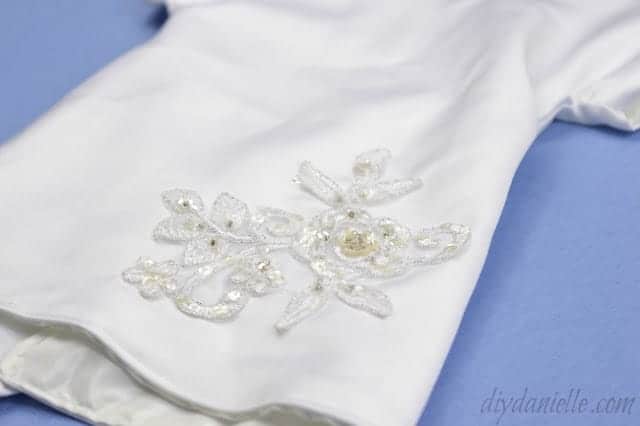
A group of my friends sat with seam rippers and removed lace and other pretty embellishments from the bottom of the tulle. It’s painstaking work, but the embellishments can be sewn onto the angel gowns after. They’re very pretty, as you might expect.
Beads weren’t cooperative. I ended up with MANY beads all over my floor. I don’t know if there’s a better way to upcycle them.
Some parts of the dress can be upcycled, but not really used in the angel gowns. I kept the zipper to reuse but it’s obviously too big for an angel gown. It was just ideal not to waste anything. You can just seam rip the stitches that held the zipper to the fabric.
Sewing Angel Gowns as a Group Service Project
This actually is a feasible service project, even if only one person in the group knows how to sew. MOST of the job is actually pinning, cutting, and ironing. And honestly it makes the sewing person’s job so much easier when someone else is taking care of the other steps.
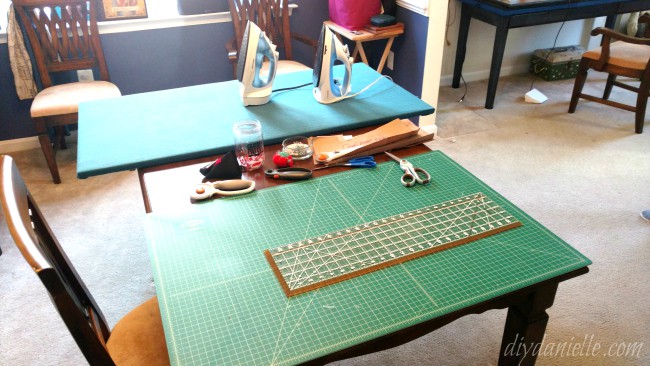
The key for making these as a group is setting up everything in advance, then making sure to give everyone their own task. Using an assembly line process is KEY to being faster when sewing in bulk. This was my setup. My sewing machine was on the table in the top right corner. There were toys in the area for the youngest kids to play while the older kids played in the basement playroom.
That said, there was definitely a bottle neck at the beginning. I’d suggest cutting a few of the dresses before the event so everyone has something to work on initially. Maybe get one dress at each step so you can explain everyone’s job.
I also recommend getting the dresses cut up for use as fabric before the event. I spent some time trying to figure out the best way to cut them.
We made 11 dresses total in maybe 4-5 hours (and our kids were with us playing), but I think we could go faster now that I know what worked or didn’t work.
I think the best setup is:
- 2 people cutting: 2 cutting mats and 2 rotary cutters for cutting
- 1 person machine sewing: Sewing is NOT the bulk of this project
- 1 person seam ripping embellishments
- 1 person hand sewing the embellishments onto 1/2 of the gowns (1/2 of gowns should be plain for boys): Machine stitching some of the embellishments isn’t a good idea due to all the beads and such that can break machine needles.
- 1 person ironing
- 1 person pinning
How to Sew Angel Gowns
Here is the step by step outline for the process. I used this as a reference for getting everyone setup.
- Cut pattern pieces for exterior and liner.
- Pin shoulders, right sides together
- Sew shoulders
- Press shoulders open
- Pin lining to exterior, right sides together. You need to pin the neck, the end of the sleeves, and the inside of the back (where the gown is open in the back and comes together)
- Sew neck, end of sleeves, and inside of the back. Leave a small area on the inside of the back to turn and top stitch (much much later)
- Snip around curves of the neck, making sure not to clip the stitching.
- Turn right sides out and press.
- Pinning the side seams: This is the complicated part, but it’s easy once you “get” it. You’re pinching the sleeves so they fold in half, right sides together. Then you’re pinning the entire side hem. Watch the video.
- Sew the side seams. Snip around the curves for the armpit, making sure not to clip the stitching.
- Turn right sides out, press.
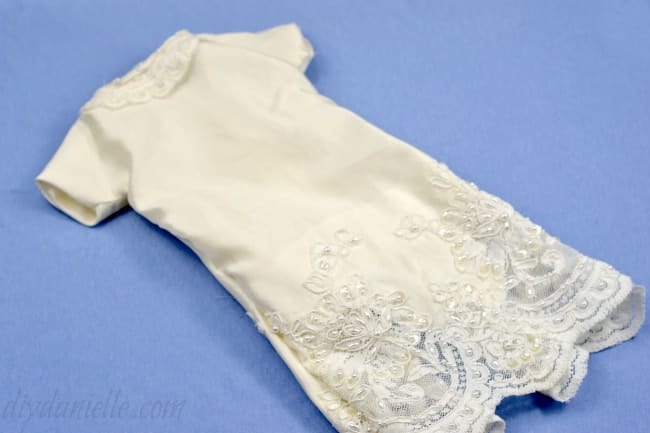
- Optional: Someone can hand sew the embellishments on right now. This can also be done earlier in the process or later. I sewed on the neck embellishments after the dress was finished.
- Now you’ll want to flip it right sides in again, touching the bottom of the dress right sides together. Pin.
- Sew dress bottom.
- Turn right sides out through the hole you left in Step 6.
- Press.
- Top stitch.
- Add snaps (or other closure)
Video Tutorial
Love it? Pin it!
Have a lot of tulle leftover and nothing to do with it? I love to use small pieces while I’m making felt soap. Small pieces of the wedding dress can be used to make a Christmas tree angel.
How to Sew Angel Gowns from Wedding Dresses
Sew small gowns using upcycled wedding dresses or bridesmaid gowns and donate them to the Angel Gowns program.
Materials
- Wedding and/or bridesmaids dresses
- Snaps, buttons, velcro, or ribbon
Tools
- Sewing Machine
- Seam Ripper
Instructions
- Cut along the existing seams of the dress.
- Use seam rippers to remove lace and other pretty embellishments.
- Cut pattern pieces for exterior and liner.
- Pin shoulders, right sides together.
- Sew shoulders.
- Press shoulders open.
- Pin lining to exterior, right sides together.
- Sew neck, end of sleeves, and inside of the back.
- Snip around curves of the neck.
- Turn right sides out and press.
- Pin the side seams.
- Sew the side seams.
- Turn right sides out and press.
- Flip it right sides in again and pin.
- Sew dress bottom.
- Turn right sides out.
- Press and top stitch.
- Add snaps or other closure.
Recommended Products
As an Amazon Associate and member of other affiliate programs, I earn from qualifying purchases.
Thanks for taking the time to read this post! I really appreciate the time you’ve taken. Please share, like, and pin my post if you enjoyed it. Follow me on social media and subscribe to my email list to keep up to date on all of my latest projects!

What pattern did you use. I can sew I just usually make blankets and quilts. And I want to do this with my wedding dress.
I got the pattern here: http://7pinedesign.com/charity-sewing-how-to-make-angel-gowns/ Hope that helps! 🙂 It’s a great project.
Hi, I can’t find the link for the Angel Gown video. Help please!
Sorry, not sure the last post got through. I’m looking for the link to making the Angel Gown video. Thanks. Sorry if this is double posted.
Sorry, I just reposted it. Just transferred my site to a new server and it looks like my videos disappeared 🙁
Bless your heart! Thanks so much!
Do the angel gowns have to be lined?
I think generally you want to line them because the babies skin can be thin so you don’t want anything rubbing against it.
I have been using this pattern for quite awhile. I love this one because it is lined& quite a bit faster. I really need a boys vest patttn that I keep seeing tha is all one piece, hopefully you can help me. Thank you.
I wish I had a good one for that size. Unfortunately, I do not. You might be able to find a pattern for a vest for a doll and use that?
How do you clean the gowns prior to using them?
I’d go with a laundry service to be on the safe side.
What is the best material to line the angel gowns?
I believe we used the wedding dress pieces for this too. You want something soft and silky that won’t hurt the baby’s skin.