
How to make a DIY wet bag for your kitchen. This wet bag is easy to make because it doesn’t have a zipper.
This post may contain affiliate links which may earn me commissions should you click through them and take certain actions. As an affiliate for Amazon, Cricut, xTool, Home Depot, and other sites, I earn from qualifying purchases. Please DIY carefully. View my full legal disclosures here.
The majority of my content is generated by me, as are 99% of the photos and videos, but I utilize technology for titles, descriptions, video editing out all of my ums, and occasionally for text overlay on images.
Please read the whole post so you don’t miss any important information!
This post was originally published in December 2012 as part of my post about sewing unpaper towels. This is being republished with new photos and updated instructions and information. Enjoy!
For Christmas, I made everyone wet bags for their kitchen. It doesn’t sound like a typical item, but I think most of us use dish cloths occasionally.
What do you do with your dish cloths when they’re dirty? I tend to make a little pile of dirty laundry to bring upstairs to our laundry room; it’s either on my counter or on the stairs. It’s not ideal.
We have predominantly stopped using paper towels though so we make a lot of laundry in our kitchen. As a result, I always have two wet bags rotating for use in the kitchen. This allows me to bring up the wash when one is full and swap it out for an empty one.
The best thing to do when YOU love something is to make it for everyone you love. So that’s what I did. I hope they get as much use out of their kitchen wet bags as I do out of mine.
I also made them a set of matching unpaper towels for their gifts.
Want to add something else to the gift? Make matching grocery bag holders, bowl covers, or casserole dish sized pot holders too. There are so many fun and easy ideas for gifts for the kitchen.
You might like my book about sewing different items for your kitchen, available as an eBook in my store. Keep scrolling for the tutorial!
Why Use a Wet Bag?
Leaving dirty towels around gives nasty bacteria an opportunity to grow on your counter top. This is true of sponges as well. I prefer to use dish cloths because I can launder them, unlike sponges, and because they don’t break apart like paper towels. They’re also much, much cheaper in the long run.
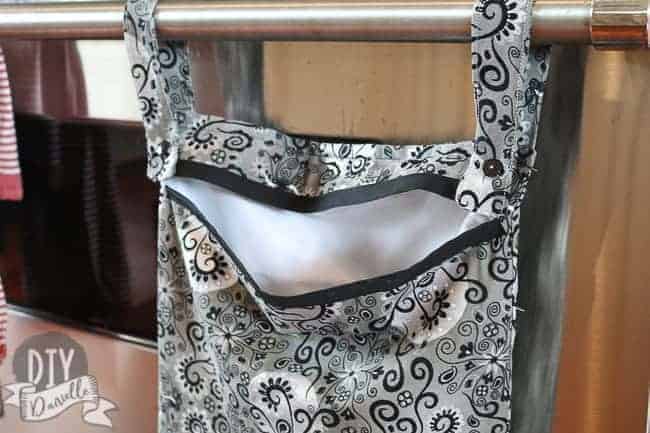
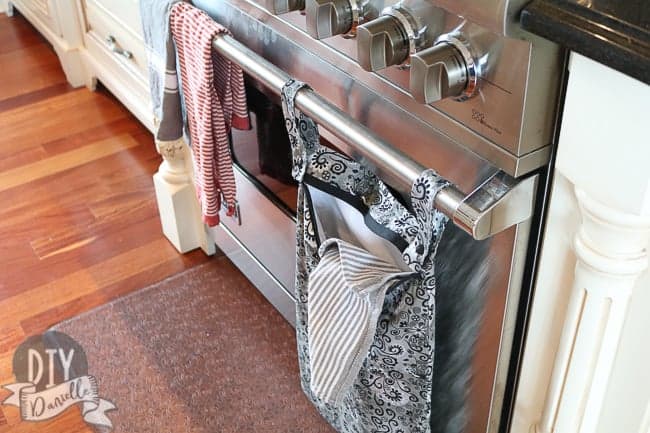
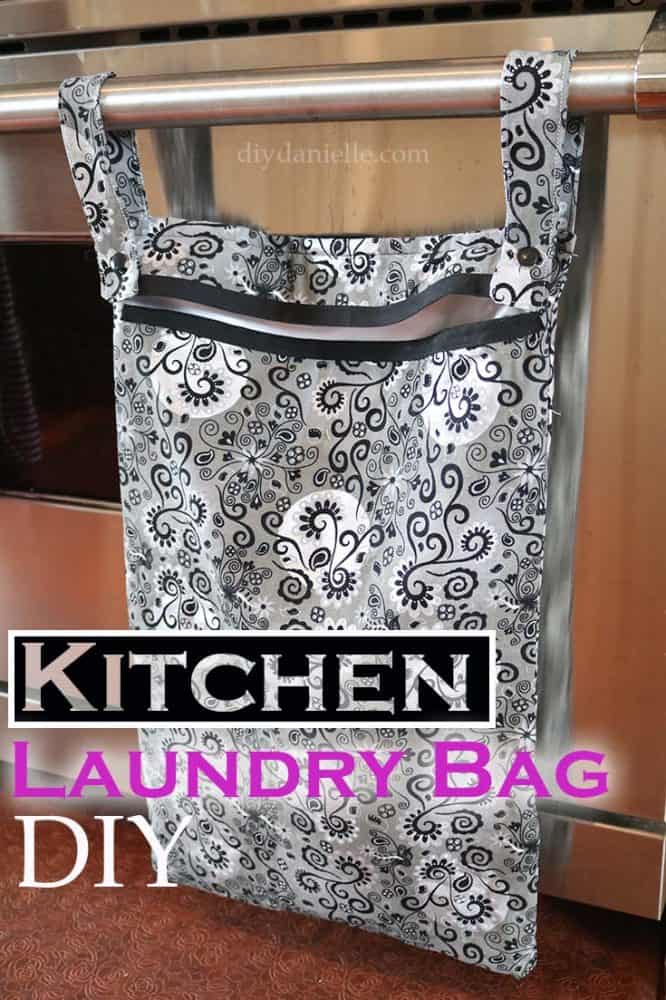
Wet bags are washable. If you make your wet bag of PUL only, then you can wash your bag safely on hot. Add a handle to your bag so you can hang it from a door knob.
My bags hang from the front of my oven. Please be careful because you don’t want to cause a fire or get burned.
Zipper or No Zipper on a Kitchen Wet Bag?
Many people add zippers to their wet bags and I certainly use them on my regular wet bags that get used for cloth diapers. I find that I prefer an open wet bag for my kitchen. There’s a few reasons for this.
- The contents of my wet bag in the kitchen don’t smell bad (like the diapers) so there isn’t as much of a need for the zipper.
- There’s better air flow for the wet bag when it’s left open. Just my two cents. Is that a good thing? In my head it is…. but it might not be real, haha.
- I prefer to be hands free in my kitchen so I can move dish cloths into the wet bag without unzipping a bag. This minimizes any contamination that could occur. If I am wiping up after cutting raw chicken with that cloth, I want to move it immediately to the wet bag rather than touching a bunch of stuff in the process. I like to reallllllly minimize how much grossness I spread everywhere.
- It’s easier to make a bag without a zipper if you’re intimidated by them.
Buy a Wet Bag on Etsy
Can’t sew? Buy your kitchen wet bag on Etsy. I know I said I preferred to skip the zipper and these all have them… but you can always leave the zipper unzipped.
- Kitchen or Stroller Wet Bag with sealed seams from monkeyfootdesigns
- Long kitchen wet bag from GoSewEcho
- Hanging kitchen wet bag from The Clementine Bee
If you want to sew your own, keep scrolling down so you can learn how to make your own. Or you can buy my book on sewing cloth diapers– it also has instructions for sewing unpaper towels, wet bags, and more.
How to Make a Kitchen Wet Bag
What Types of Fabric Work Best for a Wet Bag?
It really depends on your goal and what type of fabric you have. I usually make wet bags from one layer of PUL (polyurethane laminate) that has a pretty design on it. That way I have less work to do.
The pretty PUL gets pricey so it’s more affordable to make a plain PUL interior with a pretty fabric for the exterior. This wet bag used cotton for the exterior.
The nice thing about using a cotton is that you can make others gifts to coordinate with the wet bag. Things like a toaster cover or table runner would be neat ideas.
Should I Use Snaps or Make a Closed Loop?
Personally, I prefer to use snaps. This makes the handles easy to snap and unsnap from around the handle on my stove. If you plan to use snaps, Learn how to install snaps.
The benefit to a closed loop is that you can hang it on a door knob and the snaps won’t come undone if your bag gets heavy.
One of my kitchen bags only has one snap and it comes undone when it gets too full. Of course, that was one of my first wet bags and it’s wayyyyy too big.
Supplies to Make a Wet Bag for a Kitchen
- PUL (Polyurethane laminate): 19″h x 14w” rectangle, 3″hx14w” rectangle, 16.5h”x14″w rectangle (here’s some white PUL from fabric.com)
- Outer Fabric: 19″h x 14w” rectangle, 3″hx14w” rectangle, 16.5h”x14″w, (2) 21.5″ h x 2.75″ w for the straps. I used cotton fabric. Fabric.com has a few similar items: Basic Flowers Black & White | Basic Doodles Black Fabric.
- Double fold bias tape: Two strips, 14″ long
- Serger or sewing machine
How to Sew a Wet Bag for a Kitchen
For these bags, I made two straps so it wouldn’t sag and the weight could be distributed evenly.
Unpaper towels get heavy so it’s helpful to have the weight distributed better than I did with my original bag.
I didn’t add a zipper or draw string. The unpaper towels can still be thrown inside pretty easy the wet bag easily the way that I did it, but you can’t close the bag. This would be an issue if you were using the wet bag in another function, but it should be fine for a kitchen bag.
The shiny side of the Pul should be the very inside of the bag. Line up the smallest rectangles of Pul and the outer fabric (just like they’ll be when the bag is finished), pin.
Do the same with the medium size rectangles.
Then pin the hem tape to the bottom long edge of the small piece and to the top long edge of the medium pieces.
Sew on; this should sew the Pul and outer fabric together.

Make your two straps. You have two cuts of fabric for the straps that are 21.5 x 2.75″. I did this weird. Most people cut four strips to make two straps.
Instead, I cut two long strips, folded them right sides together so the strap was 10.75″ now… then stitched, leaving a spot to turn it and top stitch it. It’s weird, but I like to think I save a tiny bit of thread and time.
Take your large rectangle of Pul with the shiny side DOWN, lay your large rectangle of the outer fabric on top of it with the wrong side down.
On top of this, lay out your small rectangles with the binding on the bottom, right side towards the bigger piece.
Lay your medium rectangles similarly below the small rectangles. Do not overlap.
Take your two straps and put them between the right sides of the outer fabrics, sandwiched between everything.
Pin everything together and sew around the whole bag.
Flip right sides out.
Here’s a photo of how I lined up all of my pieces…
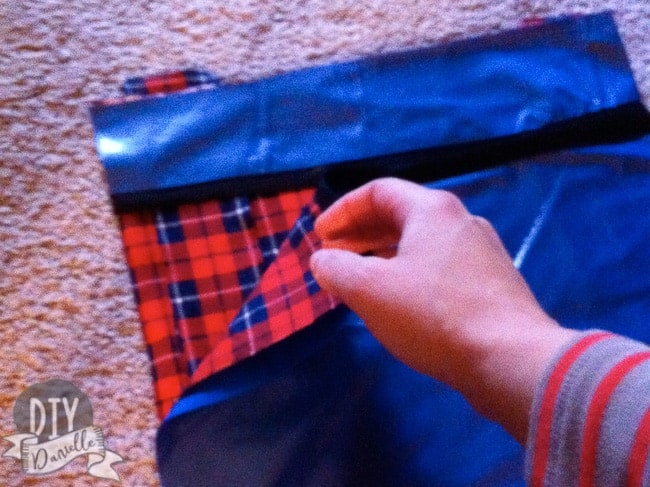
To sew the bag together, you’ll be sewing on the shiny part of the Pul. This is difficult if you don’t have a walking foot so either use a walking foot or use a piece of tissue paper OVER the Pul to sew, then rip the tissue paper off when you’re all done.
You can sew around the whole bag, sew over the part that has the straps a couple times to reinforce them, then clip the corners (just to make for better edges when you turn the bag right side out- don’t clip where you sewed).
Afterwards you can just turn your bag right sides out via the opening and you’re done. I also top stitched my bag a little.
Oh- last step, add snaps to the straps.
I really like how these bags came out (pictured with the unpaper towels).
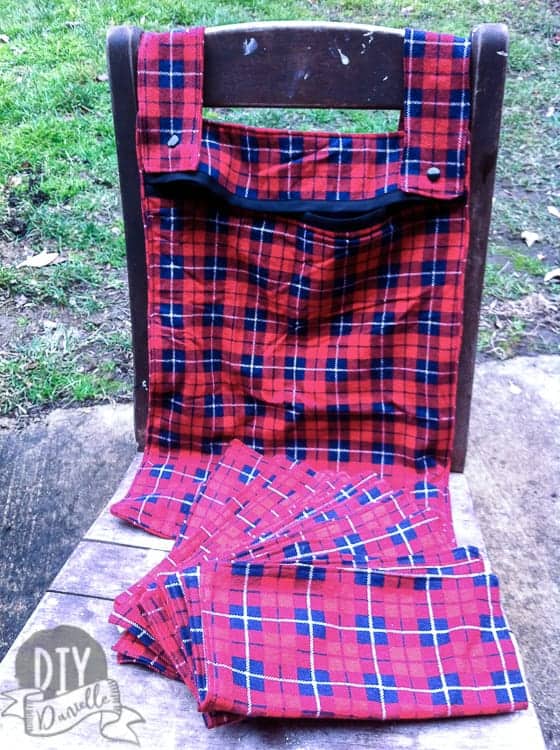
When I republished this, I had an opportunity to rephotograph this one set so here’s some better photos…
I used a bunch of scrap PUL pieces to make a patchwork kitchen wet bag too!
Check out these clever pantry organization ideas.
Please pin this!
How To Make A Kitchen Wet Bag
Make a DIY kitchen wet bag that is so useful and really easy to make.
Materials
- PUL (Polyurethane laminate): 19″h x 14w” rectangle, 3″hx14w” rectangle, 16.5h”x14″w rectangle
- Outer Fabric: 19″h x 14w” rectangle, 3″hx14w” rectangle, 16.5h”x14″w, (2) 21.5″ h x 2.75″ w for the straps.
- Double fold bias tape: Two strips, 14″ long
Tools
- Serger or sewing machine
Instructions
- Line up the smallest rectangles of Pul and the outer fabric, pin.
- Repeat with the medium size rectangles.
- Pin the hem tape to the bottom long edge of the small piece and the top long edge of the medium pieces.
- Sew on the Pul and outer fabric together.
- Make your two straps using the two cuts of fabric that are 21.5 x 2.75″.
- Take your large rectangle of Pul with the shiny side DOWN and lay your large rectangle on top of it with the wrong side down.
- Lay out your small rectangles with the binding on the bottom, right side towards the bigger piece.
- Lay your medium rectangles below the small rectangles. Do not overlap.
- Take your two straps and put them between the right sides of the outer fabrics.
- Pin everything together and sew around the whole bag.
- Sew over the part that has the straps a couple times to reinforce them.
- Clip the corners and add snaps to the straps.
Recommended Products
As an Amazon Associate and member of other affiliate programs, I earn from qualifying purchases.
