
Learn how to make this easy homemade teacher gift that is personalized and perfect for special education teachers.
This post contains affiliate links. If you make a purchase using one of those links, I may receive a small commission on any sales. Thank you.
You’ll see me repeat this often on my blog- I hate waste. I worry about gifting things that will collect dust. I think by nature, teachers can be a bit sentimental and I wanted to make sure we gave my sons’ teachers gifts that were ‘consumable’ (that wouldn’t last forever) and sentimental. My oldest son’s class was doing a group gift and requested monetary contributions. This made things really easy, particularly where I don’t know his teacher well yet.
But my middle son is in this fantastic program in our area through the school system. It’s a preschool program that is geared towards preparing kids with special needs for kindergarten, but they accept “peers” in the program to keep the classroom inclusive. He has five teachers in the class with eleven children and the program has been SO good for him. It mixes enough play with academics that he’s learning, but he isn’t bored or fighting going to school each day.
The priceless piece is that the program’s teachers work with the kids on social skills… this means they’re teaching him how to set boundaries, say no when things make him uncomfortable, and teaching him how to be a good friend. This is exactly what I wanted for my children to learn in preschool. We work on those things at home, but there’s a huge difference between how kids act at home vs. at school. At home, my 5 year old will happily set boundaries. But at school, his teachers have told me that sometimes he has trouble. They’re spending time with him, teaching him that skill and he has opportunities to practice it outside of the comfort zone of mommy. I LOVE THEM. Once he hits kindergarten, the teachers have their hands full and they’re not able to dedicate as much time for that type of learning.
I’m a social worker so my whole career has focused on teaching social skills and coping mechanisms. This is BIG for me. Good social skills set kids up to have better peer relationships and (hopefully) less social stress in their school environment, leaving them open to learning. Later on those social skills help you get- and keep- jobs, friends, and good partners. They also help you let go of jobs, friends and partners who aren’t healthy for you.
So needless to say, I could gush on forever about his preschool program.
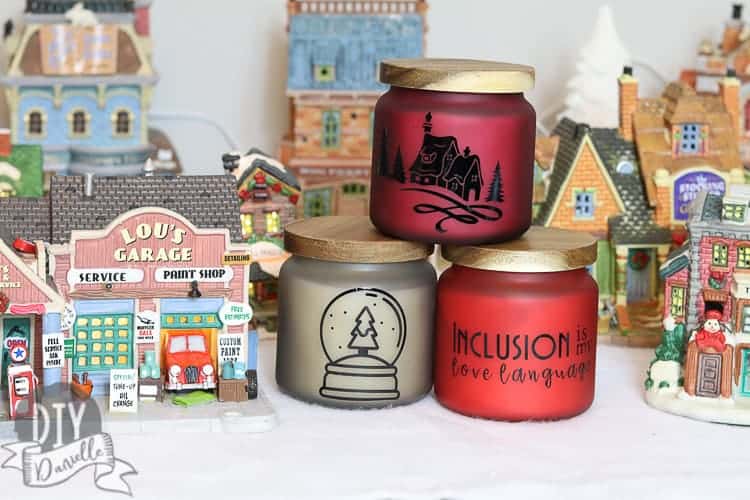
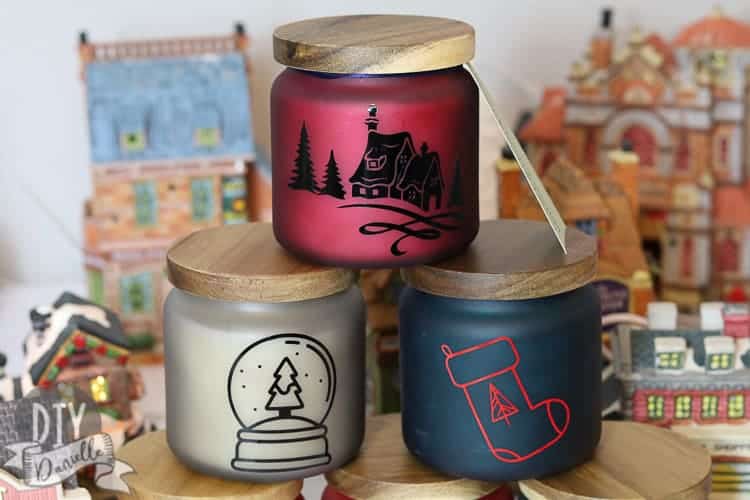
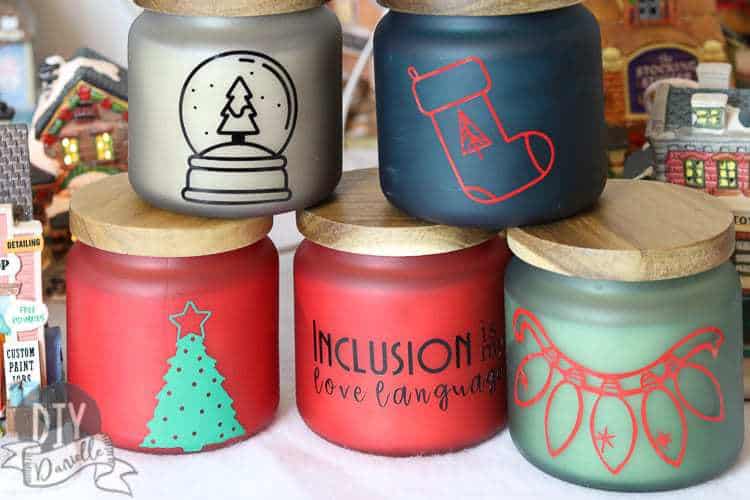
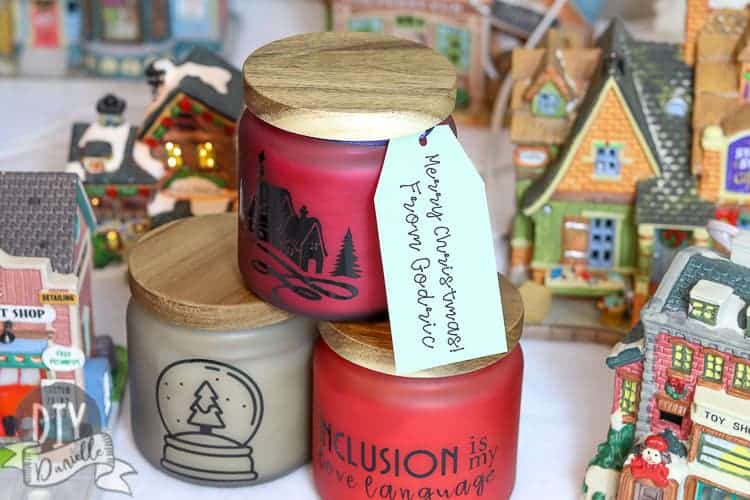
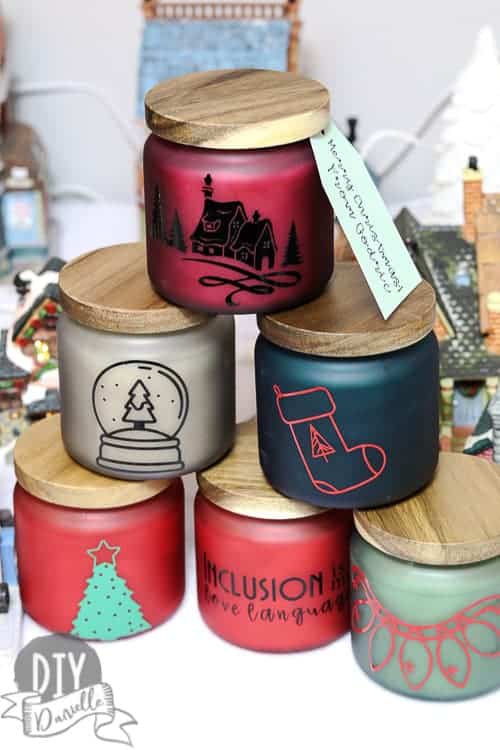
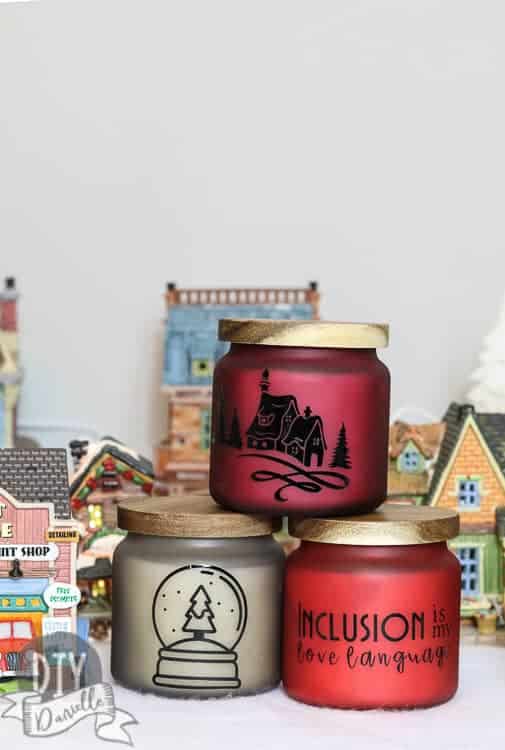
I wanted to put together a gift to thank each of the five teachers, but the budget is small this year seeing we just moved. I found these cute candles at a local store and decided to use my Cricut to embellish them. My son helped pick what designs went on them, then we cut the vinyl with the Cricut, and transferred them to the candle. It was quick work!
Let me show you how easy this is.
Supplies for Personalized Candles
- Any Cricut machine will do, but if you really want to get fancy, get the new Cricut Maker™ (this is what I use!)
- Cutting mat
- Weeding tool
- Outdoor Vinyl from Cricut
- Transfer paper
Here are the designs I used if you don’t want to make your own.
Just a quick note on your vinyl selection- an outdoor vinyl will stay on far better than regular vinyl or other types. Any heat is apt to make vinyl peel so you want the sturdiest vinyl for the job on a candle, seeing the glass may get hot. You would NEVER use outdoor vinyl directly on your wall because it could potentially remove your wall if you ever removed it, but it’s the perfect vinyl for items like cups, candles, signs, etc. And it CAN come off with heat applied, it’s just harder to remove accidentally. It’s very similar to trying to remove a bumper sticker on your car.
How to Personalize Candles for a Homemade Teacher Gift
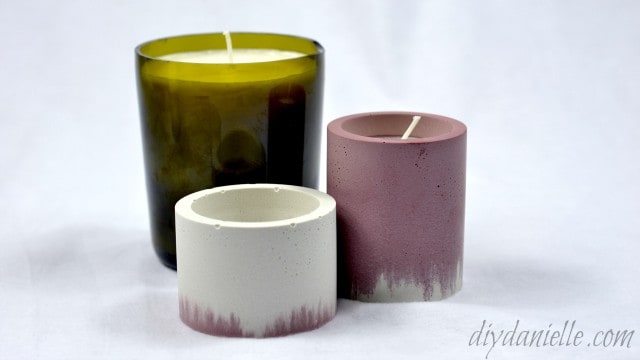
First you need to get vinyl that will show up on your candles. If you have a green candle, don’t use green vinyl because it won’t stand out very well. I did a few different colors as I had several different candles. If you’re really motivated, you can make your own soy candles and/or concrete candle holders. I LOVE doing this and have even cut old wine bottles to make a candle holder. I would have done it this year too, but it was just too much with our move. After I unpack though, I may get started for next gifting season. I have wayyyyy too many candle making supplies and no room to store them all. This isn’t my main craft.
You’d never know though… here’s the candles I’ve done in the past. They just make such cute homemade gifts for teachers and others.
So next step- You need to measure your candle front to determine how big to make the design. You can use my designs (mostly just Cricut artwork from the gallery) or make your own. I made the ‘inclusion is my love language’ design. I actually made a couple of my designs too tall and they went over the curved edge at the top of the candle… whoops. But they work and it wasn’t too substantial. Words can curve around the candle, but you ideally want them to all show when you look straight at the candle.
Once you have your max height and max width measurement, adjust your height or width for each design on DesignSpace.
You have two ways to do this:
- Drag the image to the size you want. DesignSpace shows you the size around the image. I find this works well when I don’t need a very exact size.
- Type in the size in the toolbar. You want to make sure you pick ONE dimension to resize and keep the ‘lock’ button on so you won’t distort your image.
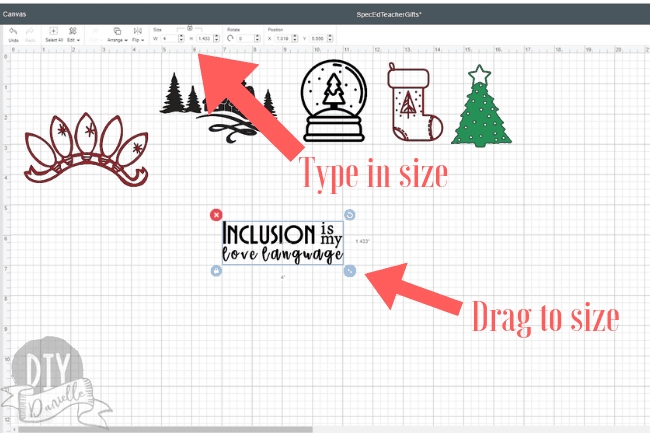
For something like the Christmas tree design, it’s taller than it is wide so I resize the height to the max height. For the house, I resized to the max width.
Note that “Inclusive is my love language” is actually four different layers that I grouped together to resize (to do this, you select the relevant layers, then click ‘group’ on the right tool bar). When you are ready to cut the vinyl, you need to click ‘attach’ for it to cut together. Otherwise you’ll end up cutting all the layers separately and need to sort them to transfer them properly. It can be done, but let the machine do the work for you. It’s a better use of your time.
Once you have your designs figured out, you can click “make it” and get your Cricut setup. You’ll want to place your outdoor vinyl on your green cutting mat, right side up. Once it’s properly on, put it in your machine and hit the ‘load’ button (the arrows) on the machine itself. Hopefully you’ve plugged your machine in already and have it connected to your computer- either through Wifi or the cord.
Now you’ll need to make sure your designs are laid out properly and you have the correct designs printing on the color you have loaded into your machine. You can actually select which sheet you want to print first… so I could cut all of my red stuff first, then black, then green. It doesn’t need to go in the order suggested…. you just need to make sure you SELECT the right one. Once you do, you select your materials (outdoor vinyl) and click the Cricut button on your machine.
Your machine will cut the vinyl, then you can click the arrows to unload it when it finishes. Remove that color, and reload your machine with other colors if you’re doing multiple colors like I did. Repeat.
While the other colors are cutting, you can ‘weed’ the excess vinyl away from your design. What this means is that you use a small weeding tool (or tweezers or whatever you have) to pull off the vinyl that ISN’T part of your design- ie. the green vinyl surrounding your Christmas tree, the white section inside the star of the tree, the white dots inside the tree. This can be meticulous work, depending on your design. Keep your designs SIMPLE if you don’t have lots of patience and time to weed. You also need to weed the insides of letters and such for words.
You can cut closely around your design so you can save small scraps of vinyl for other projects.
Check all of your designs closely once you’ve weeded to make sure you haven’t missed any small bits. I always miss something small. Or I’ll accidentally pull away the dot on an i.
At this point, you can use your transfer paper to transfer your design to your candle. You cut a piece of transfer paper the size of your designs, then peel off the backing. The transfer paper sticks onto your design and then you peel the back away from the design. Make SURE it all sticks to your transfer paper.
Then you can line up your transfer paper with the vinyl on it on the side of your candle. Make sure it’s straight- once it’s stuck, it’s stuck. When you’ve got it where you want it, you can stick it to the candle side, making sure to press each bit of the design onto the candle. Once pressed, you carefully peel away the transfer paper. I’ve found that the Cricut transfer paper is very strong and the first time I use it, it’s hard to transfer the vinyl. Some people hate that and get weaker options. What I LIKE is that I can reuse that transfer paper over and over… eventually it gets to the perfect strength too. It creates less waste (and less expense). And it does the job! So I used the same piece of transfer paper for all six candles. Yay!
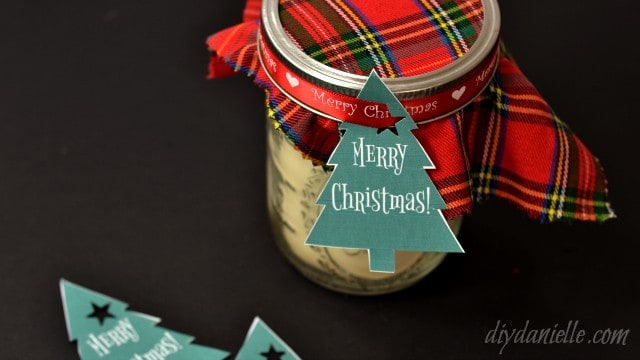
At this point, you’re finished. You may need to use your fingers to press the vinyl on a bit after the transfer paper is off. Add a ribbon and a tag if you want! I use my Cricut to print those too.
This project is great because it’s simple enough that my son was able to help me pick the designs and apply them! He LOVED being able to say he helped make the gifts.
Can you pin one of these for me!? That’d be fabulous! It helps show other people fun projects they can complete too.
Use the Discount Code DIYDANIELLE on cricut.com for 10% off any cutting machine or heatpress (no minimum). Excludes: materials/accessories/mystery boxes/etc. Applies to US/CA only, code expires 12/31/23.