

These car seat ponchos are easy to make and keep children warm in their car seats without sacrificing safety. Learn to sew a car seat coat.
This post may contain affiliate links which may earn me commissions should you click through them and take certain actions. As an affiliate for Amazon, Cricut, xTool, Home Depot, and other sites, I earn from qualifying purchases. Please DIY carefully. View my full legal disclosures here.
The majority of my content is generated by me, as are 99% of the photos and videos, but I utilize technology for titles, descriptions, video editing out all of my ums, and occasionally for text overlay on images.
Please read the whole post so you don’t miss any important information!
Been hearing a lot about car seat coats, or car seat ponchos? Here’s everything you need to know about why you need one for your child, how to use them, and how to make one. If you don’t have time to make one, buy one on Etsy from a small business!
Table of contents
Why Do I Need to Use a Car Seat Coat?
Winter parkas should NOT be used in car seats. In an accident, they can compress and the child can be ejected from the car seat. They are not safe. Here’s some great information from Safe Ride 4 Kids about the safety issues with winter coats.
Winter coats are also difficult to buckle a 5 point harness over. And as the car heats, your child is not able to remove the coat to get more comfortable.
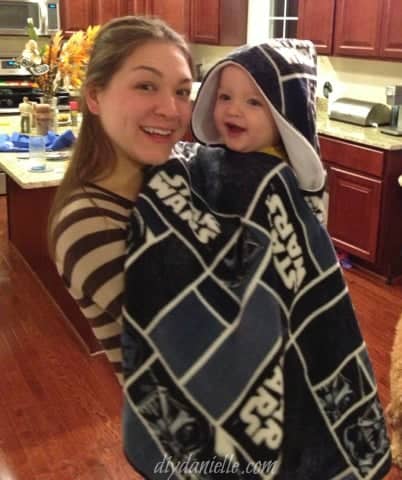
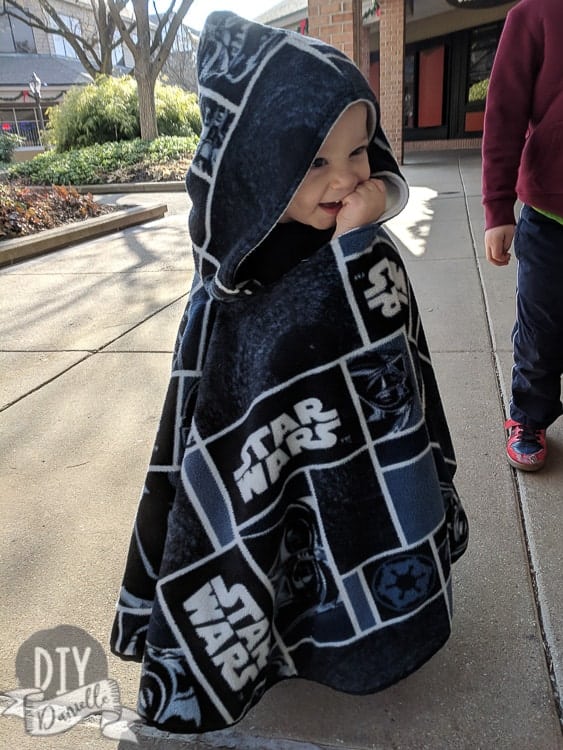
The solution to this problem is to use a car seat coat. It keeps kids warm while running errands. Your child can be strapped into their car seat underneath the poncho… which means they can easily get it on and off if they get hot (assuming they’re old enough and agile enough to do so).
How to Use a Car Seat Poncho
Here’s a Facebook video of how they work…
The car seat poncho goes over your child’s head, but they’re buckled in UNDER the poncho. This means they can take it on and off as needed.
It also means nothing is interfering with the function/strength of the car seat straps.
Sizes
Car Seat Ponchos for Babies
If your baby is still in an infant seat, then I would be hesitant to use a car seat poncho. You could certainly adjust the length and size of the neckline, but I think a cover like this for a bucket seat makes a lot more sense. Alternatively, you can just tuck a blanket around your baby. I like those covers because they keep the fabric away from the baby’s face.
If you make one for a baby, just make sure to adjust the size down so the baby doesn’t end up with fabric over their face. I would probably leave off the hood too. You just want to be cautious about baby overheating or suffocating.
I prefer to use the car seat poncho once my child has more mobility.
Car Seat Ponchos for Toddlers and Kids
These ponchos are very easy to make and you can adjust the length for the height of your child.
The 23″ length worked fairly well for my sons from age 1 through age 6. It was pretty long on him at 1 years old, but we carried him everywhere so it wasn’t a problem. I liked the long length at that age because I could wrap him up warm when we went outside.
That said, you could make one every year or two that is the perfect length for your child. You just cut the circle to the length you want the poncho to fall to (ie. measure to knee and use that number- if it’s 15″ then you cut to 15″ instead of 23″).
By 2 years old, it’s nice if it’s not too long for them to walk in.
We always have a parka and snow bibs for snow play at home, but these ponchos are PERFECT for errands. If you want your child to use this as a play coat too, you can add arm openings to the poncho.
Here’s a few products in my store that you might enjoy! Keep scrolling for the poncho tutorial!
DIY Kids Carseat Poncho
Supplies
- Fleece. You’ll want an inner fabric and an exterior fabric (if you live in a warmer climate, you could probably use just one layer). I could have used 1.5 yards easily for this, but I’d bought 2 yards to be safe. The fabric I used for the Star Wars poncho can be found on Fabric.com.
- Bias tape: Expect to use about 4-5 yards
- Sewing machine
- Pins or clips
- Sewing scissors
- Measuring tape
- Optional: Rotary cutter and cutting mat
- Car seat poncho pattern, free for subscribers
- Optional: Snaps and snap pliers for the neck
Sewing a Car Seat Poncho with Hood
For this tutorial, you need to use two layers of fleece. If you’re in an area with warmer winters, you could probably do only one layer. It will change how you sew your poncho slightly, but it won’t be a problem.
Start by folding your fleece fabric in half- twice.
Measure your child from their neck down to the area you want your poncho to end. If it’s their knees, measure to that point. If it’s to their hips, measure to that. This is a matter of personal preference.
I used 23″. From the corner of your fabric where all four corners are folded, measure out your 23″ (or whatever) and mark all along the curve.
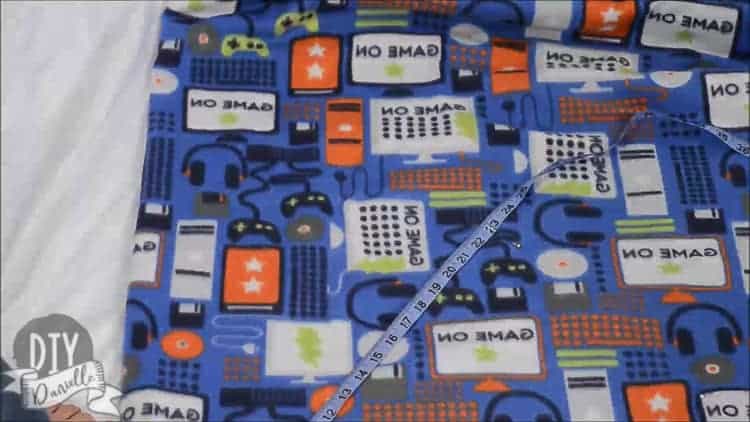
Cut along these markings (connect the dots) using scissors or this nifty rotary cutter (the pizza cutter thing).
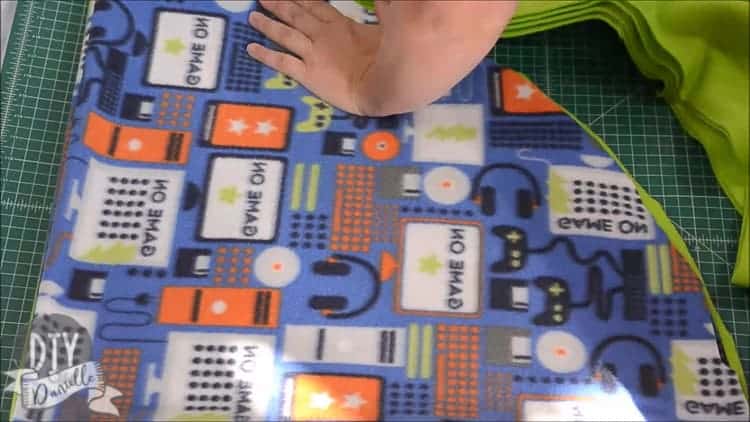
You’ll do the same for your interior fabric. As you can see above, I cut both fabrics at the same time, making my scissors very angry at me.
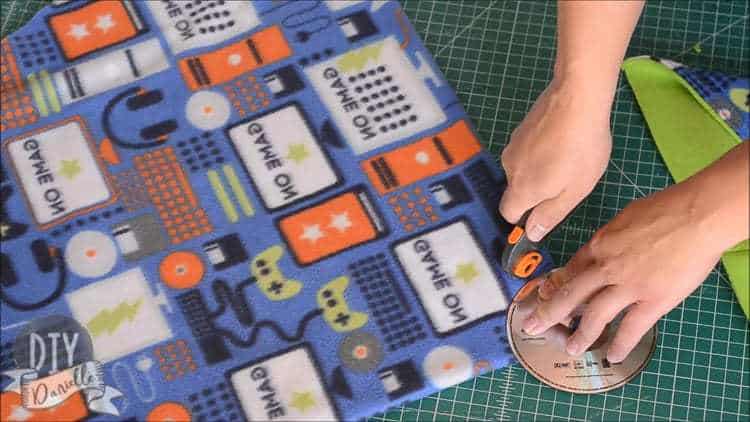
Once you’ve cut that, you want to cut your opening for the hood. I used a CD/DVD as my template. From the same corner as before, you’ll want to use a QUARTER of your CD as the area to cut.
Now you’ll want to cut out the fabric for your hood in both fabrics. You need two cuts of the pattern per fabric (interior and exterior).
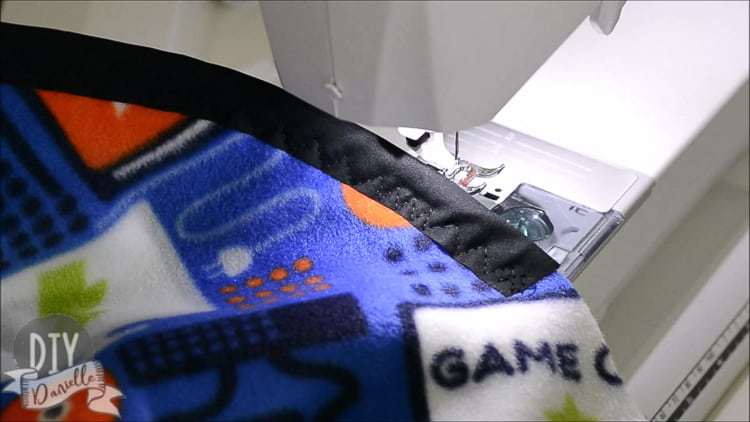
Sew your interior hood pieces together and sew your exterior hood pieces together, sewing along the curve for the back and top of the hood. You’ll leave the front of the hood and the bottom of the hood open.
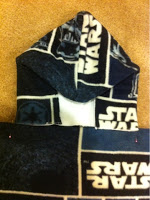
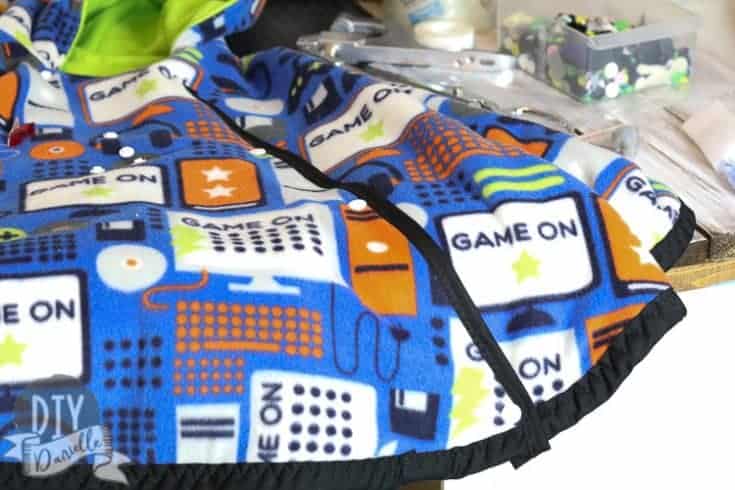
This is how I managed the hood the first few ponchos… pinning the finished hood pieces to the poncho and sewing on, then doing some crazy flipping of the poncho.
Here’s a bigger photo from the ‘Game on’ poncho.
I recommend watching the video at the bottom if you want to do it this way. It’s complicated.
Two Alternative Ways to Attach the Hood
If you don’t ‘get’ the other hood method, these two options should be easier.
For both options, start by pinning your exterior hood fabric to your exterior poncho, right sides together. Sew. Repeat with your interior fabrics. This sort of creates two one layer ponchos.
Method 1: Face your two ponchos right sides together. Sew the hoods and neck area together. Leave a small area to turn and top stitch. Turn and top stitch your hood/neck area.
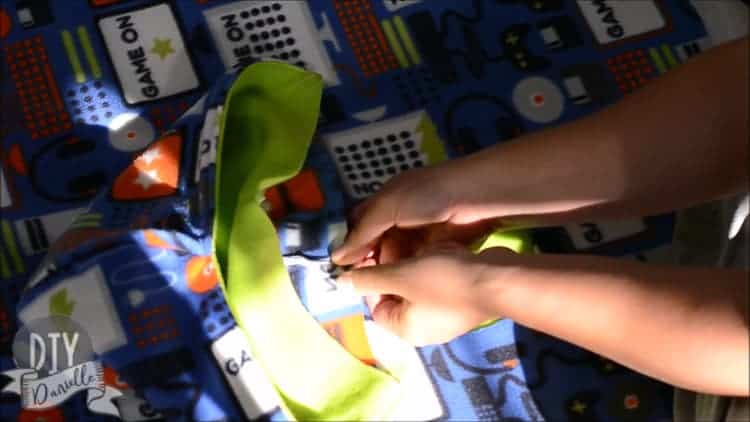
Method 2: Face your two ponchos wrong sides together, just like they’ll be once finished. Sew bias tape along the raw edges of the hood and neckline.
At this point, the bottom of your poncho needs to be finish. This is what it looks like…
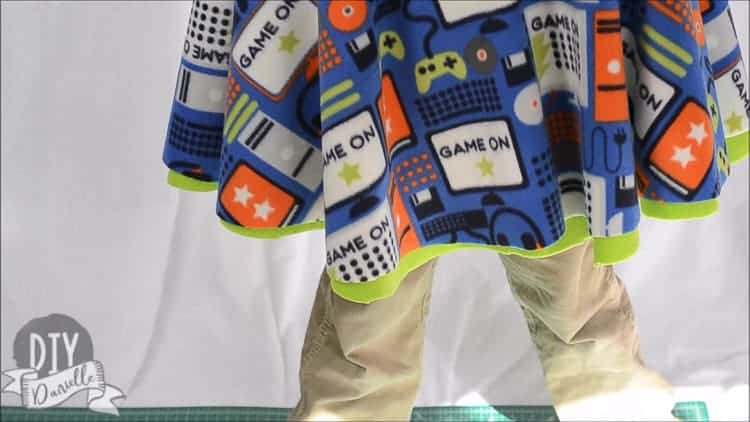
Sew your bias tape to finish the bottom edges of the poncho or you can just snip strips at the bottom of the fabric and tie them together for a fringe look.
Adding a Snap for the Neck of the Poncho
If you want the neck to be more snug than mine is, you can add a snap or two. You can learn how to install snaps like a pro here, but here’s a photo of the snaps I added. I added one additional snap for if I wanted the neck even tighter after I took this photo because I wanted the option to make it tighter or looser.
With the newer pattern adjustments, you may not need to add this, but I did because I cut my original neck too wide when I made the Star Wars version of the poncho. Of all three ponchos I’ve made, the Star Wars one is my favorite.

Here is my oldest son wearing the poncho in his car seat. He’s all buckled in underneath…

Can I make a No Sew Car Seat Poncho?
I have seen this question being asked a lot. I think it’s feasible to make a no sew car seat poncho if you leave off the hood. You can use a separate hat instead of a hood.
The benefit to fleece is that it won’t fray when washed… and you may not need to wash this a lot regardless. As a result, you can leave raw edges unlike if you were working with flannel or cotton fabric.
While I haven’t attempted to do a no sew version, here are three options.
Option 1: Heat N Bond
I would cut the two layers of fleece the same way, but make the neck area smaller. You can always make it bigger if needed. Once cut, try it on your child to make sure the neck can fit over the child’s head (without it stretching).
You could attach the two layers of fleece wrong sides together around the neckline using double sided hem tape. Then you can use either the tying method or hem tape to keep the bottom hem together.
Option 2: Fabric Glue
Use the same method as above to cut your fabric. Instead of hem tape, try to adhere the neck layers using fabric glue. You can try the same for the bottom of the poncho, or use the tying method along the bottom.
Option 3: Tying and Braiding the Fleece
I haven’t tried this, but I am BETTING this might work AND look nice. You could try braiding the neckline.
To do this, DO NOT cut the full neck out. I would draw where the neckline would be on your fabric using tailor’s chalk.
Snip off the tip of your corner instead of cutting to the neck.

Open up your poncho. Cut 2″ wide strips from your opening to the line you drew for your neckline. Repeat for both layers.
Then follow this process to braid the neck line. I think you can braid both layers together this way at the same time.
You can braid the bottom hem too or tie the edges.
Again- I haven’t tried this and you probably want a good 2″ to work with to do the braiding method. But I think it would look pretty!
Car Seat Coats for Warmer Weather
One of the things I’ve been emailed about a few times is selecting fabric for warmer weather. Some people would like a transition, light weight car seat coat for those 45-70 degree days.
My kids would happily go naked in 60 degree weather so I haven’t made a lighter weight coat, but I’ll give you my advice here.
I would go with a single layer fleece. You can finish all of the edges with bias tape. It would be easy to do and be similar to those zippered fleece coats most kids wear for warmer cold days.
If you’re dying to try something new, consider what your regular jackets use. Wool would be an interesting choice or something waterproof such as what you would use for a rain jacket. Just consider comfort and whether the fabric would drape well for this particular pattern.
Video Tutorial for Sewing a Car Seat Coat
Note: Measurement I used for the length of my poncho was 23″… my video has instructions on how to adjust if needed, but this measurement has worked well for my kids.
This project was inspired by: Reversible Car Seat Poncho Tutorial.
Download the Free Car Seat Poncho Pattern
You really don’t need a pattern, but I had someone draw up a pattern if you’re more comfortable with a full pattern to follow. You still need to fold your fabric twice for the main poncho and trace the pattern from the double fold corner.
The person who drew this up added some extra seam allowance so it’s going to be a bit bigger than my original ponchos. The hood is also different from the original.
Save a tree and only print the pages with the hood (5, 6, 10, 11). You’ll enter your email to subscribe, then you’ll receive a confirmation email to confirm your subscription. The link is included in that email! Make sure to check your spam folder if you don’t see the email.
Learn how to Add Arm Openings to Your Car Seat Poncho Here
Make sure to check out my other projects for kids. You can learn how to make a Nerf Vest with old Camo, how to sew a toy car carrier, or make an easy ironing station for your sewing area.
Can’t Sew? Support Small Businesses and Buy a Poncho on Etsy
If you aren’t sure you’ll have the time to finish a poncho before the cold sets in, consider supporting a small business on Etsy.
Please pin and share this post!
DIY Car Seat Poncho
DIY Carseat Poncho for Kids
Learn to sew a car seat poncho and keep children warm in their car seats without sacrificing safety.
Materials
- Fleece - 2 Yards for inner fabric and exterior fabric
- Bias tape: 4-5 yards
- Pins or clips
- Car seat poncho pattern
- Optional: Snaps and snap pliers for the neck
Tools
- Sewing scissors
- Measuring tape
- Rotary cutter and cutting mat
- Sewing machine
Instructions
- Fold your fleece fabric in half- twice
- Measure your child from their neck down to the area you want your poncho to end.
- Cut along these markings using scissors or a rotary cutter.
- Repeat for the interior fabric.
- Cut the opening for your hood.
- Cut out the fabric for your hood in both fabrics.
- Sew your interior hood pieces together
- Sew your exterior hood pieces together, sewing along the curve for the back and top of the hood.
- Leave the front of the hood and the bottom of the hood open.
- Sew your bias tape to finish the bottom edges of the poncho.
Recommended Products
As an Amazon Associate and member of other affiliate programs, I earn from qualifying purchases.

I am having a hard time downloading the pattern for a car seat poncho. Can you help me with this?
Send me an email at [email protected] if you need help. 🙂 I can send a direct link. It should direct you to the link though when you confirm your sub.
what problems are you having?
Is the back open Im going to try to use this for some of my kids on a school bus that are in carseats being that they cant use their wintwr coats and aometimes they get cold or if it isnt do you think it will be easy to modify
Sorry, I thought I responded to this already! It’s not open- instead you lift the back and buckle the kids in UNDER the poncho. You could definitely add an opening but it’s unnecessary (and I’m not sure it would work with a hood).
i am going to make 3 than youso much !
Enjoy! Post the finished products in our group if you want! Stuff Mama Makes on Facebook 🙂
Hi Danielle
I love your tutorial on kids ponchos I will be making 2 for my grandkids 3 yrs and 1 yr olds. But I have a question and want your option. I would like to add a tie to the hook sort like the hoods on sweat shirts. I feel like that might help keep their faces a little warmer. Will that work on a reversible poncho meaning I only need to add one tie.
Another question I have is my sisters husband is on a electric wheel chair and can’t dress himself so can you imagine trying to put on a coat. My sister loves the idea of a poncho but to make it I have to modify the length in the front and back. The back of his chair has parts and things she needs access to. The only thing I didn’t think about is he is a full grown adult and I didn’t measure his shoulder width. Most fleece is like 44” the larger sizes are twice as wide to make blankets. will a 44” wide piece work for an adult?
I am having problems with disappearing replies- I thought I replied but apparently the reply didn’t publish! I’m sorry.
First- you might be able to add a casing and a drawstring. I’ve never done a drawstring hood though so I’m not sure how I would do that. Another option would be to make a snap on face mask that snaps over the mouth. Might be a fun tweak on the pattern.
As for the math for an adult, I’m not sure! Math is NOT my strong suit. I FEEL like perhaps the length had more to do with how many consecutive yards I had but I’m not sure. But if fleece width is an issue, I wonder if you could find a big fleece blanket to upcycle into a coat. That might work nicely.
It looks like to make a car poncho with a lining that I will need 3 yards of fleece. Is that correct?
You will need 1.5-2 yards for the outer and the same amount for the inner fabric.
looking forward to making one for my grandson
Enjoy! 🙂
I cannot find where I can subscribe. I have looked at your site and I love it. I really want make the poncho for my grandson.
I’m sorry, I think the form disappeared the other day. I just fixed it.
Hi, I tried to download the pattern and ran into trouble… when I clicked the confirmation link in my email, it just brought me to a page for mailerlite.com. Am I missing something?
Love your poncho.. I have subscribed but can’t access the pattern… it keeps directing me back to subscribe Page? Your boys are adorable by the way!!!
Did you get it? If not, email me at [email protected] and I’ll send you a direct link to the pattern 🙂
I can’t access the pattern even though I signed up for your newsletter.
Send me an email and I’ll give you the direct links! I am not sure what’s going wrong with the form. It’s supposed to send you an email with the links.
Hi Thank you for this pattern I’ve just made it for my son. I shortened it to 21 inches as he’s to. He doesn’t seem to like his arms restricted, so I was hoping to add arm holes so he can put his arms through. I wondered where would be the best place to put them?
Instead of holes, I would probably add a slit on either side. That way the poncho closes over his arms when his arms are down but his hands can come up when he wants to play. It defeats the purpose of the poncho when they can get their hands out but need to put them through a hole. The slits may solve the problem.
I love this pattern and a friend made it for my toddler grandson. However he HATES not being able to “use his hands.” I saw someone ask about armholes and I think I have enough skill to slit two arm openings in the front, but am not sure of placement either. I saw you suggested side slits, but I think my grandson wouldn’t like that either, but the arm slits in front he may be OK with. I was thinking of sewing something similar to how you’d do a buttonhole (in a rectangle shape) about 3 or 4 inches in length, then slitting that space open. What do you think? I love the poncho, but otherwise without arm openings he fusses about wearing it and walks around holding his arms like a T-Rex! LOL HELP ME! Thank you, thank you!!!
Haha my kids hated not having use of their arms too honestly. I used the ponchos for the car only and regular coats for play outside.
I’m not sure about the slits… I think it’s worth a try. If it’s fleece, the fabric shouldn’t fray either. I’d love to see how it comes out if you try it!
This is a great idea but I don’t have the patience! I looked around and these popped up on Amazon, anyone try them? If not, which ones have you actually bought that work well, not just search but bought and tried?
I’d go with Etsy personally 🙂
I can’t seem to get the Car Seat Poncho Pattern, it keeps telling me to sign up for news letter which I have done twice, but cant seem to get the pattern to download. Please help.
I’ll send you an email with the direct link!
I subscribed 3 times and still cannot get the pattern. [email protected]
I have tried multiple times to “subscribe” but it just keeps giving me the eternal circle. Help!
Hm odd. Send me an email and I’ll send you the pattern link. 🙂 [email protected]
Hi Danielle,
I have subscribed several times to your site and even went to your site however I am not able to download the poncho pattern. Please email me a link to [email protected].
Thank you, Pamela
sent you an email!
can you please send pattern for car seat poncho
thank you
Thank you!
I have some extra fleece and think I’ll see a few for the family shelter too.
I would like to get the car seat poncho pattern
Can you please send me the pattern for this poncho. Thank you.
Hi Danielle,
I found your car seat poncho tutorial and am going to give it a go! I am a complete newbie and have a bad habit of making things harder and they take me way longer to finish. Like 10 times longer!
Having said that..I tried to find non-directional fabric but that proved challenging. I got dinosaurs. I’d like to fold and cut the fabric in the pie shaped piece like you showed, but then the dinosaurs on the back will be upside down. So I was thinking I could cut 2 half circles and sew a shoulder seam instead? But then how would I account for the inner circle to be the same size? I would prefer to hem my bottom edge and then top stitch to finish.
I would be so grateful for any advice you can give to an overthinking newbie like me! 🙂
No where to click to subscribe to get the pattern?
Can’t wait to make these for my boys!
I can’t seem to be able to download pattern – help!
I subscribed but when I clicked google it said Google didn’t support it and now I can get to pattern. Can you help
Do I need two years of EACH fabric or two yards total (ie 1 yard of each fabric)?
I subscribed but am unable to get the pattern for the carseat poncho, please help me with this.
I cannot get the pattern for the hood to download. It keeps telling me that there are only 2 pages!
Oh I think I figured it out, just cut a curve on the 10 X 12 inch rectangle. Sorry!
I am having a hard time downloading the pattern for a car seat poncho. Can you help me with this?
Two videos are recommended in the instructions. I do not see either of them. Are they available elsewhere?
You can check my youtube channel doityourselfdanielle. They’re on there and should show up as featured or high view videos.
Please send me a link to the free pattern for the car seat poncho. Thank you in advance.
Fran
Looks fun to make but I need a pattern please!