
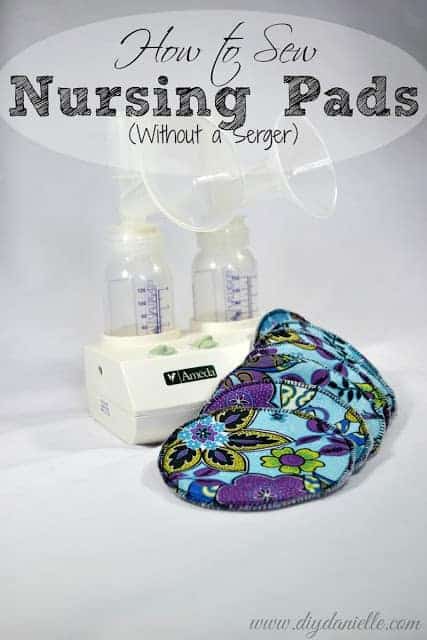
How to sew your own nursing pads without a serger. Learn how to make reusable nursing pads with a sewing machine.
This post may contain affiliate links which may earn me commissions should you click through them and take certain actions. As an affiliate for Amazon, Cricut, xTool, Home Depot, and other sites, I earn from qualifying purchases. Please DIY carefully. View my full legal disclosures here.
The majority of my content is generated by me, as are 99% of the photos and videos, but I utilize technology for titles, descriptions, video editing out all of my ums, and occasionally for text overlay on images.
Please read the whole post so you don’t miss any important information!
I’ve been buying disposable nursing pads off Amazon with their subscribe and save program, but it’s getting to be costly and I get annoyed with pulling off the little sticky tabs to stick them into my bra. I guess technically I could just leave those tabs on, but I ultimately wanted to save money and the environment so I decided it was time to sew my own nursing pads. I don’t have a serger which is a bit of a problem as these would be even more awesome, I’m sure, if I had one. But I’m getting better with my zigzag stitching so I figured I could pull this off.

Click here to buy the book on Amazon: This tutorial and more are included in the book!
Supplies for DIY Nursing Pads
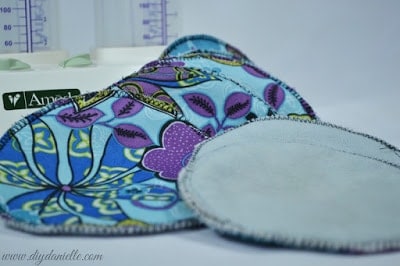
- 1 layer of Pul (you could use fleece too)
- 1 layer of alova suedecloth
- 3 layers of upcycled tshirt fabric. You can use flannel alternatively.
There’s some disagreement about the use of Pul because trapping the moisture in could cause yeast and thrush due to the warm moist environment, but I don’t feel that Pul is going to be any worse than the disposable ones I use because:
- It’s breathable
- They’ll be changed more frequently where they’re reusable
- My leaking is substantially less due to being so far into our breastfeeding relationship
- I’m using the suedecloth which should wick the moisture into the inner fabric, keeping the moisture further away from my skin.
- I don’t have any previous issues with thrush (I totally wouldn’t risk it if I’d had problems with thrush previously)
If you sew a lot, make sure to check out our new app, Sew Organized, available FREE on the Android Play Store and the Apple App Store.

Download it on the Android Play Store | Apple App Store
How to Make Nursing Pads without a Serger
Don’t forget to sew these in pairs!
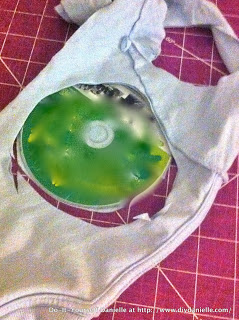
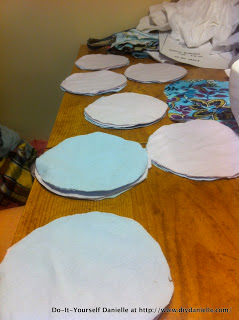
Step 1: I used a cd (more cd upcycling, haha) to cut out all of my fabric with my rotary blade. This made it much faster.
I am using old tshirt scraps for the inner material. The CD fits really nicely on old tshirt sleeves and you can cut two cuts at once! I’ve been wondering how I could upcycle those. You need 3x as many pieces for the tshirt material though so do your math ahead of time.
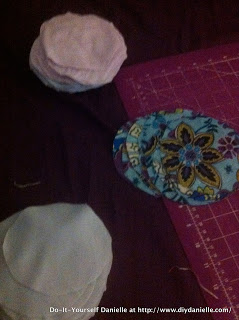
Here’s all my pieces cut out. I didn’t do my math so I have some extras. My plan is to cut some more tshirt material when I have the time. That’s the only thing that I ran out of.
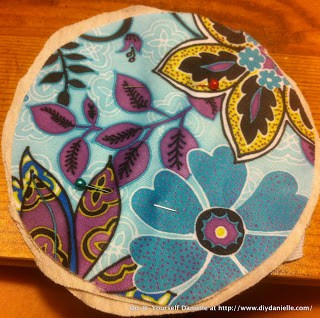
Step 2: Put your fabrics in order: Pul pretty side out, three layers of tshirt, and then your alova suedecloth with the right side out. If you’ve never worked with AS then the “right side” is the fuzzier side and the “wrong side” is the flatter side. I hope that makes sense when you’ve got the fabric in your hands. Now pin them all together. One pin in the middle was sufficient, although I’d started with two pins initially. Pins can hurt the Pul, but Pul can be sealed on hot in the dryer so I wasn’t too stressed. Plus, I don’t leak THAT much that I’m worried about a couple pins.
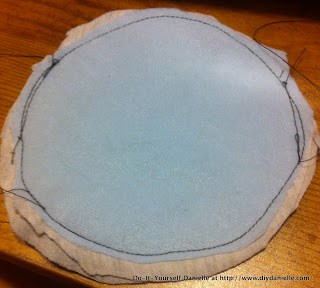
Step 3: Sew with a straight stitch all the way around your circle. I had to resew a couple areas because I missed one layer of the Pul or the Alova.
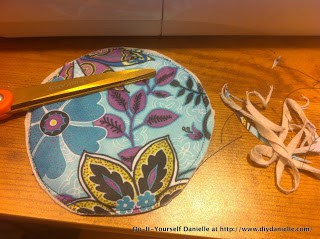
Step 4: Cut off the excess fabric and make it look pretty. Cut off all the stray thread.
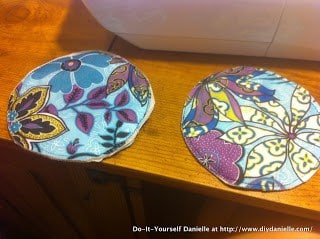
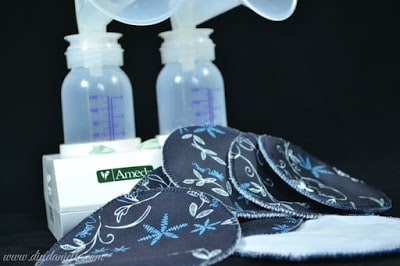
Step 5: Here’s two pads really to be zig zagged.
Step 6: For the last step, you’re just zigzagging all around each nursing pad. This keeps the fabric from fraying when you wash it.
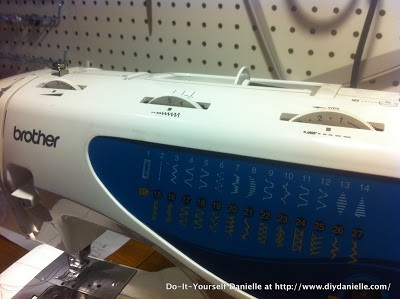
My favorite setting for the zigzag on my Brother XR-65…. 5/1.5 for #3 zigzag with these nursing pads. Not sure if that helps anyone or if it’s comparable to other machines, but this is what I used on most of mine.
I tried 4/2 and 4/3 which looked fine.Don’t forgot- assembly line style is faster when doing large numbers of an item.
I was putting my fabric in order to get ready to pin for this part. It really saves you time when you start to sew them together because you don’t need to change the settings as often.
How do Reusable Nursing Pads Work?
I love them. They’re super comfortable and pretty. The only downside to using Pul for the outer fabric (in my opinion) is that it’s a bit slippery. I read somewhere that some people use the sticky side of the Pul to the outside because the pad won’t move around as much- BUT then you won’t have the pretty side facing out, boooo! The word on the street is that you might be able to find Pul that’s laminated in that direction, but I wanted to use some of the Pul I had sitting around from diapers. Either way, I’ve been wearing a pair of these nursing pads today without too many issues.
If you soak through pads, you just need to change them more often. They’re pretty good about holding in the milk, but you may not be able to go 8 hours with them. The nice part of using them is that they’re reusable so there’s no issue changing them frequently… less time spent sitting in soggy nursing pads is better for your nipples.
I was going to make mine contoured, then opted not to because it was more work and I’ve been pretty happy with my non contoured ones.
UPDATE (3/9/14): I’ve been using these since I published this back in 2012 and they’re all holding up great. I’ve made some extra pairs because I think 15-20 pairs really gives me a lot of freedom to change them frequently without always doing the wash. I do use my serger on the newer pairs now that I have a serger because I LOVE my serger.
Should I Get a Serger?
Honestly, sewing these nursing pads looks really nice so it’s not necessary. That said, if you use reusable nursing pads then you likely use other reusable products as well. Items like cloth wipes are so much easier to make with a serger. It’s just FASTER. Sergers actually sew more stitches per minute than a sewing machine which is helpful.
Want to see a quick serger demo? Here’s a video of me serging some wipes:
Please pin this post!
Interested in sewing for your baby? Here are some sewing and craft projects for the nursery.

How to Sew Nursing Pads Without a Serger
Learn how to easily make reusable nursing pads with a sewing machine.
Materials
- 1 layer of PUL
- 1 layer of alova suede cloth
- 3 layers of upcycled tshirt fabric
- Old CD
Tools
- Sewing Machine
- Rotary Blade
Instructions
- Use your cd as a template and cut all your fabric using a rotary blade.
- Line up your fabrics: PUL pretty side out, three layers of tshirt, and your alova suede cloth with the right side out.
- Pin them all together.
- Sew with a straight stitch all the way around your circle.
- Cut off the excess fabric and any stray thread.
- Zigzag around each nursing pad.
Recommended Products
As an Amazon Associate and member of other affiliate programs, I earn from qualifying purchases.


Thanks for the non-serger tutorial! I'm planning to make some of these over the summer before my baby comes in oct (I used BUNCHES of these pads when I nursed my last 2). I don't have any of the suede and I want to use things i already have, is there a good substitute?
Whoops, sorry I missed this comment. You need a stay dry fabric. I've only used alova suedecloth so I can't speak to how other stay dry fabrics would work comparatively, but microfleece and athletic fabrics are also stay dry ones. The goal is to wick the moisture away from your breast rather than having an absorbent layer sitting against your nipple (which could potentially cause issues with thrush).
I also noticed that someone had used pinking shears to keep them from fraying. 🙂
Nice, I've tried pinking shears on cloth wipes and didn't have much luck preventing fraying that way. I tend to zig zag everything. Eventually- once I get over my fear of my DSLR camera and embroidery machine- I want to get a serger. But it's so much work to learn a new machine. 🙂
Thanks for the tutorial! This is a dumb question but do you face the suede cloth in towards yourself and the Pul side against your bra?
The suedecloth is soft (non shiny) "right" side against your breast, the Pul is right side against your bra (shiny side on inside, design towards outside).
Do you air dry the pads, since it's PUL fabric?
Nope. I wash and dry all of my Pul stuff (cloth diapers, nursing pads) in the washer/dryer. I do sun dry diapers occasionally, but that's more for stain removal. At this point (it's been over a year for many of my nursing pads) the nursing pads look pretty much the same as they did when I made them.
I would also like to know what to use in place of the suede cloth….I have just about every other kind of fabric in my sewing room…but suede cloth. I see this was asked above but do not see any answer.
I just saw that other comment! Totally missed it before apparently. Here's what I wrote in reply just now:
"You need a stay dry fabric. I've only used alova suedecloth so I can't speak to how other stay dry fabrics would work comparatively, but microfleece and athletic fabrics are also stay dry ones. The goal is to wick the moisture away from your breast rather than having an absorbent layer sitting against your nipple (which could potentially cause issues with thrush). "
Hope that helps! If you try a different option, I'd love to know how it turns out/feels.