How to sew fitted sheets for a regular size crib and a mini crib. Customize your nursery with themed fabric that matches throughout the room.
I was excited to get started on the second part of my nursery makeover: Fitted Sheets! I was so excited, I almost skipped them and went straight to the curtain. Haha. It’s hard to stay on track when there’s so many excited projects to do and I want it to be done all NOW. Too bad having a toddler doesn’t accommodate that!
Cost to Sew Fitted Sheets
- null
- Cotton Michael Miller Fabric: $8.98/yard (used 17.5″/.49 yard for both)
- Mini: $4.40
- Standard: $4.40
- Green Cotton: $4.99/yard
- Mini: 1.06 yards, $5.29
- Standard: 1.43 yards, $7.14
- Elastic: $0.28/yard
- Mini: 1.5 yards, $0.42
- Standard: 2 yards, $0.56
Total for Mini Crib Sheet: $10.11 (2 for $20.22)
Total for Standard Fitted Crib Sheet: $12.10 (2 for $24.20)
Total I spent on 4 crib sheets: $44.42

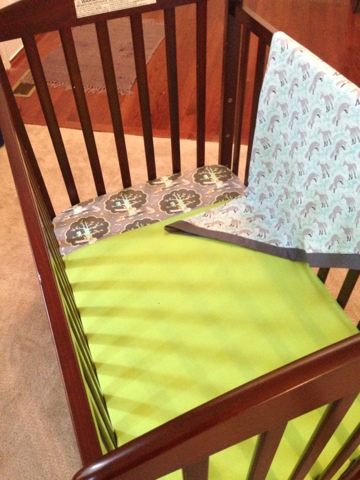
This project is great to do after making the changing pad cover because its the exact same methods. The only difference is the size of the fabric. Here’s the mattress I have for my mini crib…
To get the exact dimensions for your sheet, measure the height, width and length of your mattress. Mine was 28″Wx52″Lx7″H. Add the height(x2) + the width + seam allowance (6″, or whatever you have left) = 48″. Then add the height(x2) + the length + seam allowance (6″, or whatever you have left) = 72″. If you have an inch or 2 less on either side, don’t sweat it, it should still work.
Mini Rocking Crib:
- Measurements of mattress: 23.8″ W x 37.1″ L x 5.8″H
- Measurement of fabric combined: 41.4″ Wide x 54.7″ Long
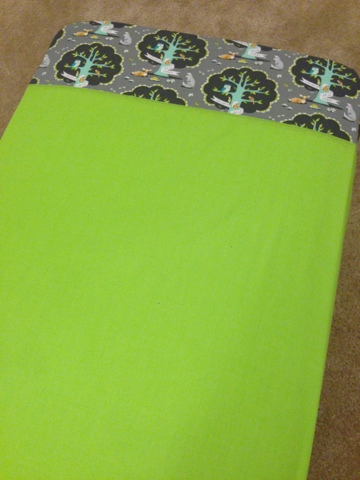
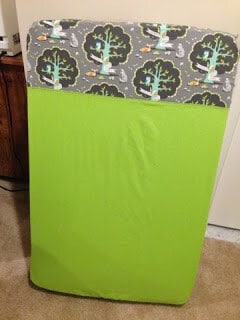
Math: 23.8″ + 5.8(2) + 6 = 41.4″/37.1″ + 5.8(2) + 6 = 54.7″ - Measurements of main fabric (green): 41.4″ W x 38″ L (only .3″ seam allowance if we want to do easy measurements)
- Measurements of accent fabric (the pretty stuff): 41.4″ W x 17.5″L (.5″ seam allowance)
Standard Crib: Opted to not do all the math on this one and I used the measurements given for the Part I Prudent Baby Crib Sheet Tutorial. Total fabric piece should be 68″ L x Width of Fabric including selvedge.
- Measurements of main fabric (green): 51.5″ Long x Width of Fabric (.5″ seam allowance)
- Measurements of accent fabric (the pretty stuff): 17.5″ Long x Width of Fabric (.5″ seam allowance)

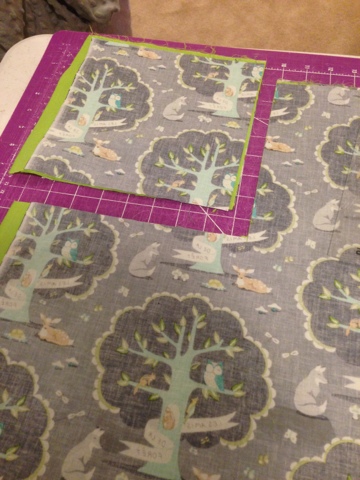
5. Sew along where you combined the two fabrics, to topstitch it.


6. For the corners, face the corners (where the square was cut out) right sides together. Sew a straight stitch, then finish the edges using a serger or a zig zag stitch (which is what I did).


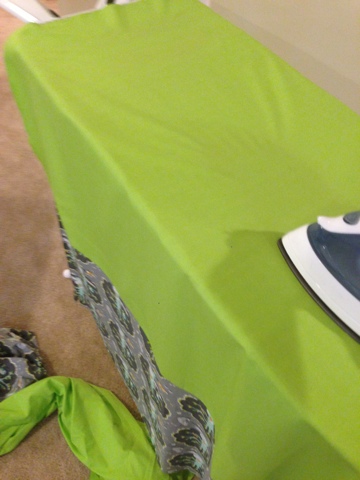
7. Flip it all right sides out now! You can see that you’re nearly done. You can use folding template from Scientific Seamstress to iron the casing perfectly around the sheet. I got a bit lazy and made the casing as I sewed, VERY carefully. The casing wasn’t perfect as a result, but it’s underneath the mattress so I wasn’t worried about it.
8. Sew the casing around the edges of your sheet. Leave a small opening to feed through the elastic.
9. Feed through your elastic until the two ends meet, sew the ends together, then close up the casing. I used 1.5 yards on my mini crib sheet AND AMOUNT on my standard crib sheet. To figure out the amount I’d make yard marks on my elastic then figure out which one I ended up at once I was able to fit the sheet onto the mattress.