

This small laundry room makeover includes DIY shelving, plenty of lighting, a dog feeding station, and gorgeous peel and stick backsplash.
This post may contain affiliate links which may earn me commissions should you click through them and take certain actions. As an affiliate for Amazon, Cricut, xTool, Home Depot, and other sites, I earn from qualifying purchases. Please DIY carefully. View my full legal disclosures here.
The majority of my content is generated by me, as are 99% of the photos and videos, but I utilize technology for titles, descriptions, video editing out all of my ums, and occasionally for text overlay on images.
Please read the whole post so you don’t miss any important information!
This post was sponsored by the DIY Decor Store. Their gorgeous metallic tiles can be seen in this post and in How to Install Peel and Stick Metal Backsplash. You can also see another metal backsplash in my post, How to Install a Kitchen Backsplash without a Wet Saw.
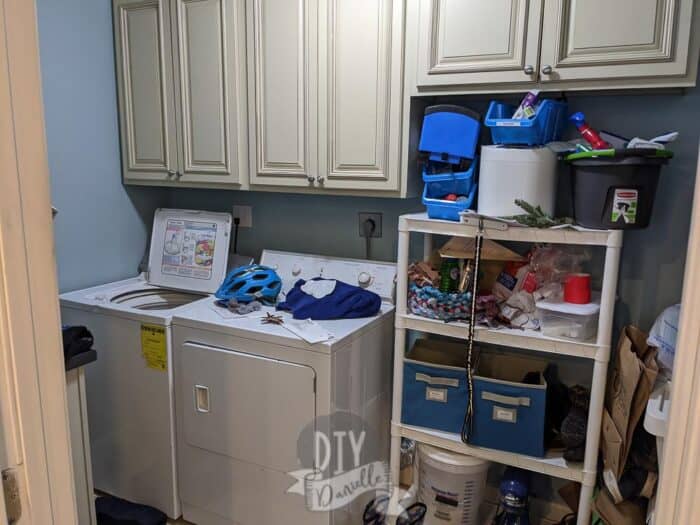
Our laundry room IS our mudroom. It’s the first room that you enter when you come in the house from the garage. It’s fairly small considering it has to function as a laundry/mudroom/pantry. The room has been driving me CRAZY and it was high priority to be updated.
Here’s the outline if you want to skip my funny little story/history below…
My First Solo Home Renovation Project
Let me explain our family situation a little because this might be funny to some of you. My husband has done a lot of our home renovation projects, but I’ve begun to take over. I wanted to learn the woodworking piece, I have more time than him, and I am better about taking video and photos for the blog.
Not only that, but I hope to inspire other women to learn to DIY… not to just marry a guy who is handy (although that’s certainly convenient). I thought my husband would happily hand over the task; he is ALWAYS complaining about working on his days off. So fine, right?
No. HE IS THE WORSE CHEERLEADER EVER.
Me: “What do you think?” (referring to the absolutely stunning backsplash)
Him: “Um I shouldn’t say anything.”
Me: “If you’re going to say that, you might as well say it.”
Him: “If I’d hired someone to do this job, I would have asked for some of my money back.”
First of all, he would not do that. He generally doesn’t even return things that don’t fit or that break. And I am usually the one dealing with contractors when we hire tasks out.
Second of all…
I love him. I’ll give him a little grace because neither of us are super chipper after a few weeks of our entry room being a hot mess.
Second, I’ve seen his work. The above quote is 100% true. His work is awesome when HE wants to do the project, but he doesn’t really put his heart into projects that don’t matter to him. The laundry room wouldn’t have been a high priority for him so it was a good option for my first big solo project.
I’m pretty new to woodworking and home renovation. This project pushed my limits and taught me a lot. I learned to use a JobPlus to remove baseboard, cut and applied trim for the first time, and yes, I made mistakes.
What’s great is that my next project will be better (and faster) because of what I learned. It’s not perfect, but that’s what caulking is for…
“Caulking and paint make a carpenter what he ain’t.”
-A gem courtesy of my brother Ryan
Damn. Straight.
For the record, my dad is a contractor and I grew up with him doing building projects. My brother has joined him in the business now. They’re both perfectionists (I won’t ask them what they think of my laundry room because YIKES).
The apple didn’t fall far from the tree, but as the primary caregiver of three active boys, I had to let go of some of my perfectionism over the years. I’m too tired to be perfect all the time, particularly when I’m learning something new.
Instead, I’ve tried to relax a bit and let myself grow as I learn. So I did this project, I learned a lot, I caulked what went wrong, and my next project will be better.
That’s what learning is all about.
While this project took me a lot of time and effort, I am proud of what I accomplished. I have worked with contractors before… they make mistakes too. And every time someone says, “Wow!” to my laundry room, I can say, “YES I MADE THAT.”
If anyone points out the flaws, I’ll just tell them not to pinch pennies when they hire a contractor like we did (wink).
I tell you all of this not to beat up on my husband, but because if you’re new to DIY (any of it), you may run into this issue. I hope this encourages you to do the project anyways.
Also- I’m convinced that DIY is like makeup… don’t like your lips? Draw attention to your gorgeous eyes. Minor imperfections in your build? BOOM! Gorgeous backsplash.
Supplies
- Distressed metal tiles from DIYDecor Store
- Glacier Bay All in One Stainless Steel Laundry Sink with Faucet and Storage Cabinet 24.2 x 21.3 x 33.8
- High quality plywood… I’m linking Purebond at Home Depot because it’s WAY better quality than what I purchased at our local store and the same price (sigh). I ordered the other plywood sight unseen for delivery and it was a massive mistake.
- 6 Light Track Lighting
- Replacement LED bulbs for the track lighting because the other bulbs were WAY too hot
- Kreg Rip Cut
Small Laundry Room Design
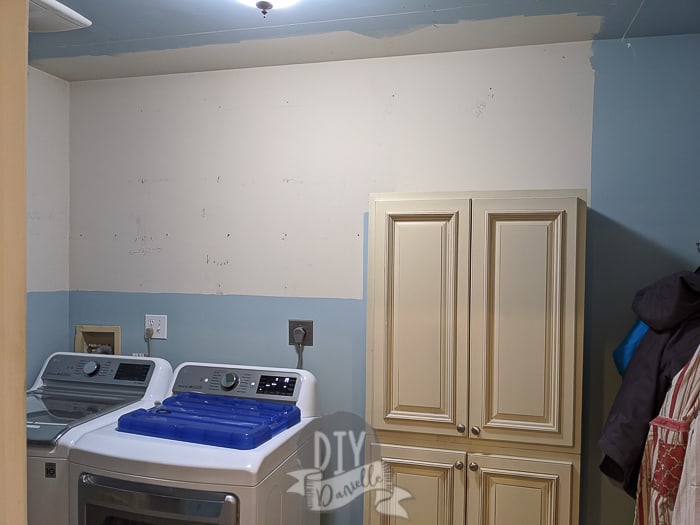
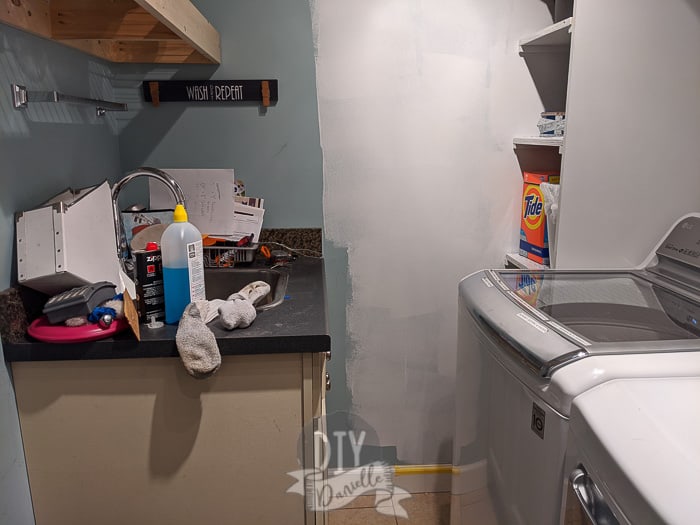
The room always felt cramped, but there was never enough storage space. Part of the problem was the HUGE kitchen sink cabinet. I had to suck in my breath to fit when I used the washing machine.
This mudroom/laundry is right off our kitchen. While the kitchen is GORGEOUS, it lacks a big pantry. We have a lot of smaller appliances that we needed to store. Unfortunately, lacking other options, they’ve been on shelves in the garage until now so they tend to need washing whenever we pull them out.
Here are our needs and wants:
- Dog feeding station
- Shelves for storing extra small kitchen appliances
- A smaller sink
- Storage for socks and shoes
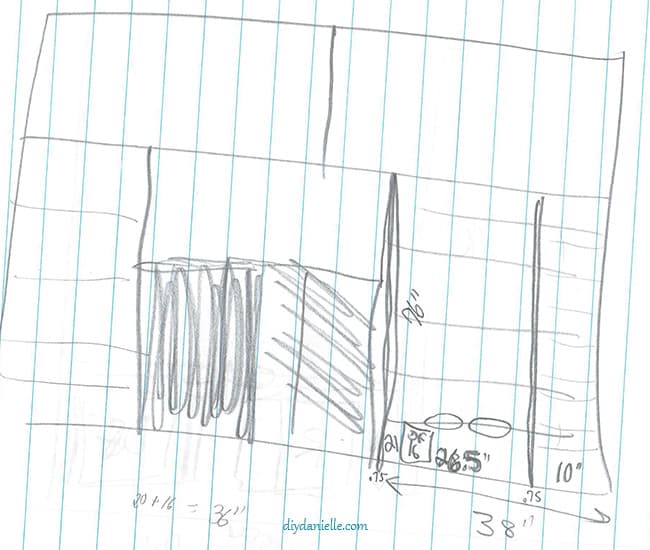
This is the sketch I drew out for the space. Some of the project evolved over time. I probably have 14 different sketches of various ideas for the space. When I get closer to deciding on a plan, I started adding measurements for shelf heights, etc.
The one thing I am missing is a place to hang coats. I have an over the door hook that I can use, and plenty of coat racks up by the front door, but we most often use this room. Oh well. You win some, you lose some.
Removing the Old Trim and Cabinets
Unlike all of those fun TV shows with renovation projects, we did NOT Hulk smash the cabinets and trim. I carefully pried the trim off and we saved the cabinets to use elsewhere.
We kept the cabinets in the room for a while to help hold the detergent, etc. while we got everything else setup.
Once everything was down, we could add shelving.
DIY Laundry Room Shelves
One of the decisions I had to make was whether to use closed cabinets for the shelving. While closed cabinets might be more appealing so you can hide eyesores, I didn’t want the room to feel cramped. I opted for open shelves. The shelves are white to keep the room feeling lighter and more open.
Supplies: (4-5) 4×8 sheets of good quality plywood, primer, white paint, trim, 1 1/4″ screws, 2″ screws, 3″ screws. If you order the plywood from Home Depot for home delivery, you can select the cuts you want and they’ll precut the wood for you!
The shelves are made with 3/4″ plywood. Read more about why plywood is a good choice for shelving here. 3/4″ is more sturdy than 1/2″ and is a better choice.
The shelves attached to studs using long cabinet screws.
Building the Shelves
We had quite a few shelves for this project and they each serve their own purpose. There’s a laundry shelf and storage shelves overhead. We have a pantry type shelf to make up for the lack of pantry space. And we have the mudroom shelf. I made sure we had it all. They were all designed a bit differently.
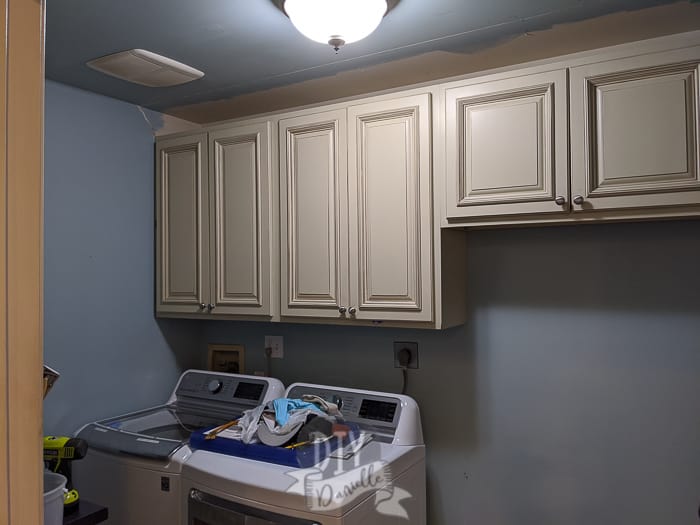
Top Large Shelves
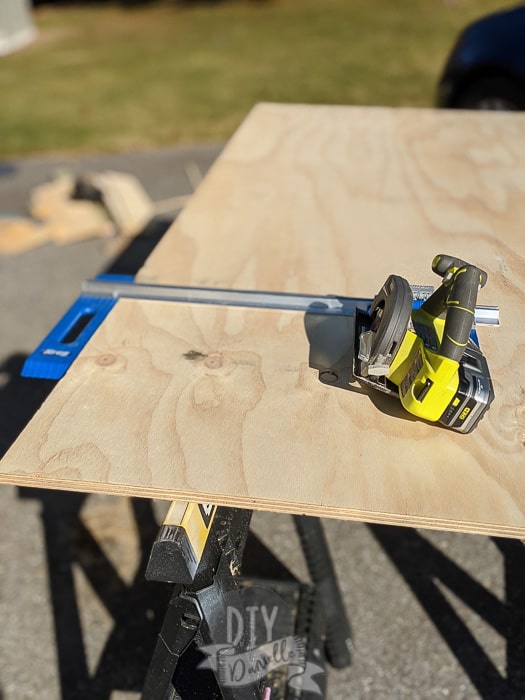
First of all, I had to rip a lot of plywood (that’s DIY-speak for cutting the wood parallel to the grain). I bought a Kreg Rip Cut. OMG. Why didn’t I buy this sooner?! When you’re cutting a bunch of boards to the same width (or depth, really), it makes the job SO much faster.
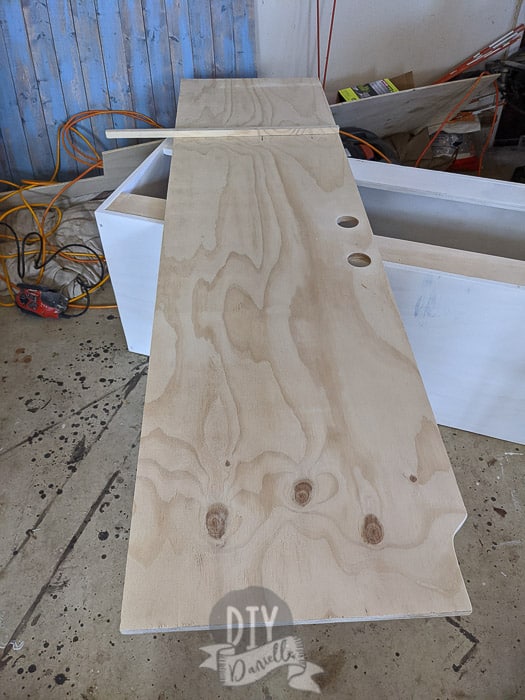
My shelves were 20″ deep so I cut a whole lot of QUALITY plywood to this width. I started with two 56″ width shelves for the very top of the room.
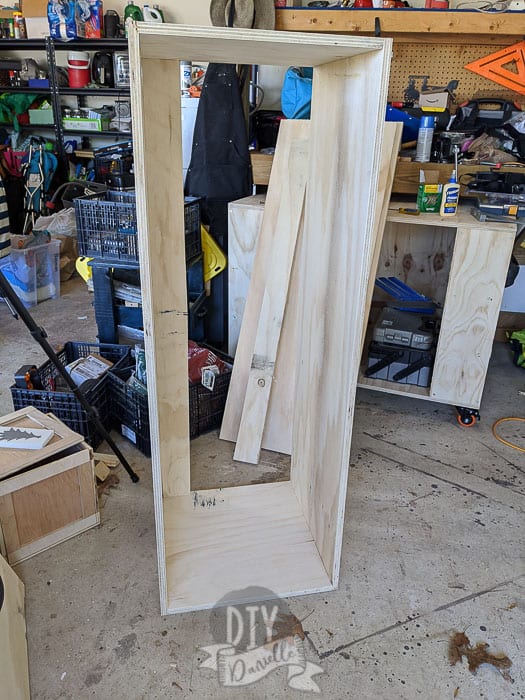
The first set of shelves that I made were the two large shelves on top. There are two shelves that are 18.5″ tall, 20″ deep and 56″ wide; the total width of the room is 112.5″
As you can see below, I added two thinner strips of plywood to the top and bottom of the shelf. These give me something to attach to the studs on the wall. They’re attached to the rest of the frame with plenty of screws.
I primed and painted the shelves white before attaching them to the wall to save myself some time and aggravation.
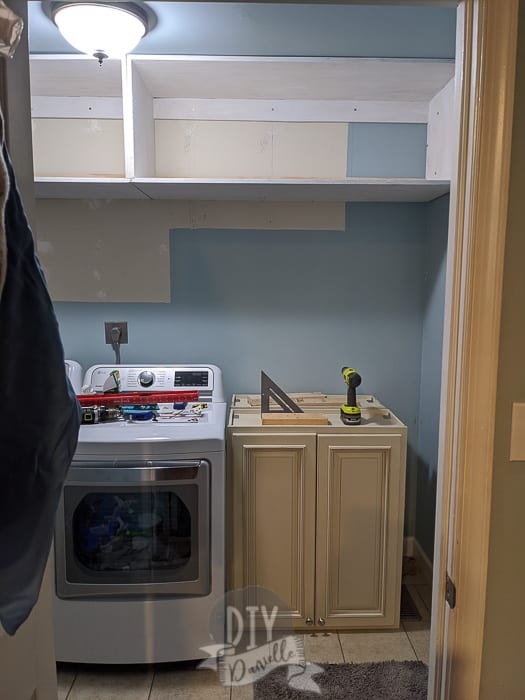
My husband, my friend Scottie, and I all put the first shelf up together because it was pretty heavy. I recommend marking out where your studs are on the wall so you can easily find the right spots to add screws while your partner is holding up the shelf. By the 2nd shelf, we’d figured this out and it went much faster.
The one issue we ran into was that the second shelf fit PERFECT. We had to slide it up the wall to get it in.
The cabinets need to be able to support weight. As such, I attached the shelves to studs in as many places as possible. These went unsupported for a few days until I had a chance to do the other shelves so this was VERY IMPORTANT. Once the project was finished, the bottom shelves help hold some of the weight too which is ideal.
The small gap between the two underneath was packed with backer rod, patched, and painted to hide the gap.
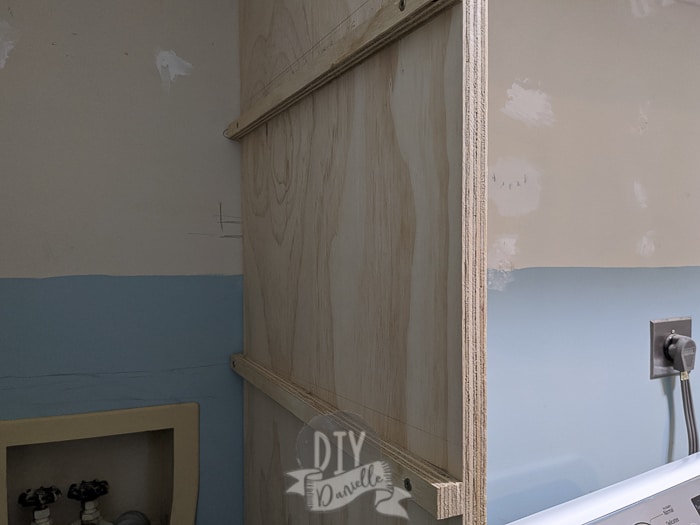
The Laundry Shelf
We saved money on plywood- and space- by not building the laundry shelf like I did the pantry shelf. We cut a piece of plywood that measured the same as the height from the floor to the top shelf.
This was attached to the top shelf by screwing it in from the top down AFTER I made some adjustments first.
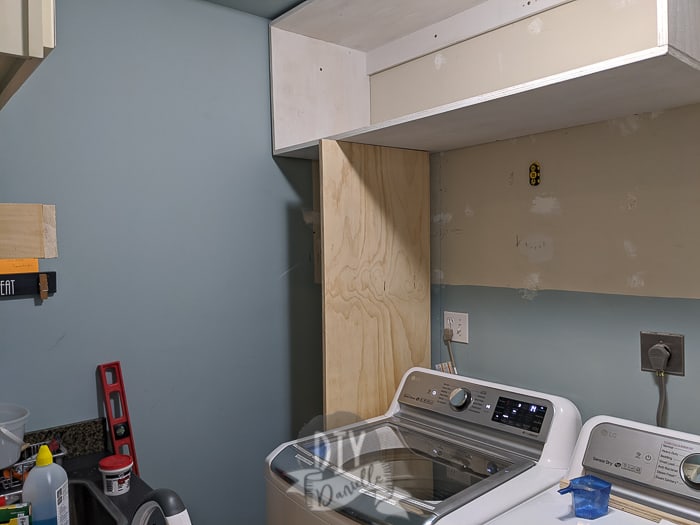
I realized pretty quickly that the plumbing for our washer/dryer needed to be accommodated. I drew out the areas that I’d need to cut away so they could be run through.
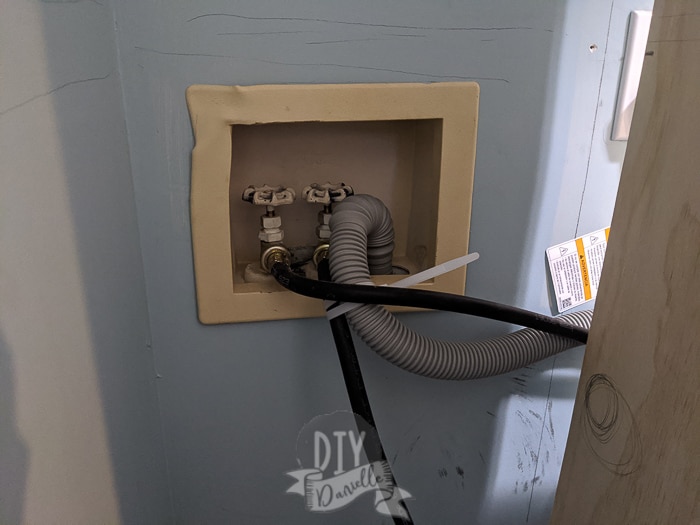
Then I used a hole saw to cut the areas for the plumbing to run. I also used my jig saw to cut away a small area in the back for the baseboard (but I’m going to tell you how to cut away your baseboard in a bit).
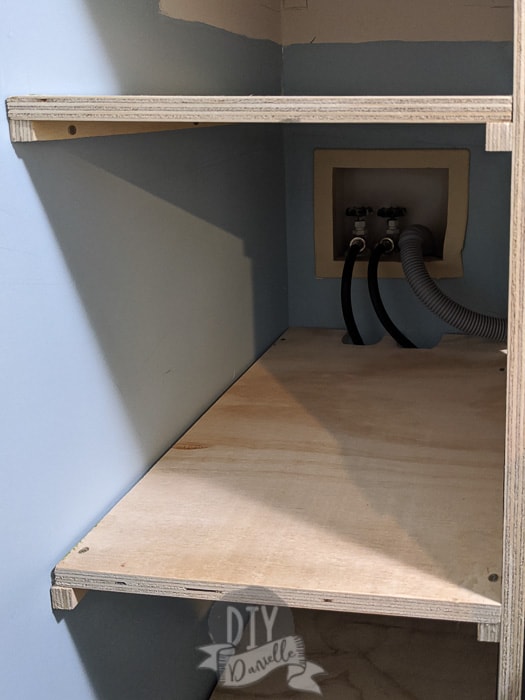
At this point, I returned the shelf to the laundry room. I marked out where I wanted each shelf to go on the piece of plywood, making sure the line I drew was level.
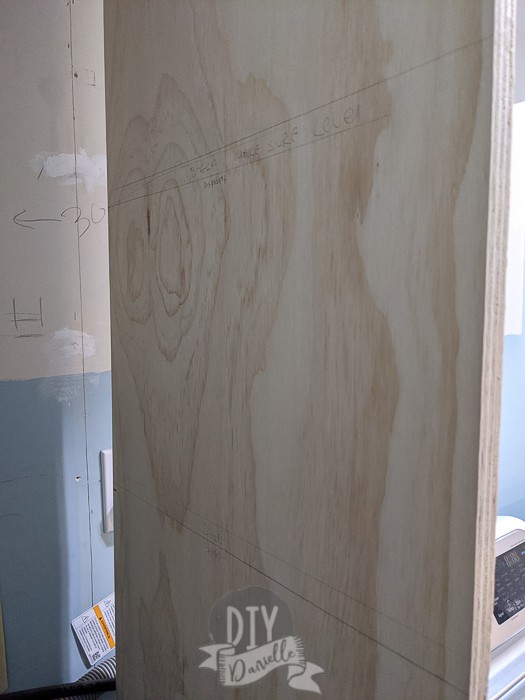
Scrap pieces of plywood cut into thin strips were perfect for placing for shelf supports. As you can see, I placed it BELOW the lines I drew (which represented the shelf itself). I attached these supports to the plywood.
Now I needed to place supports on the wall for the opposite side of the shelf. I took out my shelf piece and placed it on my (loose) left support and my right support. The level went on top of the shelf. I was able to move the left support around until the shelf was level, then attach the support to the wall! Make sure to mark your studs in advance.
Repeat for all shelves, then screw your shelves to your supports. This helps stabilize the whole shelf.
Prime and paint your shelf.
The Pantry Shelf
The largest shelf was the pantry shelf which functions as a dog feeding station AND pantry storage. This shelf required two pieces of 20″ wide plywood that were the perfect height to sit under my top right shelf.
When I decided on the width, I cut a small piece of wood to go along the back. This gave me something to attach to the wall/studs.
I’ll talk more about how to DIY the dog feeding section in a bit, but the main idea for the shelf itself is to decide how high you need each shelf area to be. Small appliances can be tall and may not fit if it’s not the right height. And DON’T forget to account for the trim when you decide on the height. The trim blocks a bit of the front of the shelf.
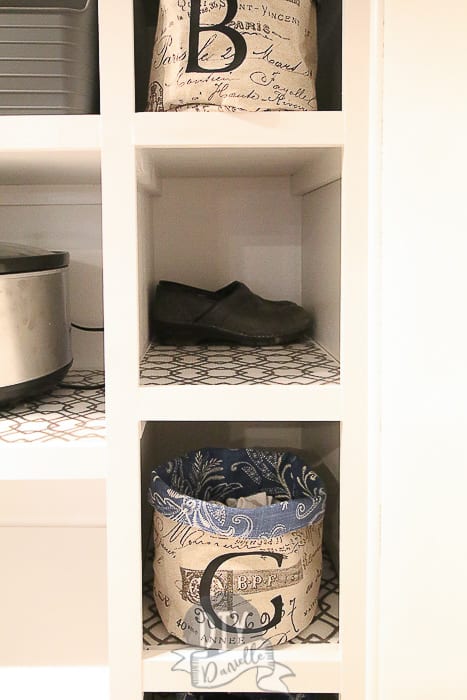
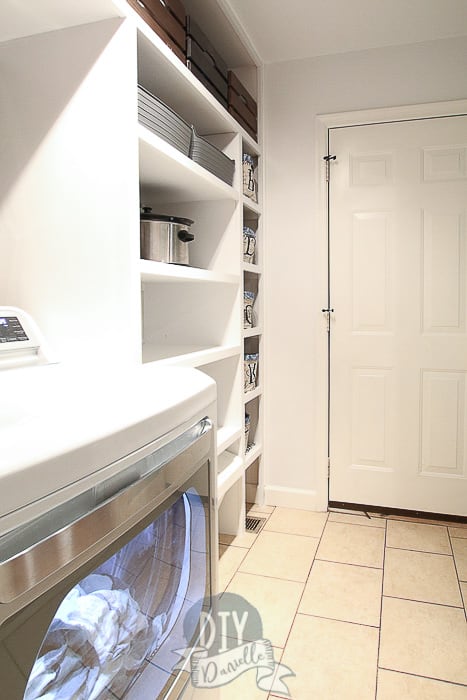
The Mudroom Shelf
I built the shoe shelf just like I built the laundry shelf, except I was using the pantry shelf as the side. Here’s a photo to give you an idea.
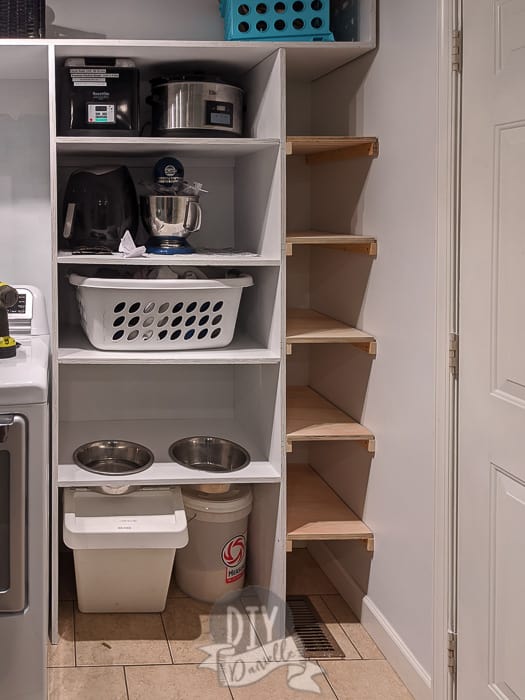
As you can see in the finished photo below, the depth and width allow enough room for a small bin up front to hold socks, mittens, etc. while shoes can be hidden away in the back. I put down some shelf protection because I didn’t want the kids ruining my shelves with dirty shoes.
Adding Trim to Cover the Raw Plywood
Adding trim to the front of the shelves hides the look of the raw plywood edges and gives the project a finished look. This is really easy to add on.
You start by measuring where you want to place the trim so you know how long the trim needs to be. Cut your 1x2s to that length. For the area around the floor, we needed to remove a piece of baseboard to place our trim.
Here’s how we did it with our Job Plus tool:
I used wood glue and a nail gun to attach the trim to the fronts of the shelves. The trim looks FANTASTIC compared to raw plywood edges.

Once it was added, I primed and painted everything.
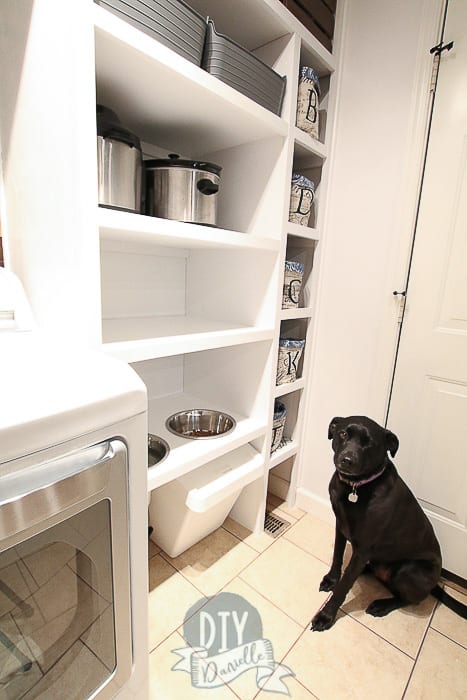
DIY Dog Feeding Station inside Mudroom Shelving
I have this rustic dog feeding station that I built a year or two ago. While I LOVE it, I didn’t think there’d be room for it in this room once my shelves were up. I didn’t want to be tripping over it. Likewise, there isn’t a great space for it in the kitchen.
The bottom shelf needed to be high enough to allow the bin of dog food to slide under it. This ended up being a problem. The feeding station looked JUST right for my dog’s height, but he seems to be struggling to get to it. I can’t move the shelf at this point so I guess our next dog will just need to be taller? Haha.
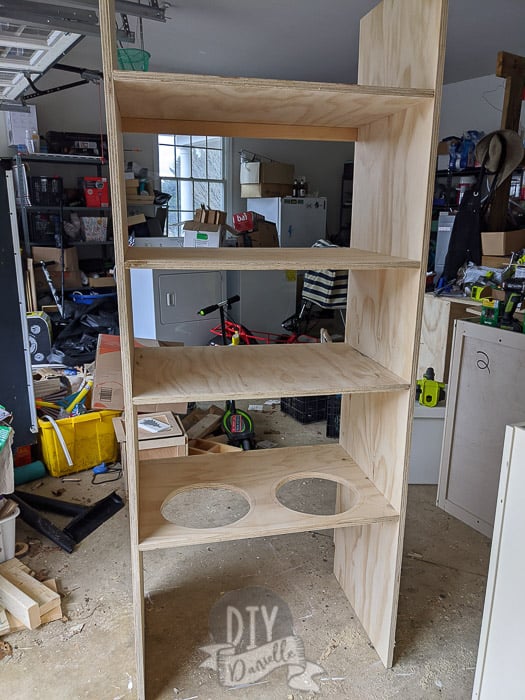
The actual DIY part of this project is easy. You take the bottom shelf for your cabinet and tip your metal dog bowls upside down on the shelf.
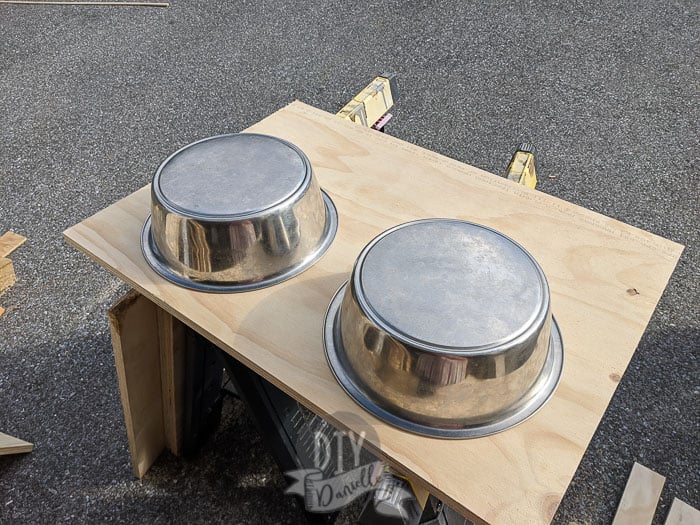
Use a pencil to draw the outline for the top of the bowl. The circle you cut out needs to be SMALLER than this outline. I draw a smaller circle to follow as a guide.

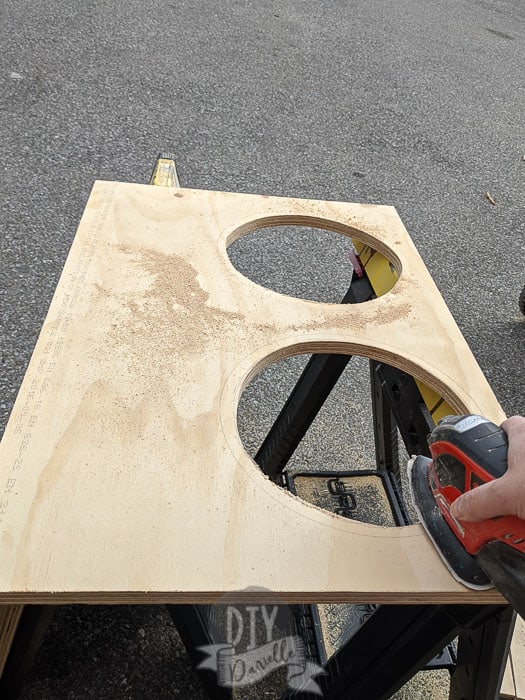
Once I have both of my circles drawn, I use my drill to create a hole in the circle that’s big enough to fit my jig saw blade. Then I can use my jig saw to cut along the smaller circle.
Sand down the edges and paint the shelf.
Attach the shelf to your shelf system at the appropriate height for your pup.
Small Laundry Room Sink
This was definitely one of the things we needed to upgrade. The best part is that I don’t feel like I lost storage space or sink size… I think our sink might even be bigger than the one we had before.
Look how much the sink size impacted the overall design of the room!
BEFORE Picture
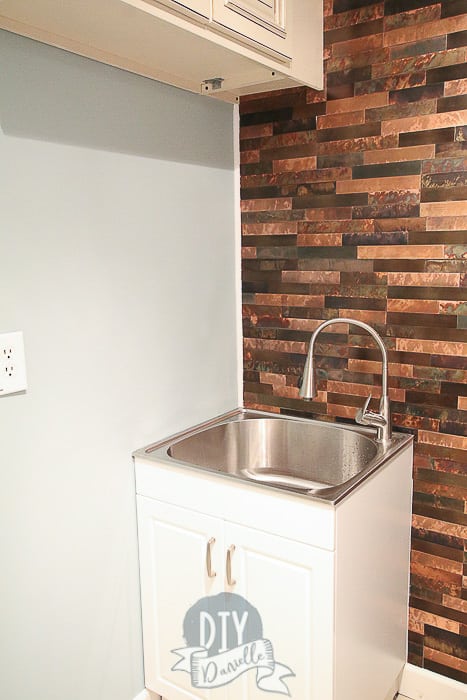
I used the Glacier Bay All-in-One 24.2″ x 21.2″ x 33.8″ Stainless Steel Laundry Sink with Faucet and Storage Cabinet from Home Depot. Here’s a bunch of their Glacier Bay All In One Laundry Sinks because they don’t have the sink available on the site right now when I wrote this. The size of this sink is really great though for my 3 year old who is able to wash his hands without a step stool… perfect for when we come in from visiting the animals.
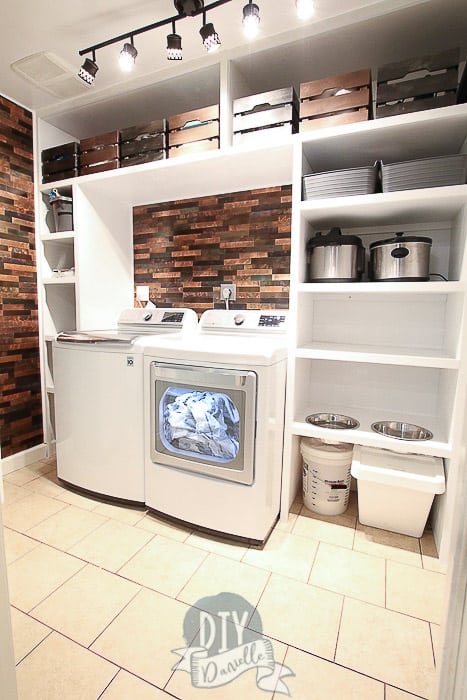
AFTER Picture
I decided to hire a plumber for this job. Scottie, my cheerleader, told me I could TOTALLY do the job, but I was far enough into the project to be happy to pawn off part of it on someone else.
I am still trying to decide what to do with the wall by the sink. It’s VERY bare and while I repaired the damage from removing the sink backsplash (the thick tile around the sink), I NEEDED to replace the drywall there.
I am tempted to remove part of that wall and make a recessed shelf instead though. We’ll see. It would be nice to have a shelf to place milking supplies when we start milking our goats again.
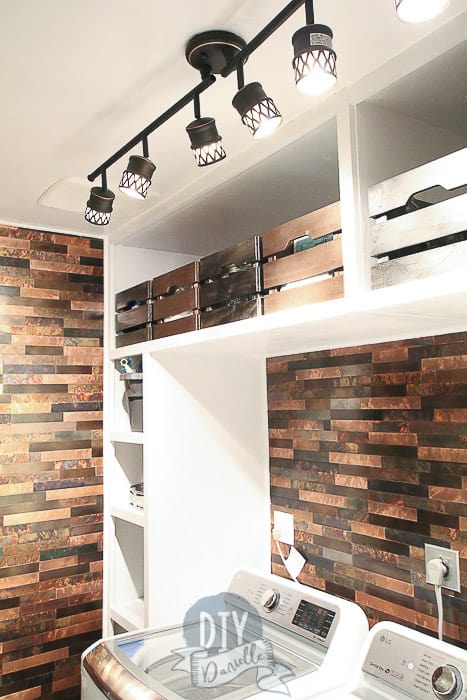
Peel and Stick Backsplash for the Laundry Room
This is really the crowning glory of the room. I wanted something that really made the room POP! While the rest of the room was functional, I also wanted this room to be attractive. It was a tough balance.
When my friend Scottie showed me the metal peel and stick tiles that she used for her home show, I was SOLD. They’re fairly easy to install, they are stick on, and they make for a magnetic surface.
Below: Aspect Backsplash in Metal and Aged Copper
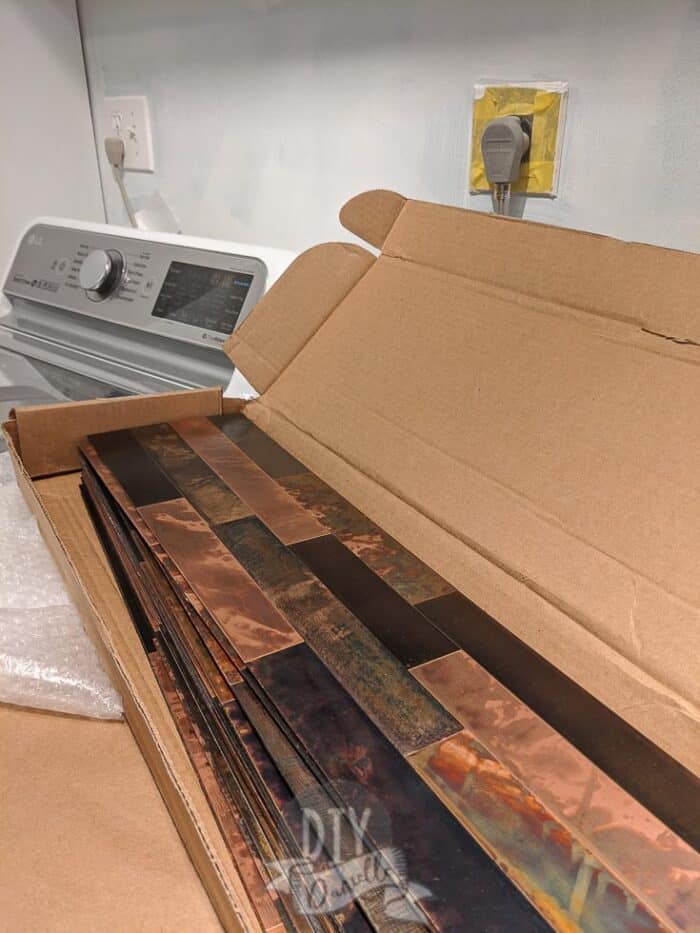
The magnetic surface was a big sell for me because our refrigerator isn’t magnetic! I have no place to hang important notes for myself and the cute magnets I’ve been gathering over the years.
This was really easy to install. When I primed my shelves, I went ahead and primed the walls that I wanted to place the tiles on. This allows them to stick better. If you want to skip priming, you’ll need to use construction adhesive to stick these to the walls.
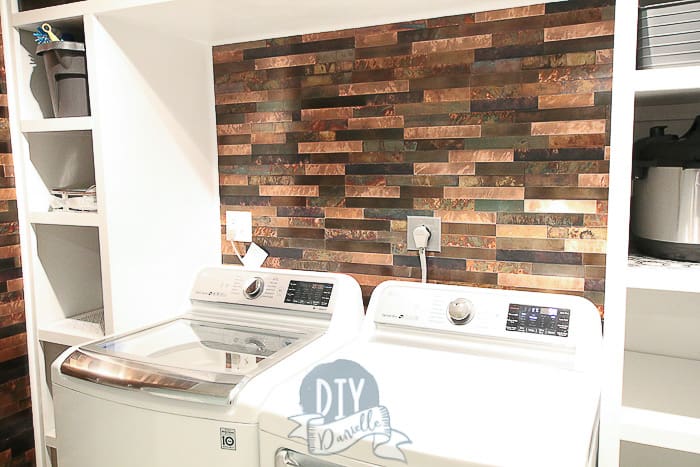
Isn’t this glorious?! I did the wall behind the sink too…
Check out my post on how to install peel and stick tile in your laundry room.
I used quarter round around the edges to frame the tiles. The wood is attached with glue and my nail gun. This helped cover raw edges on the metal and provide a more finished look. I primed and painted the wood white to match the cabinets.
Added Touches to the Laundry Room
Here are a few additional touches that I added for convenience or practical reasons.
Adding a Door Stop
First, my door now opened into the shelving. This was a problem. I installed a hinge pin door stop to prevent the shelving from getting dinged.
Storage Bins
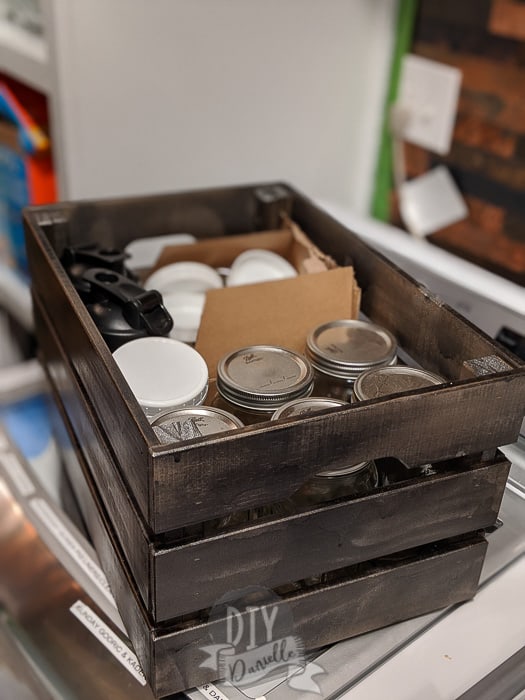
While I wanted to place my appliances on some of the shelves, I also wanted to use the very top shelves for storage bins. These affordable IKEA bins did the trick.
I spray painted them metallic sheens to match with the backsplash and stand out from the white shelving. Mason jars, tissue paper, toilet paper, etc. are stored in the upper bins.
Likewise, the thin shelves on the right are for shoes, but we also keep bins for our socks in our mudroom. This speeds up our exit when we’re running errands. I couldn’t find a bin small enough for the front of these shelves so I sewed some. Each has the initial of the person they belong to.
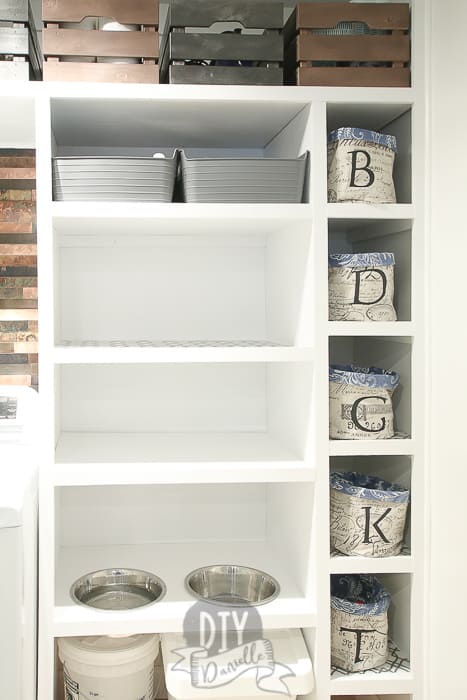
The top shelf is my husband’s, then mine, then each kid in order of tallest to shortest. This allows each child to find their own socks and shoes. The bottom doesn’t have a bin and we can store extra shoes there. I didn’t want to block the vent.
Learn how to sew some simple round bins for socks.
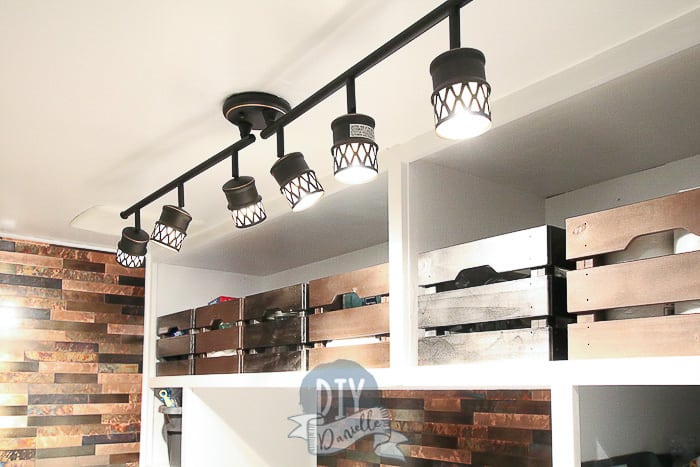
Lighting
For lighting, I wanted something that would produce a decent amount of light so the room wouldn’t look too dark. My husband did this for me because I don’t like to mess with electrical (maybe next time, lol).
Here’s the lighting touches that I added:
- 6 Track Foldable Track Lights in Rubbed Bronze
- SnapPower Guide Light: These pop on in exchange for the normal outlet cover. Very easy to install and they act like a nightlight.

Garbage
The last thing I am planning to add is a pull out garbage/recycling bin. It hasn’t arrived yet but I’m hoping it will fit and look good!
Video of the Process
Check out more laundry room renovation ideas!
Please share and pin this post! You can also post your project and tag the DIYDanielle team on Instagram @doityourselfdanielle!
Small Laundry Room Ideas
Google Web Story: Laundry Room Renovation