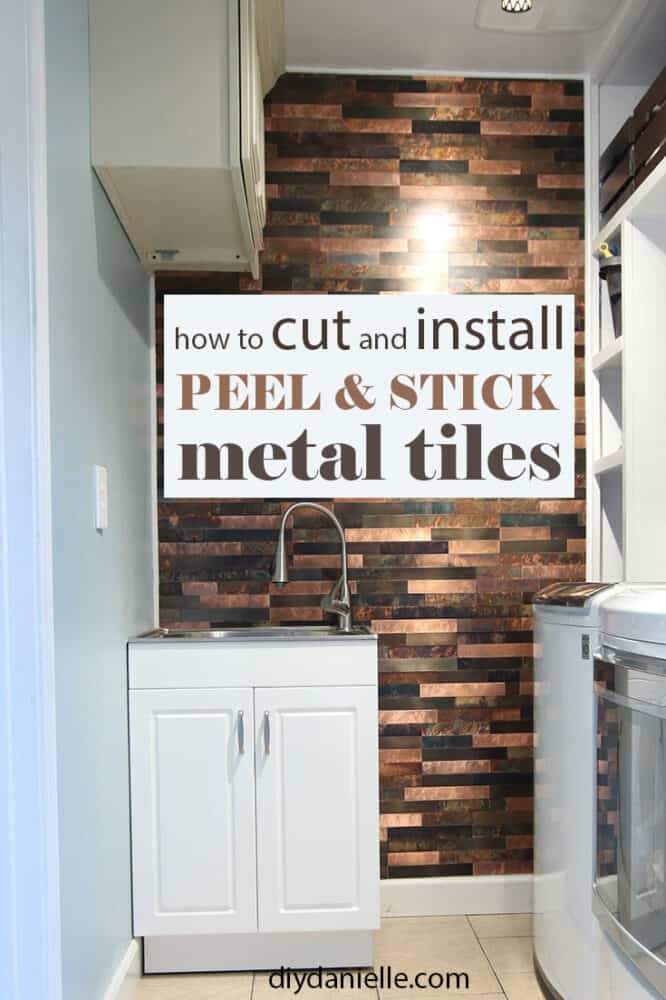
How to install peel and stick metal backsplash for a laundry room or mudroom. This is a great way to add a magnetic wall to your room.
This post was sponsored by Aspect Tiles and the DIY Decor Store . This post may contain affiliate links. Please DIY carefully. View my full legal disclosures here.
Please read the whole post so you don’t miss any important information!
When I was renovating our laundry room, I really wanted something to make the room stand out. It’s one of the entry points in our home and my design was mostly functional to this point. So I wanted something pretty. I decided the backsplash would be the crowning glory here- and ISN’T IT fantastic!? Let me show you HOW EASY it is to install the backsplash.
This project is part of my DIY mudroom and laundry room renovation.
Why Use Peel and Stick vs. Regular Tiling?
I have never DIY’ed regular tile so I can’t testify to all of the differences, but I LOVE the peel and stick option. It’s easy to DIY and it doesn’t require a lot of expensive equipment or supplies.
It’s also pretty manageable to learn how to do while you may want to take a short class before tackling tiling.
The thing I like most about it is that I can start the job, stop when the baby wakes from nap, then pick it up another day. I love being able to split up the work over a few days.
I feel like true tiling requires you to commit the day (or two) to the job.
While I’m not familiar with all of the brands on the market, I’ve used products from the DIY Decor Store on two different projects and have been very happy with the results. We always get compliments from friends on the completed project.
The company offers a fantastic variety of products for every “look” that you’re hoping for and the products are easy to install. They offer many types of backsplash, wall panels, and ceiling tiles for everywhere in your home.
I’m particularly intrigued by their shower kits which I’d like to try out when we redo the kids’ bathroom and finish the basement rough in.
I feel like the company is “hip” to current trends for style so it’s nice to see products that I can picture in my home.
How to Install Peel and Stick Metal Backsplash
This post addresses specifically the distressed metal tiles from DIY Decor Store that I used for this project. I cannot testify to any other brand’s product or installation.
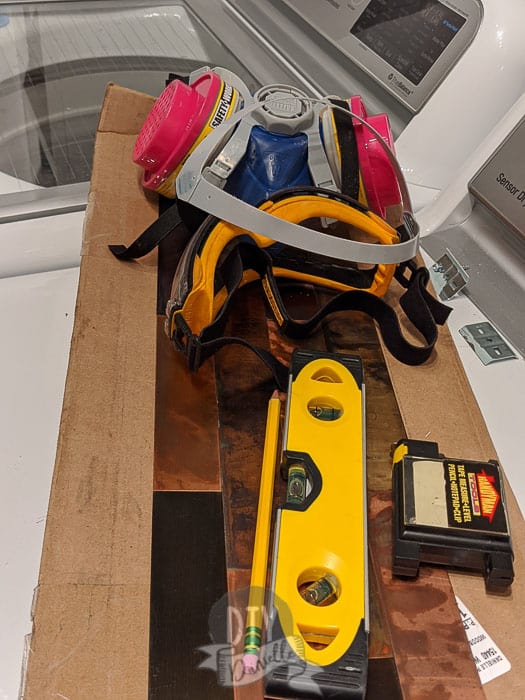
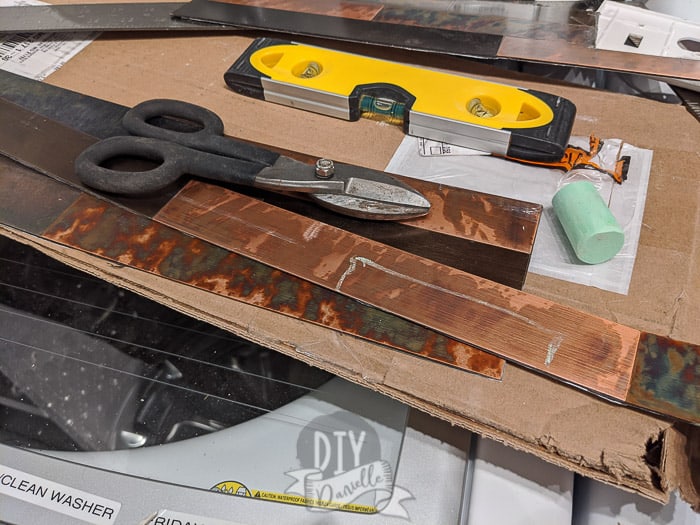
Necessary Tools
- Tin snips
- Measuring tape
- Level
- Ladder (if you’ll be going up high)
- Primer with a paint brush and tape
- Trim and something to attach it
How to Cut Metal Backsplash
I tried two different methods for cutting the metal backsplash.
Method 1: Miter Saw Blade
I started with a ferrous metal blade for my miter saw. The blade was HORRIBLE. It threw off a ton of sparks. I used a face mask, work apron, gloves, and eye protection to be safe. Unfortunately, the blade got WORSE as I got further along in my project. The cutting got slower, the metal got very hot, etc. Essentially, my blade was dulling.
I finally stopped using it after it melted a tile… yikes! It also melted a piece on my miter saw. I wasn’t happy.
The representative from Aspect that I spoke with suggested a 60-80 tooth blade that can cut through steel IF you go the route of using a miter saw, BUT they highly recommended using tin snips.
I was skeptical because saw blades are so effective and tin snips are me-powered. But I decided to pick up a new set of QUALITY tin snips. This made a HUGE difference.
Method 2: Tin Snips
We owned a pair on tin snips that were a few years old. I’d tried to cut the tiles with them, but my hand was cramping up so bad from cutting tiles; I wasn’t keen on doing it for the entire project.
But when Aspect recommended them over the saw blade, I decided to get a better pair. I ordered these tin snips on Amazon.
QUALITY TIN SNIPS MADE ALL THE DIFFERENCE.
After dealing with both, I’d recommend tin snips over saw blades 100%. Here are the benefits to the tin snips:
- No running in and out of the house to cut the metal.
- No need for extreme safety gear (you’ll still want to be safe. You’ll definitely want to wear gloves ideally, but you won’t have sparks flying at you and burning your arms, lol)
- You’ll save money because tin snips are far less expensive.
- You can get away with one pair of good tin snips instead of getting a couple of different electric tools for the job.
- Because you can cut right next to your wall, it’s faster and easier.
I finished most of the laundry room with the metal saw blade before it was so dull it was melting things. We ended up finishing up with the old tin snips.
There were extra tiles leftover though (and I hate wasting things). I decided to do an entire wall in our kitchen area using the tin snips. It went SO MUCH FASTER.
I’m really glad I got to see the difference so I could make a good recommendation to you. And the tin snips are a HUGE savings over trying to buy the blades necessary.
Tips for Sticking on the Backsplash
Sticking on the backsplash is a fine art. It’s not HARD, but there’s some things you need to get it RIGHT. You may not think about these things beforehand so please read this thoroughly… I’m happy to answer questions if you don’t understand something!
Prime your wall before you apply your tiles and let the primer dry. If you skip priming, you need to use constructive adhesive to attach the tiles. Priming is faster and easier than applying construction adhesive to every single tile.
I would recommend having your primer tinted to match the colors of your tiles. I made a couple of mistakes so there are TINY gaps in one or two spots. The white primer shows through. If the primer had been tinted, the mistake would have been impossible to see (in fairness, it’s still pretty hard to see). 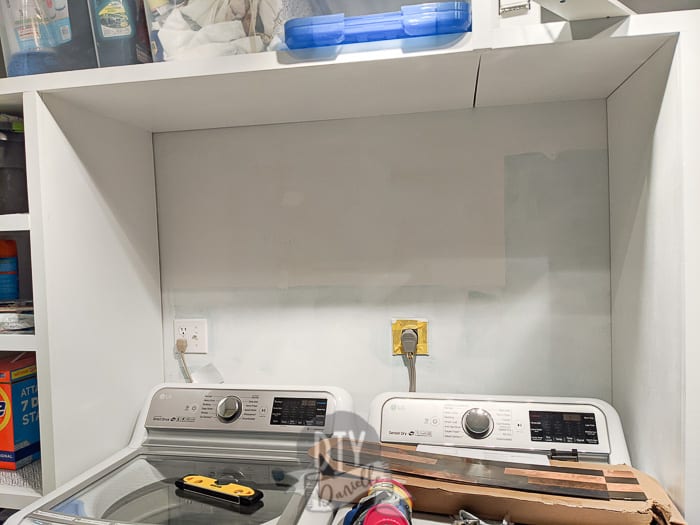
Yes. As long as you follow the directions to use primer first or to use construction adhesive, your tiles should stay on. The adhesive is STRONG. In fact, it’s so strong that you’re going to have a few potential hurdles to overcome.
Once you stick the tile down, press down firmly for a few seconds to make sure it’s adhered everywhere.
The ONLY exceptions I had to tiles not sticking were user related (more info below).
I tried this in a few places with mixed results. The problem is that the adhesive is VERY strong and if you let the adhesive “catch” the wall at all, it’s hard to pull off. You need to be able to slide the tile into a tight spot WITHOUT it catching first.
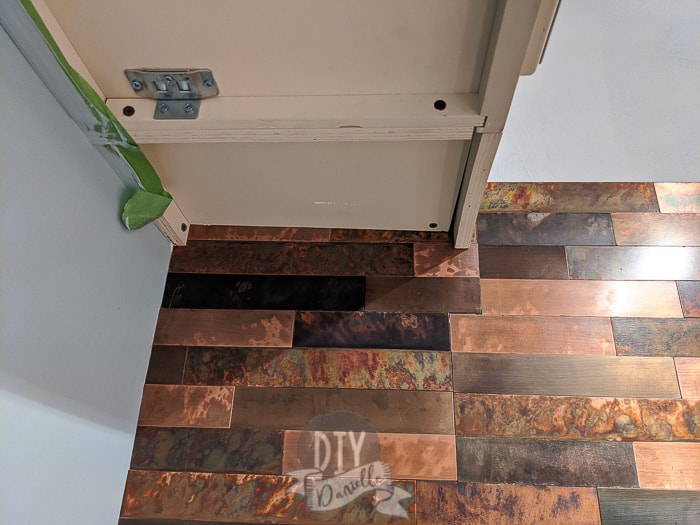
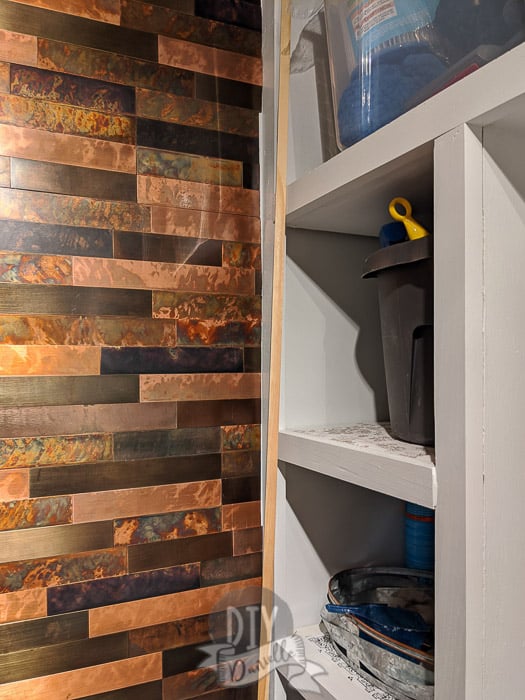
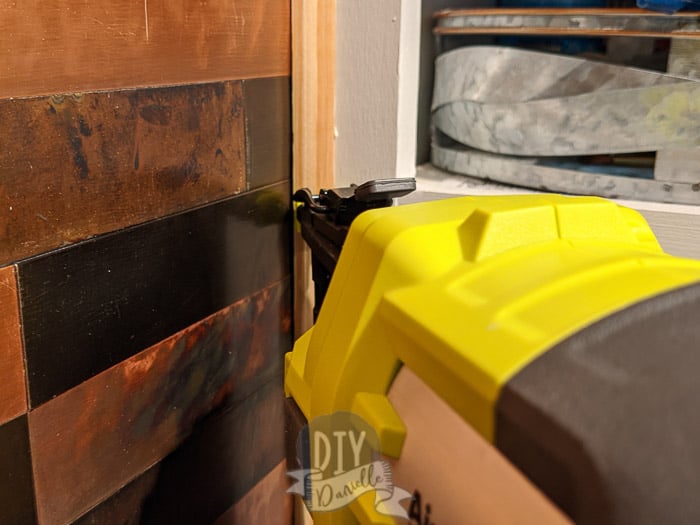
For the most part, I’d suggest just using trim. We did work out a method at the end though… I WOULD NOT recommend this in MOST situations. We had a really tight area with a weird curve of molding for a cabinet (in the laundry room above the sink). There was no way we could cut the curve with tin snips.
Instead we used our JobPlus tool to cut away at the end of the trim, leaving a small area to stuff the edge of the tile into. We left the sticker on the part of the tile that was going under the trim. This prevented it from sticking as we inserted it. The sticker for the rest of the tile was removed to stick to the wall once the trim was inserted. I hope that makes sense!
It’s not the best method of doing this because you risk your tile not adhering properly and possibly popping up later.
The other thing you could try is leaving the sticker on the back of the tile, sliding it behind the trim into the location you want, then trying to pull the sticker off while the tile is in place. This worked in a few spots for me, but it’s tricky.
The pictures below show two tricky spots where we managed to shove the edges behind the cabinet/trim. The first photo is before we cut away the trim. We cut just enough by the wall to slip the tile behind it. 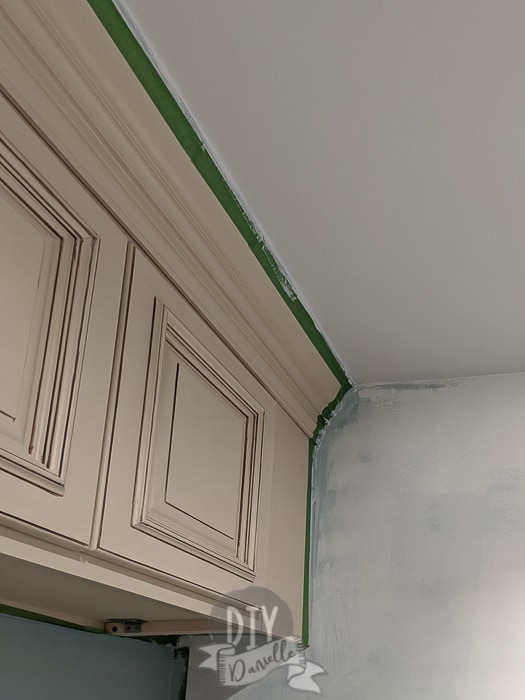
If only a bit of the tile sticks, you can pull it off the wall. You may pull off some of the paint/wall with it if it’s too stuck.
When you pull it off, you’ll find that the metal tile bends and the tiles may come apart from the adhesive layer. If the tile was stuck down well and you remove the tile, you likely won’t be able to reuse the tile.
I had a few small strips that didn’t stick well; this was caused because I pulled the tile off the wall to fix its position and the tile pulled away from the adhesive backing. Most of the tile was fine, but one strip came apart. I used a knife to cut away just the strip, then cut a same sized strip off a piece of tile that was leftover, and placed it in the spot. This is a GREAT way to fix any cosmetic issues.
You need to use a level for the first couple of rows to ensure that your tiles are straight and level with the ground. I recommend starting your tiles from the floor up if you’re doing a whole wall.
Once you have those first rows added, you’re simply placing your next tiles right above the first row. Complete ONE ROW AT A TIME. Make sure they’re tight against the tile below before you stick them down.
This is a bit tricky, but once you get the hang of it, it’s pretty fast and easy. For a new row, I would place the tile on the left most point. When placing it, I would use a little pressure to pull the tile low so it was snug up against the row below it. I tried to adhere from left to right on each tile, snugly pulling up or down on the tile to ensure a good fit.
For the next tile in that row, I would place the left side of the tile against the right side of the previous tile, ensuring they were snug against each other with no gaps. Then I would slowly move from left to right (on that one piece of tile), pulling the tile snug against the bottom tile as I adhered little by little. This sounds slow, but you move pretty fast.
This is a pretty important consideration. You don’t want all of your tiles to line up. The tiles should be staggered and random (unless you’re going for a different look- you might be able to do something creative with the designs).
For my first row, I cut a shorter piece of tile. Then I would use a full tile. Then I used a piece cut to the remainder of my width for that wall. The leftover piece from row 1 can be used for row 2. You can mix things up with the lengths.
You should also pay attention to the designs on your tiles. You may want to flip them over or arrange them so certain colors don’t form obvious patterns.
What this boils down to is that you need to cut tiles one by one. Precutting won’t work well for this project.
You’ll need trim to cover the sharp edges. You want to always place your cut edges on the far outside of your wall so they’ll be covered by trim.
For example, for my wall I might have short cut, full tile, full tile, short cut. The raw edges are always to the outside this way. You don’t want a raw edge in the middle of your wall.
If you want, you can use a metal file on the sharp edges, but I wouldn’t do that as an alternative to covering the edges. You’ll still want the edges covered to be safe.
I found that cutting metal with a miter saw was touchy, although perhaps a different blade would have done a better job. I used a lot of safety equipment and still felt like I was under protected. You’ll be dealing with sparks and metal shards. It’s not an indoor job.
Cutting with tin snips felt much safer, but you need to make sure not to cut yourself; The tin snips are sharp. The raw edges of the tiles are sharp. I recommend using gloves. You may also want to wear eye protection.
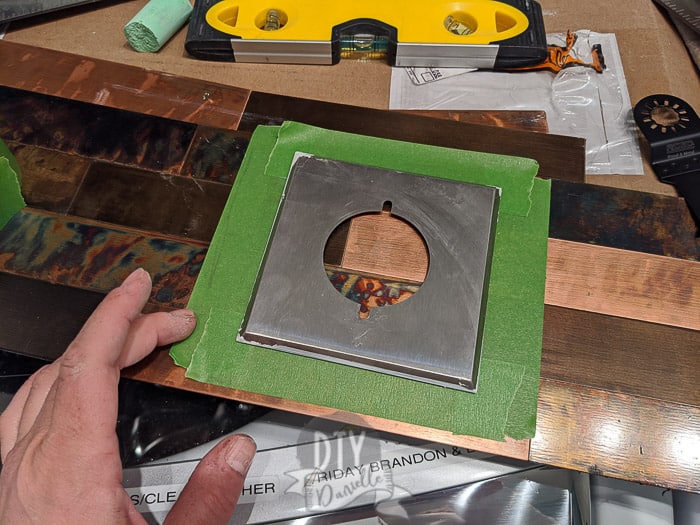
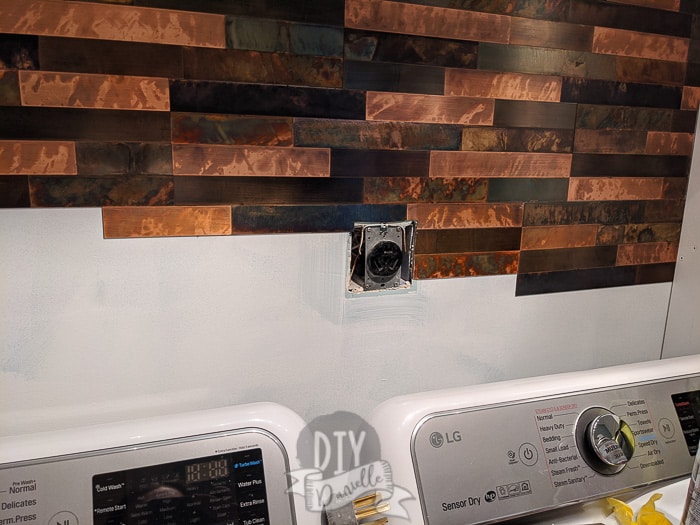
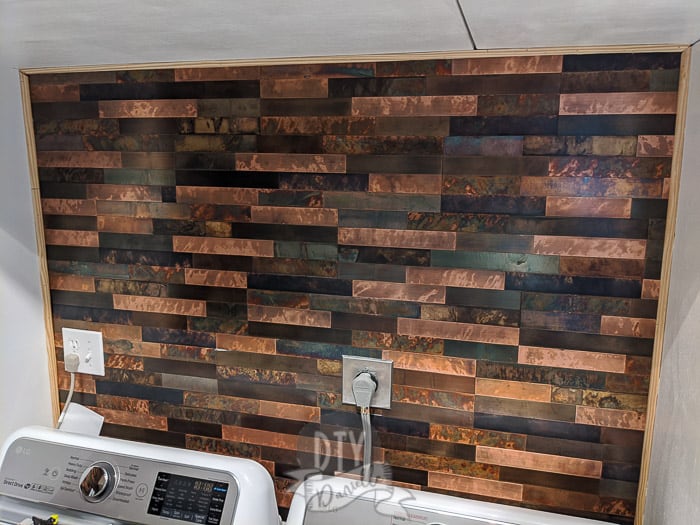
Remove the outlet covers for your outlets. You want your metal tiles placed where the outlet cover will cover the edges, but where the whole outlet can be pulled out if needed. Usually the “outlet” is a blue box. That piece may need to come out if electrical work is done. Don’t block it.
The best way I found to go around the outlets was to place my tile pieces row by row. This allowed me to cut areas to length without cutting out a random square in the middle of the tile (this is pretty much impossible IMHO).
Photo 1: I positioned the outlet cover where it would be placed on the tile. Then I taped the area so I knew what areas to avoid cutting into.
Photo 2: I cut the strips apart and cut where necessary. This is easy to do strip by strip.
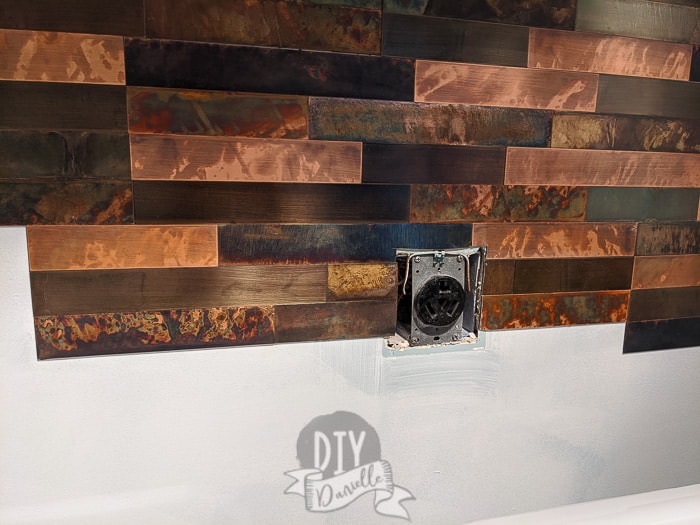
Photo 3: I adhered the strips piece by piece, stopping to cut off excess when needed.
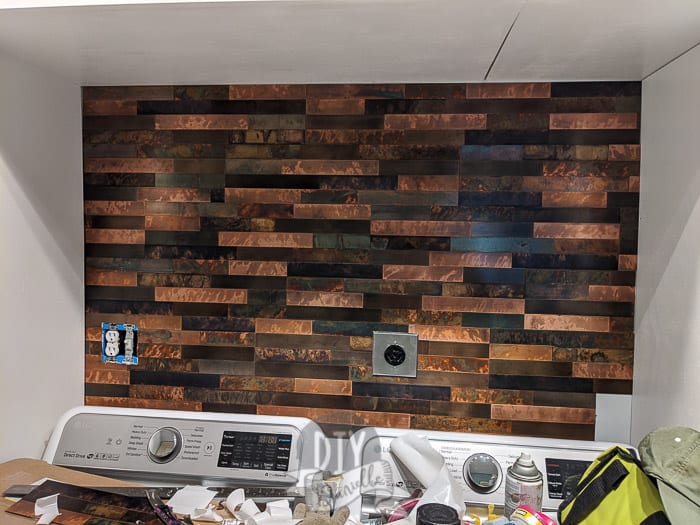
Photo 4 & 5: Photos of how I placed the strips around the outlets.
Once I finished, I mounted the outlet covers back on. You may need to adjust how much your outlet sticks out. I needed to fix one outlet, but two were fine.
Trim Options for Metal Backsplash
The DIY Decor Store offers a trim for the metal backsplash that can be stuck on. I bought some to use for the kitchen wall, but found it didn’t fit snug against the tiles. My other concern, once I saw it, was that my kids would likely play with the trim and pull it off. I didn’t have high hopes of the adhesive out lasting my children. They manage to destroy things unintentionally all the time.
For the laundry room, we decided to use quarter round. You can miter the corners or use the coping method to connect the 90 degree angles. I applied construction adhesive to the edges of the quarter round, stuck them in place, then use my brad nailer to attach the quarter round to the WOOD around my tile. The nails probably won’t go through the tile (I didn’t give it a try, I assume).
I taped everything off, then primed and painted my trim once it was on. I recommend priming and painting before you nail it on though (wink). You’ll save yourself a ton of time. I was kicking myself after.
Video Tutorial
Please share and pin this post! You can also post your project and tag the DIYDanielle team on Instagram @doityourselfdanielle!