
These DIY Beeswax Wraps are easy to make and work well for keeping sandwiches fresh! Learn how to make simple beeswax food wraps.
This post may contain affiliate links which may earn me commissions should you click through them and take certain actions. As an affiliate for Amazon, Cricut, xTool, Home Depot, and other sites, I earn from qualifying purchases. Please DIY carefully. View my full legal disclosures here.
The majority of my content is generated by me, as are 99% of the photos and videos, but I utilize technology for titles, descriptions, video editing out all of my ums, and occasionally for text overlay on images.
Please read the whole post so you don’t miss any important information!
Using disposable plastic bags drives me nuts. They’re really expensive and it’s nice to find an alternative when you have four people bringing lunches to work/school.
These wax wraps were SO easy to make and they WORK. I’ve found that the wraps keep the sandwiches fresh for a few days in the refrigerator (I didn’t test how long they last because I hate wasting food).
DIY Beeswax Wraps
Supplies
- Cotton fabric
- Pinking shears or quality scissors (these are WORTH buying!)
- Options: Sacrifice pan for oven, heat gun
- Optional: Button and ribbon as a closure
- Beeswax Pellets
- Oven mitts to protect your hands from hot wax
Step 1: Cut your cotton fabric squares to 14×14.5″.
If you use pinking shears, the edges will look pretty and be less prone to fraying. However, the wax should prevent fraying regardless.
Step 2: Apply your beeswax to the fabric. There are three ways to do this.
- Method 1: Oven + Old Pan
In this method, You use an old pan that you don’t mind getting dirty. Cleanup isn’t fun here. I lined with parchment paper, for all it was worth. I placed my cotton fabric on the pan, layered beeswax pellets on top, then put it in the oven ON TEMP until the pellets melted. Keep a careful eye on it.
Remove once beads are melted. - Method 2: Heated Wax Poured On
Heat up your wax in a broiler situation on the oven or in the microwave. Place the fabric on top of something you don’t mind getting wax on- clean cardboard (outside preferably) or an old pan, etc. Pour the wax on top, being careful to spread it out and cover your fabric.
You may be able to do this with a mason jar in the microwave. Just use oven mitts because the jar will get hot. - Method 3: Heat Gun
I used a clean piece of cardboard to lay my fabric out. Then I poured my beads on top and used a heat gun to melt the beads. This method comes with some challenges… the heat gun gets VERY hot, it’s slow, and you run the risk of setting the fabric on fire.
A few pieces of fabric got a bit browned and I almost set the cardboard on fire a few times LOL. It DID work. I just had to move my heat gun a LOT to keep from getting too hot in one area, not get too close the fabric, and I had to be patient.
The melt and pour option (also using cardboard on bottom) would be safer. I would definitely do this outdoors though if you try it this way.

Step 3: Remove from heat, let cool/harden
Once you remove the pellets/fabric from the heat, you can use a brush if needed to spread the melted wax around so it covers all of your fabric evenly.
Grab a corner of the fabric and pull out of the hot wax, letting it cool in the air. Once it stops dripping, you can hang up to cool/harden further.
Step 4 (optional): Add your button and ribbon for a closure.
Sew on a button and ribbon in the same spot. The ribbon is sewn on the wrong side of the fabric. The button is sewn on the right side.
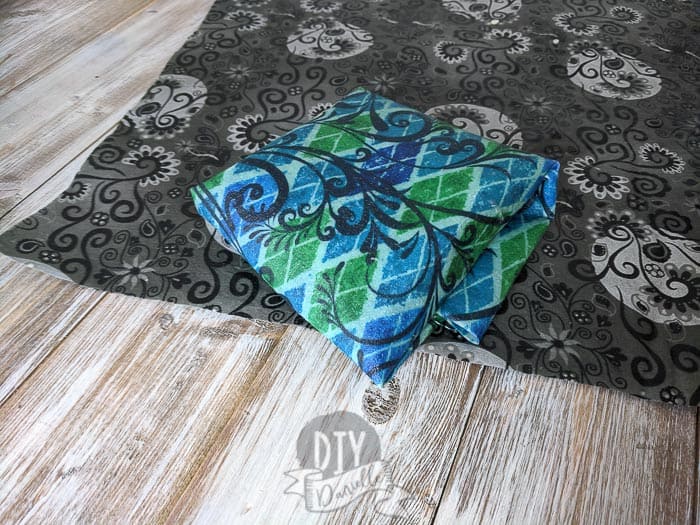
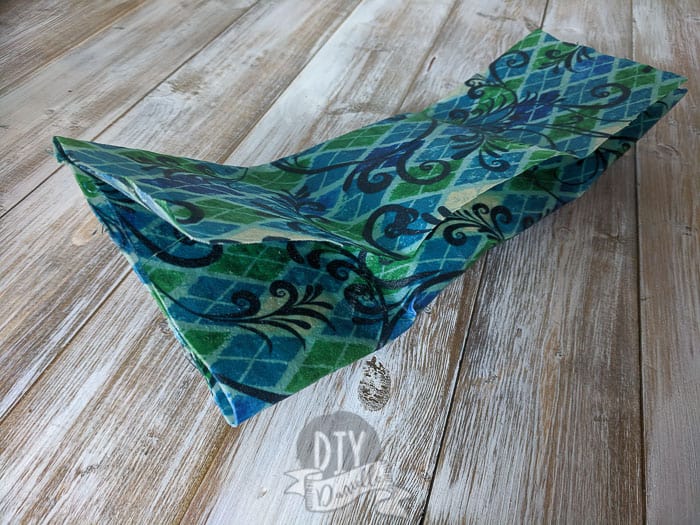
How to Fold Beeswax Wraps
To fold these, you can put a sandwich inside first. This makes it easier! I fold mine vertically in three sections. Then I fold horizontally. If that makes sense… here’s a photo below…
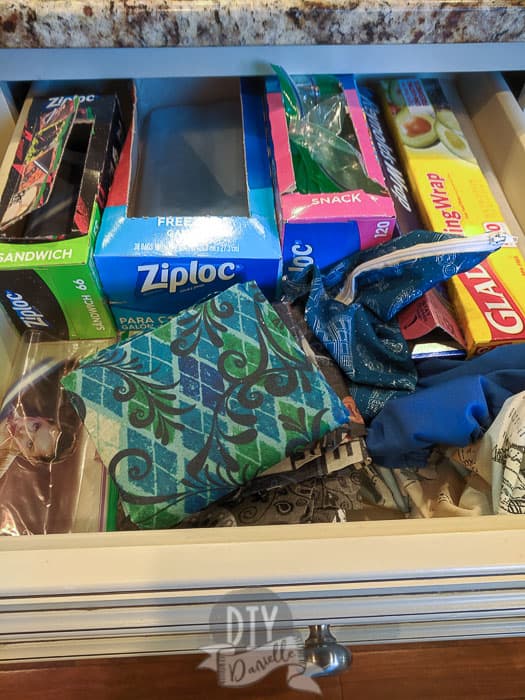
Storing Beeswax Wraps
The best part about these sandwich wraps is that they take up SO MUCH LESS SPACE than boxes of baggies. Check out how easy it is to fold them neatly and place them in a drawer. The sandwich bags take up a lot of space.
Video Tutorial
Love reusable products? Here’s a book that I wrote with LOTS of information on so many washable products.
You should also check out my tutorials on how to sew casserole dish hot pads and on DIY fitted covers for your bowls and casserole dishes.
Please share and pin this post! You can also post your project and tag the DIYDanielle team on Instagram @doityourselfdanielle!
