How to sew blackout curtains for a nursery to help the baby sleep! Sewing curtains allows you to create a custom look to your nursery without breaking the bank.
This post may contain affiliate links which may earn me commissions should you click through them and take certain actions. As an affiliate for Amazon, Cricut, xTool, Home Depot, and other sites, I earn from qualifying purchases. Please DIY carefully. View my full legal disclosures here.
Please read the whole post so you don’t miss any important information!
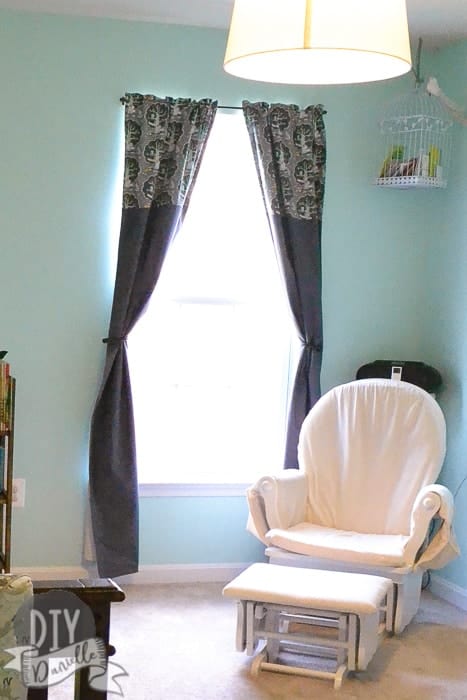
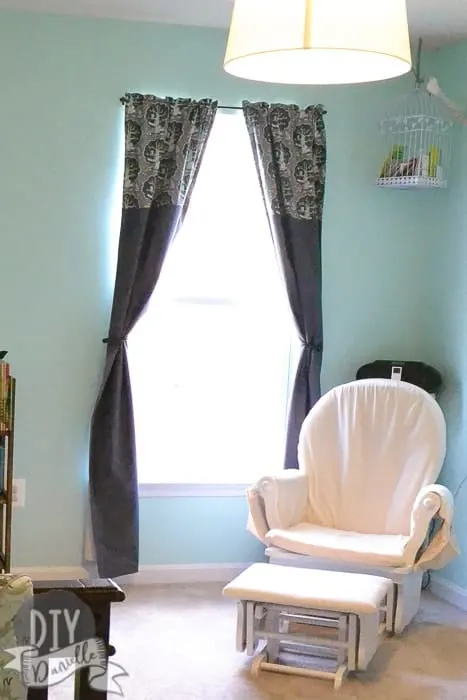
I wanted to make the curtains to match as well as the rest of the nursery items and I needed them to be blackout curtains because Baby G has enough sleep troubles that we don’t want to have light interfering. Our current curtains aren’t blackout curtains, but they’re pretty solid so only a little light gets in. The window is fairly thin and it’s only one window.
I found these two tutorials on doing blackout curtains, then pretty much decided to do my own thing. I’ll link them here though if you want something from someone who knows a bit more than I do. Haha.
Cost of Sewing Blackout Curtains
- Accent Fabric: $8.98/yard and I used 20.5″ length each so total was $10.22
- Solid Fabric: $17.58
- I bought 3.677 yards of Kona Kona Coal Grey from Cotton/Quilting area and it was $7.99 or a total of $29.30. I used a 40% off coupon on the fabric which brought it down to $17.58 for these curtains.
- Blackout Fabric: $9.78
Total Cost: $37.58
Measurements for the Curtain
- Accent Fabric (Michael Miller): 20.5″ L x 27″ W
- Solid Fabric: 64.5″ L x 27″ W
- Blackout Fabric: 84″ x 54″ (width) cut into two panels of 84″ L x 27″ W
Note: Obviously I made a mistake getting my fabric cut to 84″ long when I needed an 84″ curtain because I didn’t account for seam allowance. HOWEVER this worked for me because my curtains do actually need to be slightly shorter than 84″ to not drag on the floor. That’s what I’m telling myself anyways. Also, I only bought the one cut of blackout fabric because I was thinking to fit two panels from one width (54″)- I wasn’t sure how wide a panel needed to be and G was fussing at me at the store. I’m going to make this work. That being said, I was reading that the ideal is to do 2-2.5x the width of your window in total width of the fabric. This is obviously much smaller with two 27″ wide panels, but again it works for my window size. Once I hung my curtains, I was glad I did smaller widths on my panels because they’re barely fit on the rod.
How to Sew Blackout Curtains
1. Iron your fabric (I’m working off the assumption that you shouldn’t iron the blackout fabric, however).
2. Cut your fabric to the measurements you need.
3. Sew your accent and solid fabric, right sides together. Make sure everything is facing the right direction! Note that when I did my measurements, I added an extra 1/2″ on each fabric’s length to account for the seam allowance for this combination. Once I straight stitched, I went back over with a zig zag to hopefully keep the edges from fraying.
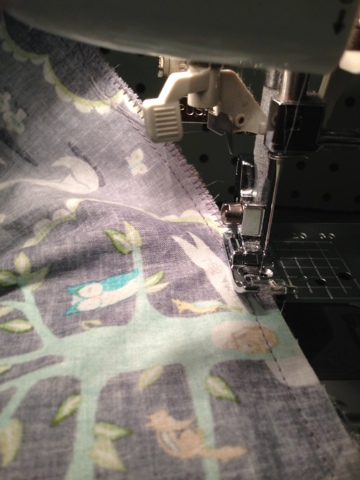
4. I ironed again, ha. Then I top stitched where I combined the two fabrics. 
5. Lay your matching pieces of blackout fabric right sides together with your “pretty” fabrics. Pin and sew, leaving an area to turn and topstitch.
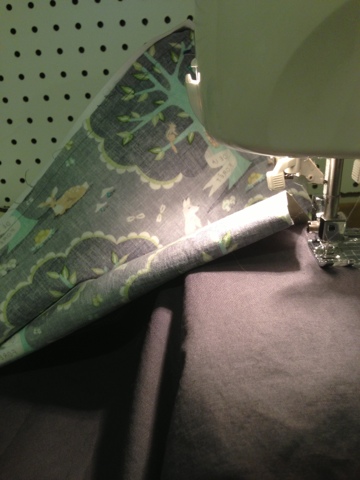

6. Turn, iron again, and topstitch, closing up your opening.


7. I laid out my two curtains and made sure they were the same length. Can’t be too careful. Here’s G dancing on my fabric because, you know, that’s what is most fun.


8. I was going to use clips to hang up the curtains, but they would’ve been too long for my window if I’d done that so instead I added a casing for the rod. I used this fancier stitch on my sewing machine in hopes it’d hope up better when holding the weight of the curtains again the rod (it’s a triple stitch one). I tried to keep the distances even so nothing would be lopsided. I probably could’ve marked them to be more accurate, but I didn’t have anything that would show up well on the fabric so I ended up skipping it.


9. Once I sewed the bottom and top for the casing, I just seam ripped the sides in between the casing so there was a hole for the rod to fit through.


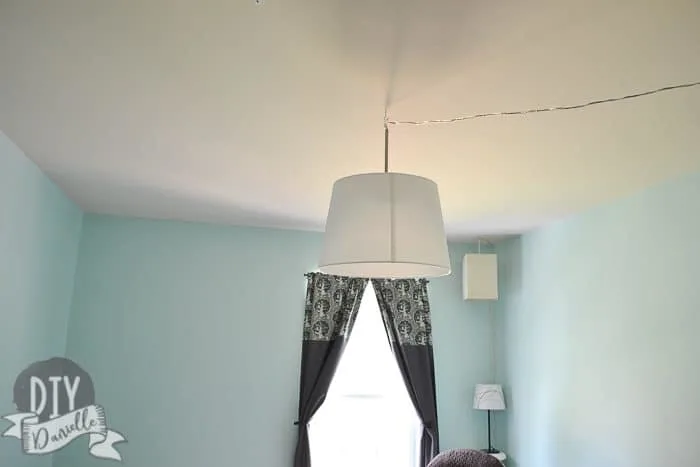
Finished product in the half finished nursery (sorry for the icky pictures, the lighting stinks in that room so it’s hard to take good pictures.
Other Nursery Crafts and Sewing Projects
- Changing Pad Covers
- Fitted Sheets: Regular Size Crib and Mini
- Blackout Curtains
- Toddler Pillowcase
- Baby Blankets
- Painting the Nursery
- Book Slings
- Nursery Lighting
- Nursery Wall Art
- Final Nursery Reveal
Please share and pin this post!