
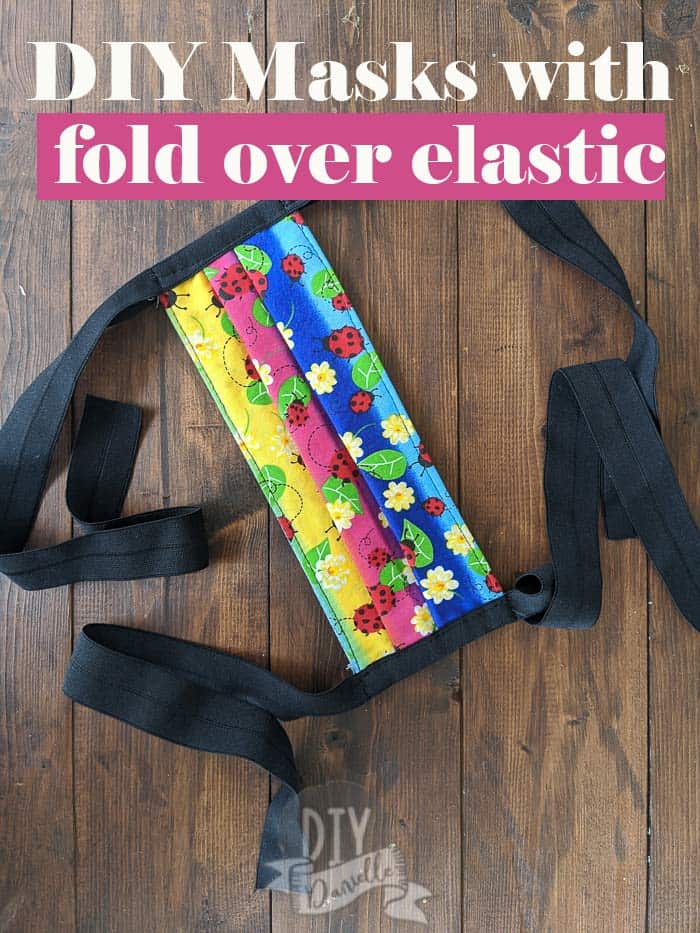
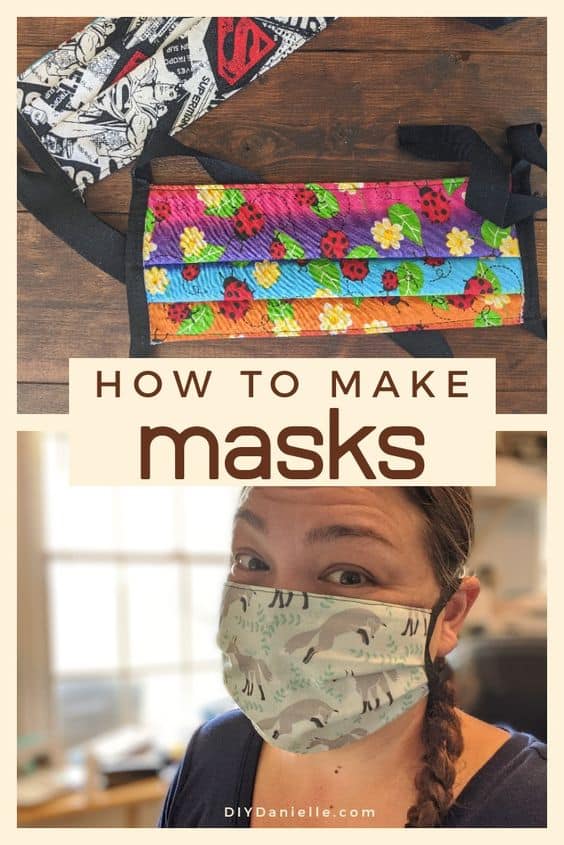
Tips for sewing a DIY face mask to use and to donate to others in need of masks. Two easy patterns that you can use as a template!
This post may contain affiliate links which may earn me commissions should you click through them and take certain actions. As an affiliate for Amazon, Cricut, xTool, Home Depot, and other sites, I earn from qualifying purchases. Please DIY carefully. View my full legal disclosures here.
The majority of my content is generated by me, as are 99% of the photos and videos, but I utilize technology for titles, descriptions, video editing out all of my ums, and occasionally for text overlay on images.
Please read the whole post so you don’t miss any important information!
When people started sewing face masks, I was following along to see what the official verdict was on these. I’m a big fan of reusable cloth products, but I also know that there are some pros and cons to them. I want to discuss some of those today, talk about how to make a face mask, and discuss some tips for faster sewing.
Table of contents
Are face masks helpful?
Probably not enough for the people on the front lines, interacting closely with those positive for COVID. There’s a reason the hospitals are BEGGING for real N95 masks and refusing cloth ones. Check your DIY supplies- you may have a dusty mask or three in your stash somewhere. SOME hospitals have started accepting fabric masks, but this is purely because it’s “better than nothing.” It might not be good ENOUGH though.
One problem with these masks is that they only cover our nose and mouth. The masks make us more prone to touch our faces. Germs can enter through our eyes as well and ideally we DO NOT want to touch our face. It’s HARD to stop doing something that comes pretty natural to us.
You also have to be careful not to remove your mask by the front of the mask. If germs built up on the front of them, you’re grabbing onto the germiest piece.
The second problem is that fabric simply isn’t tightly woven enough to keep out all of the virus particles. If someone who is positive coughs in your face, it’ll go through your mask (although if they’re that close, your eyes will probably be the biggest problem). That’s where social distancing comes in.
My understanding is that these masks are helpful when worn by normal folks because it might help stop us from SPREADING COVID.
It may also reduce the amount of the virus (the viral load) we are exposed to if we’re around someone who has COVID. More serious cases of COVID seem to be correlating to larger viral loads.
So is it a good idea to make them? HECK YES. Make them for yourself and your entire family. Make them for your local grocery store clerks and your mailman. Make them for the people who are out there interacting with a bunch of folks EVERY DAY because they’re essential employees. The people who AREN’T getting better quality masks.
And if your hospital is requesting them, make them for them too. But if we ALL WEAR MASKS whenever we go out, if we ALL stay home as much as possible and practice good social distancing, then maybe our nurses and doctors won’t be exposed at all.
It’s WEIRD to be among the first wearing masks in public, but DO IT. Make it the norm. Protect yourself and others as much as you can. Maybe it’ll become trendy.
Here’s a quick video I did about JUST WEARING THEM. Do it.
Tips for Sewing DIY Masks
Tip #1: Prewash Your Fabric
If you’re sewing these masks for healthcare workers then they’re going to need to wash them on hot. If you don’t pre-wash your fabric on hot and dry it on hot, there’s a chance that they will not be able to wear them after one wash. Pre-washing allows the fabric to shrink before you start sewing it.
Tip #2: Use Bias Tape Instead of Elastic
If you’re making these for yourself, it is probably fine to use elastic or fold over elastic. They will work. Many people are making them so the elastic fits around the ears. But this is a lot easier when you can fit them to the person you’re making them for.
Consider using bias tape instead of elastic. Some people are allergic to elastic and others will just be aggravated with elastic around their ears all day.
Don’t have bias tape? You can MAKE bias tape from cotton fabric so no big deal if the stores run out. I ordered a ton of bias tape on Amazon before this started for my stash.
Bias tape can be tied around the head and neck, allowing people to tie it tighter or looser depending on the size of their head. It’s a great option when you’re donating the masks. Bias tape WILL NOT work going around the ears.
Tip #3: Consider Sizing
Different people have different size faces. It’s good to find a mask pattern that has different sizes available. We’ll chat about patterns in a second.
Tip #4: Make an OBVIOUS Interior/Exterior
Make sure one side of the mask is very obviously the inside. Otherwise if someone takes off their mask, they won’t know which side is the clean side and which one is the side that has been facing patients or other people.
You can use a different fabric for the inside and outside, or add a pocket to the inside.
Tip #5: Add an Optional Interior Pocket for a Filter
I’m not super confident the filters are really being used or working. Adding the interior pocket gives people the option to pop a filter in there though. It’s probably worth adding, just in case it’s healthy.
Tip #6: Choose your Fabrics Wisely
Fabrics used must be breathable. You cannot use four billion layers of fabric or something like laminate fabric.
I would not use PUL, even though I’m normally a fan. It has some breathability, but folks need to be able to actually breath.
Also do not use stabilizer.
The fabric chosen is ideally a tightly woven fabric. It must be washable on HOT. This is a great use of quilting cotton. I’ve been using 2-3 layers. I think three layers is probably best. I think some folks are using an inner layer of flannel. Just remember that flannel may feel hot, particularly as we move into warmer weather.
If you decided to experiment with a different fabric than 2-3 layers of cotton, wear your mask for an hour and see if you can breath.
Tip #7: Add wire to the nose
Many people are using a pipe cleaner or other wire to a casing at the nose. This is fairly easy to add, although I haven’t tried it yet. This allows the user to bend the wire to shape tightly around their nose.
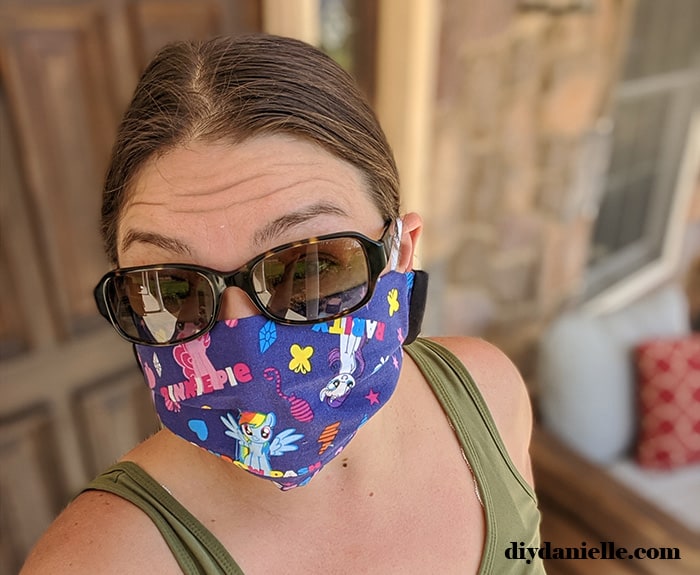
I have not, at this time, been concerned about having the perfect fit. When wearing glasses over my eyes (the bottoms over the top of the mask), there isn’t enough of a gap to worry about in my opinion. We practice good social distancing along with mask wearing.
Tip #8: How the Mask Should Fit
The mask needs to cover the nose without being in the eyes. The bottom of the mask needs to be under your chin. Ideally you want no or few gaps for particles to get under the mask.
Tip #9: Get the details before you start sewing to donate
Before you hop into this and start whipping up masks because you want to donate some to your local hospital, GET THE DETAILS. They may have certain requirements, sizes, fabric, or patterns that they want you to use. They also may not be accepting them.
Video Tips
Free Sewing Mask Patterns
There are quite a few mask patterns being used so I’m going to discuss the two I have used.
Cricut Access Pattern
If you have a Cricut machine, Cricut is offering a pattern on Cricut Access. The pattern comes in different sizes and has a fitted shape around the nose.
If you have a Cricut maker then you can cut the fabric with your machine. But don’t worry if you don’t! You can also just cut paper or cardboard to use as a template. If you do that, you cut it the paper pattern and lay it on your fabric to trace. VERY simple.
Personally, I have the Maker, but preferred to cut all of the fabric myself. I just used a cardboard template for a few different sizes. I feel like I can get more masks out of one size of fabric if I do it myself.
Cricut has children’s and adult sizes.
The mask looks like it will be more fitted than the rectangular version which is cool, but I found the pleats on the rectangular version do the trick to help the mask form around your face too. So either should be fine!
I used the Cricut pattern for a few masks, but used the PROCESS that I’ll explain in Method 1 of my rectangular masks for actually sewing them. I did not use elastic as the Cricut pattern suggested.
DIY Rectangular Masks
Rectangular masks with pleats are really easy to make. I started with the Cricut pattern and then tried a few of these. The rectangular masks use less fabric so I think you’ll get more bang for your buck in terms of making these. It’s also way easier to cut out a bunch of rectangles.
The sizing I’ve seen is as follows:
- Large 6×9
- Medium 6×8
- Small 5×7.5 (what I used for the kids)
I’m curious to get feedback on these sizes. Large is a good size for me and small seems to be working well for my kids. Not sure who I’d use the medium for?
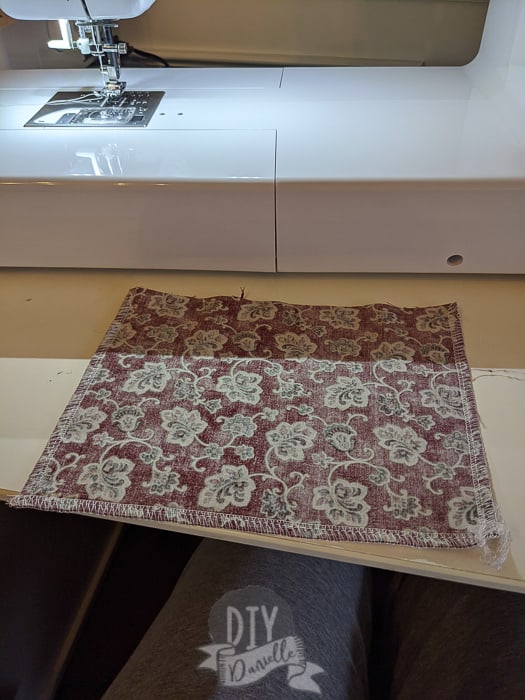
To make these rectangular masks, you just cut 2-3 rectangles in the size you want. I made my third piece a pocket.
So I cut the 3 pieces and hemmed the top of one piece to use for the pocket.
TO CUT THESE FAST: My quilting ruler is 6″ wide, allowing me to cut a ton of 6″ wide strips for a Large and Medium mask with my rotary cutter on a cutting mat. Once I cut a bunch of long strips, I can cut those strips into 9 and 8″ lengths, depending on how long my strips are!
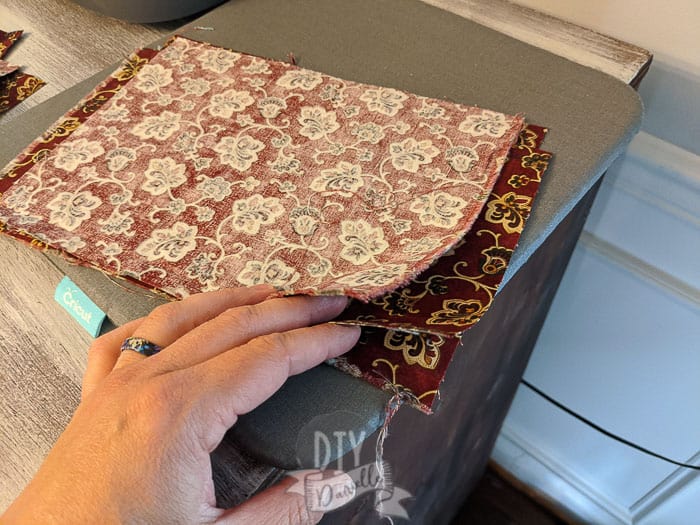
Next I layered my mask pieces as such: inner fabric right sides up, pocket right sides up, outer fabric right sides down.
The pocket piece needs the bottom lined up with the bottom of the other fabrics. This allows you to sew the bias tape on after without sewing the pocket down too. There should be a gap between the top of the pocket and the top of the other two pieces of fabric.
Method 1: Bias Tape across the top and bottom
I added my bias tape across the top and bottom. For the large mask, I cut a piece 35″ long for the top and 27″ long for the bottom. You’ll use less bias tape if you use method 2.
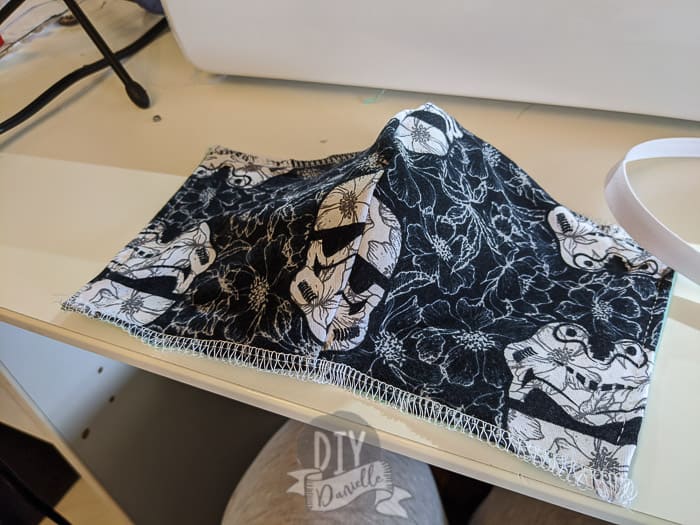
Okay so to start with this method, you sew your sides. You can skip sewing the top or bottom. In the photo below I sewed the bottom… it’s an unnecessary step. I was just trying to zip around the three sides quick. (Photo is of a serged seam, but a sewing machine is fine!)
Once you sew those sides, turn the mask right sides out. Press.
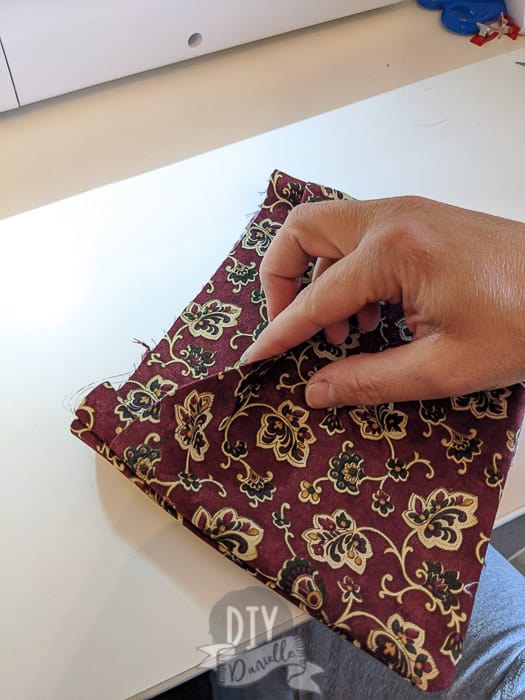
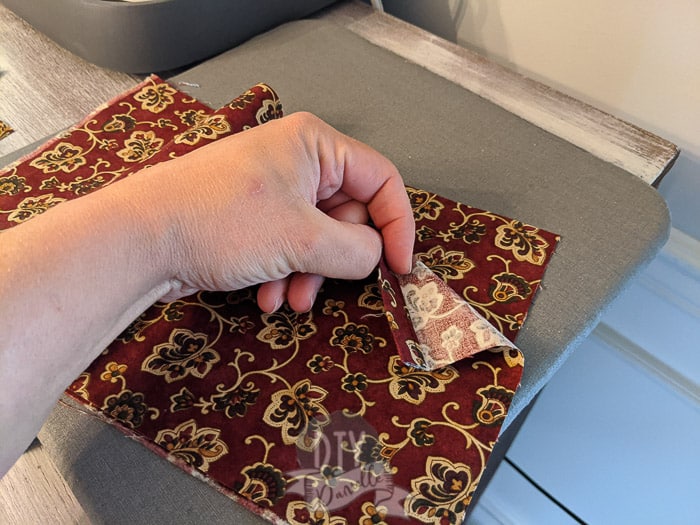
You add two pleats next. Pleats are fun. The pleats are what enables the fabric to form to your face a bit. You don’t sew them down horizontally.
You simply fold your fabric over, pin in place (on both sides), fold it over in a lower spot, then pin. You can press them down with your iron.
Then you top stitch the sides. This holds the pleats in place on the sides WITHOUT you sewing the pleats down horizontally.
Find the center of the bottom bias tape piece and center it on the bottom of your mask (make sure you check where your pocket is and which direction it’s facing). Sew on.
You can just sandwich the bias tape around your fabric which is faster, but you probably should sew the bias tape on the correct way. It’s good practice if you do. I was going for fast.
I turned over each end of the bias tape and sewed it down.
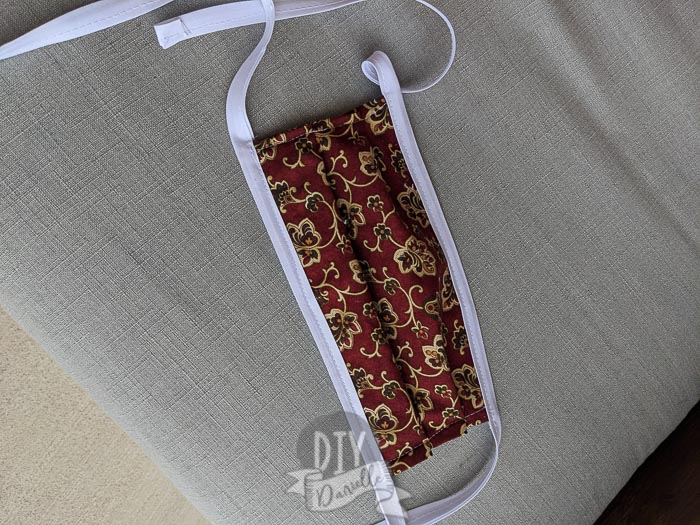
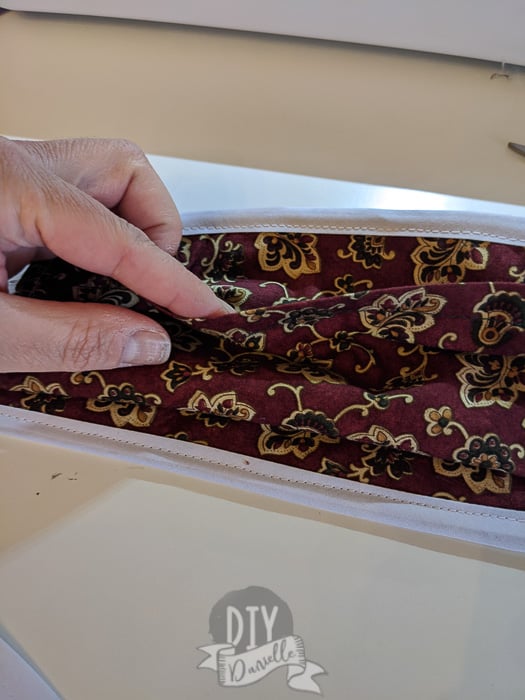
Here’s the mask finished…
Here’s the pocket on the inside. I wish I’d done a different fabric inside for the pocket so I could find it easier. I have to look pretty close because it blends in nice.
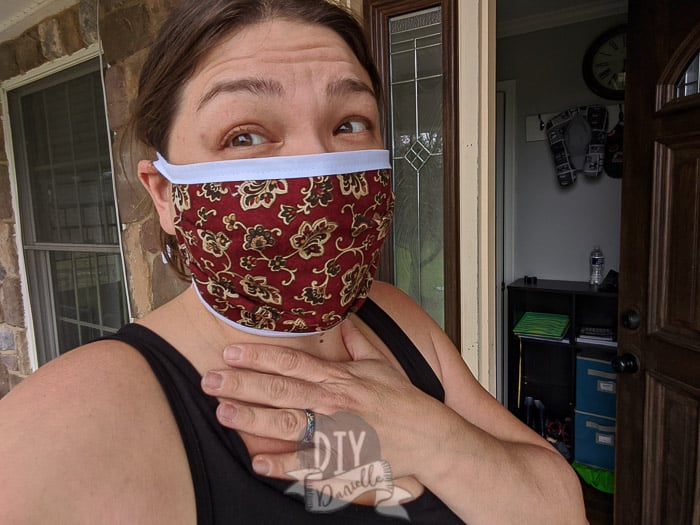
Picture of it on my face…
Method 2: Bias tape or Fold Over Elastic added to the sides.
This is the FASTEST way I’ve found to make masks. You can speed up the process considerably by using bias tape for the sides… fold over elastic (FOE) would work too.
Start by organizing your layers: middle layer, back layer right sides up, front layer right sides down. Sew across the top and bottom.
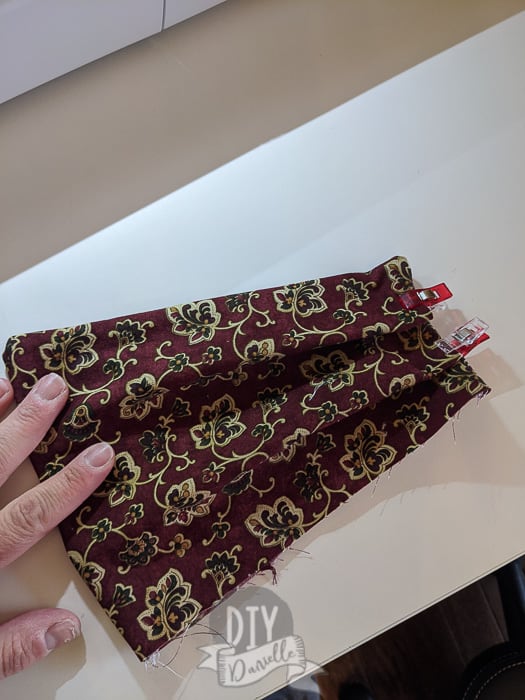
Flip right sides out. Press. Create TWO pleats and press from the back and the front.
You can pin the pleats, but I’ve found that if I iron them well, they’ll stay in place for long enough.
Use a straight stitch (or a serger) to sew along both short sides of the mask. This holds the pleats in place. You should also top stitch the top and bottom of the mask.
There’s less bulk to the sides when sewing the pleats down this way. This is why I like this method.
Now you can add your bias tape or FOE. Here’s a tutorial on how to properly sew on bias tape. I just placed it and sewed it on… it’s cheating, but I was going for fast.
I ONLY sewed the bias tape together along each short side of the mask. I am not sure the bias tape will survive long term without being sewn together. The stuff I bought seemed pretty sturdy, but if I’d made my own bias tape, I would sew all the way up to prevent fraying.
When sewing them like this, you’ll need (2) 30″ pieces of bias tape or fold over elastic (you could probably use a bit less FOE if you measure the person’s head and plan to just sew on the correct length needed so it functions as one big circle).
Bias tape vs. elastic
A quick note on bias tape vs. elastic. I found that it’s easier to remove a mask tied on with bias tape. I liked the fit of one mask I made with elastic at the top, but it was harder to sew and IMHO harder to carefully remove.
I like being able to pull the strings in the back of the mask, and use the ties to relocate the mask into the laundry.
Fold Over Elastic (FOE)
Now that I’ve attempted the FOE, I really like this option. The wider your FOE, the easier it is to cover your side stitching, but the thinner FOE is a lot more flexible. I’ve been using some that I picked up for making underwear. It’s less stiff that the cloth diaper FOE.
To sew these, I used a straight stitch to stitch them onto each side. Then I stitch horizontally at the top and bottom. I DID NOT stretch the FOE along the sides of the masks; you want that area to be flat.
No Sew Mask
Want to make a no sew mask? It can be as simple as wrapping a bandanna around your face… or two. Two or three layers of cotton are best.
Here’s a no sew mask tutorial from a friend of mine at Repurpose and Upcycle.
Masks for Kids & Babies
For masks for the kids, I used the rectangular pattern with (3) 5 x 7.5″ pieces of cotton. Our pediatrician recommends that no kids under the age of 2 wear a mask. They CANNOT BREATH PROPERLY THROUGH THE MASK. If you must take a child under the age of 2 into public, you can use a stroller and use a cover over the stroller. This gives them the ability to breath (there should be plenty of room between their face and the stroller cover), but still provides a barrier.
For older kids, a clear plastic rain cover might be even better because they’ll still be able to see.
My youngest son is 2.5 years old and I have no illusions that he’d keep a mask on. I think it’s smart to plan for younger kids refusing to wear a mask. Strollers are probably the best option.
Washing the Masks
There are a few ways to wash these masks:
- Hand wash
- Machine wash
- Steam (steamer or iron)
There’s an internet meme floating around telling people to microwave their mask. DO NOT DO THIS! This has the potential to set your microwave on fire and burn your house down.
The main thing to understand with washing is that soap and water can kill these germs. Steam can kill these germs. A heavy duty cycle isn’t necessary. To extend the life of your masks, hand washing or steaming is ideal.
Step 1: Removing the mask
Pull strings in the back, place mask in wash without touching the front of the mask.
Step 2: Washing the mask
Hand Washing— This is as easy as dropping the mask into some warm water with detergent to hand wash. Make sure to rinse all of the soap out. Let dry. Iron the pleats down.
Machine Washing— This method will make your masks wear out more quickly, but it’s an option. Place your masks in the machine (you can use a small laundry bag), ideally on cold, with detergent. Gentle wash is best. Hang dry or dry in a dryer. Iron the pleats.
Steaming— Steam is supposed to be a great way to kill germs. You can steam the front of your mask with a steam cleaner or use the steam function on your iron. Just make sure to get the inside and outside of your mask, as well as under the pleats. When finished, iron your pleats down again to keep the mask looking nice.
Sewing to Sell or Donate
I have been making quite a few masks for family and friends. I’ve also given them away to our USPS delivery person, our local pharmacy, and I’m trying to make more for the people working at our grocery store.
First, if you’re selling these, please charge what your time is worth. Most people can afford it. Remember to account for the time you’ll spend dealing with humans, the wear and tear on your machine, and the cost of supplies. DON’T FORGET shipping the supplies to your home costs money, and it’s difficult to find affordable cotton fabric or elastic right now. I recommend charging $10+ per mask.
Second, TAKE NO SHIT. This is a really good article on the division of labor and how women have generally been the ones who will pick up tasks like mask making in times of need. Sewists have been berated for charging money for these masks or for refusing to sew them. This is UNACCEPTABLE behavior and those people should be ashamed of themselves.
While this is a great use for scrap cotton fabric and while I LOVE helping other people, ANYONE can pick up a sewing machine and sew their own. They can even hand sew these!
You know how many people have called my husband and shamed him for not sewing masks? None. He’s been playing video games in his spare time. Nobody would ever, ever say anything to him. These are stupid simple to sew so tell people to pull on their big boy/girl pants and sew their own if they are going to be jerks.
Sorry this makes me irate. My neck is killing me from doing these. My eyes hurt. I’ve run through a huge stash of cotton, bias tape, and elastic. And I haven’t sewn NEARLY as many as some folks. My friends and family have been extremely awesome and thankful for these, as was our USPS driver and the pharmacy staff.
Help and/or donate if it makes your soul happy. Sell if you want/need to earn the money. Stop when it stops making your soul happy. Charge enough to account for ALL of your costs.
I have been torn between wanting to protect EVERYONE by sewing masks and being immensely irritated that a few people with sewing machines are supposed to give everything of themselves to save the world. Please set good boundaries. Okay off my soap box. Sorryyyyyy.
Here are my tips for making masks in bulk:
Tip 1: Set a goal each day for how many masks you’ll make.
Be gentle with yourself if you don’t make that number but don’t force yourself to do more than you can manage. I have three kids to watch and my husband has been working so I usually give myself a goal of 5 a day. This is reasonable for me.
Tip 2: If you have yardage, be smart about how you cut/sew your fabric.
Here’s the BEST way to cut your fabric to sew it faster. Use your quilting ruler to cut your 6″ wide strip along the LONGEST length of your fabric (this will depend on the direction of the design).
If you have fabric like the cotton below, it’s bidirectional so you can cut a 6″ strip for 5 yards if you have 5 yards of it.
Cut THREE strips the same length, place the interior fabric face up, then one outer fabric right sides up, and the other outer fabric right sides down.
Pin if desired (I live dangerously). Then sew up both long sides (5 yards if that’s the length you have.
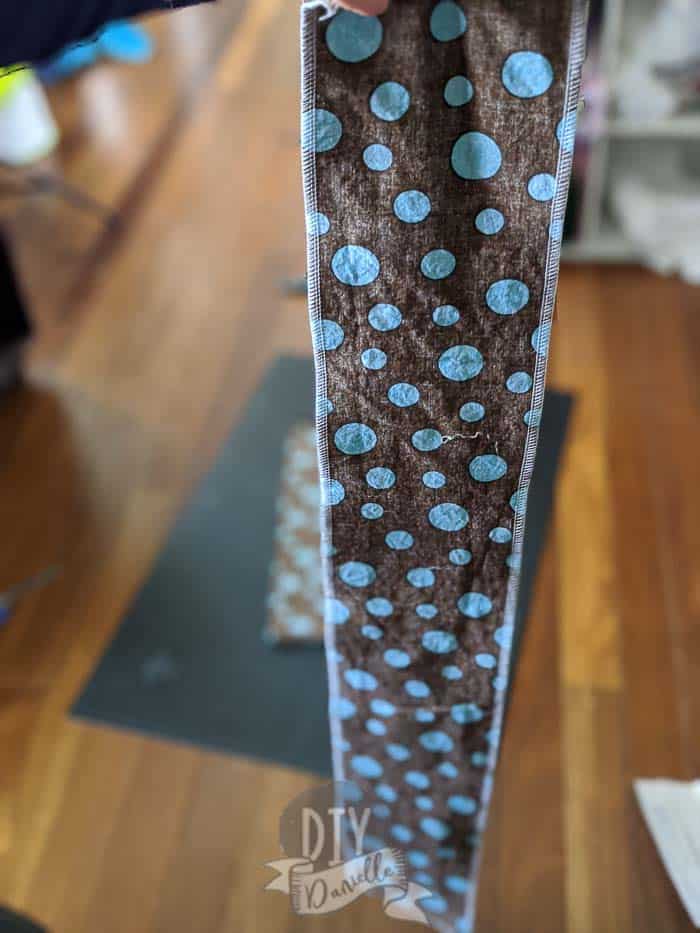
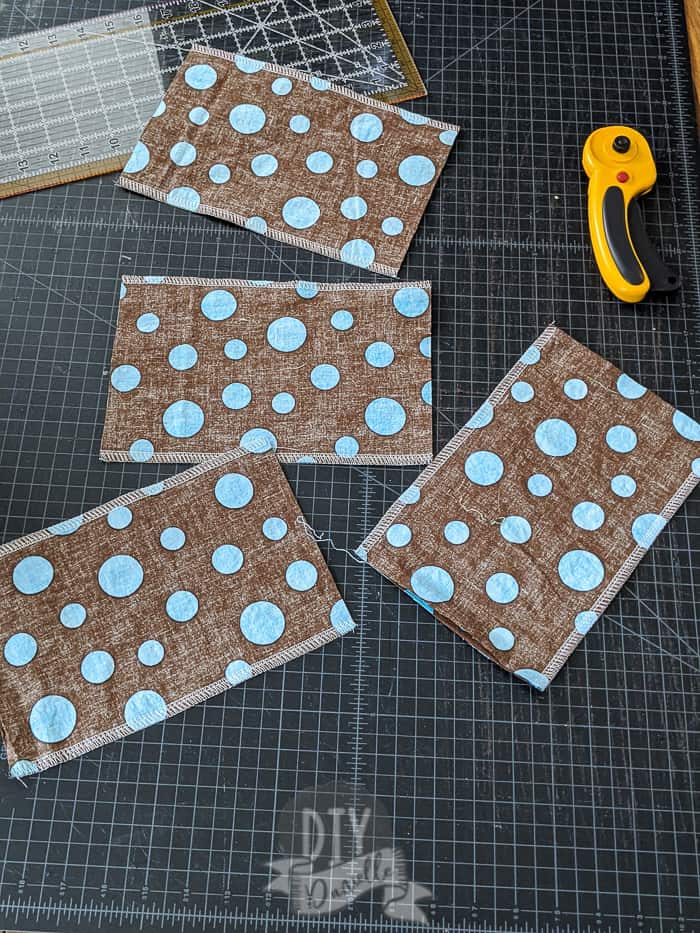
Now you can just cut these up into 9″ sections. This makes the mask making a tiny bit quicker!
Tip 3: For the hidden layer, use old 100% cotton linens.
The cheapest option for the hidden layer (or exterior layers too) is to use 100% cotton linens. Find some cotton sheets, new or used. This is a way to get around how HARD it is to find cotton fabric right now. This will also cut costs.
Light color interior is best if you happen to be using a white exterior fabric… otherwise you can sometimes see through to the middle layer.
Tip 4: DO NOT get creative on using elastic.
I see people taking apart some crazy stuff to get the elastic to use. Those elastics aren’t meant to be against your ears or face. Don’t use them. It’s going to be hella uncomfortable to wear and it will likely get caught in the person’s hair.
Bias tape is still relatively easy to find and I imagine FOE is too. You can also make your own bias tape.
IF you decide to use some crazy elastic taken from bungee cords (this HAS to be expensive), then cover that elastic with cotton fabric.
Tip 5: Work in Assembly Line Fashion
I’ve found it easiest to sew as an assembly line. First I cut tons of masks. Then I sew the long sides. Then I press right sides out and press the pleats. Then I sew the short sides. Then I add my bias tape.
This means I might spend Monday and Tuesday cutting and sewing the long sides on 20 masks, but my Thursday I may have 20 masks complete. This means I meet my goal of 5 masks per day, even if I didn’t actually finish 5 per day.
You can always get family involved helping to press the masks too!
Tip 6: Be strategic for shipping.
One pleated rectangular mask fits in a normal size envelope and seems to ship properly with one First Class stamp.
Do you have any other tips? Leave me a comment!
Comparison of Elastic vs. Bias Tape vs. FOE
These are the options I’ve tried and I wanted to put them together to show you the differences.
Elastic around the Ears
I haven’t made any like this. I heard it bothers the ears and I don’t love that. But it would use FAR less elastic or bias tape.
Elastic + Bias Tape
For this version, I did an elastic that wraps around the back of the head for the top, and bias tape for the neck area. This saves on elastic but I like how easy is to put on.
They were sort of a pain to sew, however, and I felt like the finished look wasn’t as nice.

Bias Tape on Short Sides
My favorite method (along with FOE) in terms of sewing on the pleats and overall functionality. I thought I’d prefer elastic to get on and off, but it’s easy to tape the masks off when you untie the bias tape in the back.
Bias Tape on the Long Sides
I liked the idea of this because the bias tape was going in the correct direction (toward the back of the head) but the bias tape just simply works better on the short sides. You also use less bias tape that way.
FOE on the Short Sides
This picture below shows a thicker FOE that I had leftover from the cloth diaper sewing days. I also tried using a thinner FOE that’s used for sewing underwear bands; it’s a lot more flexible which is nice. My only complaint with the thinner FOE is that it was hard to cover the stitching on the sides due to it’s thin width.
The FOE allows the user to wear it like a full elastic mask. The user needs to pull the elastic tight(ish) and tie a knot for the back of their head and around their neck. They can unknot and retie tighter if the elastic starts to get loose.
You also don’t need to worry about the FOE unraveling if unsewn, like you would the bias tape. This has definite benefits. It was easy to sew on and a really great option for masks!
Here are some mask storage ideas too!
Buy a DIY Mask
Want to buy a mask? I don’t make them to sell because I don’t have any childcare right now with the kids all home, but my friend Brooke does. She’s an awesome local mom that I’ve known for years and she runs The Mad Sewist shop on Etsy. She sells both children’s and adult sizes, as well as some other handmade fabric items!
Here are some products in my store that you might be interested in!
Please share and pin this post! You can also post your project and tag the DIYDanielle team on Instagram @doityourselfdanielle!
Thank you for the tutorial! I have a lot of 1″ FOE because that is what was left when I went out a few weeks back. If I use that method should I be stretching the FOE at all as I sew it down? It has been a few years since I’ve done any sewing and then it was just clothes diapers =)
Hi! I tried FOE on a few of these. I did one for myself and just measured it all and sewed as two circles essential. All the ones for other people allow them to tie the foe around their head, just like the bias tape. It’ll require less FOE than bias tape because of the stretch. My only issue was my FOE wasn’t very wide so it didn’t cover my stitches unless I was realllllly strategic. Yours is probably wide enough… I had some thinner FOE used for underwear that I wanted to use because it wasn’t as stiff.
I DID NOT stretch where I sewed along the sides. I did sew horizontally at each end too.
Thank you! That was super helpful! Our county just put out a notice that masks are required if out. So I’ve got to get busy tonight making these for my family!
My pleasure 🙂 Good luck! If you let anyone know you’re sewing these, you’ll have a billion orders. Approximately. haha.