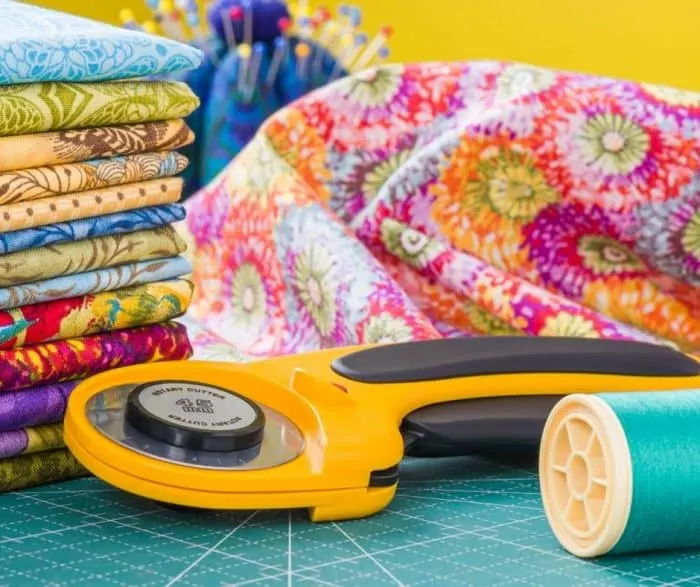
How to use a rotary cutter for sewing and where to buy one. These are my “must-have” item for my craft room!
This post may contain affiliate links which may earn me commissions should you click through them and take certain actions. As an affiliate for Amazon, Cricut, xTool, Home Depot, and other sites, I earn from qualifying purchases. Please DIY carefully. View my full legal disclosures here.
Please read the whole post so you don’t miss any important information!
How to Use a Rotary Cutter
Rotary cutters are a game changer for cutting out fabric faster and easier. The hardest thing about using them is making sure you’re safe. I’ll get more into safety tips in a bit, but first lets talk about how to use them.
First you put down a self healing cutting mat. Without the mat, you would cut your table up. It would be akin to taking a sharp kitchen knife and running it over your surface.
Second, lay down your fabric.
You’ll either put a sewing pattern on top of the fabric, weighted down with pattern weights (these keep the paper from shifting while you cut), or you’ll use a quilting ruler to cut a straight line.
I recommend a quilting ruler that has the ability to grip the surface a bit… mine tends to move around a bit. Some people stick stuff to the bottom of their ruler to help create more friction and prevent movement.
If you were cutting out fabric for a pattern, you’d just follow around the exterior of the paper fabric, staying close to the pattern but not cutting the paper.
In this picture, I’m cutting out strips of fabric in a straight line so I lined up my quilting ruler. I have approximately 2″ strips that I’m cutting and I can measure that out using my ruler.
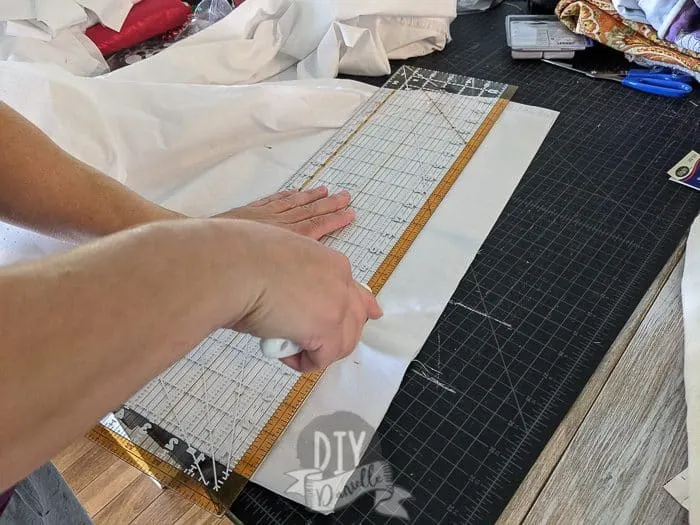
I use the ruler as a guide to run my rotary cutter along. It’s very easy to slide your hand in the path of the rotary cutter so make sure your hand stays completely on the ruler and off the path.
Video Demo of a Rotary Cutter
What You Need
You’ll need three items if you want to use a rotary cutter.
Cutting Mat
You can’t cut with a rotary cutter without a mat underneath- unless you want to leave cut marks all over your table and dull your blades. Personally, I’d suggest getting the biggest mat you can fit/afford. It’s convenient to be able to cut large items like clothing on them. Even if you don’t now, you may eventually want to sew your own clothes.
Quilting Ruler
The quilting ruler is a nice item to have, but you can get away without one. These are used to help cut straight lines. You can line your rotary cutter up next to the ruler and zip right up the line. It’s very convenient (a thin piece of wood can do the same, but might snag your fabric).
Rotary Cutters & the Sizes of Blades
The 45mm blade is good for most projects, but smaller blades will help you get around smaller corners.
Olfa blade sizes come in 18mm, 28mm, 45mm, 60mm.
Replacing Rotary Cutter Blades
These blades, like all blades need to be sharpened or replaced occasionally. When you need to cut over a line more than once, it’s time.
Replacing the Blades
Follow the instructions for your rotary cutter to replace the blades. Usually there is a screw that you can unscrew, pop the blade out (carefully), and replace it with the new blade. Make sure the screw is put back on tight!
Sharpening the Blades
Supposedly you can cut aluminum foil with your rotary cutter to help sharpen the blades.
They also sell rotary cutter blade sharpeners that you can buy.
Personally, I haven’t tried either method, but I need to soon! My blades have seen better days.
Saving Old Blades
Save your old rotary cutter blades to use for paper! They’ll still work well for cutting out patterns and other paper items. I keep my “bad” rotary cutter for paper items and have it labeled “paper use only.”
Store bad blades and dispose of them like you SHOULD for any sharp object. Inside a sealed (preferably baby proof) container.
Blade Options
Did you know you could buy specialized rotary blades, such as pinking shear blades!?! Isn’t that fun! I haven’t tried them, but they make it to the Christmas list this year.
Rotary Cutter Safety
It’s a bit harder to take off a piece of a finger with your quality sharp Gingher scissors, but it’s pretty darn easy to remove a piece with a rotary cutter.
When I first started using one, I was happily cutting away and PINCH. Off came the side of my finger. Not. My. Favorite. Day.
To avoid doing what I did, here are a few safety rules:
- Always keep your free hand away from the path of your rotary blade.
- Always make sure your blade is on tight.
- Always make sure you are paying attention while cutting with your rotary cutter.
- Always cut AWAY from you- not towards you
- ALWAYS close (and ideally lock) your rotary cutter after every use. Even in between cuts.
- Dispose and store them properly. You may want to consider a baby proof container for storage.
Always always close and lock your blades. You don’t want a kid (or adult) accidentally grabbing that blade, stepping on it, or dropping it on their foot. It’s very easy to knock one of these off the table- if it hits the floor it’ll dull the blade. If it hits your foot, it’ll dull the blade and you’ll have a fun trip to the ER. The blades are sharp which is awesome for cutting fabric, not so awesome if you hurt yourself with it.
Some rotary cutters have a safety lock type thing… some don’t. Buy the ones that have the safety features. Just my two cents.
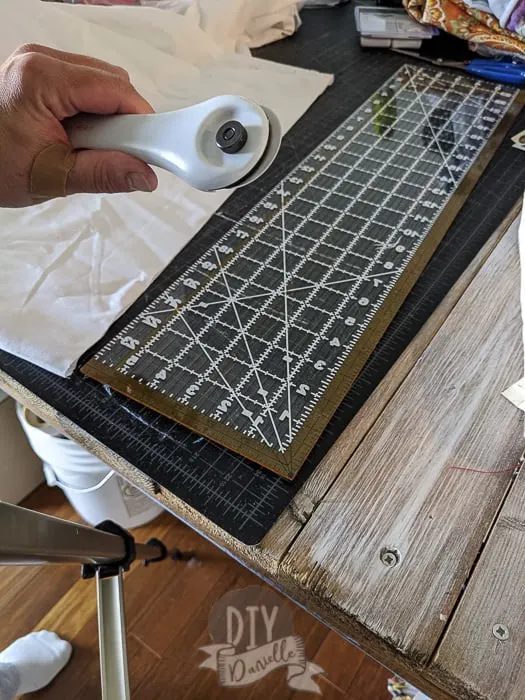
This is the rotary cutter in the “safe” position… there’s a little piece of plastic covering the blade…
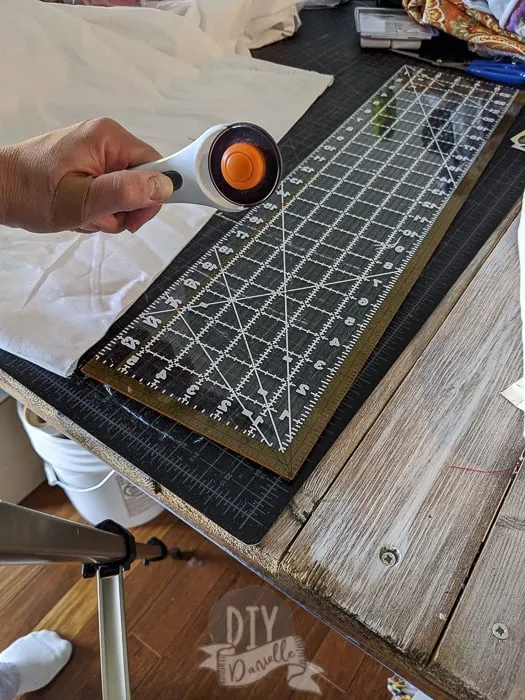
And here it is unlocked… you can only see the shiny blade. The plastic is tucked away.
Please share and pin this post! If you make this project, share it in our Stuff Mama Makes Facebook Group. We have regular giveaways for gift cards to craft stores. You can also tag me on Instagram @doityourselfdanielle; I love seeing everything you make!
Web Story: What is a Rotary Cutter and How Do I Use It?

Grandma G.
Monday 30th of December 2019
I feel for you. The thumb accident wasn't the only time I cut myself. From just above the knuckle to the tip, my left pointer finger is significantly less wide than my right. I got careless one day and wasn't using the glove. I sliced off a huge piece when cutting some binding strips. There are a lot of nerves in fingertips and this one hurt! It took a couple of years before the nerves healed and the side of my finger stopped having that "pins & needles" sensitivity. Now I wear the glove all the time.
Your children are adorable.
Happy New Year!!
Grandma G.
Tuesday 19th of November 2019
I've been sewing for 60 years and quilting for five. I've used rotary cutters for years, so I'd like to offer a little advice: BUY a protective glove and USE it! It costs about $20 or less, (depending on where you buy it) and is VERY cheap insurance. The first time your cutting hand slips, you'll be glad your other hand was protected - no visit to the ER, no stitches, no pain, and no blood all over your project. Before I smartened up and got one, my right hand slipped and the cutter sliced diagonally right across the thumbnail of my left hand. It took a hand surgeon to put me back together and a couple of weeks to heal - let alone the expense. And Danielle is right, rotary cutters are superb for cutting fabric (especially knits!) and I would suggest buying only an 18mm and a 45mm. The 18mm is best for small pattern details and the 45mm will easily handle everything else. The 60mm can be awkward unless you're already used to it. But please don't try to use the cutter for making notches - you'll end up slicing into the body of your fabric. Use sharp little scissors instead. And lastly, as far as I'm concerned, that so-called nifty little pinked-edge cutter blade is just a pain in the a**, but you should judge for yourself, that's just my opinion. As Danielle said, rotary cutters ARE a game changer, and definitely in a good way!
Danielle
Thursday 21st of November 2019
Excellent advice! I have one of those gloves, I SHOULD probably pull it out. It just takes one slip of that quilting ruler and bam. I took off a piece of my finger once, not fun.