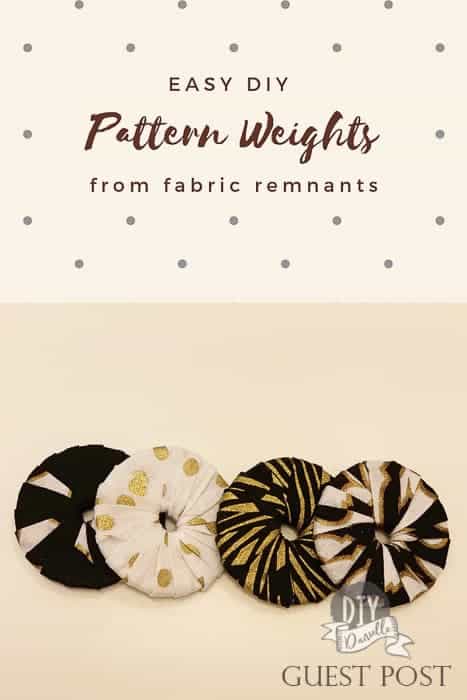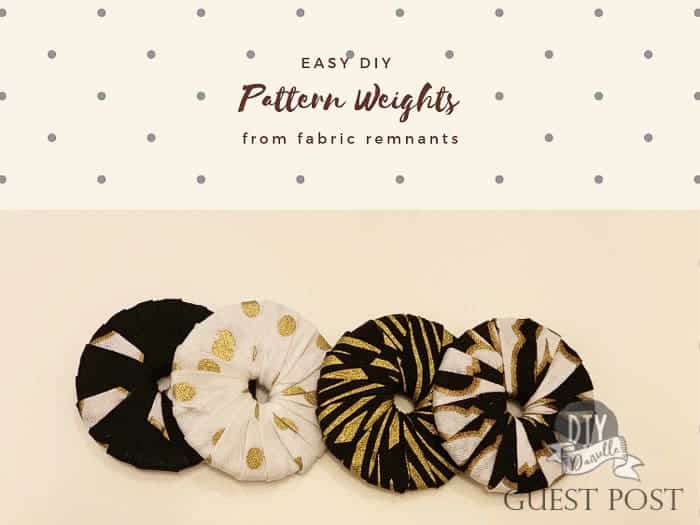
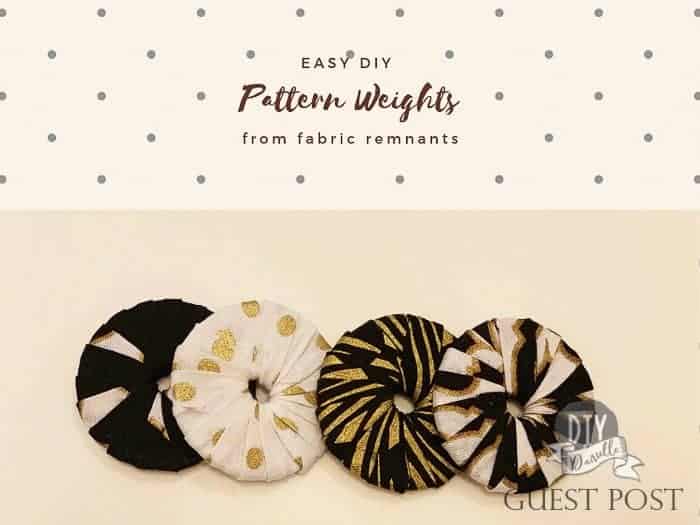
Learn how to make pattern weights using fabric scraps and washers. Also includes information on how to use pattern weights and how to store them.
This post may contain affiliate links which may earn me commissions should you click through them and take certain actions. As an affiliate for Amazon, Cricut, xTool, Home Depot, and other sites, I earn from qualifying purchases. Please DIY carefully. View my full legal disclosures here.
The majority of my content is generated by me, as are 99% of the photos and videos, but I utilize technology for titles, descriptions, video editing out all of my ums, and occasionally for text overlay on images.
Please read the whole post so you don’t miss any important information!
Please give a big welcome to Tesha of thecajungirl.com . She will be guest blogging today to show us how to make some easy washer pattern weights. Visit her blog to see more tutorials and check out her pattern shop on Etsy!
If you are like me, you have lots of beautiful fabric remnants leftover from many sewing projects. I hate to waste my fabric even if it is a tiny scrap. This has forced me to find creative uses for my fabric remnants. One idea that I came up with is making pattern weights. In this post, I will show you how to make pattern weights from fabric remnants.
How to Use Pattern Weights
Pattern weights are used to help hold the paper of your pattern down on top of your fabric while you cut the fabric with your scissors or rotary cutter.
This is a great alternative to pinning your pattern to your fabric before cutting.
Both methods prevent errors when you cut due to the pattern or fabric shifting. You want them to be heavy enough to hold down your pattern and you may want quite a few, depending on how large your patterns usually are.
Supply List
- 10 Large Stainless steel washers ½” x 2” (this will make 5 weights)
- Fabric Adhesive
- Fabric Remnant measuring at least 10” x 10” or 1 yd of single fold bias binding for each weight
- Bias Tape Maker (optional)
DIY Pattern Weights
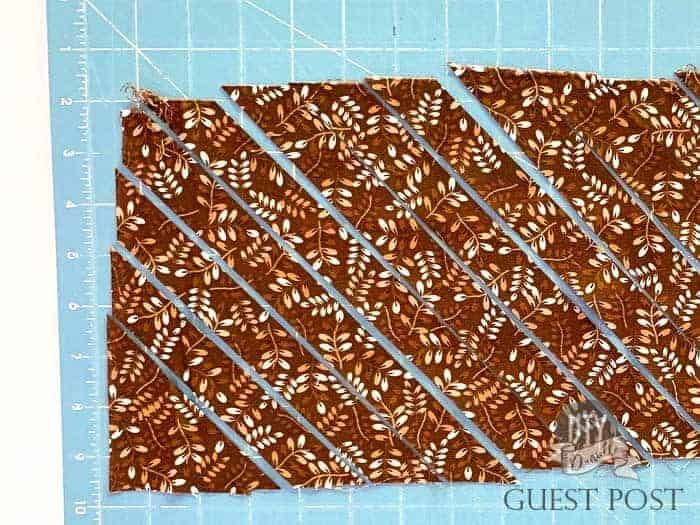
Step 1: Cut Bias Strips from the Fabric Remnant
First of all, you really can NOT skip this step and only cut straight grain fabric strips. It is important to cut bias strips for the fabric so the fabric will stretch and lie flat around the washer.
My favorite tools for this step are a self healing cutting mat, quilting ruler, and rotary cutter.
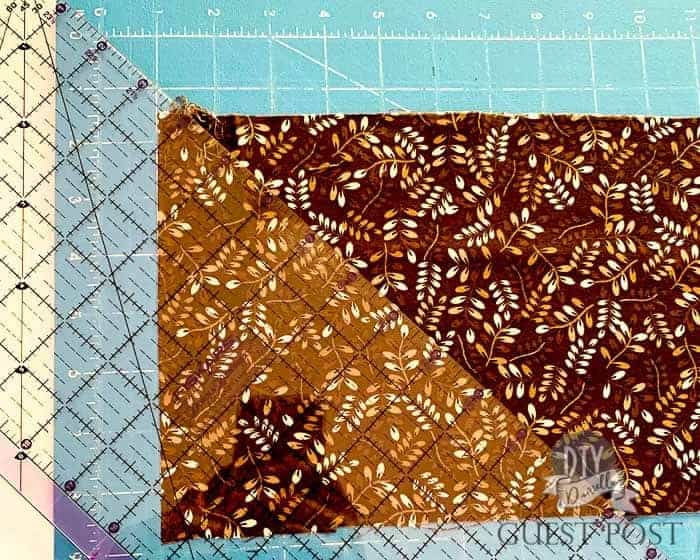
You can easily find the bias of the fabric with these tools as you can see from the photo below. Cut 1” bias strips from your fabric remnant.
Step 2: Piece the Strips Together
Now that the strips are cut, they will need to be pieced together to make a continuous strip. Remember, you can not simply place the strips right sides together and sew a straight stitch. The seam needs to be a bias seam. This will maintain the stretch of the bias tape. Follow the steps below to create a bias seam, and stitch all the strips together.
First, place the strips at a 90 degree angle with right sides together.

Next, stitch using a straight stitch from the bottom left corner to the top right corner at a 45 degree angle. If you are doing this step for the first time, I think it helps to mark the stitching line with a fabric marker. You can also pin the strips to keep them from slipping in the sewing machine.
After you have sewn the strips together, trim the excess fabric to ¼” seam allowance.
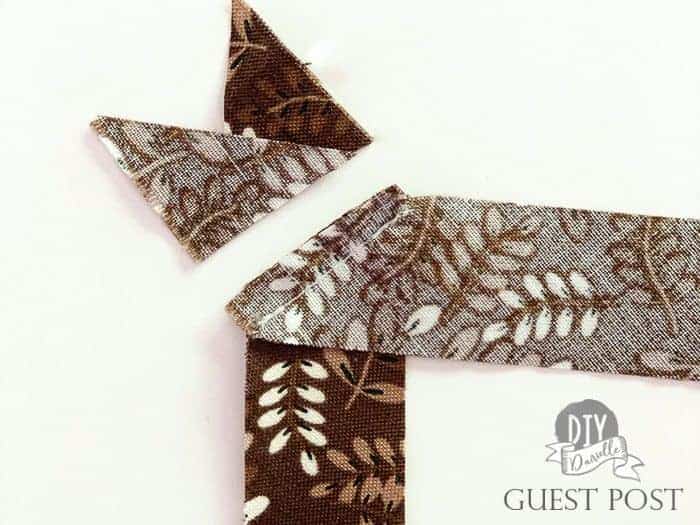
Next, press the seam open and trim any excess fabric sticking out above or below the strip. Continue with these steps until all the strips are sewn together.
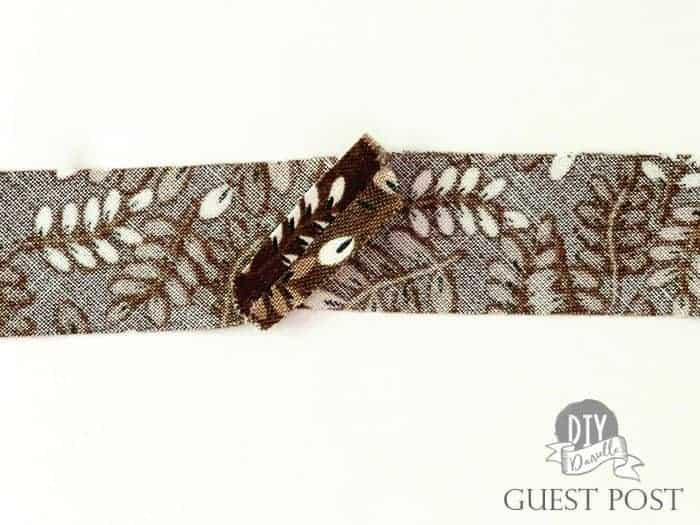
Step 3: Make the Bias Tape.
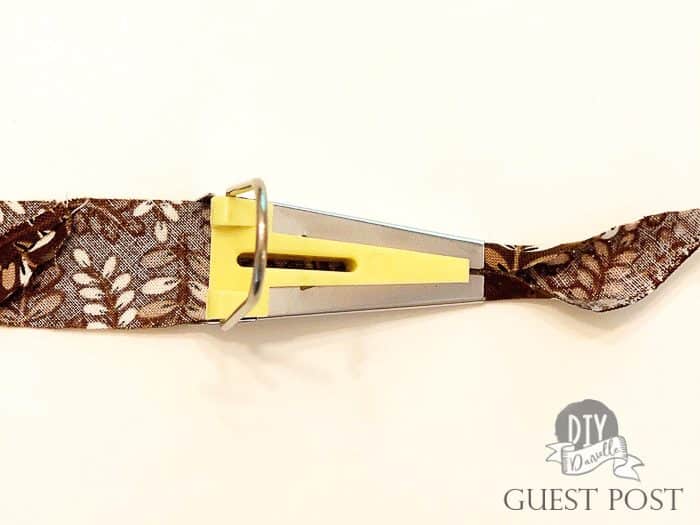
Once the strips are sewn together, it is time to make them into bias tape. For this step, I used a 12mm bias tape maker. It is the yellow maker in the photo above.
A bias tape maker is certainly optional, but will save you a ton of time. If you don’t have one, no worries!
There are 2 other options you can use to make bias tape.
- First, Simply fold the strip in half and press with a hot iron. Open the strip and press the raw edges to the center fold line.
- The second method is using a needle pinned to an ironing board and running the folded edges under the needle and pressing as you go. This is a great sewing hack for those who do not want to purchase bias tape maker.
Here is a YouTube video with a great tutorial for this method:
I will be using a bias tape maker to make my binding.
Simply place the strip into the large end of the bias tape maker. The strip will start to come out the other side perfectly folded.
Press the folded end with a hot iron and pin it to the ironing board. Then pull the handle of the bias maker and press the fabric with an iron as it slides out of the small end of bias tape maker. Super duper easy!
Step 4: Glue 2 of the Washers Together.
Each washer weighs about 25 grams. I like a slightly heavier weight so I glued 2 of the washers together. You can use your own judgement whether 1 washer is heavy enough for your projects.
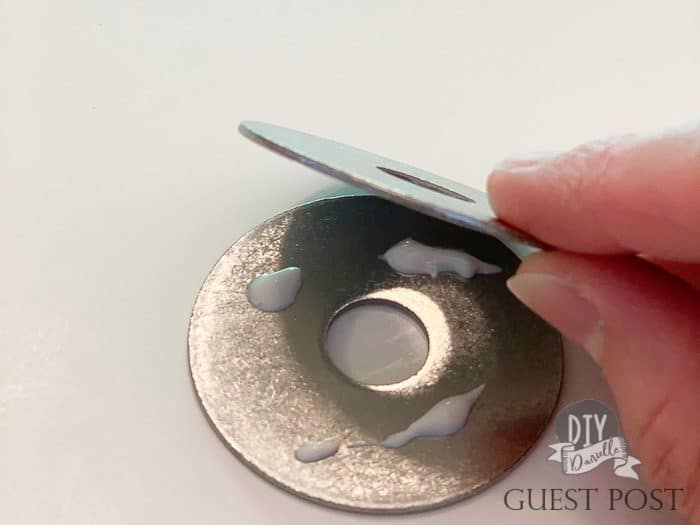
Step 5: Glue the bias strip to the washers and start wrapping.
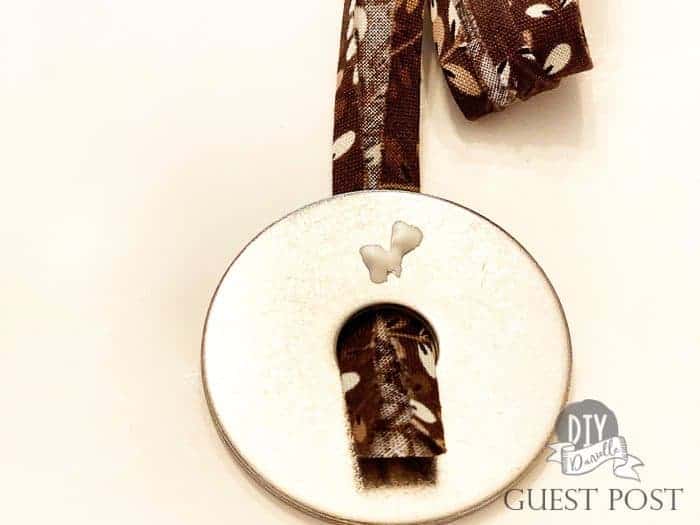
Next, place a small bead of glue on the washer not too close to the edge. Trim the end of the bias tape so that you have a straight edge. Place the bias strip with the right side up on the washer about ⅜” from the edge.
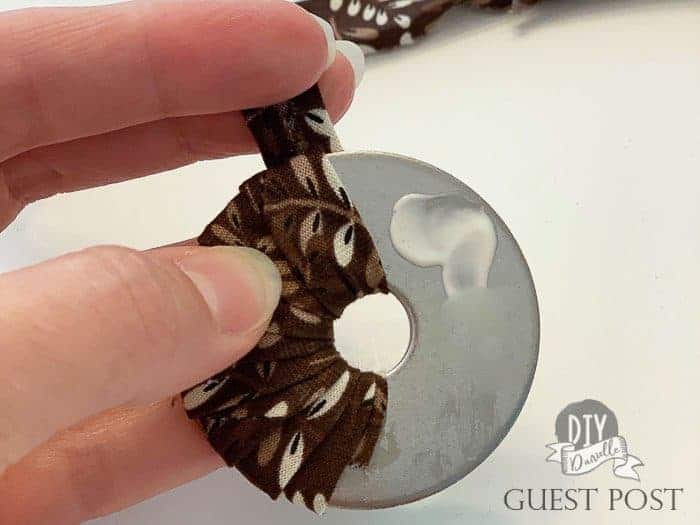
Then, start wrapping the bias tape around the washer overlapping slightly as you go.
As you wrap, the bias strip will be secured with the next wrap. When I got about halfway, I placed a small bead of glue on the washer and kept wrapping to make sure that the strip was secured and the fabric will not slip.
Step 6: Secure the end and let dry.
Once you have covered the entire washer, place a bead of glue toward the top of the last strip. I pressed the strip down to see where the end should be cut.
I cut the end slightly past the middle ring and folded the raw edge under. Secure this edge with a bead of glue.
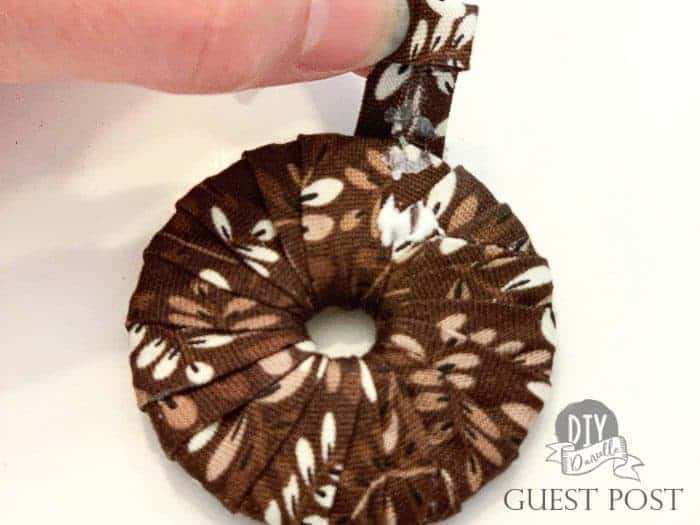
Clamp with a clothespin.
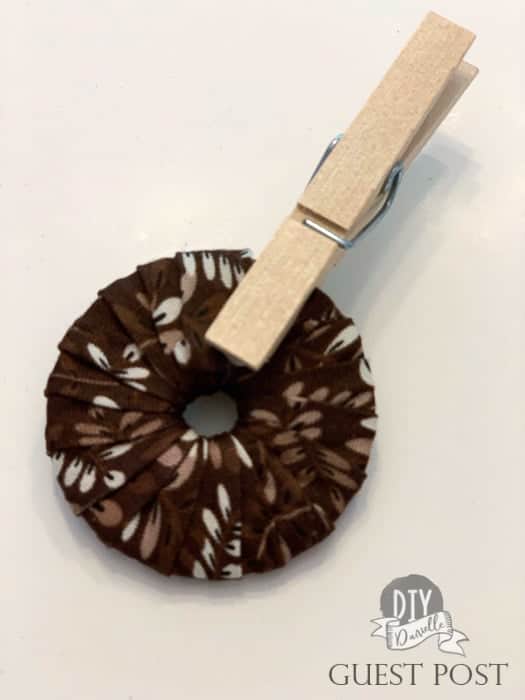
Viola! A beautiful pattern weight made from fabric remnants ready for your next sewing project!
Storing Your Pattern Weights
These are super easy to store- you can throw them inside a mason jar and keep them on display by your sewing table.
Love this? Make sure to check out other sewing tools that make sewing easier.
About Our Guest Poster: The Cajun Girl
Like many of you, I wear many hats. I’m a wife, mother, crafter, blogger, and sewist. I hope that my passion for sewing will become a full time career. Currently, I am an independent pattern maker and part time blogger. If you liked this post, please check out my blog thecajungirl.com or visit my pattern shop on Etsy!
Please pin and share this post!