

How to make a wall growth chart using wood and your Cricut machine. This giant wooden growth ruler is a quick and easy project!
This post may contain affiliate links which may earn me commissions should you click through them and take certain actions. As an affiliate for Amazon, Cricut, xTool, Home Depot, and other sites, I earn from qualifying purchases. Please DIY carefully. View my full legal disclosures here.
The majority of my content is generated by me, as are 99% of the photos and videos, but I utilize technology for titles, descriptions, video editing out all of my ums, and occasionally for text overlay on images.
Please read the whole post so you don’t miss any important information!
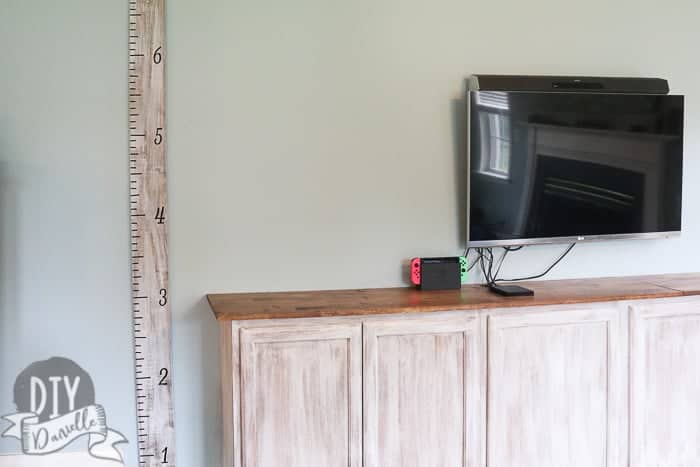
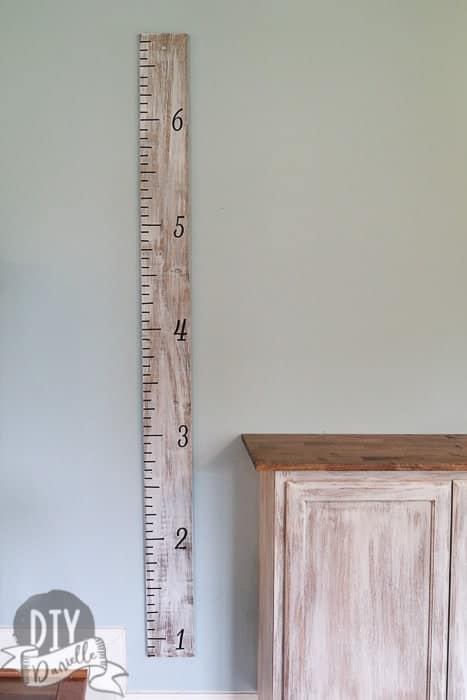
I’ve been wanting to tackle a wooden growth ruler for our wall for a lonnnnnnng time. In fact, I finished making the wood piece probably a year ago and hadn’t added the vinyl yet. Whoops. Needless to say, I’m ecstatic that this project is finally finished and it looks AMAZING next to my new built-in storage cabinets in our family room.
It’s sort of embarrassing how long I waited to finish this, given how quick it was to finish up. Here’s how to make one for your own family.
Why Get a Growth Ruler?
For those who live in a rented home or apartment, these are ideal because they can be moved with you. For those who love to renovate, paint their walls, or move things around, the same is true.
While we are in what we consider our “forever home,” I like the look of these over writing on a pillar in the house. They stand out and they’re an attractive piece of decor.
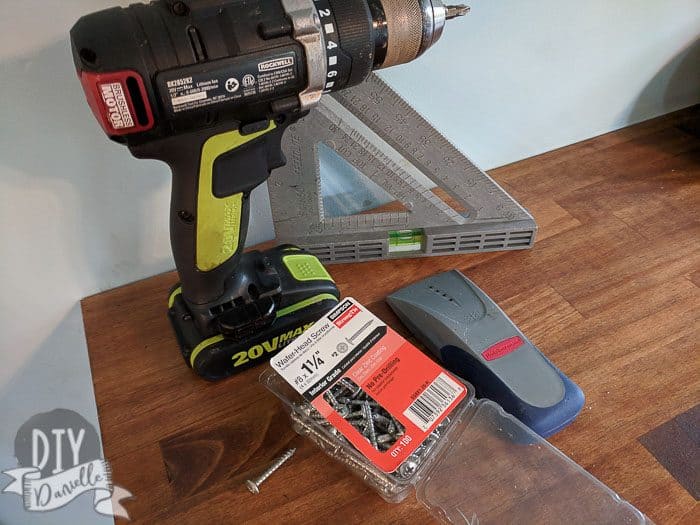
Supplies
- Cricut Air 2 or the new Cricut Maker™(and associated supplies)
- Outdoor Vinyl: Oracel 751
- Transfer paper
- Growth Ruler File from Etsy
- Level
- Ruler/Measuring Tape
- Screws
- Stud Finder
- Wood: 5.5″ wide, 6′ tall
- Stain / Paint: I used white paint and my stain is Minwax Red Mahogany.
Use the Discount Code DIYDANIELLE on cricut.com for 10% off any cutting machine or heatpress (no minimum). Excludes: materials/accessories/mystery boxes/etc. Applies to US/CA only, code expires 12/31/23.
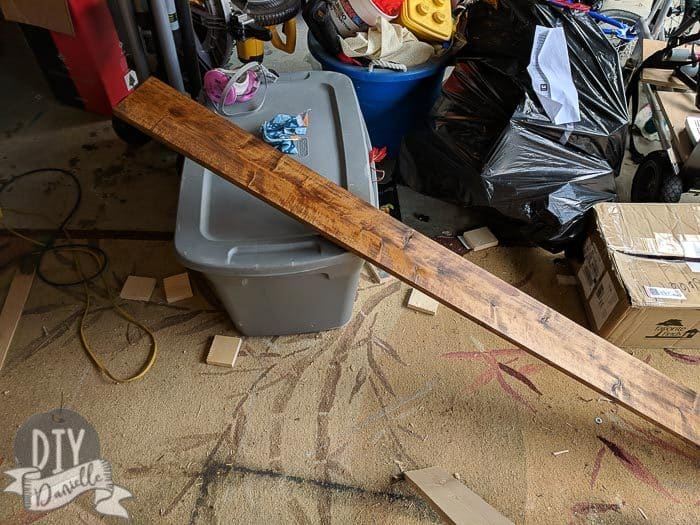
The board was already pre-cut to 6′ tall and it was in what I call the “special wood” section, haha.
The Oracel 751 may have been overkill. Regular outdoor vinyl would probably suffice but I had this on hand and nothing else that would work.
I did not apply polyurethane to this, but I may need to long term. I’m going to keep an eye on it. I feel like poly might make it hard to write on.
Painting the Wood Ruler
Usually you’d need to cut a piece of wood down. In this case, I found a piece of wood that was already the correct height. It is a 6′ tall piece of pine, I believe, and it’s 5.5″ wide. You may want a wider board if you want to include a family name down the side for personalization. Alternatively, you could use the same size that I did and place the numbers closer to the ruler marks.
I’ve been into dry brushing recently. I used it for my backdrop, my built-in storage cabinets, and my toothbrush holder shelf.
To dry brush, you start by staining your wood.
Once the stain is dry, you use a paint brush that is BARELY dipped in the color you want to lightly brush over the stain. The brush should be mostly DRY.
Unlike normal painting, you’re not pressing down hard. It’s a light brush- kind of like a weak handshake. You know how sometimes people let their hands get floppy? Sorry, this is the only thing I can think of to compare it to. I relax my wrist a lot. You’re creating the distressed look because the paint brush isn’t making contact with all of the wood.
I recommend brushing from the top to bottom (or vice versa). You want to go with the grain of the wood. Long strokes are ideal.
If you make a mistake, you can wipe with a wet paper towel, moving with the grain of the wood.
Cutting Vinyl for the Wood Ruler
I started to create my own and decided it wasn’t worth it. It’d be easy enough to do, but why recreate the wheel? There was a Growth Ruler File from Etsy for sale on Etsy. Bought it. DONE.
When I bought it, I assumed I could upload to Cricut Design Space, then cut it. But you need to do some additional work.
First, make sure they’re the correct size. I resized mine to 12″ height. When I cut them though, the spacing between the bars wasn’t correct. As a result, I needed to place each bar individually. I’m not sure if there’s a way to get it perfect so you can just transfer a whole foot of bars at once, but I didn’t want to cut it twice. I anticipate that it’ll be more accurate to apply them individually regardless.
The other thing I wanted to mention is that you can save a lot of vinyl if you print these carefully. I ended up slicing out the numbers for each bar. Then I placed the numbers along the bottom. I duplicated the first bar so I had six bars. Then I organized them on my sheet so they were scrunched together. Once that was done, I could attach them so they would print close together, instead of Cricut doing its own thing.
This allowed me to get them all on the remainder of black Oracal 751 that I had. If I’d done this as uploaded, I would have needed to order more.
Alternatives to Vinyl
- Stencil and Paint
- Hand Paint
- Use a Wood Router
- Wood Burner
Hanging the Ruler
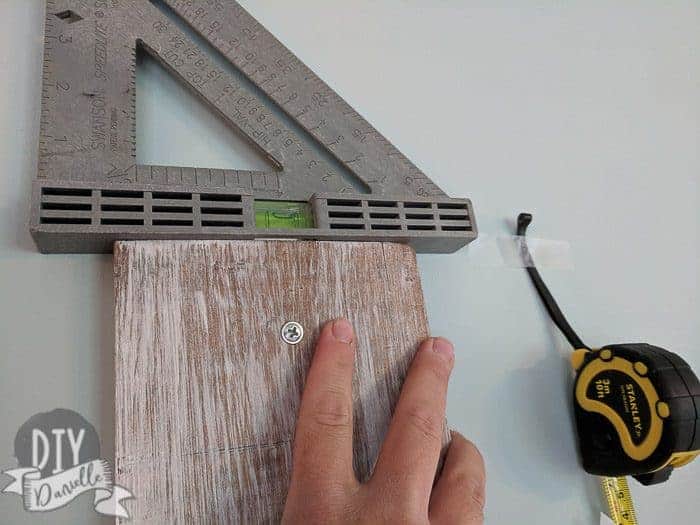
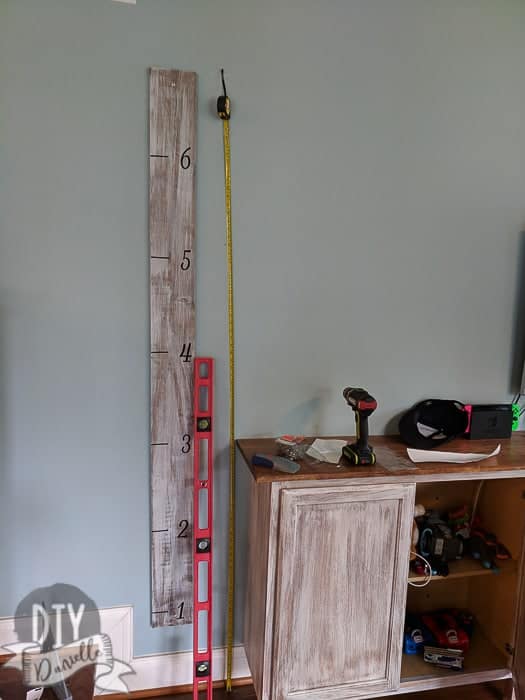
Make sure you have your level and your stud finder.
There are a few things to remember:
- You want to hang this over a stud.
- It needs to be level.
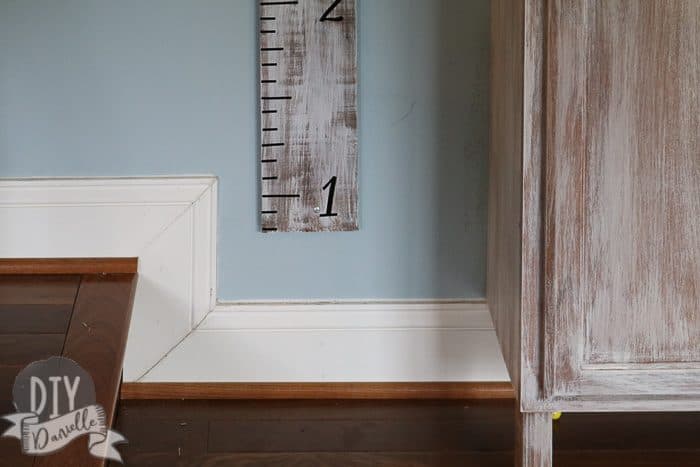
- The ruler is NOT flush with your floor. Your baseboards will interfere.
You can use your judgement here in terms of how high to hang this. I used tape to hold my measuring tape on the wall next to where I placed my board. This allowed me to figure out where I wanted my highest point to be (a little over 6 1/2′ because my husband is a tall guy). I screwed in the top of the ruler at that point… right on the stud.
Once that was done, I put a level on top. Adjust so it’s level, then screw in the bottom. It should ALSO be on the stud.
Applying Your Ruler Markings
You’ll use the transfer paper to move over each marking. Make sure you have a good measuring tape or ruler lined up so you get it right.
I started by applying the foot marks, then added the numbers.
Once that was done, I added the 1/2 foot markings, then all of the smaller markings.
And you’re done. If you want to personalize it, you can add your family’s name or a quote or whatever you want. Just make sure you leave space on your board for that. I don’t like how our name looks in script fonts and I feel like this project looks better for script so I gave up on the name. It’s just not necessary. We know who we are. Haha.
Here’s a good picture of how far up the bottom is… wowwww are my baseboards dirty. Yikes.
Love your Cricut? Here are a few projects that you might also like: DIY Wooden Shields | Make Minecraft Themed Windows | Baby Nursery Signs | Kids Garage with Pretend Play Autobody Signage
Get a Personalized Ruler Made on Etsy
Figure that you’ll buy the supplies and let them sit like I did? Don’t have a Cricut? You can have a personalized growth ruler made for you from the following sellers on Etsy:
- Wild Grace Designs Company Family Name at the Top
- Wild Grace Designs Company Child’s Name at the Top
- Lemonality Name on the Side
- iirntree Engraved, Not Vinyl
- 937 Designs Nice Script Font on These
- Rustics by Sam Hand Routed, Not Vinyl
Could you pin this post and share it please?
Growth Ruler DIY
Web Story: Growth Ruler DIY