

How to make a wooden shield for pretend play using scrap wood. These are super fun to pair with wood swords- if you dare let your kids play with them.
This post may contain affiliate links which may earn me commissions should you click through them and take certain actions. As an affiliate for Amazon, Cricut, xTool, Home Depot, and other sites, I earn from qualifying purchases. Please DIY carefully. View my full legal disclosures here.
The majority of my content is generated by me, as are 99% of the photos and videos, but I utilize technology for titles, descriptions, video editing out all of my ums, and occasionally for text overlay on images.
Please read the whole post so you don’t miss any important information!
We attended Renn Fest, a favorite local event here in Maryland. It’s always fun for the kids. My husband decided to let the kids purchase some toy swords… while I was off somewhere else. Wood swords.
Now… first… I am a cool mom. In my head I’m like YEAHHHHHH wood swords. But I’m also pretty realistic. I knew it was T – 10 seconds before somebody was crying. He’d already told them yes so we got the unfinished wood swords with the promise that I’d help the kids paint them fun colors. And HE promised that he’d make them some shields. If you’re going to give them wood swords, you better give them some good shields to protect themselves with, am I right?
He made them. I finished them. It was fun. I am still a little (lot) nervous about the future concussions. Threats have been made. Mommy makes things disappear when kids are naughty. Personally, I made my own weapons when I was a kid- took my mom’s steak knives and carved wood bows and arrows (badly) our of twigs in our forest. So I guess the bonus here is that I can at least educate them about safe use? Maybe?
Now… don’t make these, then sue me because your kids poked their eyes out. These toys may cause concussions or other injuries. They’re probably better for decor. If you prefer, I have some super fun fabric shields I’ve made too- this one is a regular knight’s shield and this one is a shield fashioned after the Captain America shield. They pair well with foam swords. They won’t work well against wood swords.
Supplies
- Wood
- Sander
- Jig saw
- Old leather belt (hit up the thrift store if needed)
- Cricut Maker™ and related supplies
- Outdoor Vinyl from Cricut
- Transfer paper
- Black paint
- Rustoleum 2x Metallic Aluminum Spray Paint
Use the Discount Code DIYDANIELLE on cricut.com for 10% off any cutting machine or heatpress (no minimum). Excludes: materials/accessories/mystery boxes/etc. Applies to US/CA only, code expires 12/31/23.
How to Make Wood Shields
Creating the Shield from Wood
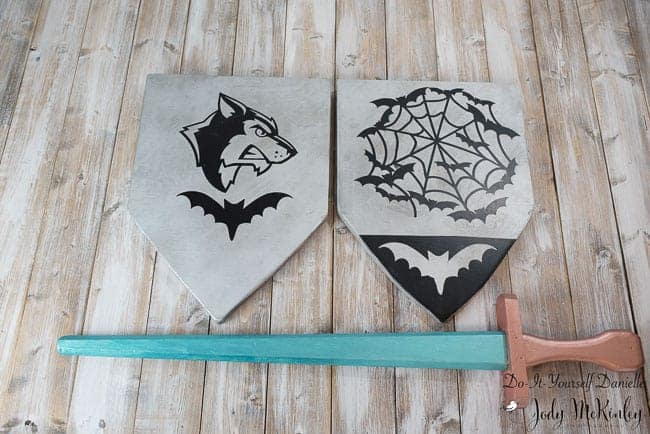
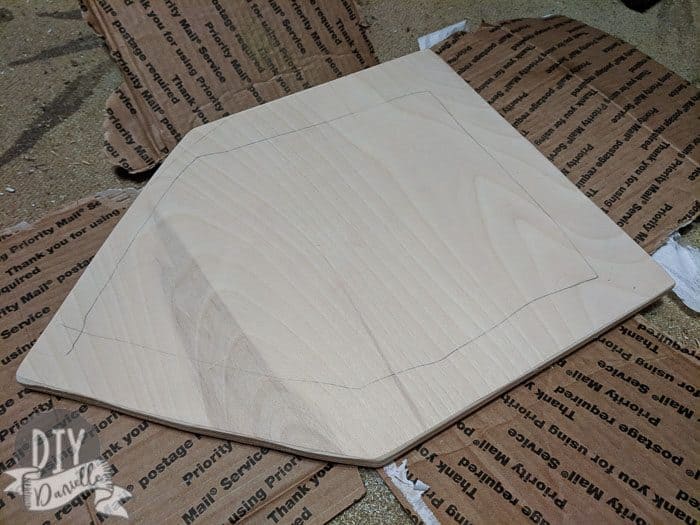
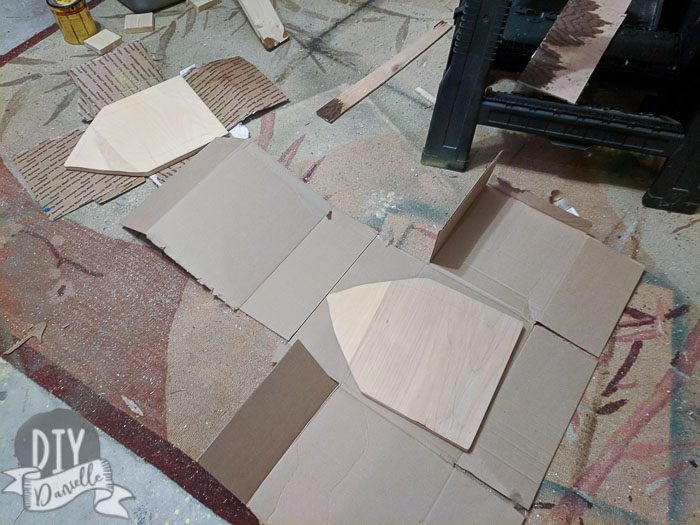
You’ll probably want to draw a template up for your shields. These were 16 tall x 12″ wide. You can sketch the template onto a piece of scrap wood, then use a jig saw to cut it out.
Sand the edges and entire shield very well.
Painting the Shield
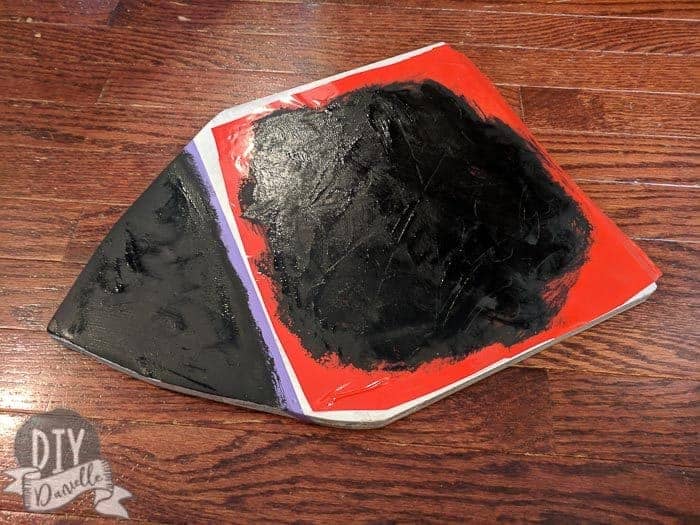
Start by laying your shields down on some cardboard to protect your garage floor and spray paint them with Rustoleum 2x Ultra Cover in Metallic Aluminum. Let dry. Reverse and spray paint the other side. You may need more than one coat on each side.
Choosing the Design for the Front
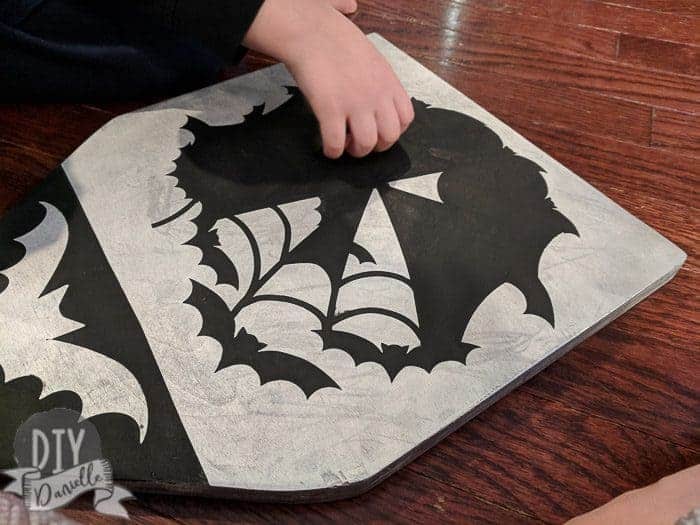
I decided to let my kids pick what they wanted on the front of their shields after showing them what traditional heraldry would look like. They made their choices from the options available on Cricut Design Space. They love bats and dogs.
Once the spray paint had dried, I used my Cricut machine to cut the designs in the correct shape. Then I reverse weeded the design.
I was able to use transfer tape to transfer the designs to the front of the shields. Remove the transfer tape and press the designs on very well. This vinyl is ONLY acting as a stencil. You remove it after painting. As an alternative, you could print the design you want, weed it regularly, and apply it to the front permanently. Then you could skip the stencil/paint option.
Once the stencils are attached, you or your kids can paint the design on with black paint (or whatever color you choose).
My kids helped me with the paint. We let it dry (or helped the paint dry with the hair dryer) between coats. This did require a few coats.
Once dried, we just peeled the vinyl off.
If you want something more ‘correct,’ check out this information on crests and heraldry from Wikipedia. The “charge” is the image on the front of the shield. Here’s an article on the meanings of those symbols.

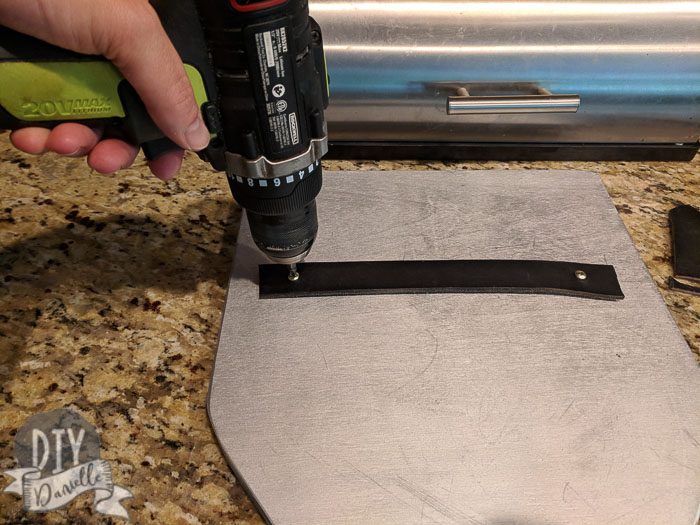
Adding a Handle
The last thing I did was take an old belt and cut a strip of the leather to create a handle for the kids to hold the shield. I just used short screws to attach it to the back of the shield.
Now go have fun kids and don’t poke your eyes out! I’m not taking you to the hospital if you do! (Direct quote from my own parents, circa 1980s)
Please pin and share this post!

Finished product photographs were done by Jody McKinley Photography.