


How to build a shed base on uneven ground. This easy tutorial explains how to level an area and build a wood base for a 10×12 shed.
This post may contain affiliate links which may earn me commissions should you click through them and take certain actions. As an affiliate for Amazon, Cricut, xTool, Home Depot, and other sites, I earn from qualifying purchases. Please DIY carefully. View my full legal disclosures here.
The majority of my content is generated by me, as are 99% of the photos and videos, but I utilize technology for titles, descriptions, video editing out all of my ums, and occasionally for text overlay on images.
Please read the whole post so you don’t miss any important information!
If you’ve been following along on my Facebook page, you may know that I’m in the middle of a huge project with ShelterLogic to make their 10×12 Ironwood shed frame kit into a children’s garage. This is SUCH a fun project and I’m really excited to get started… if you are interested, here’s some of the juicy beginner details on it:
So the first part of this project is to setup a level area for the shed.
It’s important to make sure the area is fairly level because otherwise you’ll find that your structure won’t be stable. You can put a lot of stress on a structure if it’s not on a flat surface.
Options for Creating a Level Area for a Shed
You have a few options for creating a level area for a shed.
Option #1: Do Nothing
Bad option. Don’t do this. We have ignored this before while constructing swingsets… it makes for bad construction and a less stable structure than you’d have if you were careful and took your time to do it RIGHT.
If your area was perfectly level or if you just leveled the dirt before placing it, you might be fine. But keep in mind that your shed doesn’t come with a floor so whatever is under your shed IS YOUR FLOOR. If that happened to be grass, the grass will die and potentially turn into mud.
Option #2: Concrete Base
I really like this option because it’s attractive and solid. It LOOKS like it might even be easier. What I ran into, however, was that the price of having a base poured was fairly high. I saw an approximate estimate of over $1,000 for a 10×12 base from a quick internet search. We’ve never mixed concrete so while we could have saved some money and DIY’ed it, we still would have needed to rent a cement mixer.
The other downfall to a concrete base would be that it’s permanent. The wood allows us to eventually relocate the shed and base, if needed. It would NOT be ideal to do that… but it’s possible.
Option #3: Level with Stone or Sand
When we bought a shed years ago for our last home, we hired someone to prepare the area before the shed was placed. We anticipated a lot of work being done, but he came and mostly just put down a bunch of rock to level the area. It was pretty and seemed to do a good job.
But I definitely didn’t want this shed to have rock under it. Why?
First, I hate hauling rock. The over ordering red rock incident has convinced me that I never want to haul rock again. It’s HEAVY, gross work.
Second, it’s not a huge money saver (if at all).
Third, I have kids and kids LOVE rocks. With our other shed, rocks ended up in other areas of the yard. It drove me absolutely bonkers… they didn’t quite understand that the rock doesn’t grow back. They aren’t ideal when you’re mowing either.
Fourth, the shed doesn’t have a floor so whatever is under your shed is your floor. I didn’t want all of the toys on stone or sand.
Option #4: Build a Wood Base
This was our choice for this project. It seemed like an affordable option that we could tackle ourselves without a lot of effort. It didn’t require that we learn anything new.
The wood base would be a long term floor for the shed that would look nice and not get muddy like grass would. It would hopefully keep our stuff dry too.
Supplies to Build a Wood Base for a 10×12 Shed
As mentioned above, this base was for the Ironwood Shed sold by ShelterLogic. It’s a metal frame and you place wood panels for the exterior. The metal frame isn’t supposed to touch pressure treated wood. The panels we used for the flooring are not pressure treated as a result.
Also, the shed manual instructions called for 2x4s all around, but we opted for some 4x4s for additional stability per the recommendation of my father-in-law.
- Level
- Shovel
- (11) 12′ Pressured Treated 2x4s: $85.80
- (4) 10′ Pressured Treated 4x4s: $52.68
- (5) 4×8 3/4″ CDX Yellow Pine Plywood: $143.50
- Nails 10×4 galvanized (2lbs should be good): $8.28
- I recommend getting some 6″ nails or thereabouts to nail into the 4x4s
- Optional but helpful: A tractor
Cost for a 10×12 Wood Shed Base
The total cost of our wood shed base came out to be around $290.26. This was substantially lower than the cost to have a concrete slab poured- although I’m not sure how much that would cost to DIY.
How to Level the Ground for Your Wood Base
Honestly, I like the idea of adding sand or sand first to level, then adding a wood base on top. We dug.
To begin, my husband took the tractor and the front bucket to just remove the grass and try to get it somewhat level. He put a lot of the grass back- upside down- but the area wasn’t so hilly when he was done.
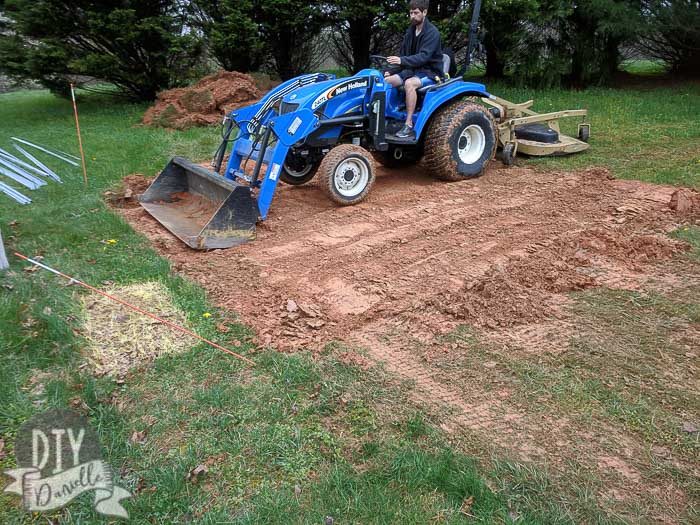
Once that was done, he laid out his four outer pieces of wood for the base. He leveled each piece where they would be placed.
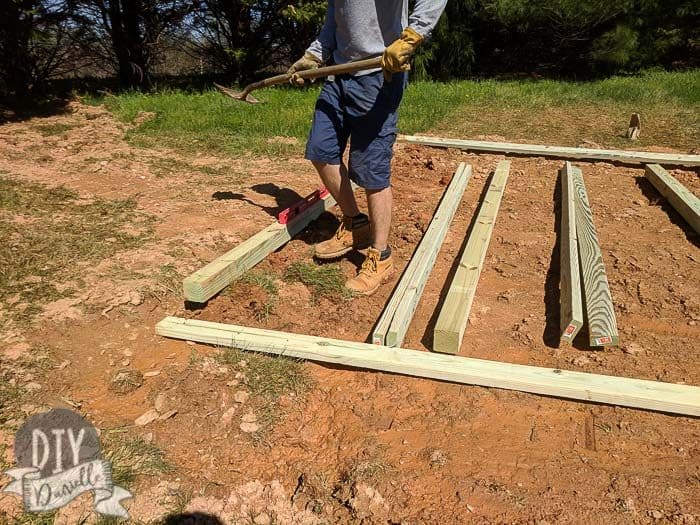
I’ll get more into how we built the base in a moment, but each piece of wood needs to be leveled as you go. We kept a shovel (one small, one large) nearby to adjust the dirt as needed. And we continued to check with our level through the process to make sure it was level.
How to Build the Base
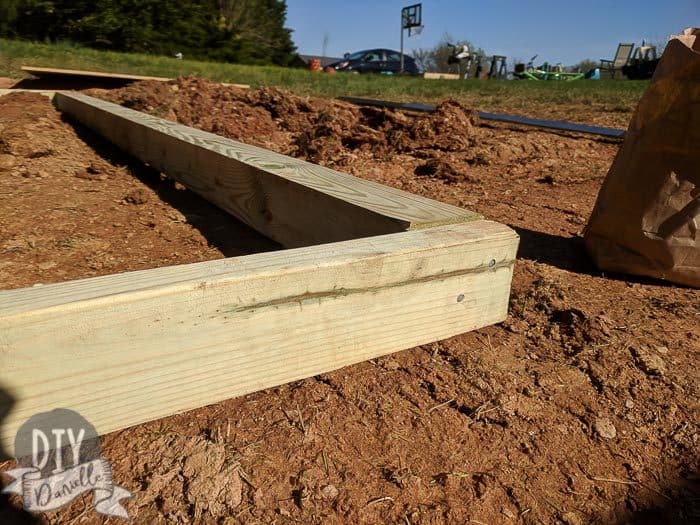
The exterior frame is made up of (2) 10′ 4x4s, one at each end and (2) 12′ 2x4s for the long side. Once those four pieces were leveled, he nailed them together. Try to keep them flush with each other so the plywood at the end will lay flat.
Two more 4x4s were space evenly in the middle for additional supports. Nail to frame.
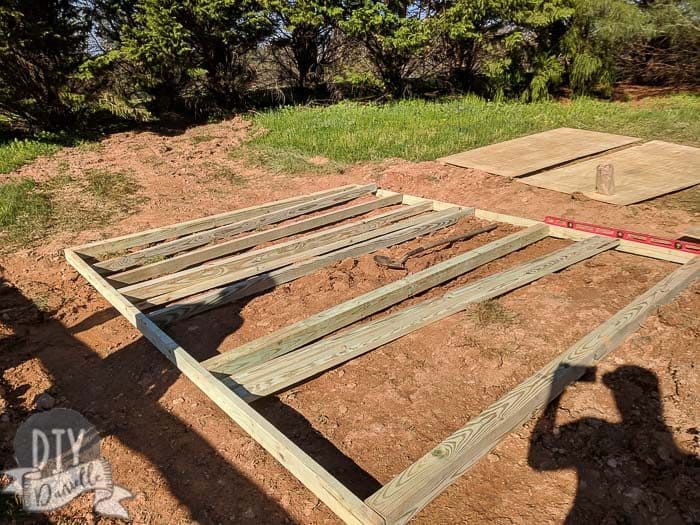
After the 4x4s are placed, you just need to space your remaining 2x4s evenly. These 2x4s should be cut to 10′. Nail to the frame.

As you can see in the photo above, you’ll need to use smaller scraps and cut them to size to provide additional supports. These help keep the panels on top from bowing when they have a lot of weight on them.
We measured each section to make sure the smaller cuts were the right size.
BEFORE you nail in the supports, make sure to cut and lay your plywood panels. You’ll want to make sure that each panel has supports under it so looking at the placement of the plywood prior is helpful.
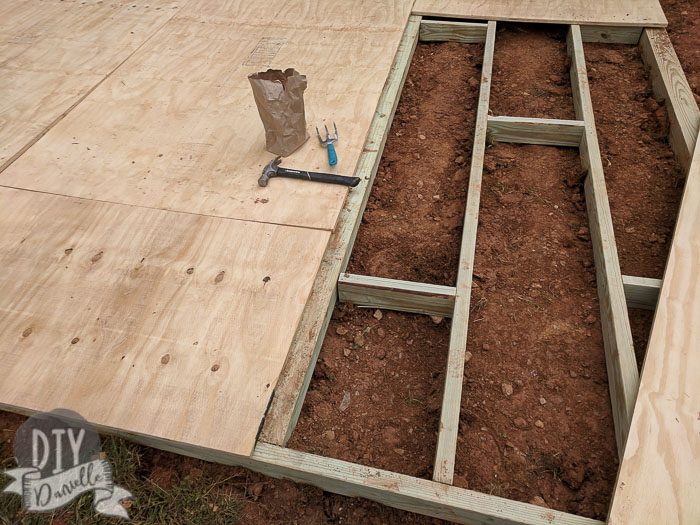
Once you’ve figured out the placement, nail in the short supports. If you’re nailing through a 2×4 into the support, you need the 4″ nails, but you need 6″ nails if you’re nailing through the 4×4.
Home stretch friends!
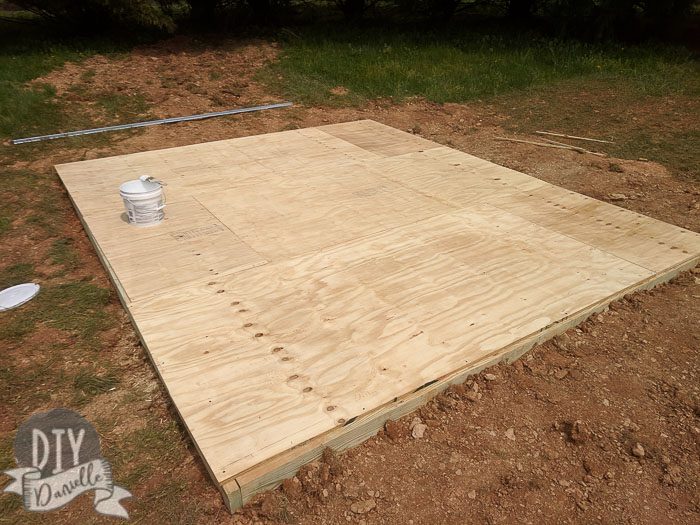
The last part is to nail the plywood down to your base. Strategize so you won’t forget where your middle supports are… you’ll want to nail the middle of the plywood boards down to those, as well as to the exterior base.
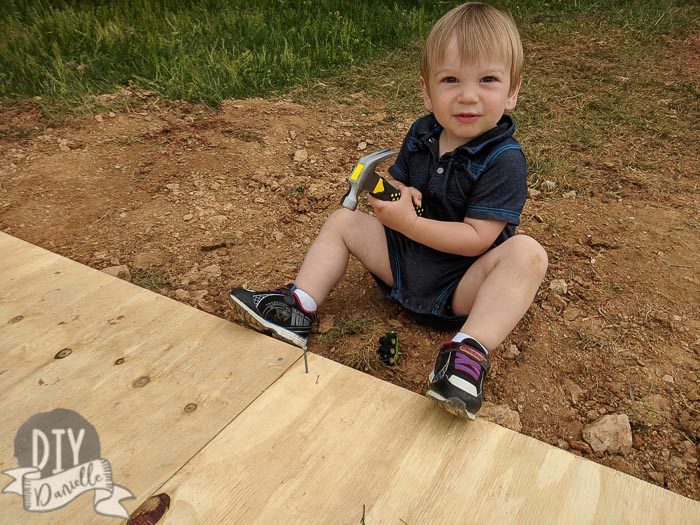
Get the kids a real tool kit and have them help!
It wasn’t perfect, but it worked! We ended up using the circular saw to even up the sides a bit.
Then I primed and painted the surface.
I HIGHLY recommend covering this with a tarp until you can get your structure and roof up. We had weather and this delayed our shed building by about 2 days… which resulted in some water sitting on top of the base.
The good news? The water didn’t run off so yay, the base is level. The bad news is that the water sat on top and warped some areas. It’s not bad or super noticeable, but it irritated the heck out of my husband and me. All of that work for IMPERFECTIONS! Ahhhhh.
Video of Building the Shed Base
And that’s it. The reality is that this took some time to get it done and get it done right. I wish I could say it was easier or faster. But it’s worth doing right and having a nice solid base for your shed.
Next in this series: Details on Installation of the Ironwood Shed Frame Kit and Building & Organizing a Kids Garage
Here’s some structures I’ve built that might be useful with a shed base: DIY Duck Coop | DIY Goat House
Please pin this project and share it with others!
