Learn how to sew a toddler hospital gown for a child undergoing surgery or hospitalization. This is a great comfort item to donate to your local hospital!
This post may contain affiliate links which may earn me commissions should you click through them and take certain actions. As an affiliate for Amazon, Cricut, xTool, Home Depot, and other sites, I earn from qualifying purchases. Please DIY carefully. View my full legal disclosures here.
Please read the whole post so you don’t miss any important information!
We have a few friends who had babies born with a congenital heart defect (CHD); this is a common birth defect that requires multiple surgeries. My friend’s daughter was having her “2 year old surgery” (I think it’s typical to have surgery at birth, 6 months, and 2 years) and I wanted to make her something special for her hospital stay.
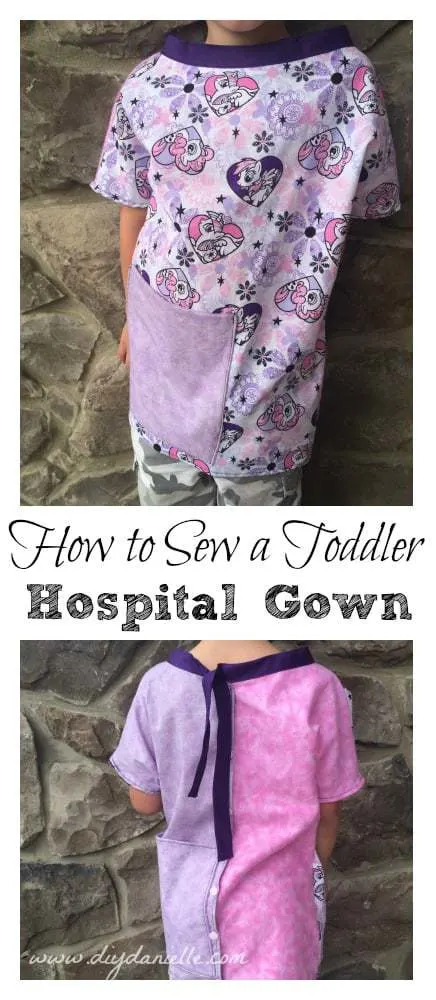
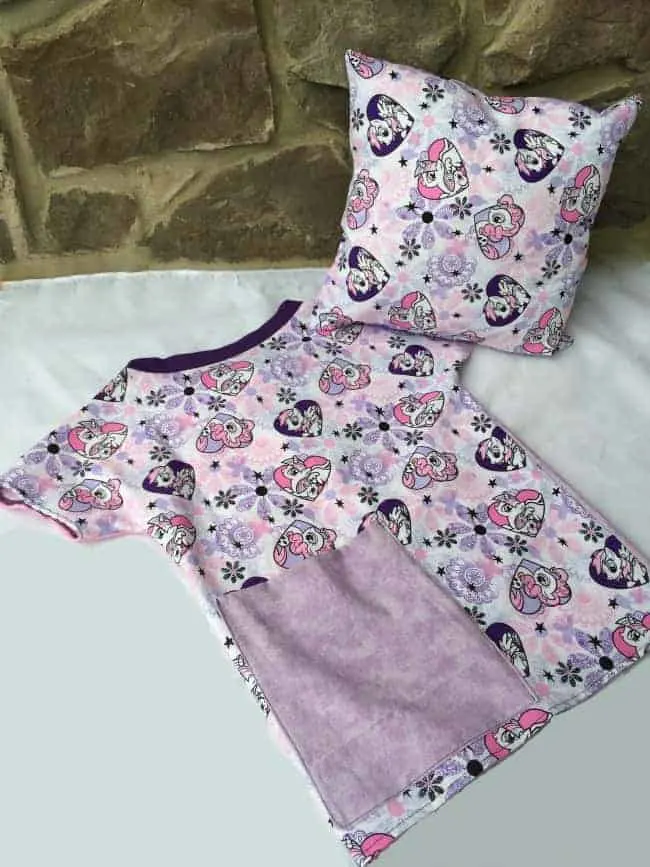
I asked around to my other CHD moms to see if there’s anything they would suggest adding to a toddler hospital gown. One friend suggested adding a pocket for the mobile monitor. My original toddler hospital gown, the one with the My Little Pony hearts, has an extra large pocket to account for that.
This was such a fun and easy project. I love being able to tweak the gown to be appealing for a little girl. I LOVE the original My Little Pony fabric– my sons aren’t into it so my son was a really good sport to model it for me.
Table of contents
DIY Toddler Hospital Gown
Supplies
- Cotton or flannel fabric (I used My Little Pony Fabric)
- Bias tape
- Sewing supplies
- Optional: Snaps for a closure (or you can make ties)
- Optional: Pillow form or fiber fill for a coordinating pillow
If you’re short on fabric, this is a GREAT item to sew with clean sheets. You can often find cute character sheets. If you have a fitted sheet, cut off the edges to ditch the elastic. The best part about sheets, particularly old ones, is that you know how they look USED after MANY hot wash cycles. If they still look good, they’ll continue to look good.
Sometimes things are a bit more touch and go when you’re using fresh, new fabric. The purple versions of this hospital gown were made with a purple sheet I didn’t need anymore.
Free Sewing Pattern
When I originally wrote this blog post back in 2015, I used a pattern from another website. Unfortunately this site was shut down so I had some folks requesting a new pattern. After quite a bit of finagling, I finally have a FREE toddler hospital gown pattern for you.
Please remember that the original “hearts My Little Pony” gown was sewn with a different gown pattern that’s not mine to give away (and it’s not available anymore on the website).
This pattern is for personal use only. If you have any special requests or questions about this, please email me at [email protected].
There are a few differences between the original pattern and this one. For example, the sleeves snap open and closed. This allows for easy access for doctors and nurses.
The neckline is slightly different and the pocket for the pattern is much smaller.
If you want the larger pocket, simply cut your pocket fabric to a larger size and sew it on in the same manner. I added a huge pocket to the back AND front of the first hospital gown. Again, this is simple to add yourself.
Preparing to Sew
It’s REALLY important to make sure you prewash the fabric on HOT before sewing. This will allow the fabric to shrink BEFORE you sew with it.
Items made for a hospital are very likely washed on hot to sanitize them. Here’s some information on prewashing fabric.
Cutting out the Pattern
There are two versions of the pattern- one that allows you to hem the neckline and one that skips the hemming so you can add bias tape for the neckline instead.
Your pattern pieces will line up in order- A1, A2, A3, etc. with B1, B2, B3, etc. for the row underneath.
Cutting Your Fabric
You need one cut for the front. This piece is cut “on the fold.” If you’re not familiar with this term, you fold over your fabric, line up “the fold” line, and cut. When you finish, you unfold the cut piece and you have a full front to the gown.
For the back pieces, you need to cut two pieces that are “mirrored.” This means that you have a piece for the right side and for the left side. As most fabric is one sided, this is an important thing to get right!
In the case of the old sheets, they’re two sided so it’s hard to see any real difference if you mess up (at least as far as I can tell).
How to Construct the Hospital Gown
You can construct the entire gown with a sewing machine and a straight stitch; this project is very simple to do with a standard machine. I do, however, use a couple of other types of sewing machines such as a coverstitch and serger. These are often used in garment sewing and sew more stitches per minute than a sewing machine. It’s purely for cosmetics and speed in this case.
To begin, I cut out my fabric. There’s one big piece for the front of the gown, and two pieces for the back.
For each pattern piece, you begin by hemming the top of the arms where the sleeves will snap closed. The dotted lines on the pattern indicate where you need to turn your fabric under twice to hem.
Press the first fold. Press the second fold. Sew with a straight stitch to hem.
Repeat for all.
The back needs to be hemmed in the same manner.
Place your front panel right sides up. Lay the back pieces right sides down. Pin along the sides, from the edge of the sleeve to the bottom of the gown.
Sew a straight stitch up each side.
Finish your neckline.
There are two finishing options for the neckline; make sure you’re using the correct pattern for the one you choose. When I made the first gown, I used a pretty purple bias tape.
Option 1: Hem the neckline. An additional 1″ was added to the other pattern to account for this hem. When you’re hemming the rounded neckline, it’s difficult to get a nice round curve. You want to clip the edges a bit before hemming which will give you a better curve.
Option 2: Use bias tape for the neckline.
I think this is the easier option because it’s a bit more forgiving around the curve. You can make your own bias tape with coordinating fabric.
Add Snaps
The snaps should be placed on the thicker hem which helps prevent them from ripping through the fabric. You can use buttons if you prefer, but use plastic. Metal can’t be worn into an MRI machine and I imagine it’s better to skip it altogether for that reason.
Optional: Sew a Pocket On
Feel free to sew a pocket on, or leave it off. I have included a small pocket in the pattern, but you can make it bigger or smaller. You can get creative and make heart pockets!
Original Tutorial
This is the original tutorial I made for the other gown pattern.
Step 1: Cut Fabric
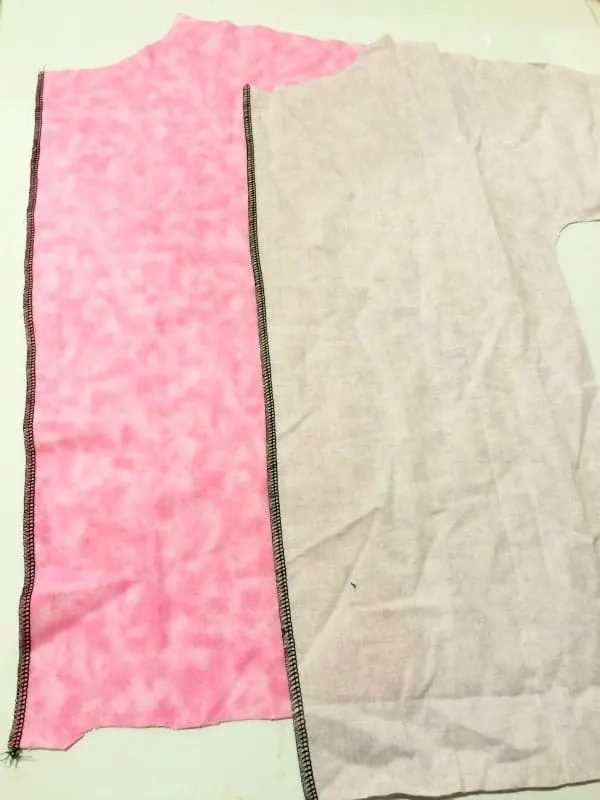
Step 2: Serge along back pieces (where they will snap together)
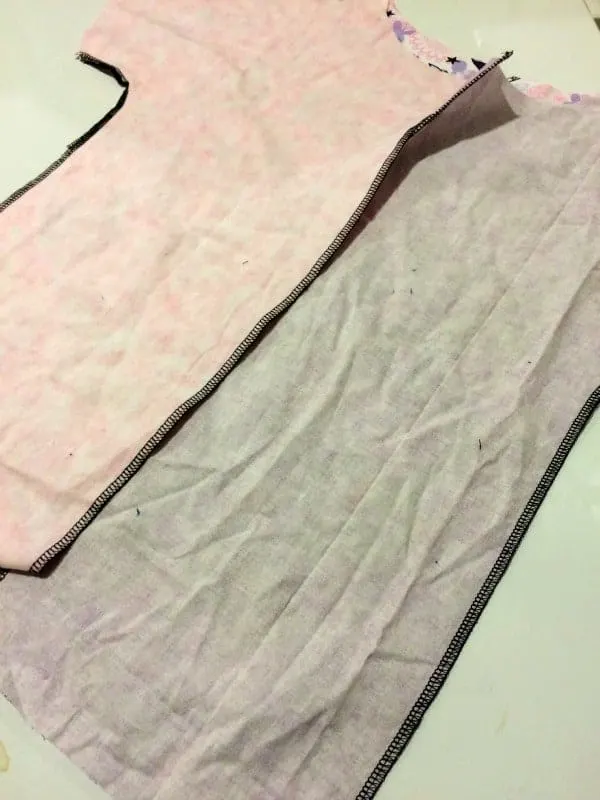
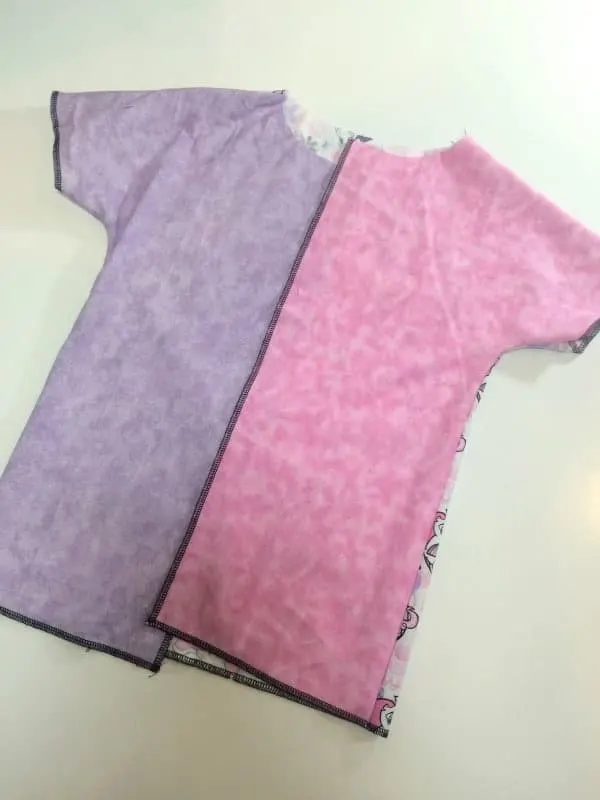
Step 3: Face front piece and back pieces right sides together. Back pieces will overlap. Serge along sides and the top of the shoulders. Also serge along the bottom edge of gown and the sleeves.
Step 4: Turn side sides out.
Step 5: Add pocket. Now is a good time to make your pockets and add them. I added one big pocket to the back and one to the front. I tried to make the pockets as big as possible in width.
Here is a photo of the original gown, front and back.
Accessories to Include
Thinking about other items to include with your gift? I also made a matching pillow. You can use a pillow form if you want, but I sewed a square pillow with matching fabric (I used the rest of my MLP fabric). I left a small opening to stuff with fiberfill, then filled it and hand sewed the pillow closed. Very simple.
I’ve also made pillows in the shape of a super hero shield which is fun or a knight’s shield.
Now that COVID-19 is here, it might be worthwhile to sew a coordinating face mask to match the gown. I’m not sure how many high risk kiddos are wearing them while hospitalized, but if they have it then the option is there!
You could also add a scrunchie, pillowcase, or other items to the kit.
Save for Later!
Please share and pin this post! If you make this project, share it in our Stuff Mama Makes Facebook Group. We have regular giveaways for gift cards to craft stores. You can also tag me on Instagram @doityourselfdanielle; I love seeing everything you make!
Originally posted December 11, 2015. Updated May 2020.

JOYCE
Tuesday 1st of August 2023
I can't wait to make these. My nephew had cancer when he was younger (& was stationed at Lee Moffitt Cancer Center in Tampa) & I wish I knew then how to do this for him! I have my mom's old serger but have no idea how to use it. How do I enforce my seams without it. Thank you so much again!! Joyce Estle [email protected]
Danielle Pientka
Thursday 17th of August 2023
With cotton fabric, using a straight stitch on a sewing machine is fine!
Joann
Monday 10th of April 2023
I've signed up for the newsletter - how do I get the pattern?
Karen Estep
Tuesday 7th of June 2022
I have signed up for the newsletter, how do I get the pediatric hospital gown pattern
Janet
Friday 8th of February 2019
How much fabric did you use and the pattern would be helpful as the link has been removed
Wendy
Thursday 31st of January 2019
Hi. This project looks beautiful. Did you wash fabric before cutting or just use as it comes from the store? Thanks, Wendy
Danielle
Thursday 31st of January 2019
I always wash my fabric before using it, just to prevent shrinking.