

How to create DIY recessed shelving that are built into the wall. These bookshelves are perfect for living room storage.
This post may contain affiliate links which may earn me commissions should you click through them and take certain actions. As an affiliate for Amazon, Cricut, xTool, Home Depot, and other sites, I earn from qualifying purchases. Please DIY carefully. View my full legal disclosures here.
The majority of my content is generated by me, as are 99% of the photos and videos, but I utilize technology for titles, descriptions, video editing out all of my ums, and occasionally for text overlay on images.
Please read the whole post so you don’t miss any important information!
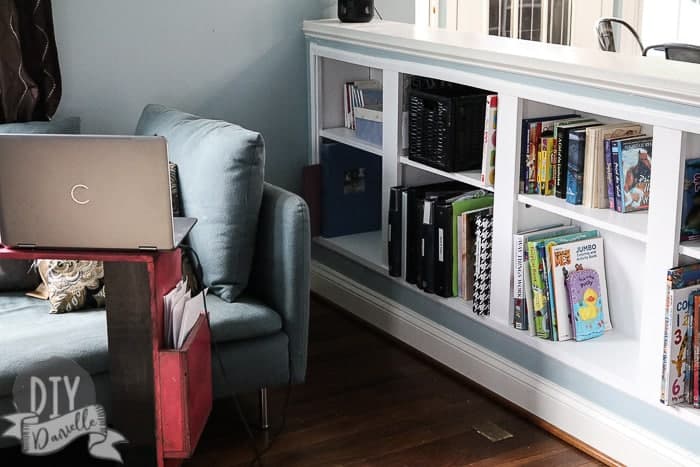
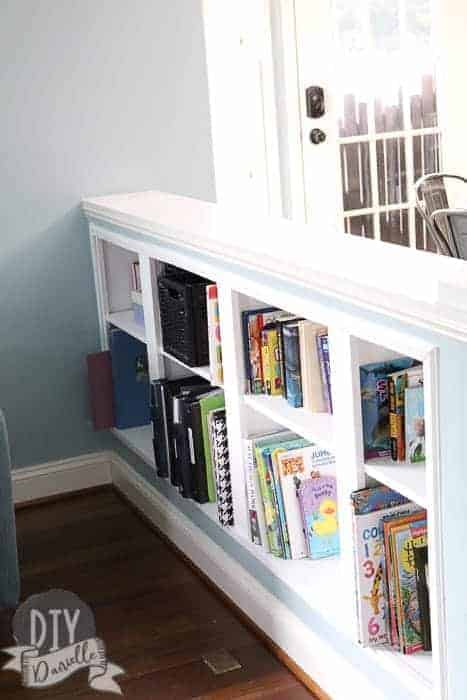
I told my husband I’d take the kids to the local farmer’s market so he could get a bit of a break. He decided to knock down a wall. I LOVE the finished product. Now I have some simple bookshelves beside the couch in our living room where I can store work notebooks, my microphone, photo albums, and books.
I love that these shelves are tucked out of the way a bit, unlike our large built-in bookshelves. I am able to store our medical binders on them without it being too awkward. It’s also a great spot for children’s books. My toddler loves being able to grab books for me to read.
This is such a great use of wasted space!
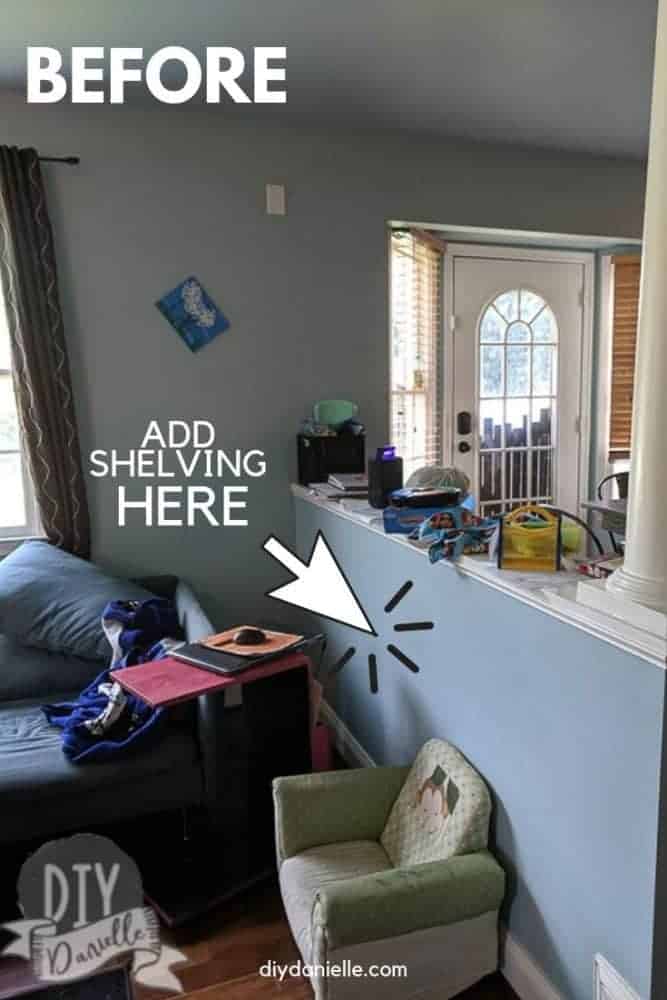
Here’s the before picture of our “pony wall,” which is also called a half wall:
Here’s how he built them…
How to Build Shelves Inside Your Wall
Supplies
- Stud Finder
- Drill and drill bit, plus something to cut the drywall away with (for areas where you need to be slow and careful, a utility knife is a good tool. He used a jig saw once he saw that there wasn’t wiring).
- (5) 1×10 8′ Common Board [email protected] $73.65*
- 1×4 wood (we had some on hand)
- Trim pieces (we already had some)
- Primer
- White paint
- Nail gun
*We don’t think we used all of these boards for this project, but this is how many I bought.
Removing the Dry Wall
First of all… don’t do this to just any wall. Leave exterior walls alone; they have insulation in there that you don’t want to lose. This area didn’t have insulation in it at all… or wiring. But you need to be careful of both if you’re hacking away at a wall.
You want to identify where your studs are. You can drill a hole with a large drill bit in an area WHERE THE STUDS AREN’T to eyeball what your situation is… a peep hole.
This is ours after he widened it a bit…
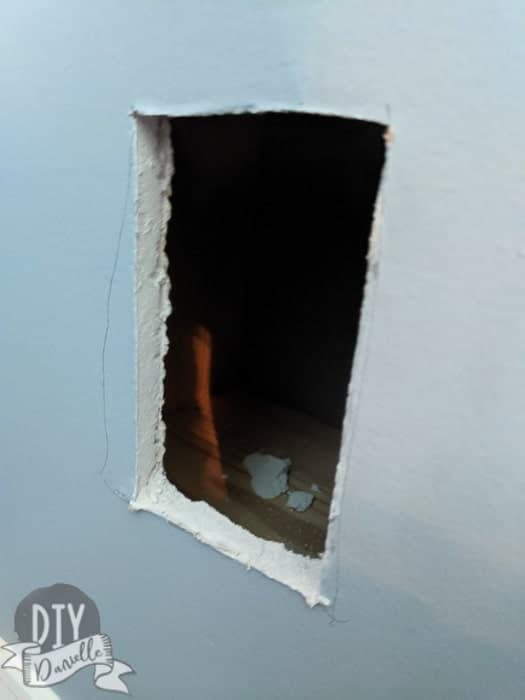
Make sure to keep an eye out for where any wiring or insulation is… DO NOT HIT WIRES! This is a major safety issue so if you’re not comfortable (or careful) doing projects, please hire the job out.
My husband used a utility knife to widen the areas to get a better view, then a jig saw once he knew there weren’t any wires to hit. The utility knife was used by the studs as well.
Don’t cut the studs.
Clean up. This means dusting, washing curtains and pillows and blankets in the room, vacuuming, mopping, etc. He cut the rest of our wood outside so he wouldn’t make more mess.
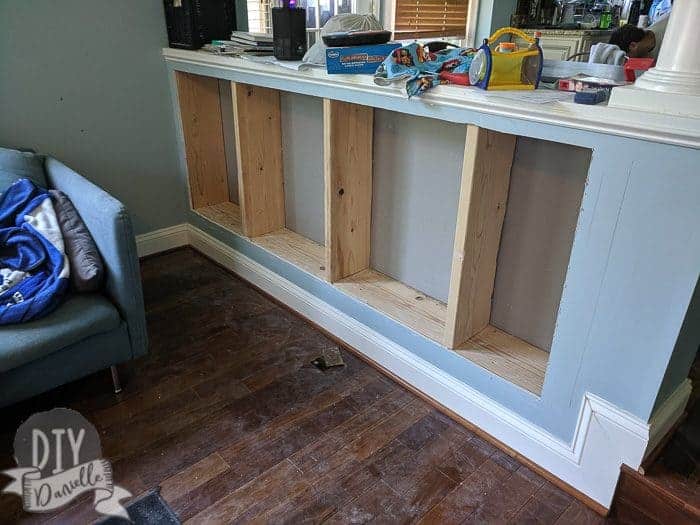
Adding Shelves
First… the correct way to do this is to build a shelf that fits inside the area and plop that in there. We didn’t do it this way. The back of the dry wall is the back to our bookshelf. We’re going to roll with this and see how it goes. We didn’t want to lose additional space from our shelf.
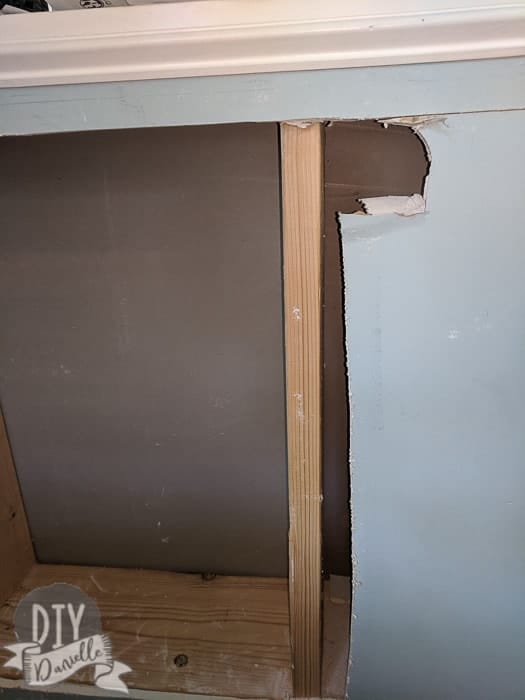
We had some pieces of trim left by the last owner so he cut them to the width of the studs. He used his nail gun to add them to the stud. The piece of scrap wood underneath is to help make sure each shelf is the same height.
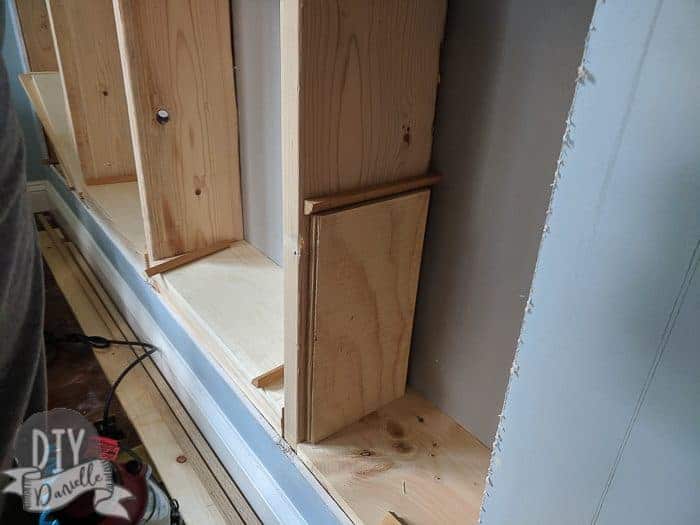
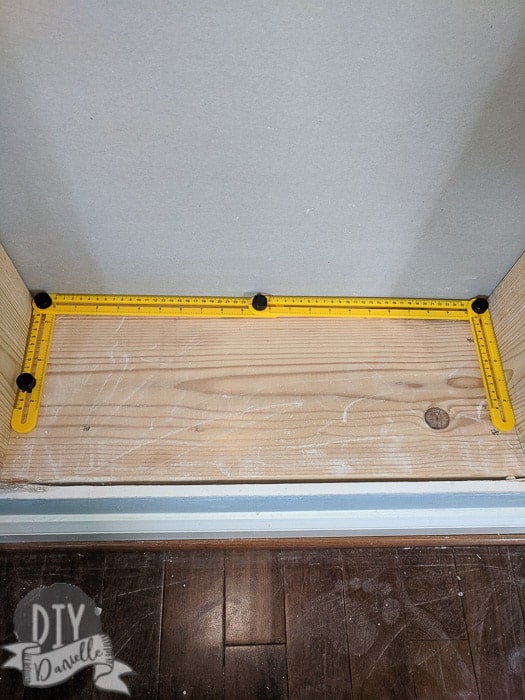
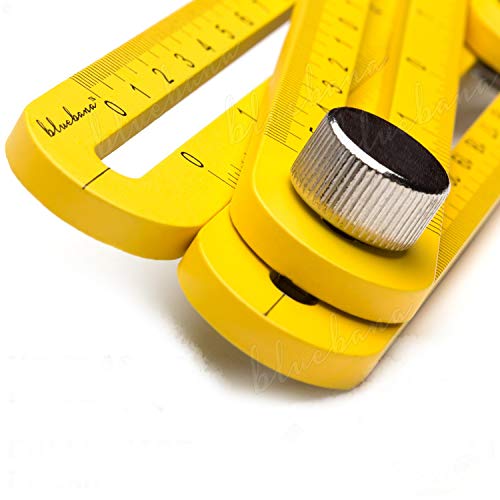
I got him this weird measuring thing for Christmas one year that he used to figure out the exact size for the shelf. It allowed him to get a template for each space though so the board could be cut perfectly to size. If you want to get a similar product, this is one that I found on Amazon.
I am still horrified that walls aren’t always even and studs aren’t always straight and all of that fun stuff.
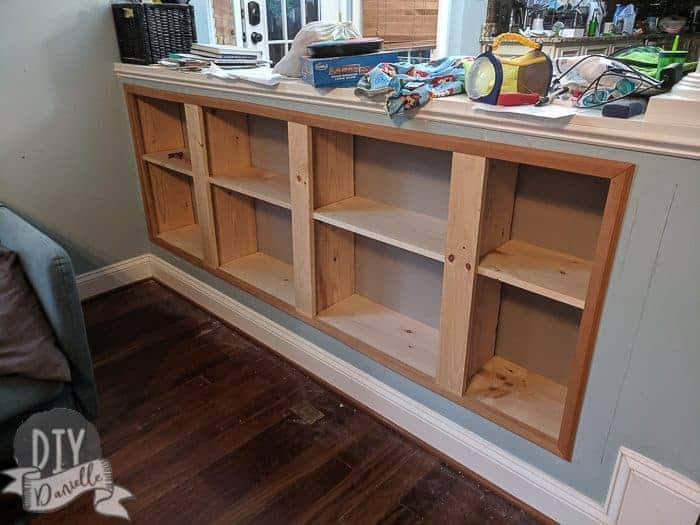
He placed a 1×10 board for the bottom of each shelf.
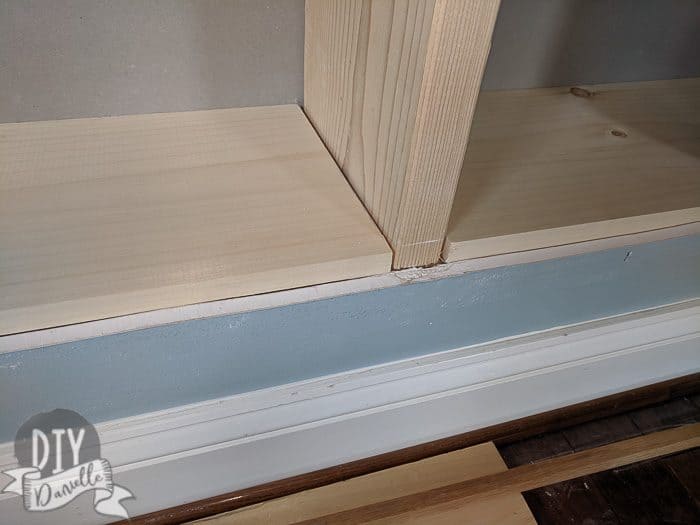
Once those were up, he added the top/middle shelves.
1x4s were used to cover the front of the studs vertically. Square moulding was then added to cover the rough cut edges of the drywall. Finally decorative molding was added around the edges to give it a finished/framed look.
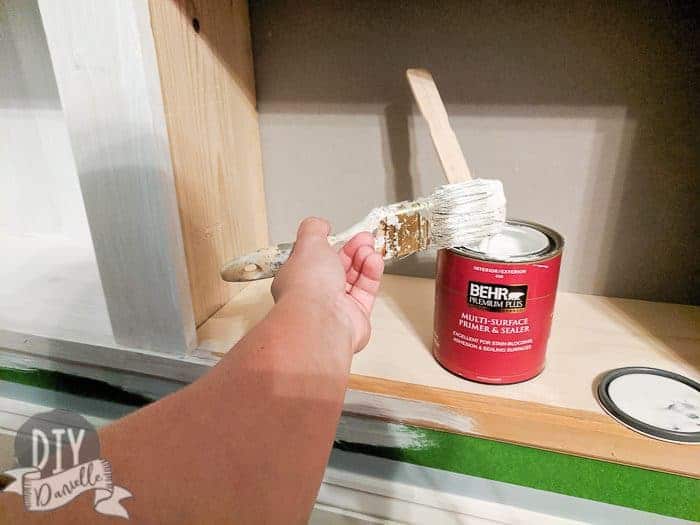
Painting the Shelves and the Back of the Drywall
This is the point where the project was passed on to me. I was uncertain about painting the back of drywall, but I used Behr Premium Plus Multi-Surface Primer & Sealer first. Then I painted everything with a few layers of white paint.
If I did this again, I’d probably do two layers of the primer in hopes I didn’t need as much white.
You can also fill in any flaws in the studs if you want. I didn’t as I was lazy hoping any flaws would add character.
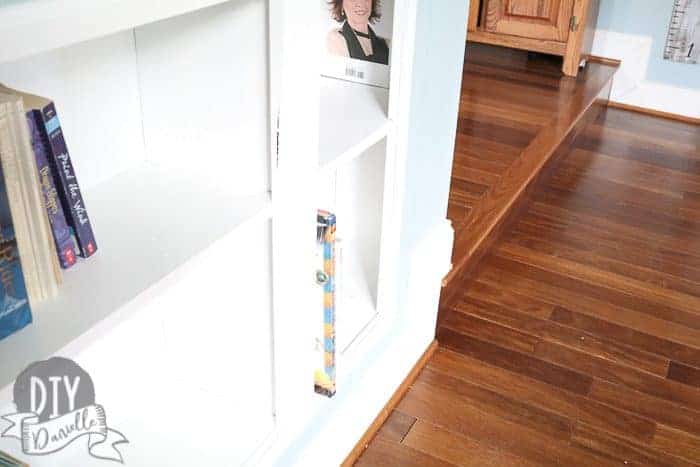
Finished Recessed Shelving
There’s an area under the column that my husband didn’t remove the drywall (even though there’s just a stud at the end). It looked more natural this way and there’s a bit of a hidden alcove there if we want to use it like that.
This is my perfect “office” space seeing I often work at the couch on my DIY laptop desk.
If you love built-ins, make sure to check out my other built-in posts, including our new built-in bookshelves above storage cabinets, our old built-in entertainment center at the old house, our built-in office at the old house, and our built-in shelves in the bathroom.
A couple of years after building this, I built a DIY sofa table to add extra storage behind the couch.
Please share and pin this post! You can also post your project and tag the DIYDanielle team on Instagram @doityourselfdanielle!
DIY Recessed Shelving
Learn how to create DIY recessed shelving that are built into the wall. These bookshelves are perfect for living room storage and are easy to make.
Materials
- Stud Finder
- (5) 1×10 8′ Common Board
- 1×4 wood
- Trim pieces
- Primer
- White paint
Tools
- Drill and drill bit
- Nail gun
Instructions
- Remove the drywall where the shelving will go.
- Identify where the studs are.
- Cut pieces of trim to the width of the studs.
- Attach with a nail gun.
- Place a 1×10 board for the bottom of each shelf.
- Add the top and middle shelves.
- Attach 1x4s to cover the front of the studs vertically.
- Add square moulding to cover the rough cut edges of the drywall.
- Finish with decorative molding around the edges to give it a finished look.
Recommended Products
As an Amazon Associate and member of other affiliate programs, I earn from qualifying purchases.
Google Web Stories: How to Build Recessed Shelving