

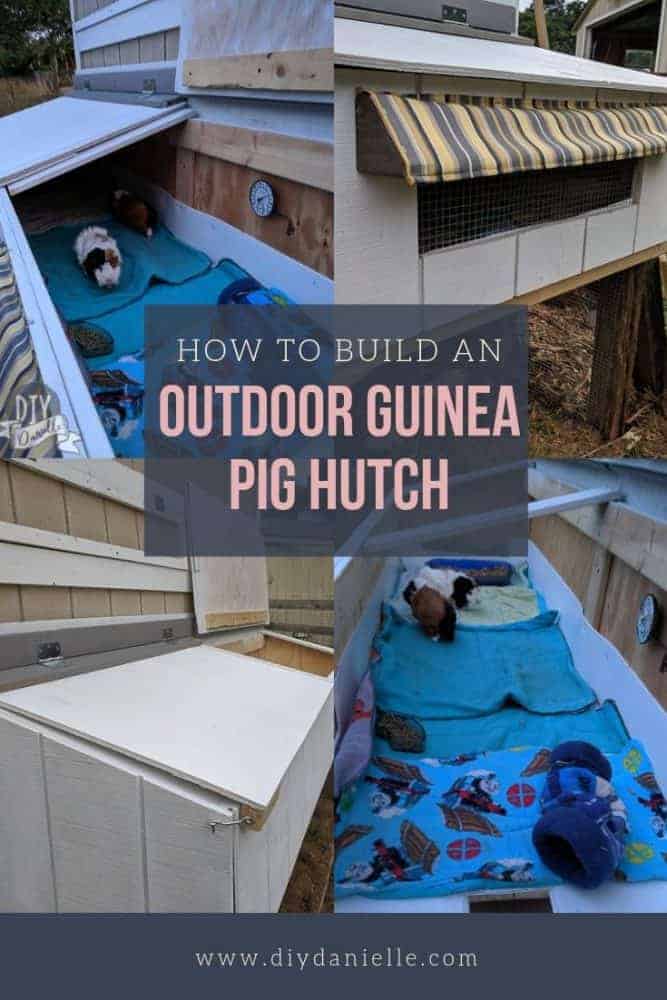
Information on how to build an outdoor guinea pig cage and run, as well as the safety considerations to making sure the guinea pigs stay happy and healthy in their outdoor space.
This post may contain affiliate links which may earn me commissions should you click through them and take certain actions. As an affiliate for Amazon, Cricut, xTool, Home Depot, and other sites, I earn from qualifying purchases. Please DIY carefully. View my full legal disclosures here.
The majority of my content is generated by me, as are 99% of the photos and videos, but I utilize technology for titles, descriptions, video editing out all of my ums, and occasionally for text overlay on images.
Please read the whole post so you don’t miss any important information!
We had our guinea pigs indoors in a wood cage that I built with scrap wood. It’s larger than the Midwest cage that we owned before, but I still felt like it was a fairly small living space. It meets more than the minimum requirements for a cage for two guinea pigs, but still. I loved the idea of them having more space.
The problem is that we really don’t have the indoor space to keep a larger cage. We have PLENTY of room outdoors though. While keeping guinea pigs outdoors is a big no-no from what I’ve read, the main consideration (along with temperature) is that guinea pigs should be with the family where they won’t be forgotten.
See, the problem is that we spend all of our time outside. We have ducks and goats that we care for daily. We play outside for most of the year. We garden.
The guinea pigs were not getting the attention and interaction indoors that they would outside. All of my animal chores are outdoors, except the dog who I feed as I come in from my outdoor chores. We have a pretty streamlined system. Moving the guinea pigs outdoors has meant more time and attention for them.
The first thing I did was a lot of crowd sourcing and research about the safety of outdoor wood cages. I wanted to consider how to make the cage safe against predators, how to control the temperature best, and many other factors.
I get a little more in-depth about this pretty extensive topic in my blog post, Can Guinea Pigs Be Kept Outside? PLEASE read it before you go and decide outdoors is right for you. And read this ENTIRE POST before you go and build an outdoor hutch.
Looking for an easy to clean guinea pig cage? Check out the Eglu Guinea Pig Cages and attached runs! You can purchase a 3′-13′ attached run to go with it, add wheels and handles, and the cages look super easy to clean. I love that you can use them outdoors because the main cage is insulated, but I think you could use them indoors too if you added chloroplast and cage liners to the wire on the bottom of the run. If you decide to buy one, email me for a coupon code at [email protected]!
Adjustments to the Hutch for Safety/Health
None of these will make the outdoor option completely safe. Please read my “Can Guinea Pigs be Kept Outside” post because it’s much longer/more detailed about some of the steps we took. You may want to consult with your veterinarian on whether this is the right choice for you.
Concerns with Chewing Wood
Due to concerns with the guinea pigs chewing the wood and ingesting something in the wood or paint that was unsafe, we made the following adjustments to the build:
- Coroplast bottom inside the wood frame of the cage.
- Added wire/wood along each interior side of the cage. This prevented the guinea pigs from chewing on the exposed frame boards on either end of the cage.
- We offer the guinea pigs lots of safe wood to chew because it’s good for their teeth and health. We give them mostly apple tree wood from our apples trees in our food forest.
I was not concerned about the guinea pigs chewing wood that was high up or flat (like the flooring). They aren’t climbers like rats.
Temperature Control
- We are keeping the indoor cage for months where the weather isn’t safe for the guinea pigs.
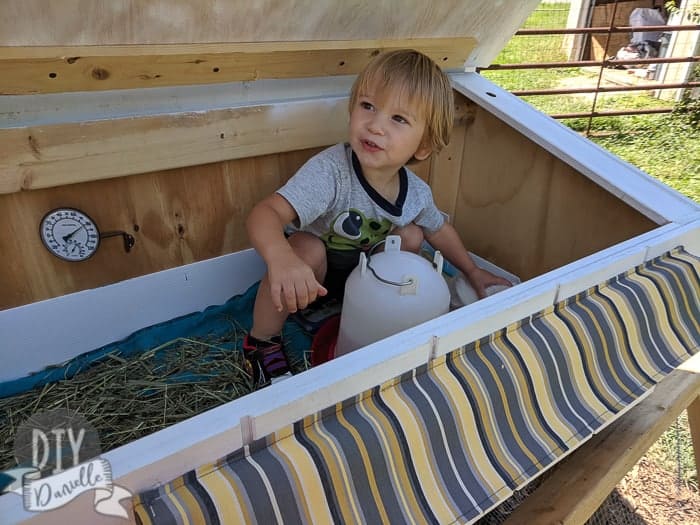
- Mounted a thermometer inside the cage to monitor temperature.
- Included a window that opens and closes for ventilation.
- Planting a tree near the hutch for additional shade on one side. We currently have shade in the afternoon heat for that side of the coop so it works out well.
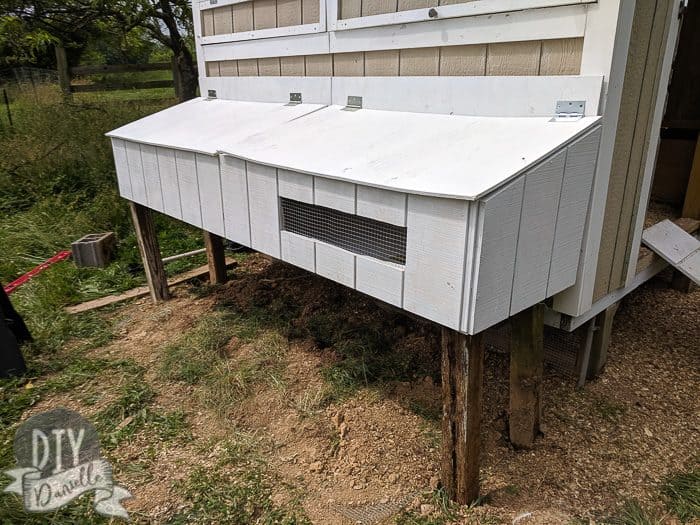
Building a Two Level Guinea Pig Hutch and Run
I have to apologize. This is going to have too many and too few details all at the same time. Hopefully you’ll get a good enough idea to replicate the project if you so desire. My husband built the first part and I popped in occasionally to take photos. I finished up the second part. So photos and video got a bit discombobulated. I’ll add the video at the bottom of the post.
Supplies
- Wood: 1x6s for the bottom and structure of the cage, T1-11 for the sides. pressured treated 4x4s to hold it up (ours were used ones that were already there). We used a pressured treated 2×4 for the bottom front (buried partially) and a 2×2 for the top front. 2x4s for the bottom level doors.
- Coroplast for the bottom liner
- Hardware cloth 1/2-1/4″ (the one linked is 2′ wide… you may need the 4′ wide if you have a larger width area. We used some we had leftover from our duck/chicken run)
- Screws/nails
- Shovel
- Fabric for the awning (check Joanns scrap bin for a scrap sized piece of Sunbrella fabric)
- Heavy duty staple gun: I want this one by Ryobi
- Sander
- Hinges for the bottom level doors, as well as for the lids (8 total, if I recall)
- Hooks/closure of some type for the lids and bottom level doors: Something like this, except you want extra eyelets.
- Outdoor thermometer of some sort
- Jig saw
- Glue gun
Creating the Hutch
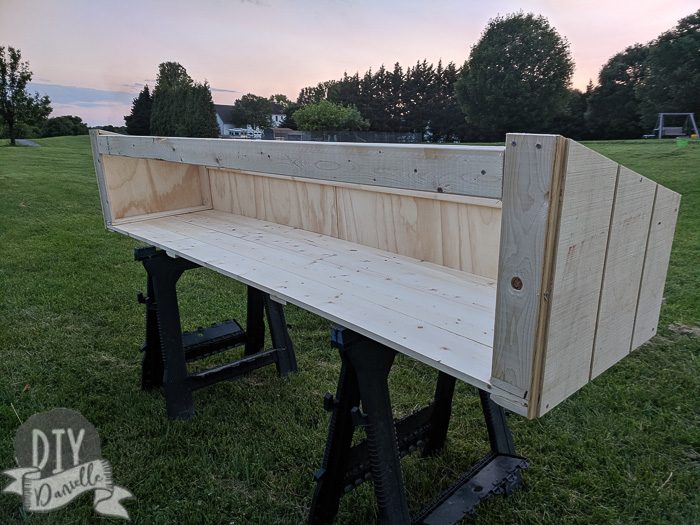
My husband did most of the hutch so this is where my instructions will be minimal. He used 1x6s for the floor. This hutch was built to be around the same length as the long side of our chicken coop.

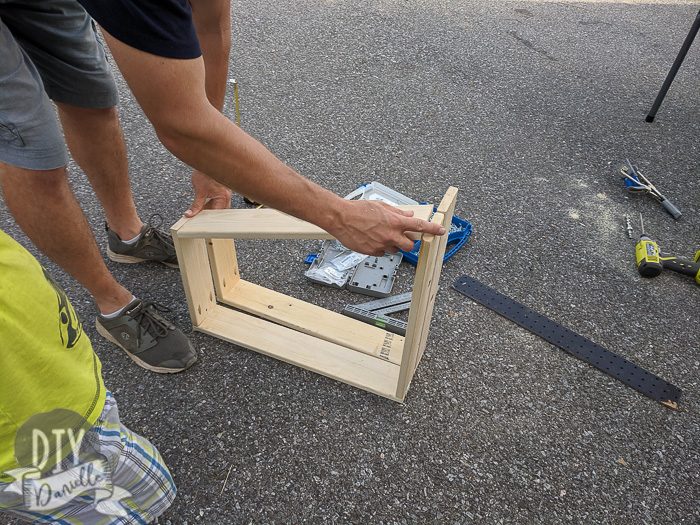
While I finished up putting together the base, he started on the side pieces for the hutch. We needed one side to be higher than the other so the roof would have a slope.
The snow needs to be able to slide off the roof as we get a few snowstorms each year here in Maryland.
He used another 1×6 board along the back to connect the sides and there’s another board in the front.
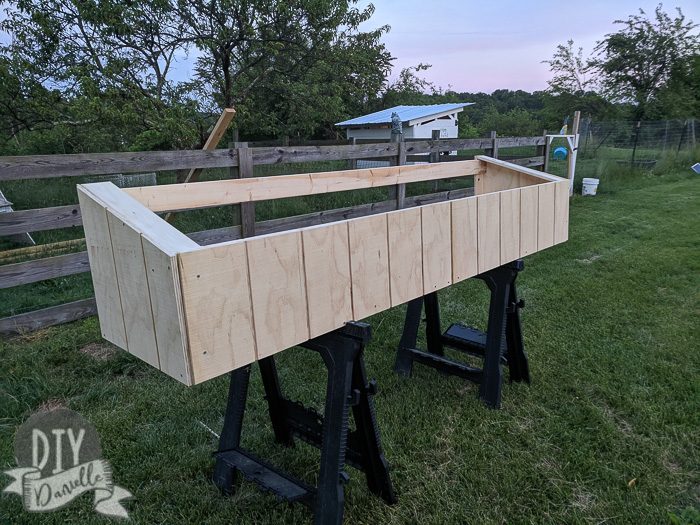
He used scraps of T1-11 leftover from the goat shed for the sides.
At this point he cut some plywood for the roof/lids. I am going to talk about the roof later… I had to make some adjustments to his original plan.
He used a piece of plywood for the back so there are no gaps at all between the hutch and the side of the chicken coop.
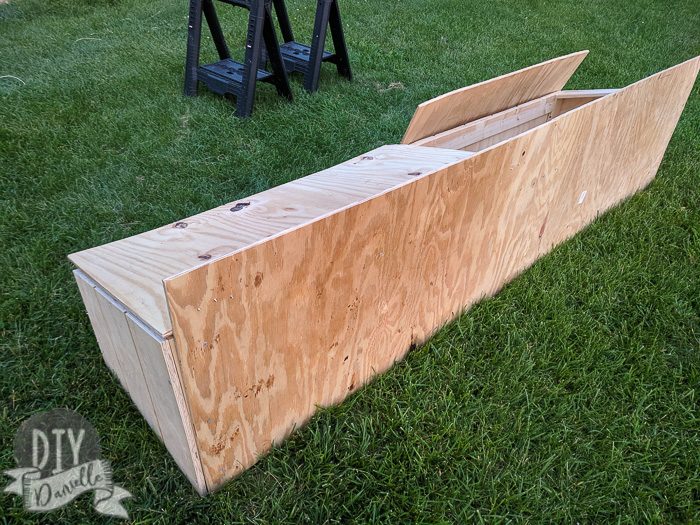
At this point, we had most of the structure for the hutch complete. I primed and painted the exterior of the hutch. I used white to match my goat shed. I didn’t paint the interior.
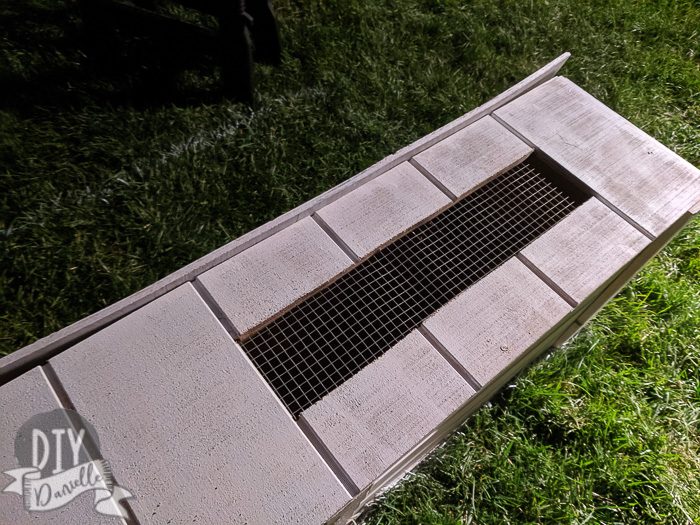
After the paint dried, I used my jig saw to create one window for the hutch. For the sake of keeping it as warm as possible in the winter, I didn’t want to add too many windows.
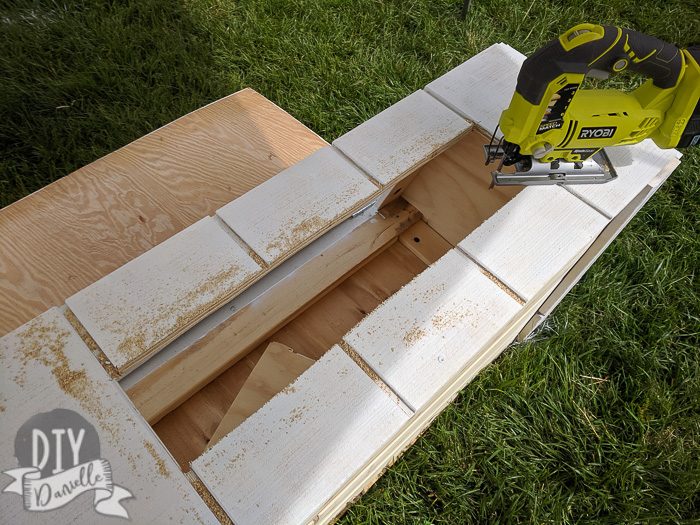
To predator-proof the window, I added a small cut of hardware cloth, making sure there were no sharp edges for the guinea pigs to cut themselves on. This is a good area to use the 1/4″ hardware cloth.
I used a heavy duty staple gun to attach the wire from the inside.
I also cut a hole in the bottom of the cage so I could add a ramp to the bottom level. Here’s my son making sure to sand around the opening for the ramp…
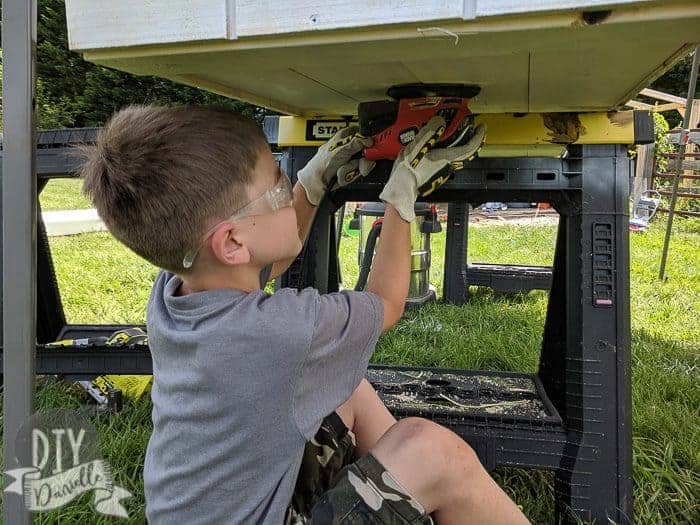
We vacuumed all of the dust up to finish up.
Cutting the Corrugated Liner
I decided to use corrugated plastic as a liner so the cage would be easier to clean. It also means that there’s a barrier between the guinea pigs and any wood. You don’t want them chewing the wood. The third benefit was that I could skip sealing the wood on the inside- I was concerned of health issues from any paint, stain, or poly.
Here’s the corrugated plastic liner all cut and taped up. I had to shove it in a bit but it fit perfect- measure twice, cut once right?!
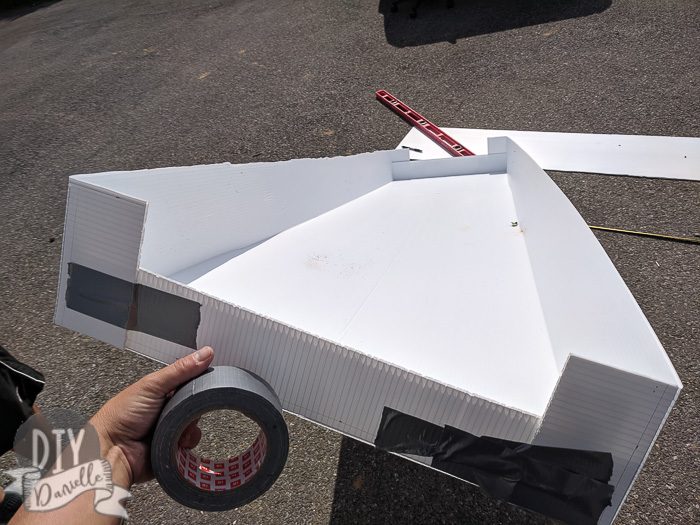
Make sure to check out my post on cutting corrugated plastic sheets for a liner. I used these to line my cage to protect the wood from urine and to keep the guinea pigs from having access to the wood (to prevent chewing).
Once the liner was inserted into the cage, I cut around the opening at the bottom for the ramp.
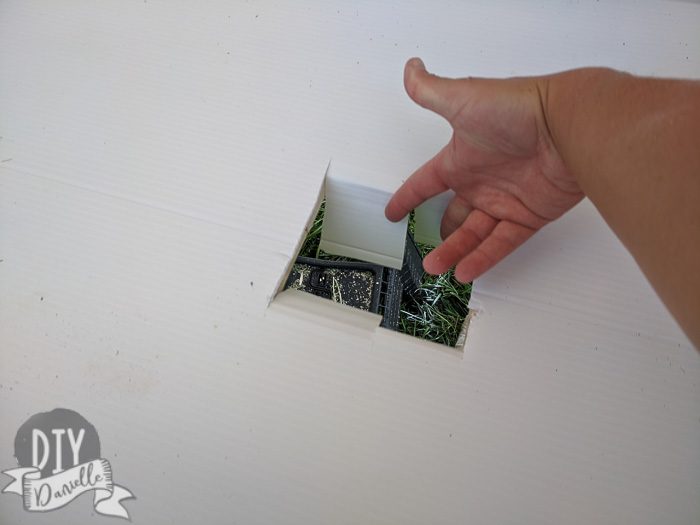
Then I stapled the excess plastic under the bottom of the hole.
Preparing the Lower Level & Predator-Proofing
The hardest thing about creating the cage and hutch was making sure it was predator proof AND that the guinea pigs couldn’t chew the wood. This was quite the challenge and irritated my husband because I was a pain in the tush about it.
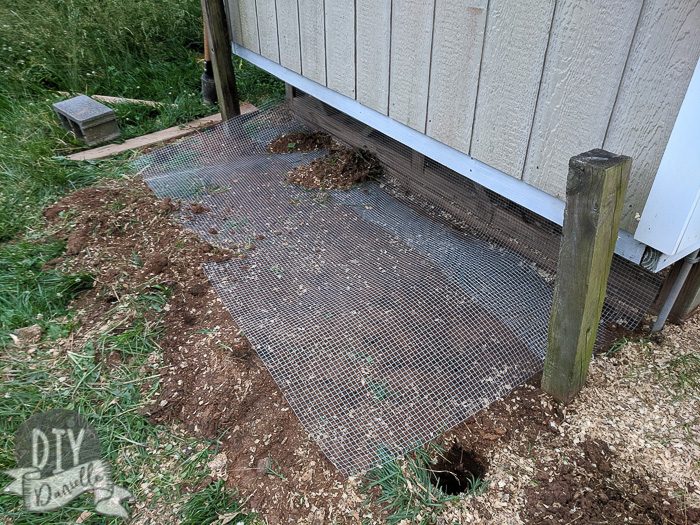
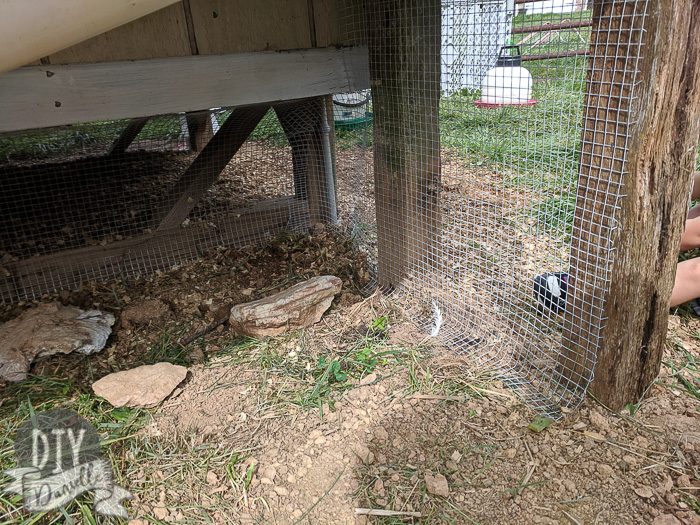
We started off by prepping the area… we added our wire along the wood bottom frame for the chicken coop. Then we dug up the soil for under the guinea pig run and laid wire under. Guinea pigs can’t walk on wire without risking issues with their feet so we buried the wire completely. Make sure the wire comes out further than the run. It’ll give any predators an extra challenge.
The nice thing about our guinea pig area is that it’s inside the duck’s area… which has a fence around it too. It’s also close to the house, has a lot of noise (thanks to three kids and a dog), and there’s a security light that goes on and off with motion at night. These factors just provide a bit of extra security against foxes and raccoons.
Once buried, we cut the 4x4s to all the same height. We wanted it tall enough to make cleaning the bottom level easy, but low enough that I could clean the top level easily. The 4x4s are buried 2′ into the ground.

The hutch was placed on top of the 4×4 supports, then attached with screws to the side of the chicken coop. The chicken coop has several studs so we tried to attach it to those. This thing needed to withstand children opening, closing, and hanging on it.
The next step was adding a ramp. I used a large PVC pipe that someone had cut down to use as an animal feeder. There is a wood semi circle screwed into one end which allowed me to screw the wood from that into the base of the hutch.
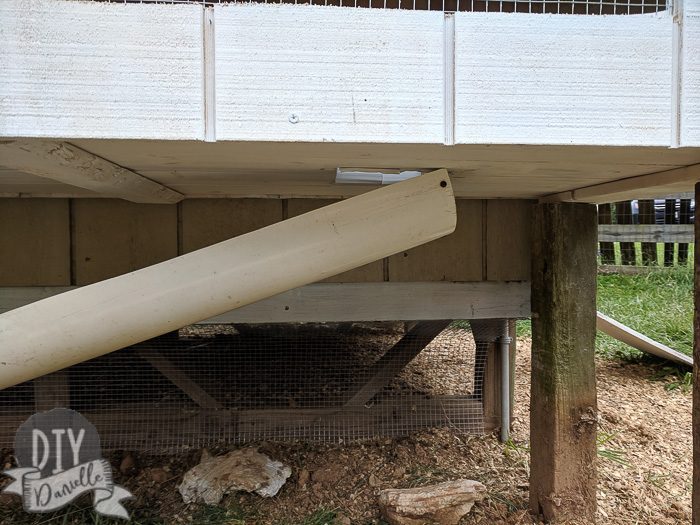
I used a glue gun to add horizontal stripes of glue down the ramp. This helps give the guinea pigs traction to go up and down without sliding. You can sort of see the stripes in the photo below.

At this point, we needed to add wire sides to the bottom level. As you can see, we added wire to the INSIDE of the 4x4s. We did NOT want the guinea pigs chewing on the pressure treated wood.
When we first did the front, we made one LONG front piece. It didn’t work well. I took it apart and cut it down into two doors. There are hinges on both sides and a latch in the middle.
There’s also a pressure treated 2×4 along the bottom to act as a frame around the front… and a 2×2 on the top. Not fancy- we were using what we had.
Again, all wire is stapled to the inside of the wood.

Adjustments to the Lids
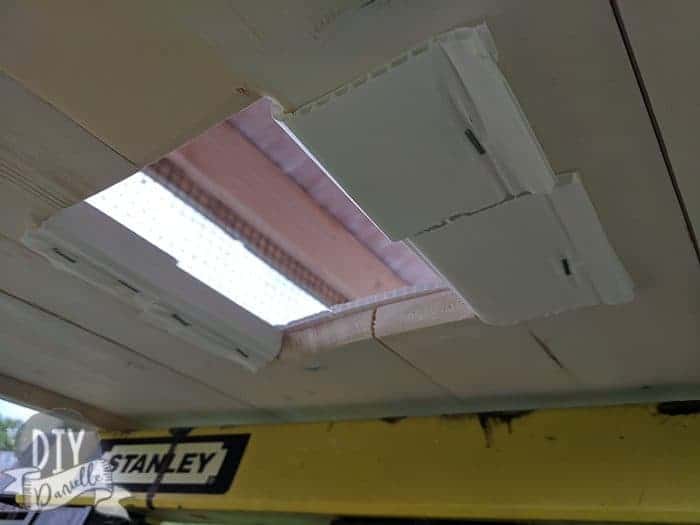
Initially we just added the plywood and hinges. BAD. WRONG. Haha. Water leaked right through. I realized I needed to copy the nesting boxes on the chicken coop.
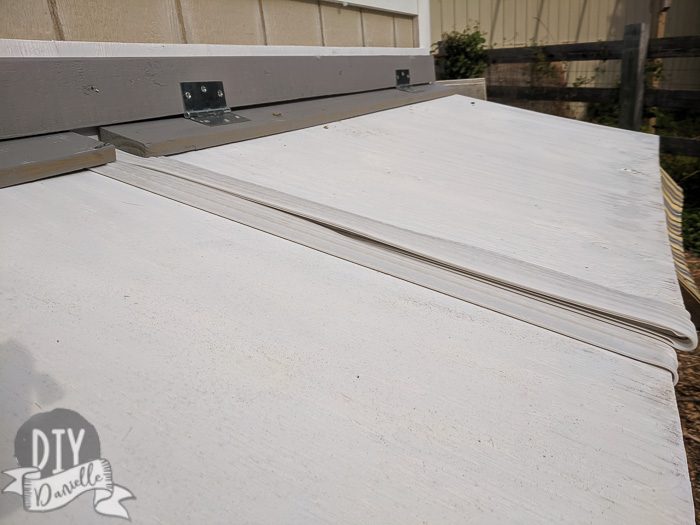
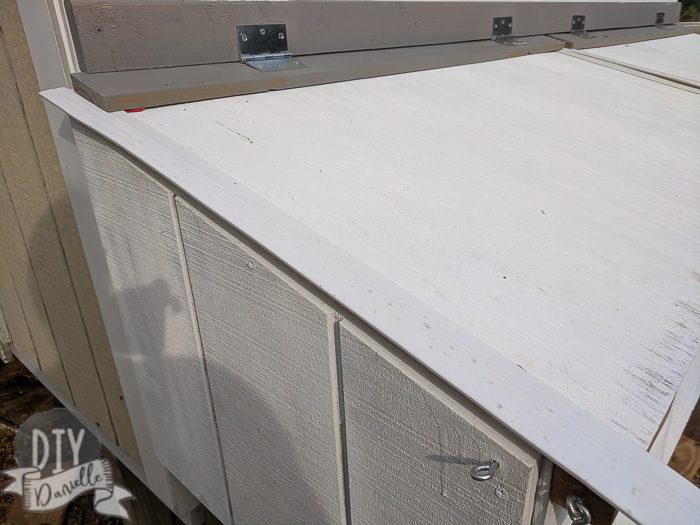
There’s a piece of wood along the back with the bottom cut at an angle. There’s a piece of wood on the top of the lid that’s cut at an angle. And there’s a piece of wood under the lid too that fits so it will close properly. Everything sort of overlaps. The video will show how this works better.
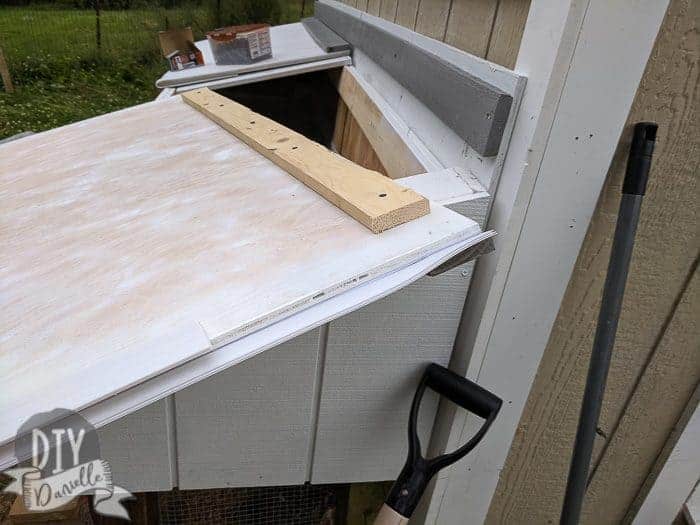
You can see how they overlap below.
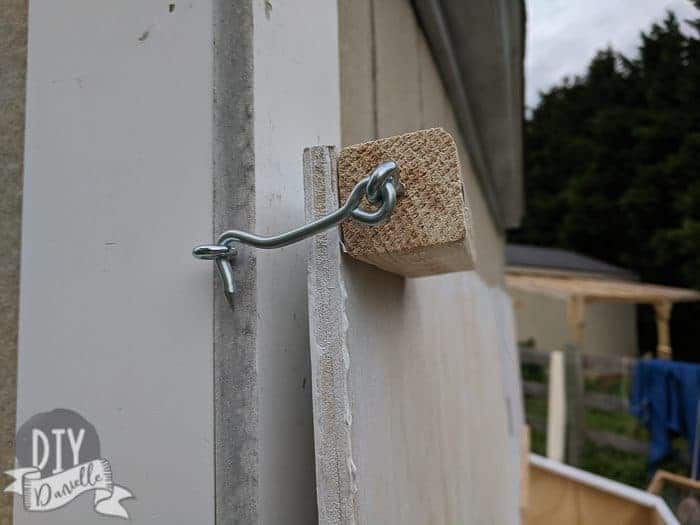
I added a small piece of wood under the lids to add a latch. I couldn’t figure out how to add it otherwise.
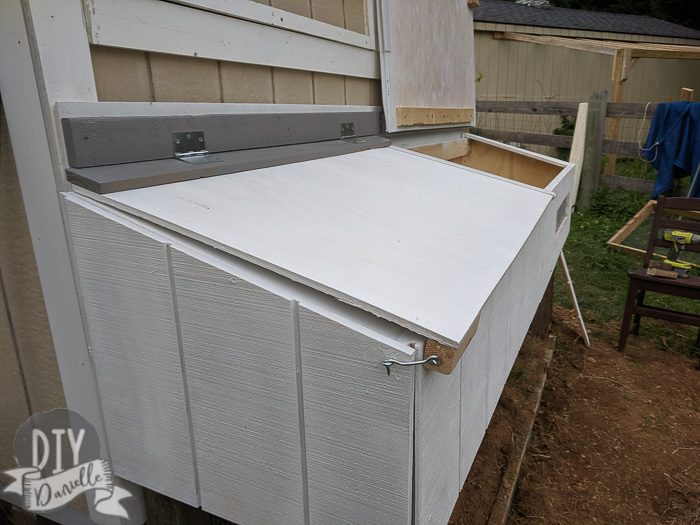
I made sure there was a second eye hook above so I could hold the lid open while I’m cleaning the cage. This works AWESOME.
Initially there was leaking where the two lids joined… so I added a piece of stick-on weather stripping. It makes the pieces harder to open than I’d like, but it works.
Then there was some leaking on the left side so I think the lid needs to be a bit longer on that side. I added another piece of weather stripping on that side to hold us over until I build new lids… something I may do long term.
I’m tempted to just make one long lid when I fix/replace the left side. But for now, it’s all working and everything seems to be staying dry.
Adding the Awning
The last addition was an awning to prevent water from coming in through the window. I used some scraps of Sunbrella type fabric that I had.
I also used a couple of scrap 2x4s cut at an angle. They’re screwed in from the inside out.
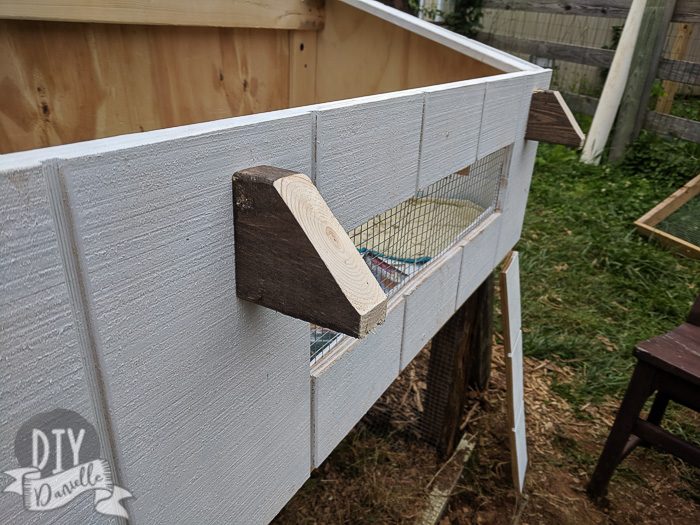
I cut my fabric to the correct size, sewed the edges so they wouldn’t fray, then used my staple gun to attach it to the wood. You’ll want to stretch it a bit. This looks a bit loose.

For the winter, I may take the scrap leftover from cutting out the window and use it to create a cover for the window.
Other Notes on the Hutch
I added a small thermometer on the inside to keep track of the temperature. Keeping the lid open when the sun is directly on the cage increases the temperature SUBSTANTIALLY during the summer. So keep the lids closed as much as possible!
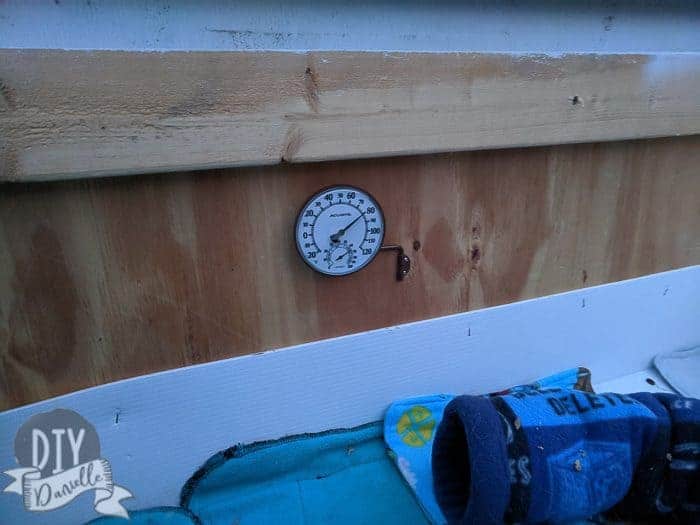
This thermometer allows me to keep an eye on temperature, although the important thing to keep an eye on is your guinea pigs. Mine go down to the lower level when it’s hot and seem pretty happy about it. They look active and happy. If they were acting lethargic in the heat, I might need to add something to cool down the hutch or consider moving them indoors during extreme heat.
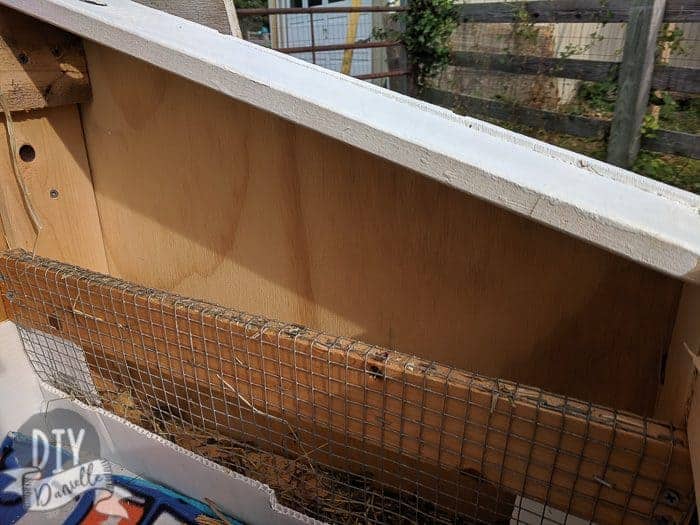
I added wire to block off the sides of the cage. I was stuffing hay in there for them but due to water leaking in on the sides it ended up being a bad idea (wet musty hay, sigh). I need to figure out what to do for those sections.
On one hand, if I make the panels bigger for the “roof” then I shouldn’t have any leaking. The hay along the sides could provide some insulation. I could also just store supplies there or maybe even add real insulation at some point. I’m not sure if that would help or make sense though.
In the humidity of the summer, I didn’t think the hay did well smooshed in there… I think there’s enough moisture in the air that it wasn’t a good fit.
ETA: We had a small gap in the wire on the other side. DO NOT DO THIS. We had a guinea pig try to get through and get stuck. I knew that small wire hay feeders were unsafe because they could get stuck, but I thought it was big enough to be safe. I was wrong and we lost one of our dear girls. It was something I’d debated removing and I have so many regrets now. We removed that section since. I will probably cut a piece of plywood to fit both sides now and remove all of the wire sides (we kept the wire side seen below because there’s no way for them to get in). I’m trying to decide if it’s worthwhile to add some insulation in those areas.
The best thing about the position is that the coop or tree seems to shade the hutch during the hottest part of the day. It’s working well!
I have a compost pile in a corner of the duck pen which is ideal for cleaning the guinea pig cage. I use fleece cage liners and shake them out over the compost pile. I also empty our litter box in there (it’s filled with paper bedding).
This cage is SUPER easy to clean and it’s AWESOME. The guinea pigs seem to be enjoying their extra space. I added rocks below for them to climb on and have a couple of chicken waterers on the bottom level so they have plenty of water to drink. I used two because these seem to leak and I wanted to make sure they always have water… I still change the water every day or two.
My next challenge is going to be growing some grass down below. I’d like them to have grass to play and hide in. The area does get sun in the morning so hopefully it’s enough. I threw some wheatgrass seeds in there when we first set it up and there’s SOME growth showing up now which is pretty exciting.
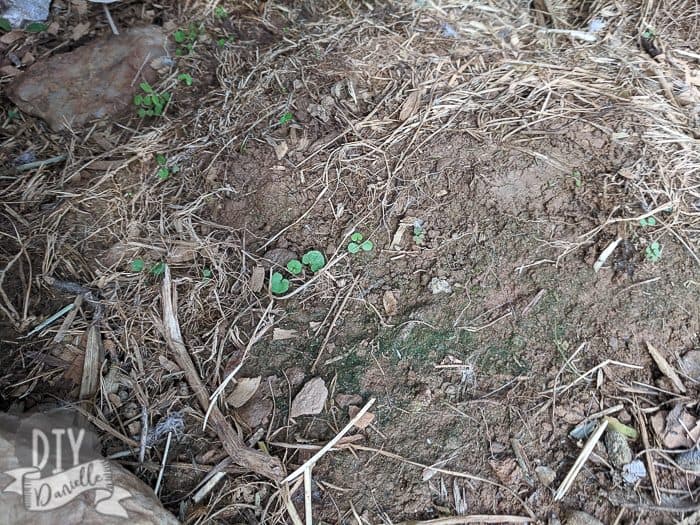
We usually pick dandelions for them so they have fresh greens to eat most of the summer, but it’d be nice to see a pretty carpet of green under there.
To give you an idea of the size of our cage, the hutch is 22×88″ (13.5 sq ft roughly) and the bottom area is 88×31″ (roughly 19 sq ft). The grand total square footage is 32.5 sq ft.
Video of the Process and Cage
Did you know I wrote a book about sewing for guinea pigs? You can get it on Amazon via the link below!
Here’s some other guinea pig blog posts!
- How to Sew Guinea Pig Cage Liners
- How to Make a Guinea Pig Hay Bag
- How to Care for Your Guinea Pigs
- Easy Guinea Pig Litter Box
- Sewing for your Guinea Pig
- Midwest Guinea Pig Cage Base
- Customized Guinea Pig Igloo
Eglu also makes a pretty neat outdoor guinea pig cage if you want something that’s easy to clean and that you don’t need to build!
Please share and pin this post! Thanks!

DIY Outdoor Guinea Pig House
Build an outdoor guinea pig cage and run. Also learn safety tips to make sure the guinea pigs stay happy and healthy
Materials
- 1x6s
- T1-11
- Pressured treated 4x4s
- 2×4's
- 2×2
- Coroplast
- Hardware cloth
- Fabric for the awning
- Hinges
- Hooks/closure
- Outdoor thermometer
Tools
- Screws/nails
- Shovel
- Heavy duty staple gun
- Sander
- Jig saw
- Glue gun
Instructions
- Use 1x6s for the floor.
- Start on the side pieces for the hutch.
- Make one side higher than the other so the roof has a slope.
- Use another 1×6 board along the back to connect the sides.
- Add another board in the front.
- Use T1-11 for the sides.
- Cut some plywood for the roof/lids.
- Cut a piece of plywood for the back.
- Prime and paint the exterior of the hutch.
- Use a jig saw to create a window for the hutch.
- Add a small cut of hardware cloth for the window and attach with a staple gun.
- Cut a hole in the bottom of the cage for a ramp.
- Use corrugated plastic as a liner.
- Cut around the opening at the bottom for the ramp.
- Stapled the excess plastic under the bottom of the hole.
- Dig up the soil for under the guinea pig run and lay wire under.
- Cut the 4x4s to the same height.
- Bury the 4x4s 2′ into the ground.
- Place the hutch on top of the 4×4 supports.
- Attach with screws to the side of the chicken coop.
- Add a ramp.
- Attach wire sides to the bottom level.
- Use a pressure treated 2×4 along the bottom for a frame around the front and a 2×2 on the top.
Recommended Products
As an Amazon Associate and member of other affiliate programs, I earn from qualifying purchases.
-
 Ryobi P305 One+ 18V Lithium Ion Cordless Hot Glue Gun w/ 3 Multipurpose Glue Sticks (Battery Not Included / Power Tool Only)
 -
 Ryobi One+ P5231 18V Lithium Ion Cordless Orbital T-Shaped 3,000 SPM Jigsaw (Battery Not Included, Power Tool and T-Shaped Wood Cutting Blade Only)
 -
 Ryobi ZRCFS1503GK 1.2 Amp Corner Cat Finish Sander (Green) Factory (Renewed)
 -
 Ryobi 18-Volt ONE+ Cordless Compression Drive 3/8 in. Crown Stapler (Tool Only) P317