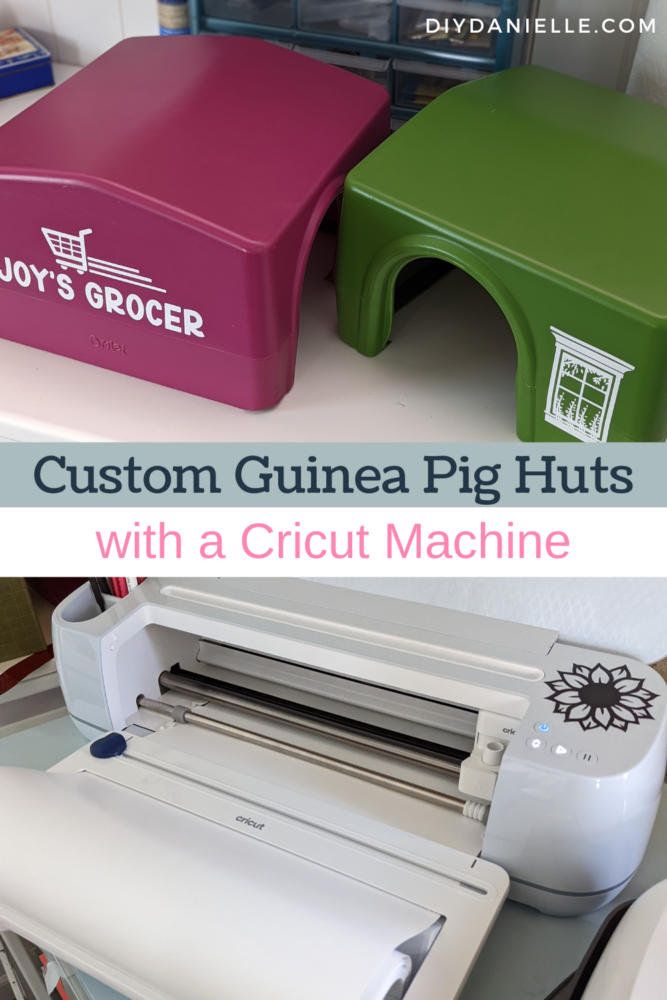
How to customize guinea pig igloos with Cricut Vinyl to create a guinea pig village. I used Omlet’s Zippi Guinea Pig Shelter as a base.
We recently got a huge outdoor guinea pig run setup inside my garden, surrounded by no climb horse fence AND electric fencing as well. I wanted a safe and large outdoor zone to keep our guinea pigs. Having the larger area allowed us to expand our guinea pig ‘herd’ to eight female guinea pigs. We got our first four guinea pigs from someone who raises hers 100% outdoors, through the Maryland summers and winters. They seem to do well, despite the weather, and we’re keen on keeping them outside where they can enjoy a more natural environment. It’s a bit sad to stick them in small cages outdoors.
Needless to say, I’ve been wanting to make a little village of guinea pig igloos and I had big plans to make them from sticks. Annnnnd that never happened. My project ideas always out pace my ability to get them finished. There’s a giant pile of sticks in my front yard, but in the meantime, I decided to use guinea pig igloos that I bought and customize them. This made me feel better about buying something— I just LOVE custom stuff.
Here’s how I made them…
This post may contain affiliate links which may earn me commissions should you click through them and take certain actions. As an affiliate for Amazon, Cricut, xTool, Home Depot, and other sites, I earn from qualifying purchases. Please DIY carefully. View my full legal disclosures here.
The majority of my content is generated by me, as are 99% of the photos and videos, but I utilize technology for titles, descriptions, video editing out all of my ums, and occasionally for text overlay on images.
Please read the whole post so you don’t miss any important information!
Guinea Pig Igloos: Base Shelter to Update
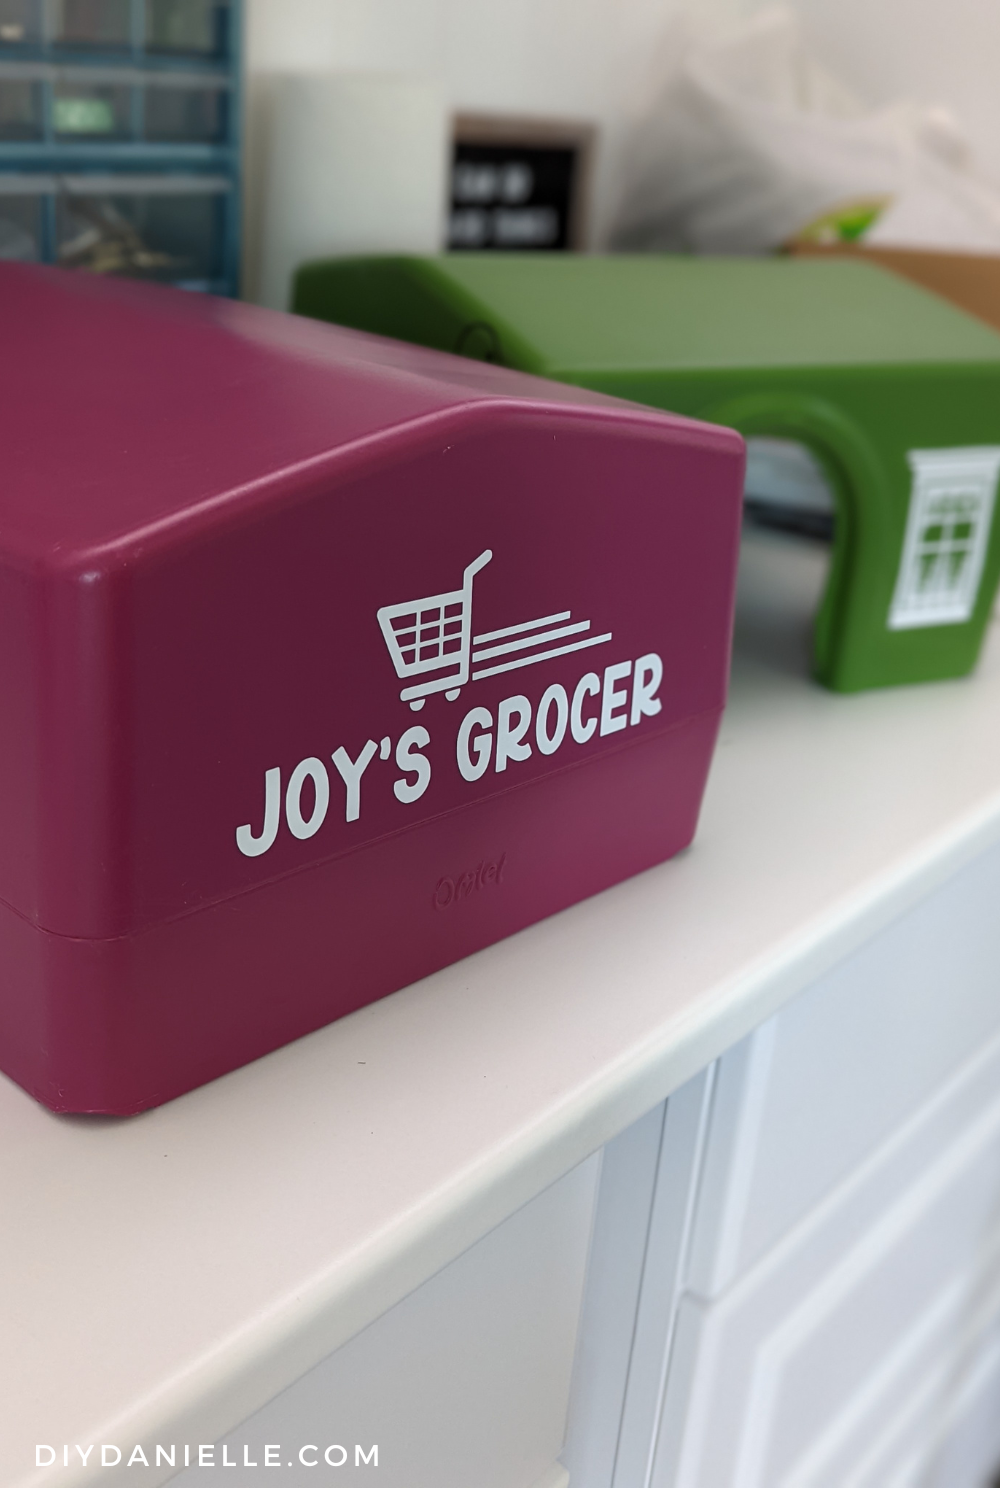
I started by purchasing (2) Green Omlet Zippi Guinea Pig Shelters and (2) Pink Omlet Zippi Guinea Pig Shelters. I wish they had more color choices, but these are great and I didn’t want to attempt to spray paint them. If the paint ever fades, I’ll give it a try as I’ve done a few painted plastic projects. It’s easy enough, but I didn’t want to risk chipping paint.
The nice thing about these shelters vs. some other types of igloos is that the sides are relatively flat so they’re easy to add vinyl to.
I BELIEVE the Omlet plastic is dyed during the plastic pouring process which means it doesn’t chip away (at least from what I’d seen). It can fade, but that’s not as big of a deal as guinea pigs eating paint chips.
The traditional igloo style, such as this pink Igloo with castle type top, are likely more difficult to add vinyl to because they’re circular with a castle top (no vinyl there). They’re also likely a bit more scary for the guinea pigs because they’re see through. Rounded sides are more difficult to add vinyl to: You need to make the design smaller so it can be read fully from one direction and you have to carefully apply the design so it doesn’t wrinkle. That’s true for flat rectangular surfaces too, but I find circle type objects harder, particularly if your design wraps around the circle.
There are also some wood igloo shelters if you prefer. Just make sure you find one that’s the correct size. We bought one that said guinea pig and ended up being FAR too small (hamster size). This wood shelter is cute and has a removable roof… from reviews, it seems like it fits guinea pigs, although guinea pigs DO range in size.
If you buy a wood shelter, I prefer to use HTV on Wood (tutorial on how to apply it) if possible. You’d probably need a mini iron to apply it though on a small structure like these.
Our Guinea Pig Setup
Just for reference, we own the 6×9 outdoor guinea pig run. It’s 6’8″ tall so it’s easy to stand in and has plenty of room for the guinea pigs to run around. We started with the 6×6 size and bought the expansion section. It’s possible to keep expanding over time if you want to buy new sections.
I believe the guinea pigs should be fine this winter without the special hutch, but I plan to buy one anyways- just in case. The Eglu hutch is insulated and should give them additional warmth. And I’ll stuff the hutch and other houses with fresh hay for added warmth. The Eglu hutch can be attached to the outdoor guinea pig run using the Eglu Go Hutch Connector Kit or with the tunnel connector kit to the Eglu Go Hutch + Run.
How to Apply Vinyl to a Zippi Guinea Pig Shelter
As mentioned before, I started with Green and Pink Omlet Zippi Guinea Pig Shelters for this project.
Supplies:
- Cricut Machine: I’m using a Cricut Maker 3
- Permanent Vinyl: I used Cricut Smart Vinyl in Black and White with the Cricut Roll Holder
- Cricut Transfer Sheets
- Optional: Use my designs on DesignSpace
Use the Discount Code DIYDANIELLE on cricut.com for 10% off any cutting machine or heatpress (no minimum). Excludes: materials/accessories/mystery boxes/etc. Applies to US/CA only, code expires 12/31/23.
Video Tutorial
Step 1: Cut the Vinyl with Your Cricut Machine
Cut the vinyl with your Cricut machine. To do this, you simply pull up the design in DesignSpace and tell it you’re ready. You’ll go through connecting your machine and choosing your materials (Permanent Vinyl- I used Smart Vinyl).
If you use my designs and the same shelters, I have the designs sized to the correct size for the shelter. If you are creating your own design or using a different shelter, make sure to measure the size of the shelter and adjust the size of your design accordingly.
Once you’ve got the designs ready in Design Space, you can load your vinyl into the machine and press the blinking triangle button (the ‘go’ button). It will cut your design, then blink when it’s time to unload the design.
Step 2: Weed your design
Weed away the excess vinyl that isn’t part of your design.
Step 3: Apply Transfer Paper
The transfer paper simply sticks over the design. Make sure to cut it approximately the same size as your design or slightly larger.
Step 4: Clean and dry the shelter.
It’s important that the shelter is clean and dry when you apply the vinyl. If you have a new shelter, this shouldn’t be an issue, but I needed to clean one older one.
Step 5: Remove backing on vinyl
Remove the backing on your vinyl carefully, ensuring that all pieces are sticking to the transfer paper.
Step 6: Stick on your vinyl to the shelter.
Stick the vinyl on the shelter, making sure it’s straight and exactly where you want it before adhering it. I like to rub the design firmly so it sticks well.
Step 7: Remove transfer paper.
Carefully peel off the transfer paper and make sure that none of your design comes off with it.
Step 8: Enjoy!

I’m an ambassador with Omlet so if you’re new to the brand and want a 6% discount code, email me ([email protected]) with the email you’d like to sign up with. If you click my links to the products though to purchase, I think you still get a 5% discount as a new user when you sign up for the newsletter.
Please share and pin this post! You can also post your project and tag the DIYDanielle team on Instagram @doityourselfdanielle!