
How to organize measuring cups, measuring spoons, and keep a list of commonly used measurements on the inside of your cupboard.
This post may contain affiliate links which may earn me commissions should you click through them and take certain actions. As an affiliate for Amazon, Cricut, xTool, Home Depot, and other sites, I earn from qualifying purchases. Please DIY carefully. View my full legal disclosures here.
Please read the whole post so you don’t miss any important information!
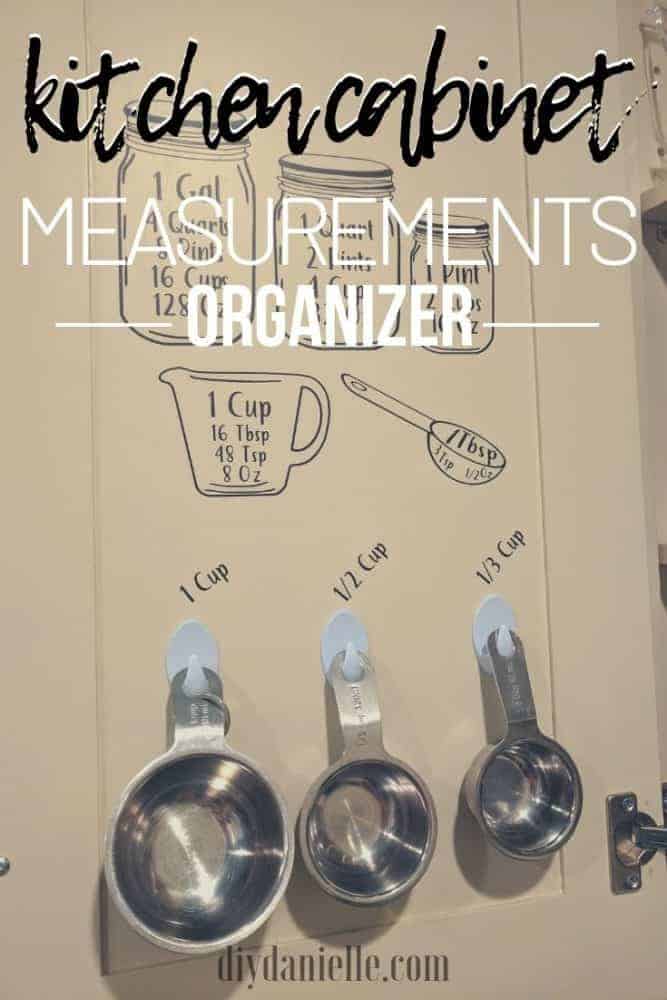
Two things drive me nuts in my kitchen- not being able to find measuring cups AND measuring cups blocking the drawers from closing. I saw this cute idea on Pinterest where you can put the measurement conversions and measuring cups on the back of the cupboard door… I decided to do this in our kitchen!
Here’s the basic idea…
Supplies
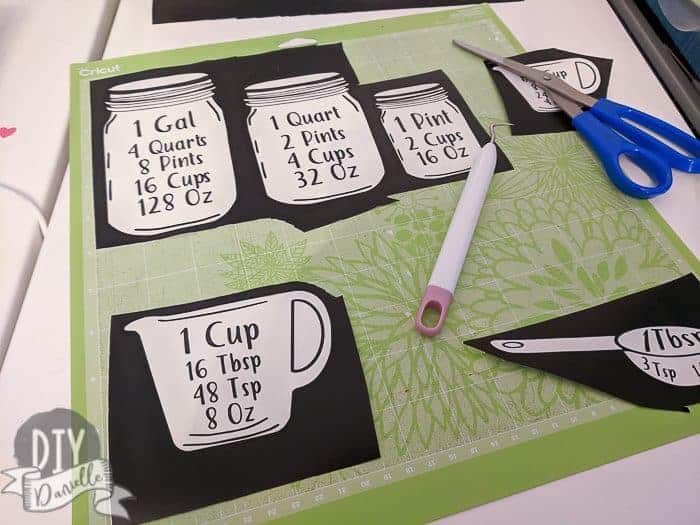
- While I could have created my own, I decided to buy this easy to upload SVG on Etsy. It was $3 or thereabouts so it made sense to save time.
- Cricut Air 2 or Cricut Maker™
- Cutting mat
- Weeding tool
- Removable Vinyl from Cricut
- Transfer paper
- Hooks: I got mine at Dollar Tree. Make sure whatever you choose fits the hole in your cups/spoons. I used a different set for the cups and spoons because of this.
Use the Discount Code DIYDANIELLE on cricut.com for 10% off any cutting machine or heatpress (no minimum). Excludes: materials/accessories/mystery boxes/etc. Applies to US/CA only, code expires 12/31/23.
Adding the Vinyl to Your Cabinet
Thoughts on Cutting
If you want to save a little money on cutting these, consider which items you really need and delete the ones you don’t. If I recall, you may be able to do that with this file. I printed everything, then later realized that I didn’t need all of the measurements that I printed- I think there were some measuring spoon amounts that I didn’t own spoons for (I have a pretty basic set).
Vinyl Choice
Vinyl choice is important. You want to make sure you’re using removable vinyl, not permanent/outdoor vinyl. The removable vinyl will allow you to take the decal off at some point more easily WITHOUT ruining the finish on your cabinets.
If you make a mistake and use permanent vinyl, don’t stress. Hopefully you don’t ever want to take it off, but if you do then I find that using heat (such as a hot hair dryer) to warm up the vinyl helps allow me to peel it off without ruining the finish. You probably want to use heat regardless of what type of vinyl you use, justttt to be on the safe side.
Applying the Vinyl
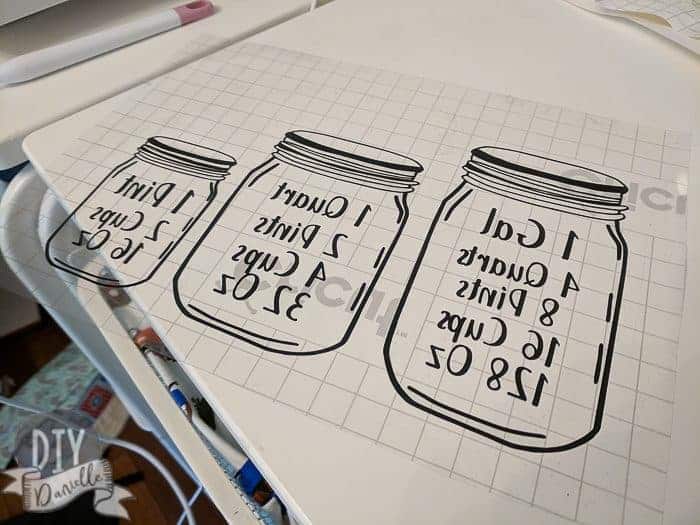
Applying the vinyl is simple. You cut the vinyl using your Cricut. You weed the excess away.
Stick a strip of your transfer paper (slightly larger than the design you’re transferring) to the vinyl. Remove the vinyl backing.
Place your vinyl where you want it on the inside of the cabinet. Finish by removing the piece of transfer paper, making sure all of your vinyl is stuck to the cabinet.
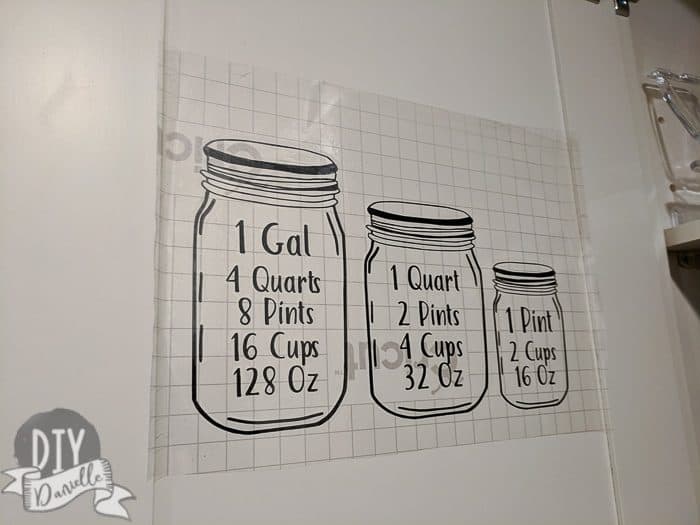
Position of the Vinyl
I find the measuring cups and the conversions are most useful where I prep all of my food. This is right next to the oven and under my plates, bowls, and casserole dish cabinet. That’s why I chose the inside of that cabinet to use for this project.
Think carefully about your placement and how much room everything needs to fit correctly.
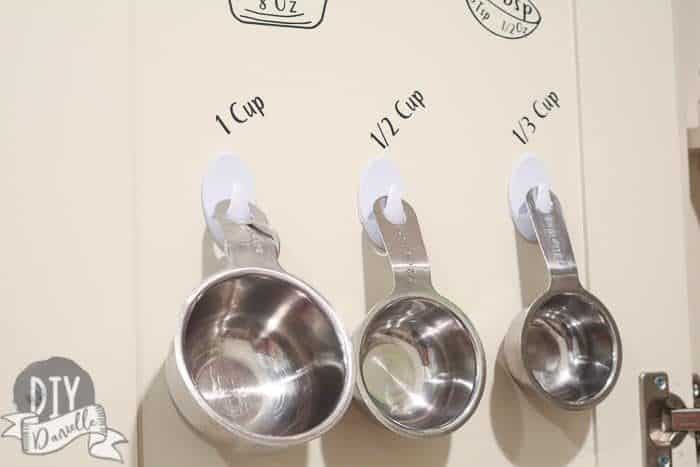
Adding the Stick On Hangers to Your Cabinet
This is as easy as sticking the hangers onto the inside of your cabinet. Just peel off the back of the stickers. I found these hangers at the Dollar Tree which means the project was cheap-cheap-cheap.
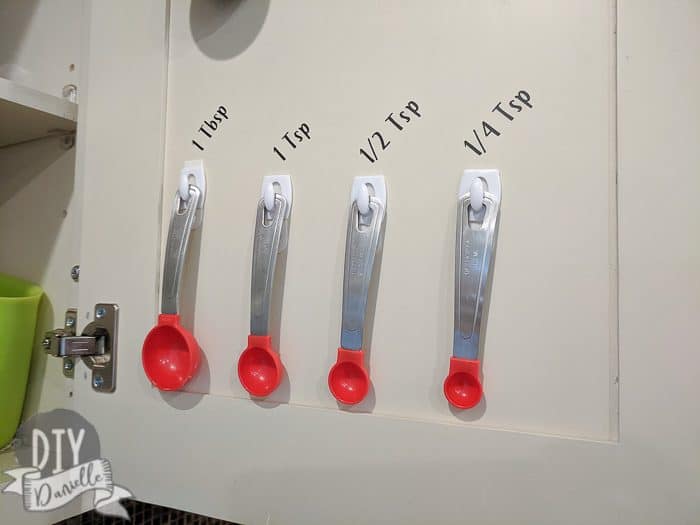
Placement of the Measuring Cups
Think carefully about where you want your cups positioned. One thing we’ve noticed is that there’s one spot where the measuring cups hit the plates because of how the plates are positioned in that cabinet. It’s something to consider as you’re placing your vinyl/stick on hangers.
The 1/4 cup couldn’t fit on the left side of the cabinet so it looks sort of silly above the measuring spoons all by its lonesome, but it works.
Here’s the spoons:
I LOVE how these came out and they’ve been really helpful. I particularly like having a special spot for the measuring spoons and cups. It’s easier to stay organized and they’re close at hand when I need them. I just need to train my husband and kids to put them back in the correct spot when it’s their turn to unload clean dishes.
Love organization ideas? Here are some organizers we’ve built for our home: Kitchen Wrap Drawer Organizer | Under Sink Organizer | Stroller Organizer | Wall Mounted Dish Drying Rack | Electric Toothbrush Holder for Wall | DIY Over the Door Shelf
Please share and pin this post! If you make this project, share it in our Stuff Mama Makes Facebook Group. We have regular giveaways for gift cards to craft stores. You can also tag me on Instagram @doityourselfdanielle; I love seeing everything you make!
Google Web Story: Organizing Measuring Cups in Kitchen with Your Cricut