
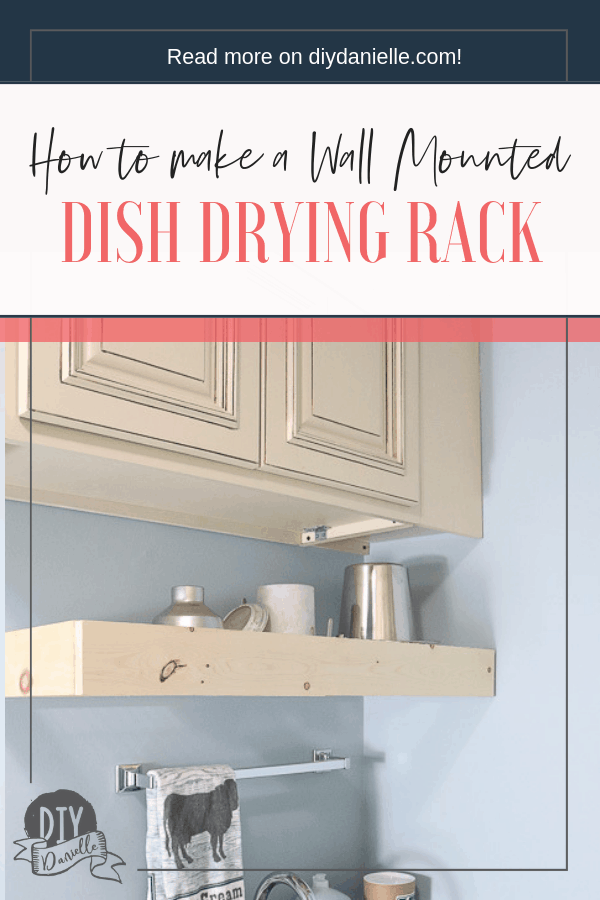
How to make a wall mounted dish drying rack. This is the perfect DIY project to organize a small dish washing area, such as the one I use for cleaning up our milking supplies.
This post contains affiliate links. If you make a purchase using these links, I may receive a commission from the sale. This does not impact your price for the product.
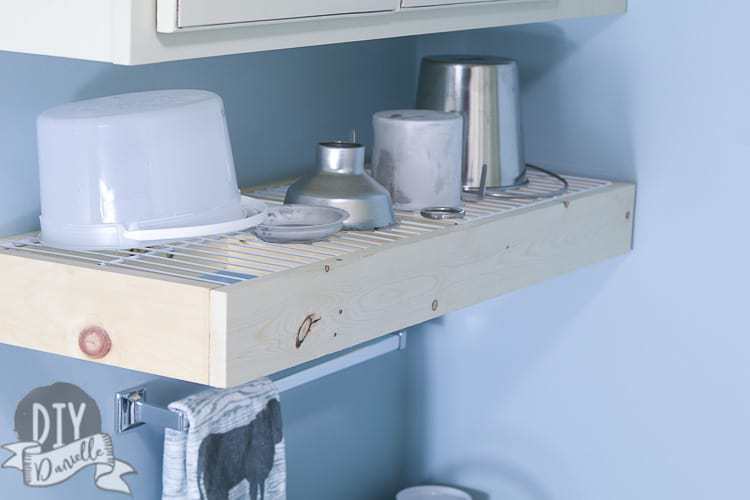
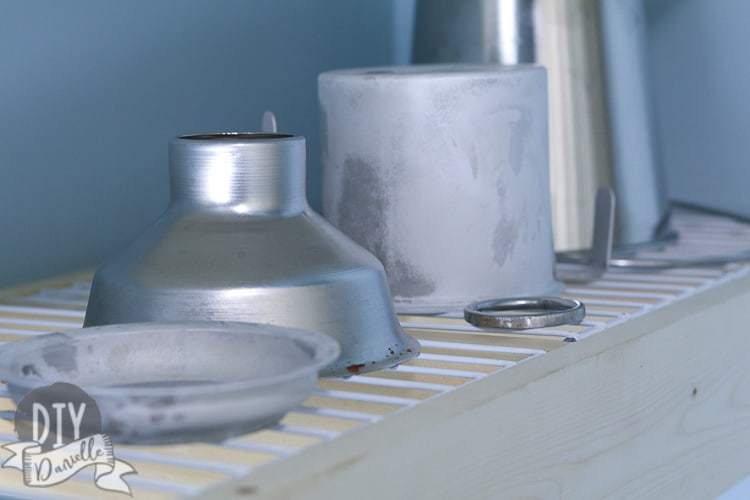
We have a new adventure- milking goats! I’ve been wanting goats foreeeevvvver and we finally moved to a property big enough for them. When I started doing research, I decided on a breed of goats used for milk, figuring that if they produce milk and clear away weeds and have a super awesome pet value, then that’s even better. So we brought home two baby Nigerian Dwarf goats and one adult doe who is “in milk.” Our new house has a mudroom off the garage where I milk, and my husband was quick to direct me to use the mudroom sink for washing all of the goat supplies. It’s also where I’m filling water buckets because it’s too cold to use the hose. Unfortunately there is no counter space for drying the goat milking items. My husband decided to whip me up this super easy wall mounted dish drying rack to use.
Can you tell he’s really motivated to keep my goat adventures as close to outdoors as possible? LOL!
Here’s how he made the rack. He used two short wire shelves that were leftover from some project… you could choose to use one long piece instead, but we wanted to make good use of items taking up space in the garage.
Make sure to check out my book: 14 Easy Sewing Projects for Your Kitchen!
Supplies
- 1x4s
- (3) 11.75″
- (2) 33.5″
- (2) 15.5″ wire shelves
- Kreg Pocket Hole System
- Router Attachment for Drill (use one that works for your drill)
DIY Wall Mounted Drying Rack
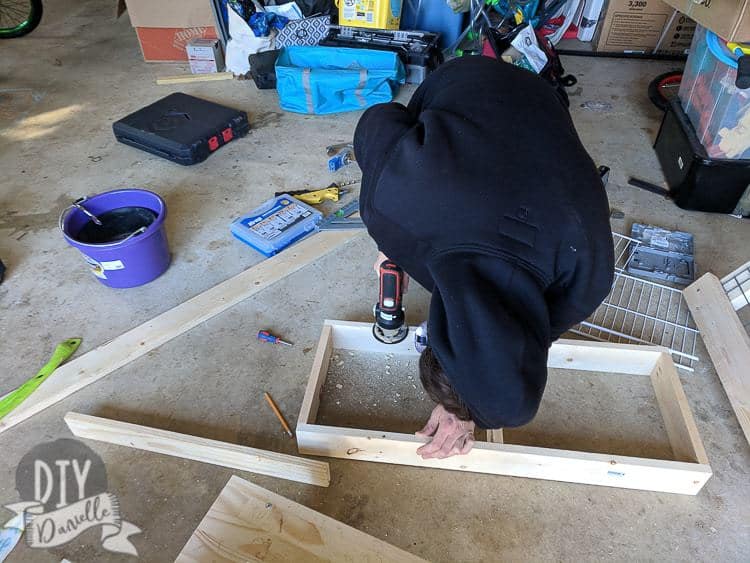
You will need to begin by cutting your wood to the specifications above, as well as cut your shelves to the right size. You can adjust the measurements for your particular space though… don’t just go with what we used!
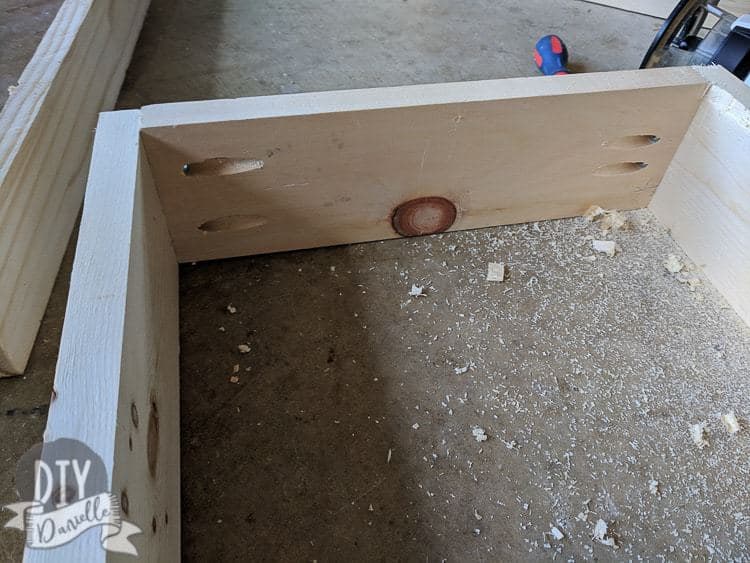
To create the frame for the drying rack, we used pocket holes in the three short pieces. Each one has two pocket holes on each side that allow you to attach it to the long sides. Note that we used three short pieces of wood… this is because our shelf pieces were short and we wanted a bigger drying area. The third piece of wood was attached in the middle, centered at the 17″ mark.
This Kreg master system comes in really useful for creating pocket holes so that the screws are hidden. You can certainly just use screws on the outside, but the finished product won’t look as nice in my opinion.
Once that was finished, my husband used his router attachment for the drill to create a bit of a lip for the shelves to rest on.
See how it rests on the edge?
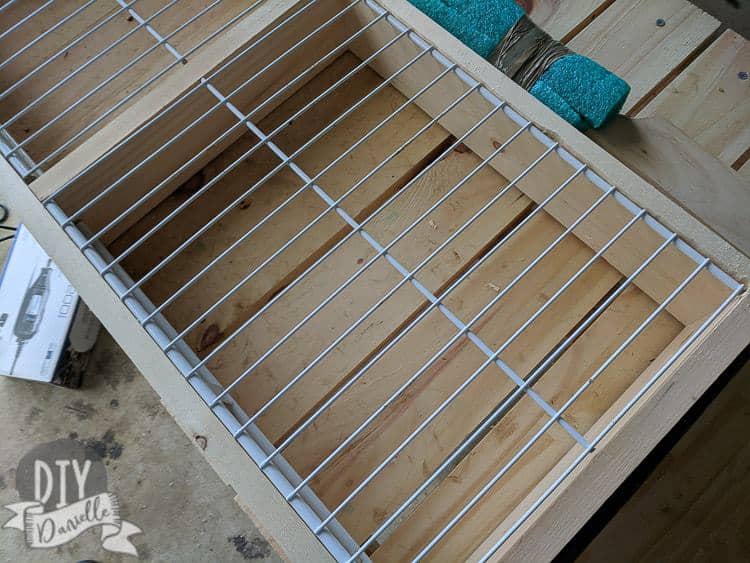
He also screwed the shelves in as well.
Isn’t it perfect?! I LOVE it. I wanted to paint it, but I’m digging the raw wood and I may keep it like that.
The most satisfying part is that we got some junk out of our garage that was taking up space- and put it to good use, rather than sending it to the landfill!
Love kitchen projects? Learn how to build a drawer organizer for your kitchen wrap.
Could you do me a favor? Pin this post or share it!
Google Web Story: Wall Mounted Dish Drying Rack
Thank you for your post! We have a broken grill with a bunch of missing pieces but decent racks I could definitely use for something like this. We might even make an extra for our milking supplies:)
@Ruth, YES! That’s fantastic- the grill rack could also be used over a fire pit to cook food. Fire pit food always tastes extra good too. Good luck with your upcycle!