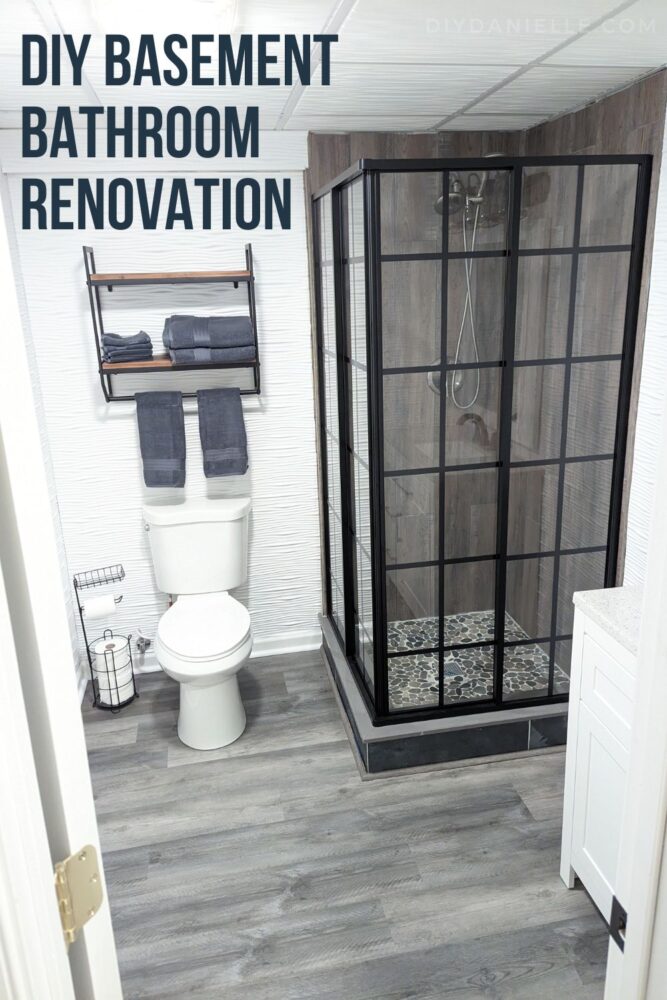
How to finish a basement bathroom with rough in plumbing. A guide to adding a usable bathroom that adds to your home’s value!
When we moved in four years ago, our basement bathroom had the rough in plumbing finished, but we ended up using the space as a storage area as we couldn’t afford to finish it yet. Now that we’ve settled and have some extra time and money to throw at it, we decided to finish the basement bathroom for guests to use when they stay. This has been SUCH a long project- our family had COVID TWICE since we started it, but I’m so pleased with how it came out!
This post may contain affiliate links which may earn me commissions should you click through them and take certain actions. As an affiliate for Amazon, Cricut, xTool, Home Depot, and other sites, I earn from qualifying purchases. Please DIY carefully. View my full legal disclosures here.
The majority of my content is generated by me, as are 99% of the photos and videos, but I utilize technology for titles, descriptions, video editing out all of my ums, and occasionally for text overlay on images.
Please read the whole post so you don’t miss any important information!
Products Used in Our Bathroom
Before I walk you through the process we had to get this rough-in finished, I’m going to give you links to all of the products we used. I have separate tutorials for installing some of these, but
Products Used for Basement Bathroom Renovation
These are products that I used on the basement bathroom renovation.
iDesign Spa Rectangular Trash, Waste Basket Garbage Can for Bathroom, Bedroom, Home Office, Dorm, College, 2.5 Gallon, Black
This attracts dust, but I like it anyways. Hopefully once we aren't still doing construction in there, it won't be an issue. It's easy to rinse out and rinse off, however. I didn't want metal that might rust.
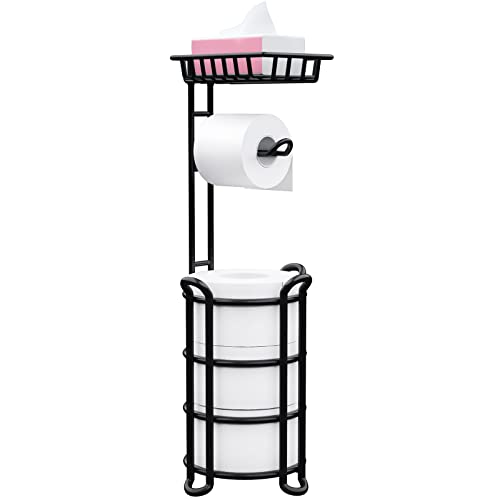
Toilet Paper Holder Stand with Shelf, Free Standing Toilet Tissue Roll Storage Rack for Bathroom, Black
I went with a free standing toilet paper holder so I didn't need to cut into my pretty new walls. I have this theory that everyone is more likely to replace toilet paper if the roll can slide off and on easily so this was my choice.
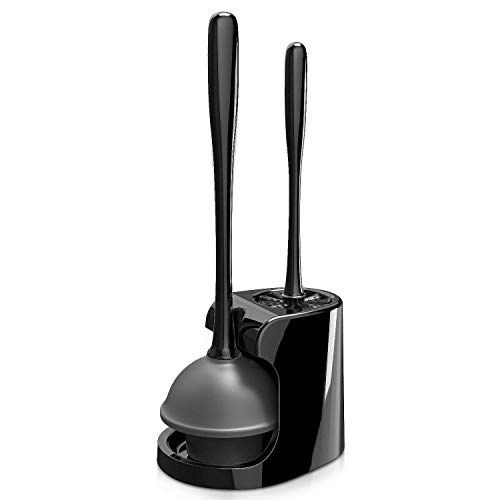
MR.SIGA Toilet Plunger and Bowl Brush Combo for Bathroom Cleaning, Black, 1 Set
Nothing fancy. Just a toilet plunger and bowl brush set that we had to use FAR TOO SOON. And there wasn't a toilet problem... it was a septic problem. Fun Times.
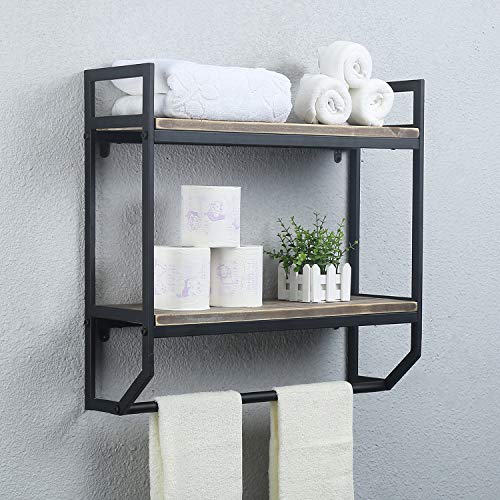
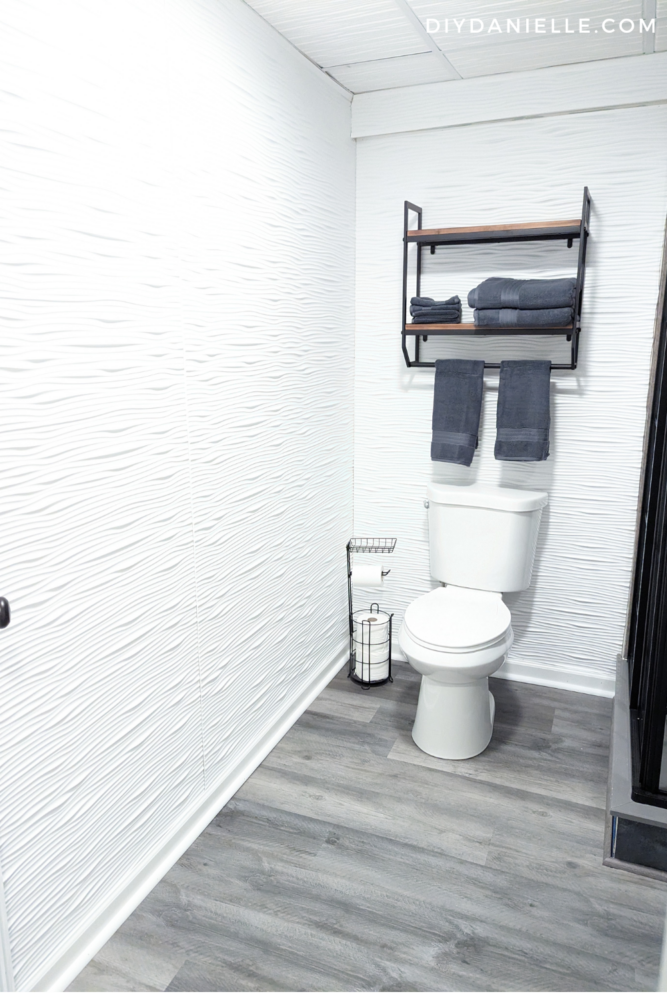
2-Tier Metal Industrial 23.6" Bathroom Shelves Wall Mounted,Rustic Wall Shelf Over Toilet,Towel Rack with Towel Bar,Utility Storage Shelf Rack,Floating Shelves Towel Holder,Black
Absolutely love this. It gives me extra space for towels and other items. I need to put some decor on ours, however... it's a little boring currently.
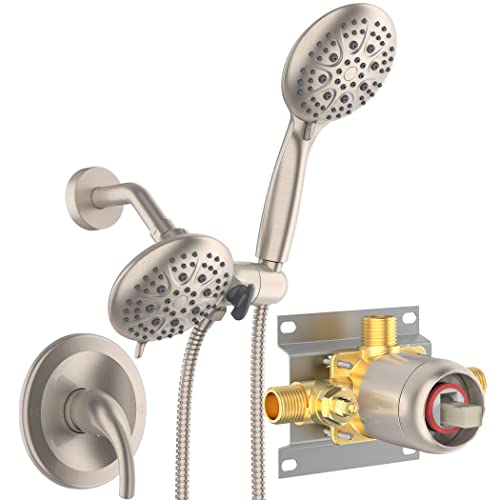
SR SUN RISE Shower System with Handheld Shower and Rain Shower Combo Set High Pressure 5-spray Dual 2 in 1 Shower Faucet Patented 3-way Diverter Brushed Nickel (Valve Include)
I would have liked to go with a shower head that matched our sink faucet, but I had this on hand and I wanted to use it. I think it looks fine though. Whatever. I hate trying to finish-match this stuff.
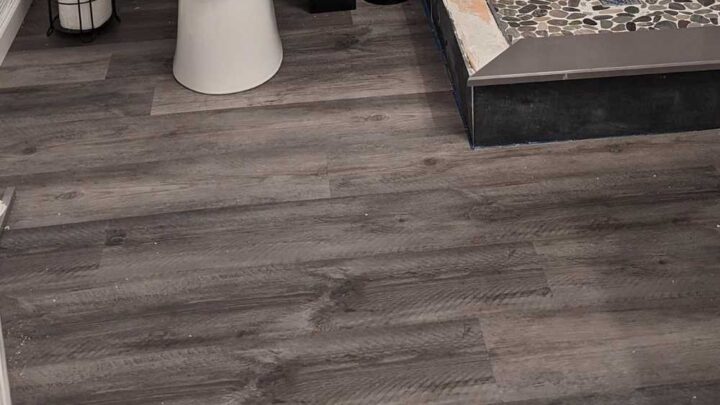
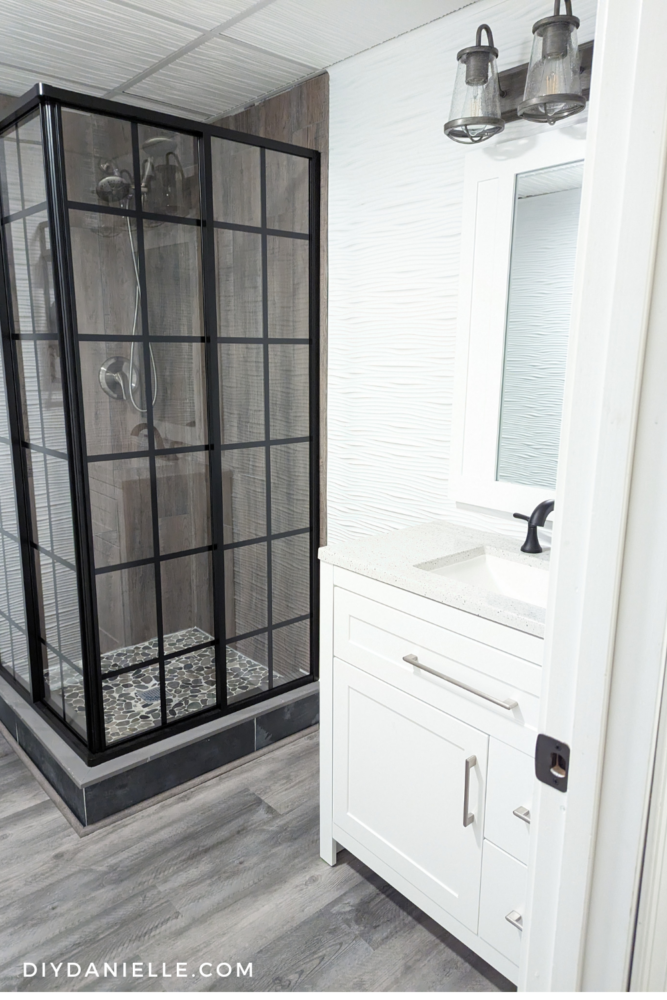
Woodland Beaufort Birch Vinyl Plank Flooring (Laminate Floors)
I love love love these floors. I used them in my she shed too. Ignore the construction debris. You'll get pretty pictures later. I bought some quarter round that matches the flooring for around the shower, then white PVC quarter round for the rest of the room along the baseboards. It's gorgeous (not shown in this picture).
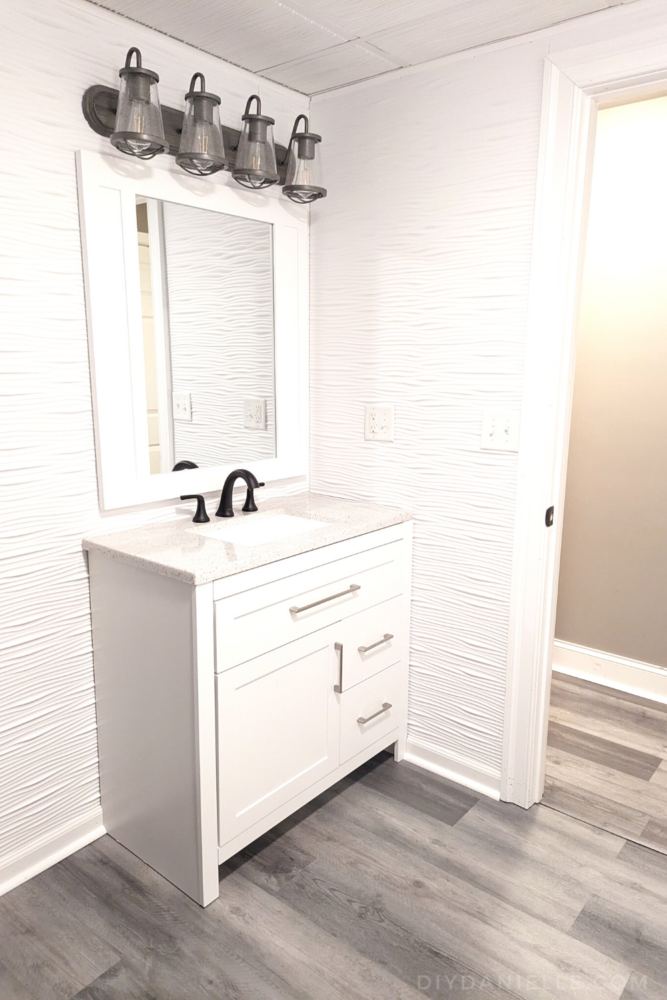
33 in. W x 36 in. H Framed Rectangular Bathroom Vanity Mirror in White
Again- went for white here and framed. It matched the original vanity that I got- unfortunately the vanity was broken and I paid the ADHD tax because I didn't open the box until a year after I'd purchased it. Womp womp. It wasn't an expensive vanity though so at least there's that.
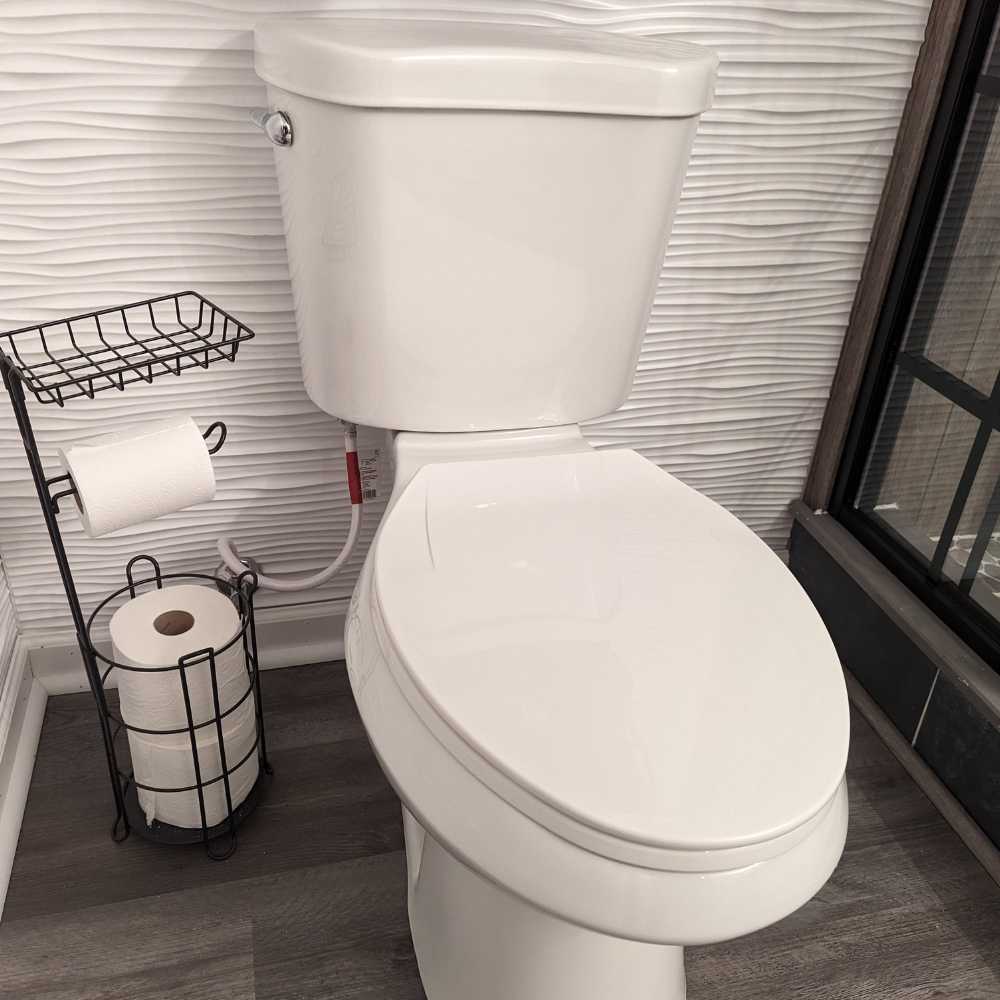
2-Piece 1.28 GPF High Efficiency Single Flush Elongated Toilet in White
Nothing special about this- it's a toilet. But it's the right color. I wanted WHITE everything so the space would appear brighter... but I didn't want it to look like a hospital so I added other darker items (like the flooring and tiles).

Georgina 30 in. 4-Light Weathered Iron Industrial Bathroom Vanity Light with Clear Seeded Glass Shades
I really like the Edison style bulbs and the rustic, but almost modern look to these. They look better in person, the photo isn't great (it's hard to photograph directly at a light).
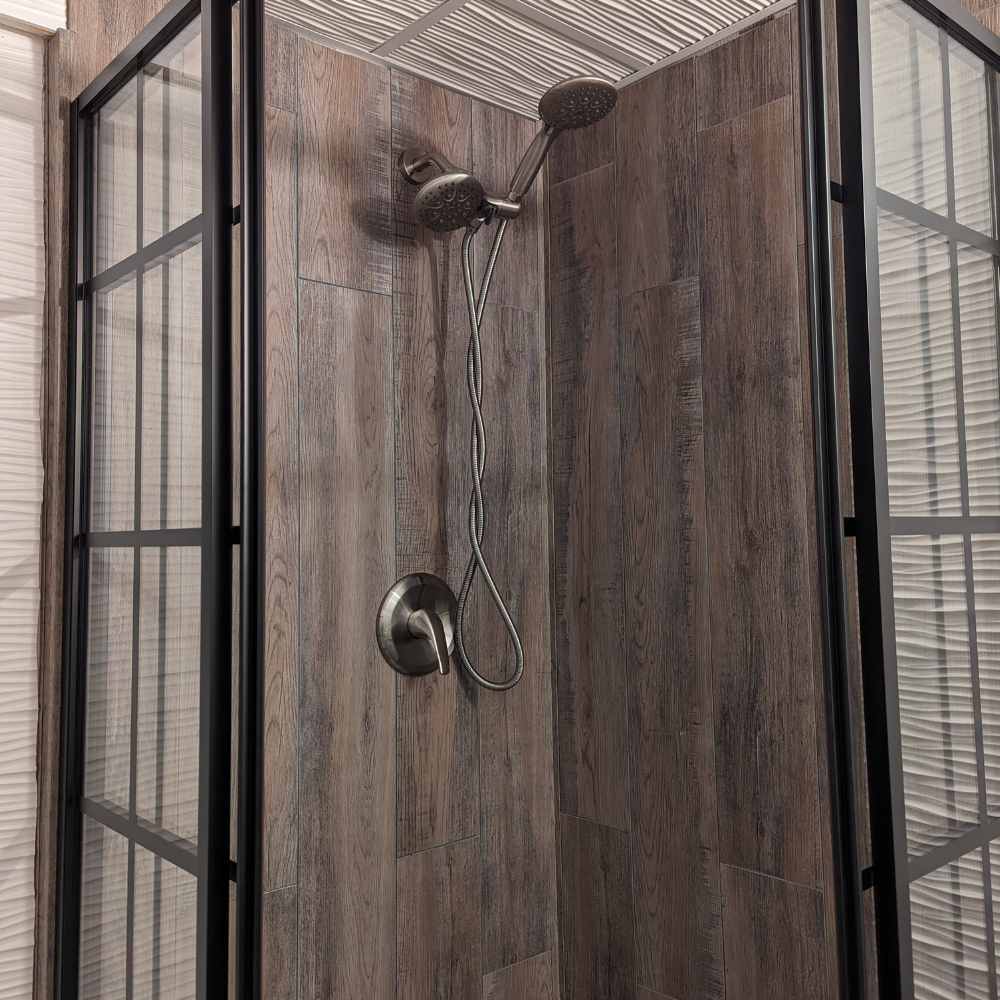
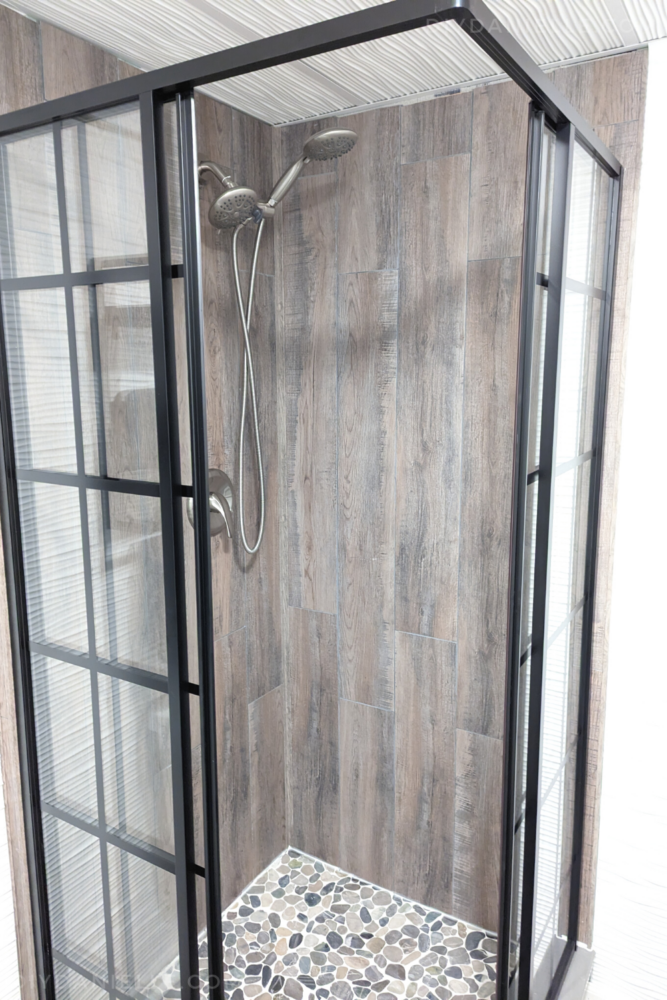
Palisade Wall Planks
I was worried these would clash with the flooring, but I think they work together. If not, don't tell me. I don't want to know. I just want to call this bathroom finished and not think about it again. This project has taken up mental space for four years. I'm done.
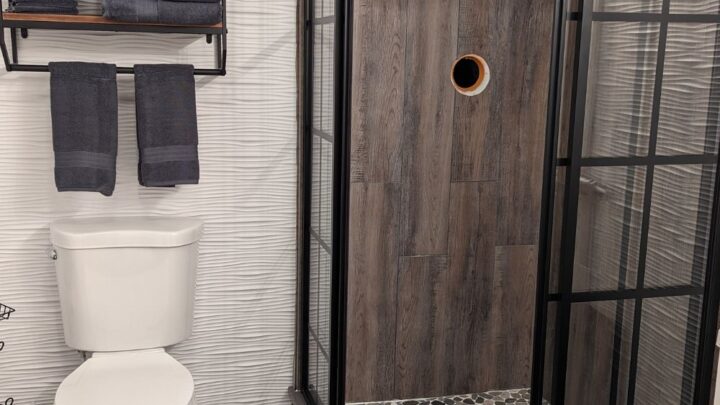
Dreamline Shower Doors from Home Depot
These doors are amazing. My husband and I think that the framing on the glass is a bit plasticky looking, but overall it's a nice look and I LOVE how the door opens at the corner. There are other options that don't have the window frame type look that might be a good alternative if you aren't a fan either.
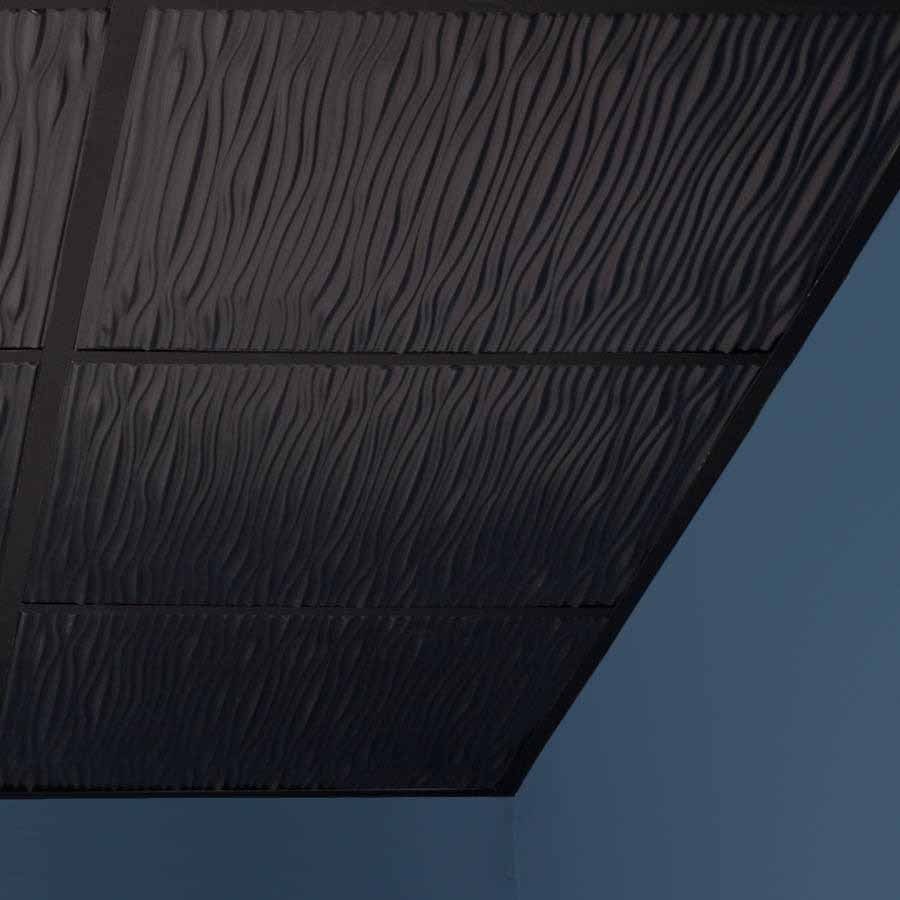
Genesis Drifts Ceiling Tiles
This is a stock photo from the website of the black version. I was going to replace with my own image, but the black tiles were so tempting to buy... and I think you deserve to see both color options. These would probably be awesome in a home theater?
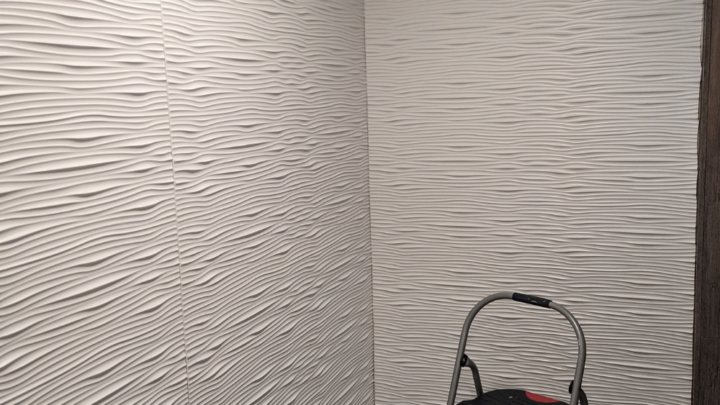
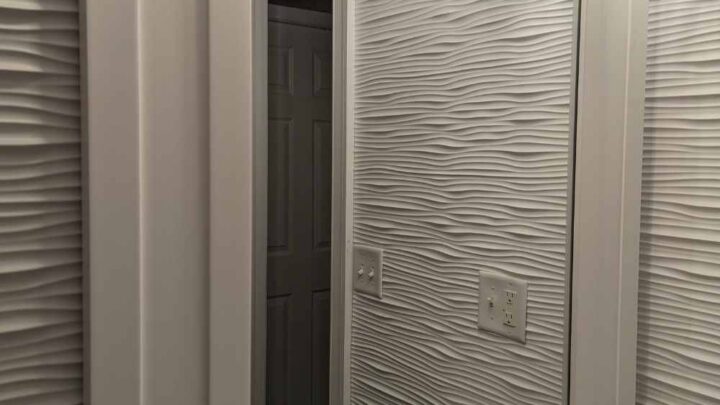
Fasade Wall Panels: White Matte Wave
I love these. I thought afterwards that I probably should have just done the priming and painting (and maybe some drywall work) so I could paint the walls whatever color I wanted. But the white REALLY helps open the space up. And it was really easy to install.
How to Finish a Basement Rough-In Bathroom
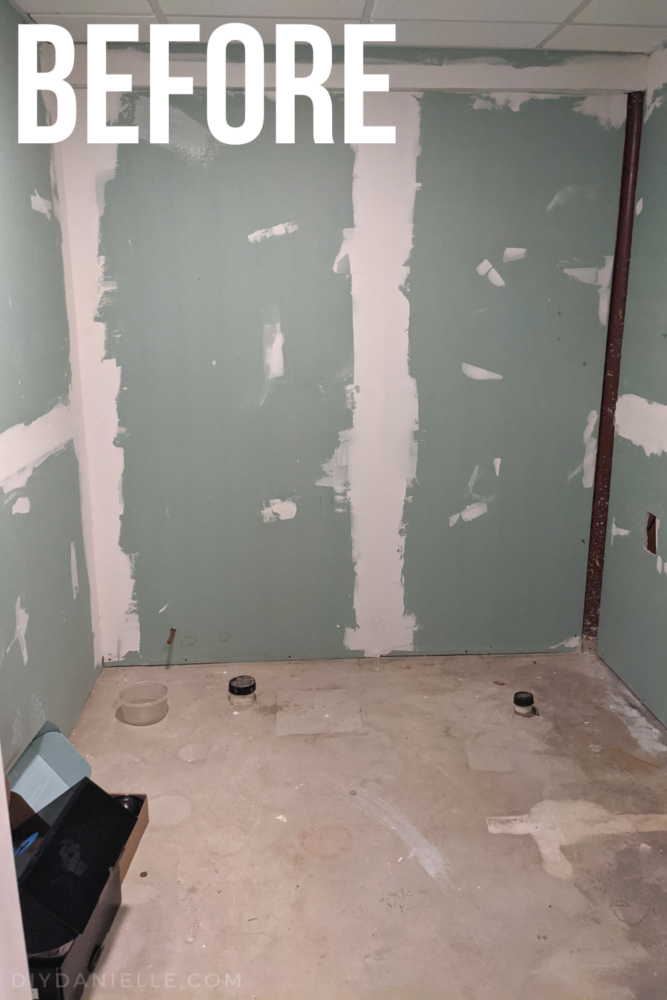
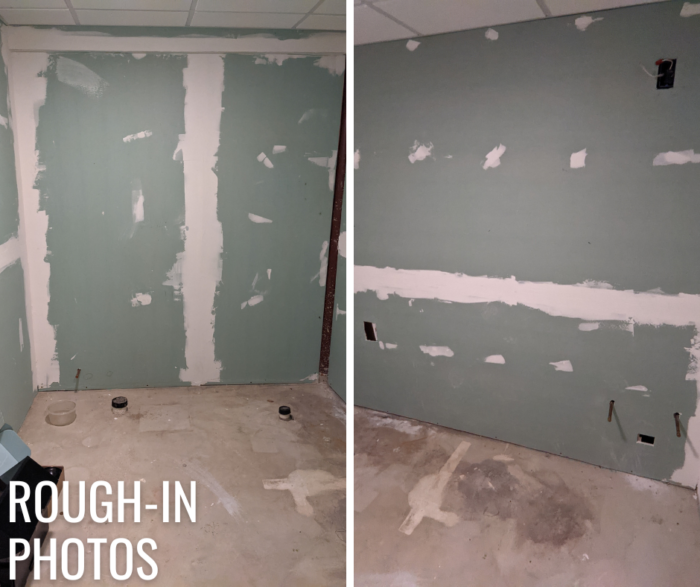
First of all, the former owners had done the rough-in work for this bathroom. This is what the basement bathroom looked like. We didn’t touch it for 3 years, instead using it for extra storage.
I finally worked up the energy to work on this when my kids returned to school after the pandemic shut down. We were using the basement as a guest room and having a bathroom down there was important because my mom, 70 years old, was having to trek up and down the stairs when she had to use the bathroom at night.
Step 1: Double and Triple Check that you have your necessary plumbing and electrical setup.
This was an epic nightmare. We initially thought we had everything correct, but we couldn’t find the sink drain. We hired a plumber to come in and add the drain. TWO plumbing specialists for the same company came out… they both thought we’d need to jack up the concrete floor to run the plumbing. Y’all. They finally came to do it, tore up the flooring, and realized there was already a drain in the other wall. We didn’t think to check there. It was stupid that we didn’t check- but somewhat irresponsible that the contractor didn’t.
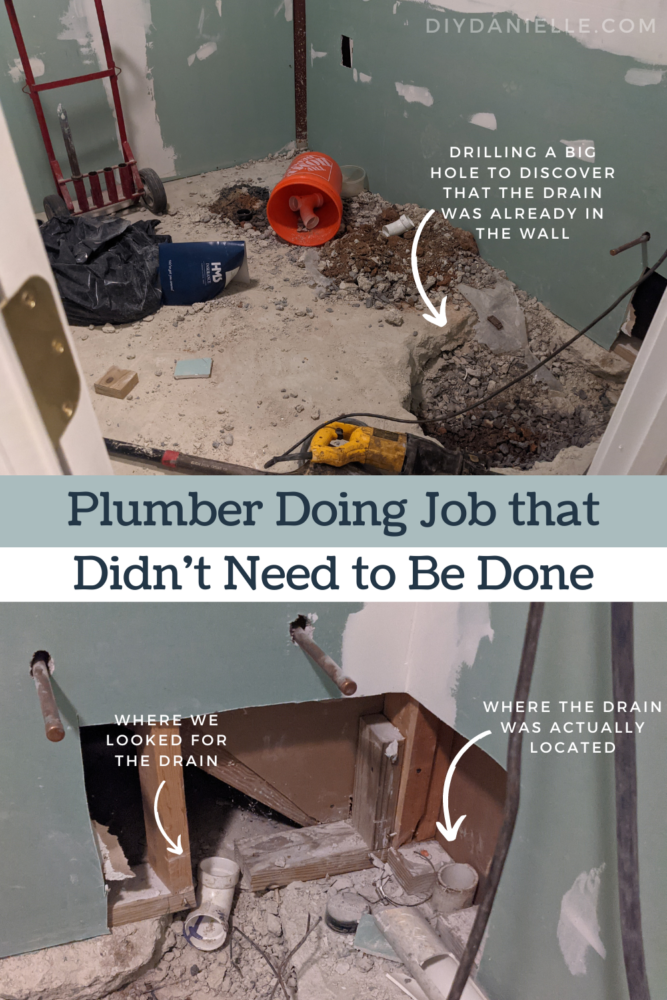
Also… yeah there’s more… the plumber had two different people come out to look to see if the drains were appropriate for the bathroom. They noted that the plumbing drained into the sump pump which they said was fine. At the time I remember one eyebrow going up and I was like, “are you SURE?” I mean… our sump pump has an unsealed lid. They were having issues with the toilet not draining and they said it was because our dehumidifier drained into it and the tube slid down too far. I was like, “Sooooo… the toilet won’t flush if the dehumidifier tube slides too far down… that seems… problematic.” But I was assured it was fine.
Spoilers: It was not fine.
Someone turned off the electric to that pump at some point (no idea why or how) and after a few days of use, the toilet wouldn’t flush. My husband thought the pipes were frozen or that there was a clog so he was pouring hot water down the drain, trying to unclog it, and in the meantime… over in the playroom… the sump pump had water seeping out of it all over the floor and carpet. Oh and this was DECEMBER 26th. We were at the part of the project where I just wanted to cry and be finished with it all so this is NOT what I wanted to see.
And now we have beautiful new floors… lol.
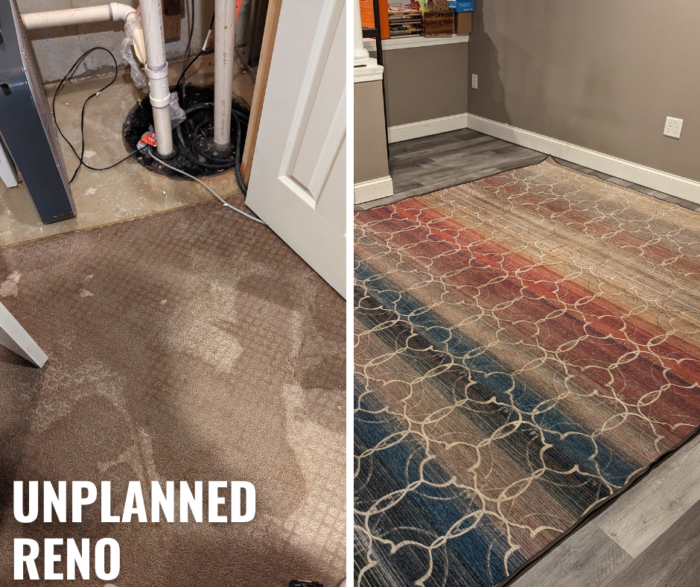
We’re waiting on a quote from a different plumber to replace the sump pump with a sewer ejector pump. It won’t be a huge job, but it’s still a lot of extra crap that I would have preferred to take care of at the beginning of the project.
In summary, this mistake cost us a lot of money for nothing. Womp Womp. I was so upset about this mistake, but hey, it’s not the only money I wasted this year! Hold onto your pants, this project required paying a whole lot of ADHD Tax!
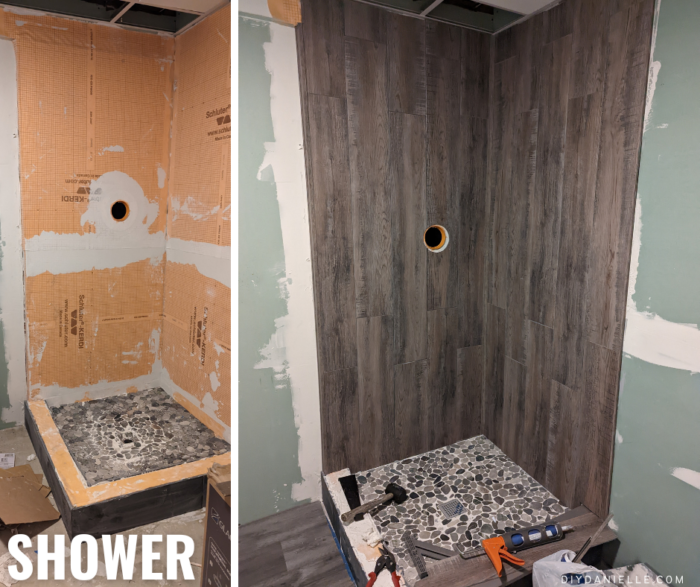
Step 2: Install your shower pan.
My husband started the shower pan in December 2021 (yes, a year ago), the FIRST time our family had COVID. And then he got stuck on deciding how to make the curb so it sat for almost a year. I got frustrated and hired a contractor to finish the curb and walls of the shower.
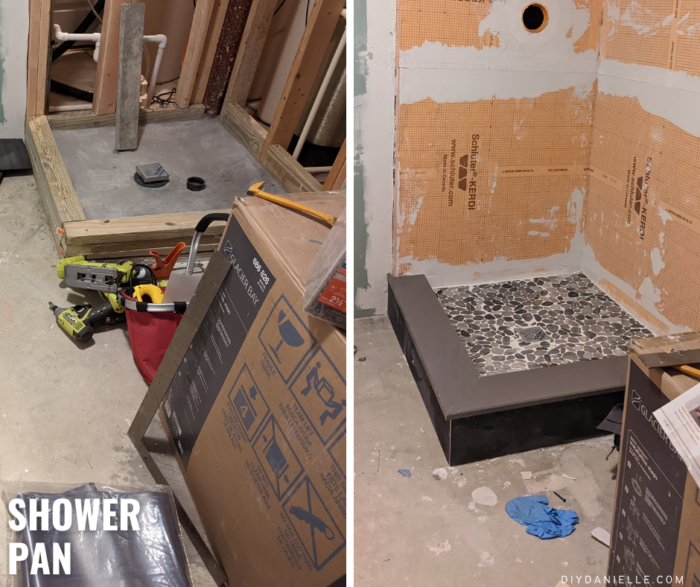
This ended up taking two contractors (from the same company), three visits, and a lot of trips back and forth to the store to get supplies. Honestly, I was so burnt out by the time this was done. I hate hiring contractors to do the beginning stages of a project, but I also didn’t want to learn and rent a wet tile saw so I did it anyways.
For what it’s worth- mosaic tile like the stone we got is VERY difficult to install. The contractor left a few pieces of stone sunk in the grout underneath so there are slight indentations where water can pool. I have two options- deal with it or add extra grout in those sunken areas, covering up the stone there. I’m going to see how it goes and fill in if needed. I asked in a group, however, and they said it’s a common issue as these are hard to install properly… so knowing that, I’m not sure I’d recommend going the route of mosaic tile.
Also, you want to seal this stone and grout using grout sealer; the contractor stated that we should do this every 4 months or so. It’s easy to seal: you just spray or wipe it on, then let it dry.
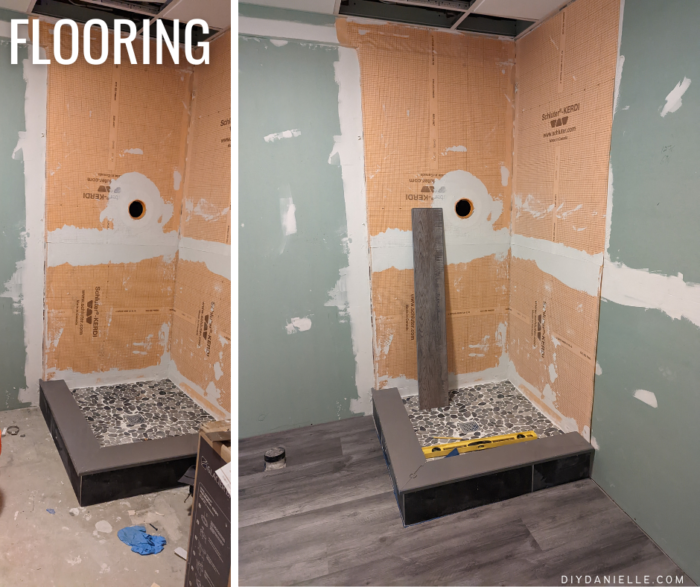
Step 3: Install your flooring.
I installed laminate flooring that is approved for use in wet spaces like a bathroom or kitchen. I used this same flooring in my she shed and I LOVE it. I also find it pretty easy to install.
How to Install Laminate Floors
Step 4: Install your shower walls.
As an alternative to traditional tile, I opted for the Palisades Shower Kit. I like that the tiles look like wood planks, and they’re also easy to cut and install- WITHOUT using a wet tile saw.
Step 5: Install Wall Panels
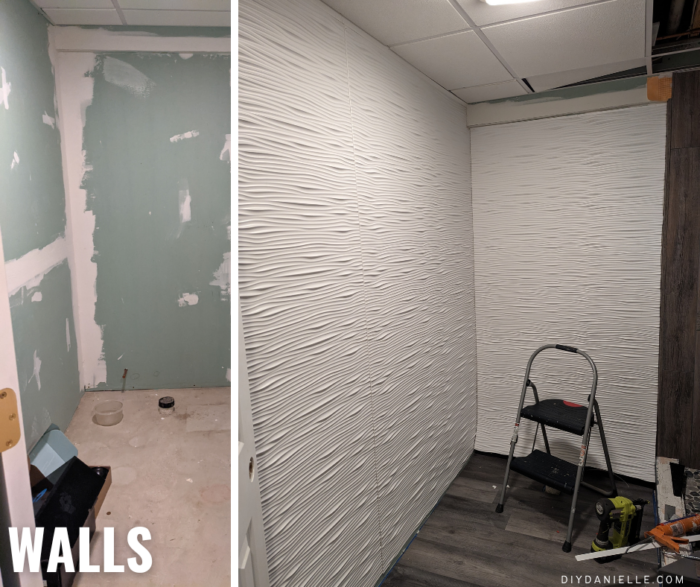
How to Install Fasade Wall Panels
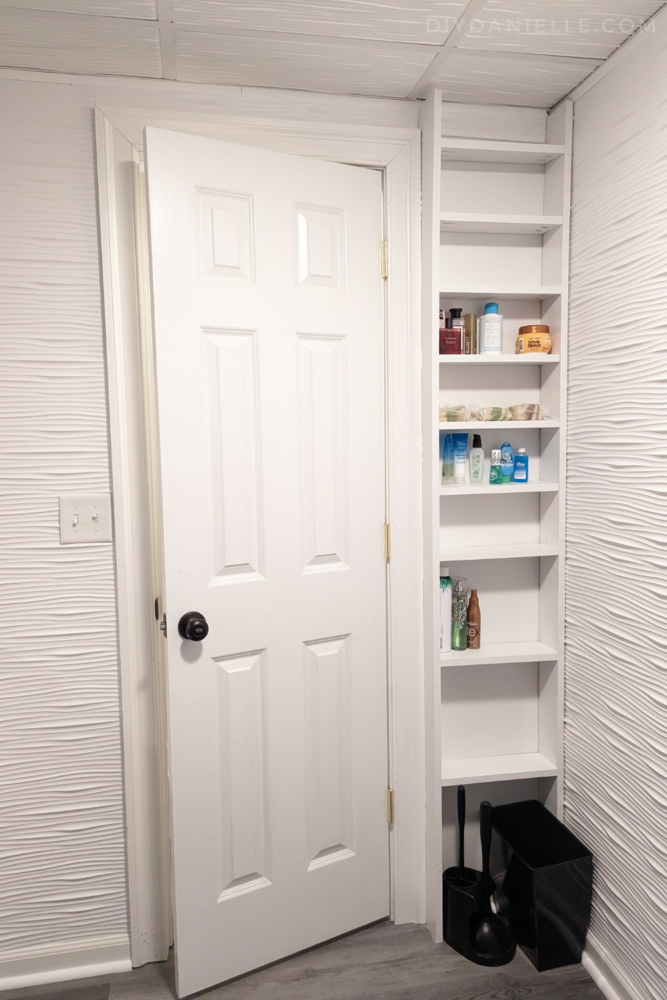
Step 5 1/2: Ran out of wall panels so I made a behind the door shelf to fill that last space.
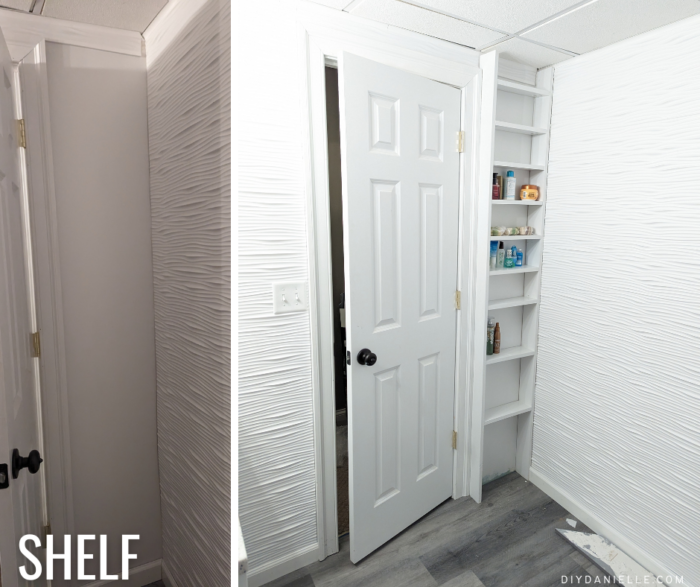
How to Make a Behind the Door Shelf
Step 6: Installed baseboard and quarter round.
I installed baseboard along all of the walls, as well as PVC quarter round along the white baseboard. I had some gaps where the shower and flooring meet so I used quarter round that matched my flooring there. The white would have worked, but it would have stood out.
Step 7: Installed toilet and sink. Installed the shower plumbing.
Remember how we started this project last December? Well, I ordered the supplies last November. I’ve had a toilet, vanity with sink, a mirror, and ALL OF THE OTHER THINGS store in our basement. Gah! When I first got the items, I thought, “Gee I should probably open these all and make sure they’re in one piece.” Then I convinced myself it would be safer to keep the boxes closed up, seeing catching COVID delayed the project a LOT. Many, many times in the following months, I thought, “Hey Danielle, you should just make sure those items are in one piece before the return policy ends” and I think I may have even headed to the basement a few times to check, then forgotten why I’d walked down there.
Alas… December 2nd or so, I popped the vanity box open and found this (photo below on the left)… being one year and two weeks past the purchase date, the store couldn’t do anything for me. I ended up buying a different vanity (sigh) and this one was senselessly trashed. I was so sad about it.
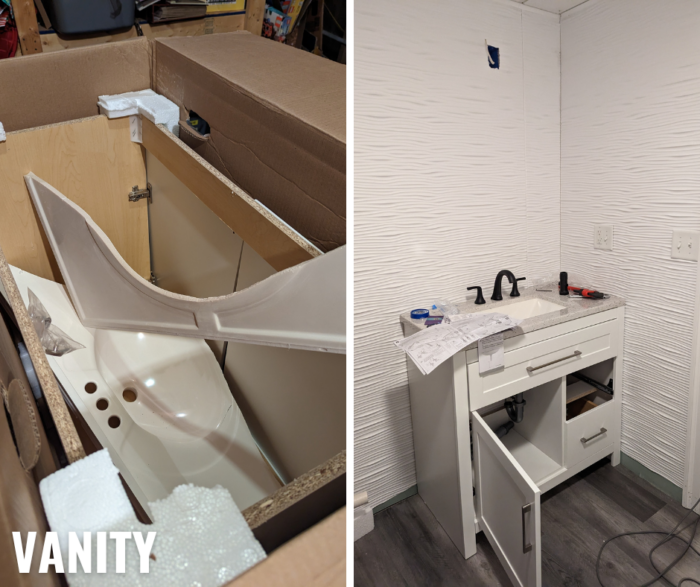
That all said, I LOVE my new vanity. It looks good. But it will forever remind me to STOP buying project supplies before I’m ready to tackle the project.
Step 8: Replace Drop Ceiling Tiles
The drop ceiling tiles were the old paper kind. They were pretty icky and dusty- and they weren’t appropriate for a moist environment like a bathroom. I replace them with the Genesis Drop Ceiling Tiles. This was THE LEAST PAINFUL part of this entire project- including the parts I hired out to contractors.
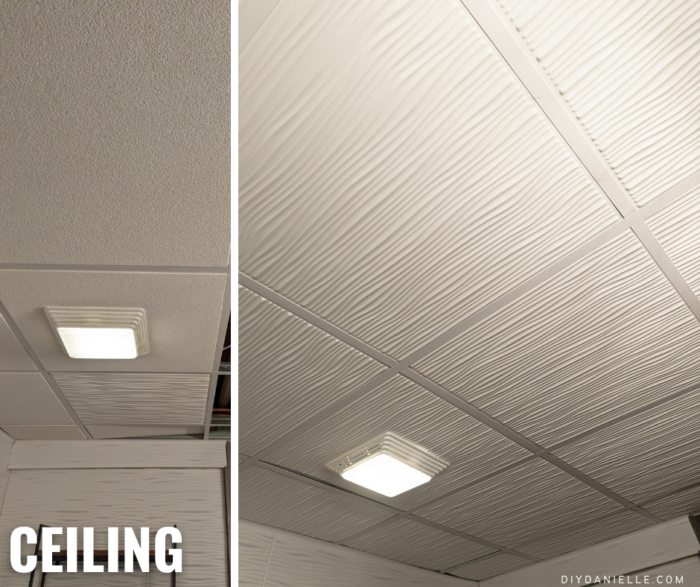
Information on the Genesis Drop Ceiling Tiles for Bathroom
Step 9: Installed the shower doors.
These were fairly easy to install. I LOVE how they came out.
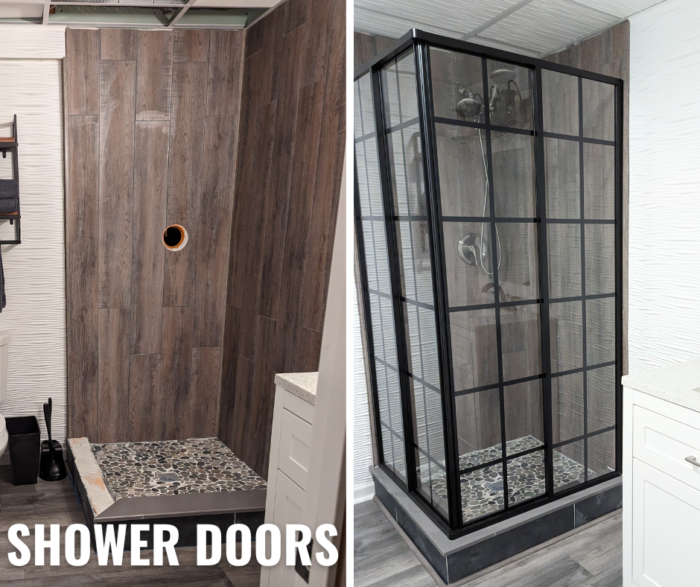
How to Install Dreamline Corner Shower Doors
Step 10: Caulked the shower and sink.
Step 11: Caulked the baseboards and door trim.
Step 12: Add quarter round and transition piece for the flooring.
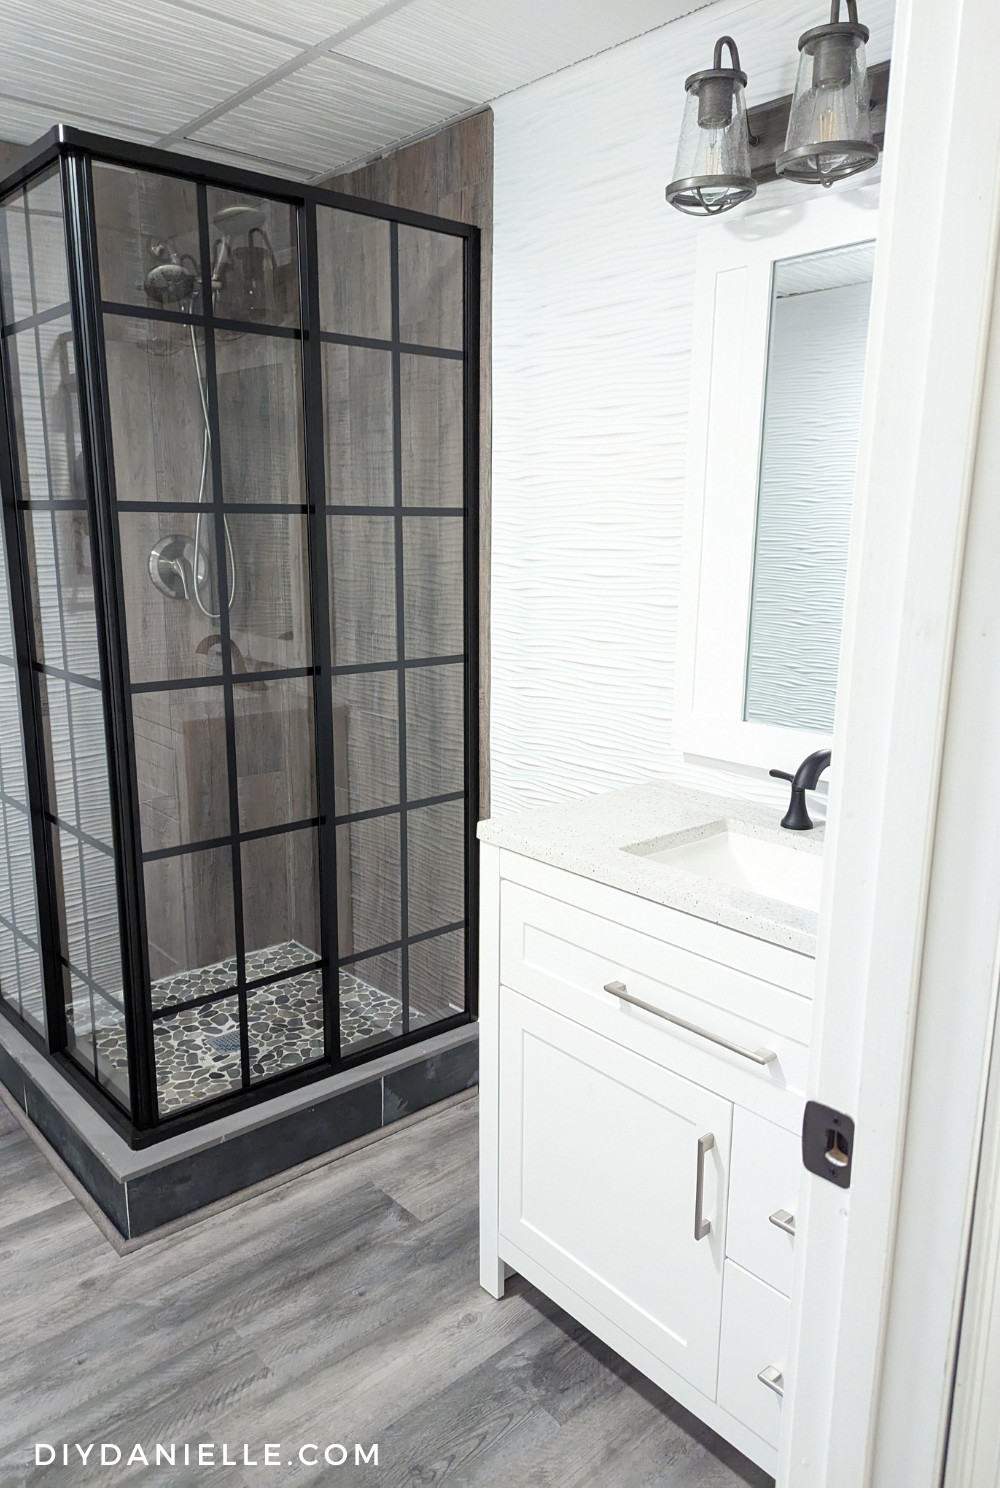
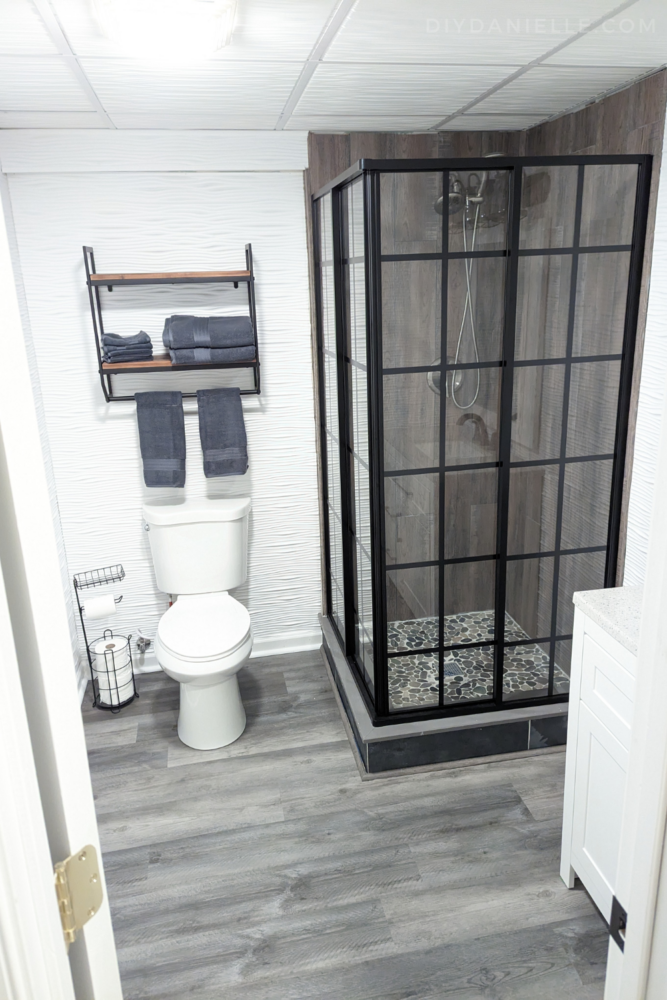
Here are the final photos of the basement bathroom renovation!
Here’s a video walk through.
I have rarely been so glad to see the end of a project as I was with this one! It’s an area I don’t lay eyes on frequently so it doesn’t give me that frequent glow of pride reward that I get with renovation projects that are in our main living area.
Naturally, I was still working on the finishing touches for this when I found myself inspired to convert our basement storage room into a dual purpose space— guest room AND storage. I’ve been trying not to go down that rabbit hole until I finish some other projects that are collecting dust currently. But I’m DYING to tackle it!
Please share and pin this post! You can also post your project and tag the DIYDanielle team on Instagram @doityourselfdanielle!