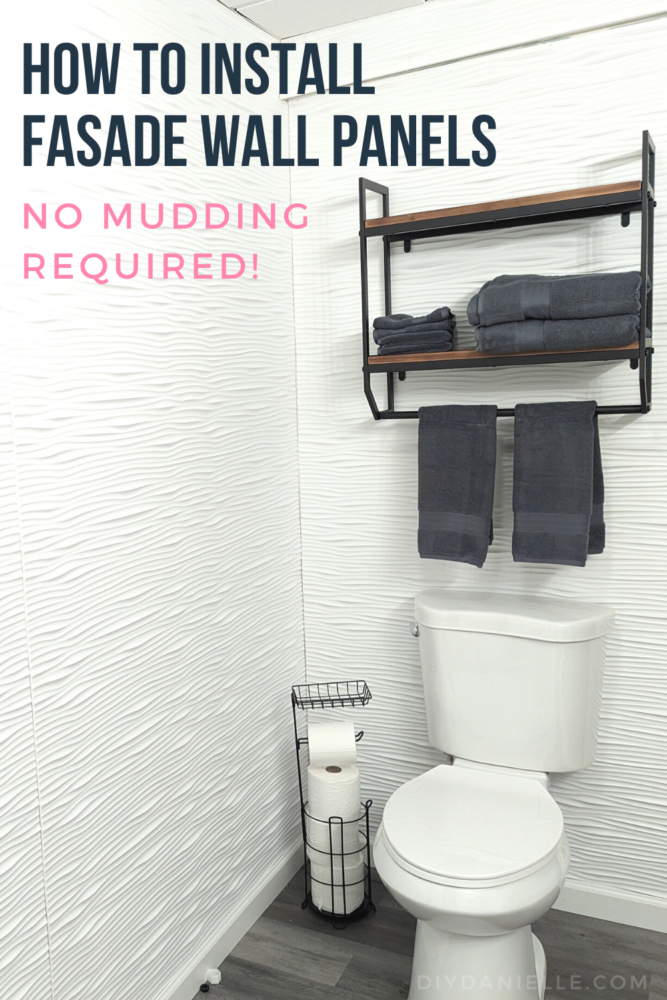
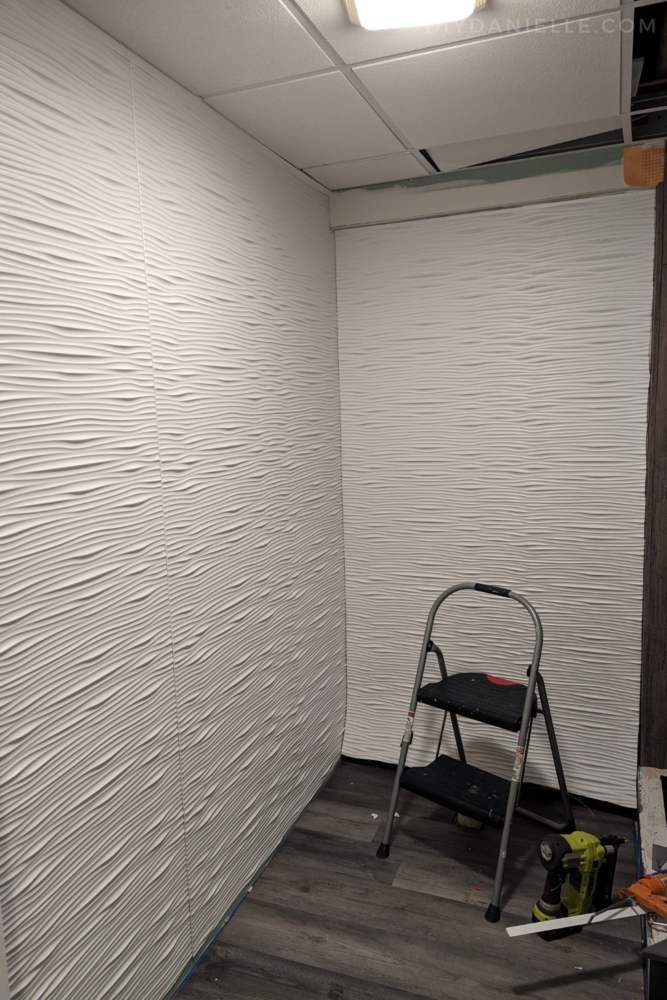
How to install Fasade wall panels. The Fasade Wall Panel in Matte White Waves was the perfect alternative to finishing drywall without mudding.
I did NOT want to mud my walls. I LOATHE sanding indoors (asthma issue), and it seemed like a LOT of work. I’ve avoided mudding in the past by using alternatives to drywall such as paneling. I redid my she shed AND my barn office without using drywall. THE LENGTHS I will go to are pretty extreme.
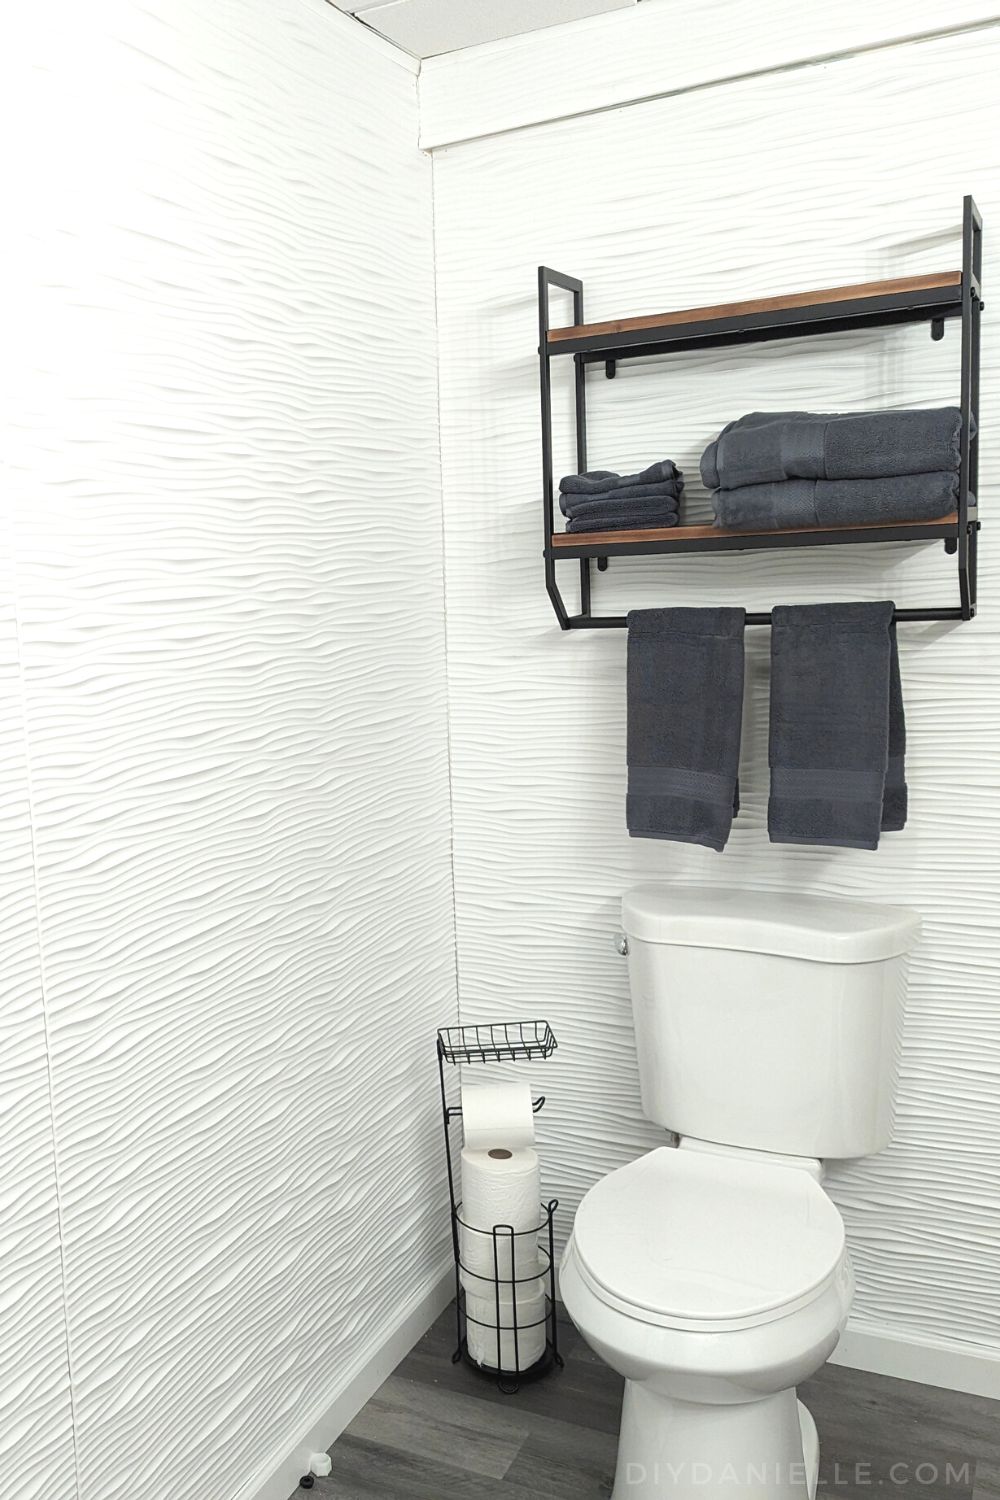
Needless to say- I LOVE these walls. They are nice and clean looking, but add dimension to the room with the waves. The white reflects light well in the dark basement bathroom. They were straightforward to install. Here’s a tutorial on how to install the panels!
This post may contain affiliate links which may earn me commissions should you click through them and take certain actions. As an affiliate for Amazon, Cricut, xTool, Home Depot, and other sites, I earn from qualifying purchases. Please DIY carefully. View my full legal disclosures here.
The majority of my content is generated by me, as are 99% of the photos and videos, but I utilize technology for titles, descriptions, video editing out all of my ums, and occasionally for text overlay on images.
Please read the whole post so you don’t miss any important information!
Many thanks to the DIY Decor Store for sponsoring this post and providing some of the supplies for the project!
How to Install the Fasade Wall Panels
Supplies
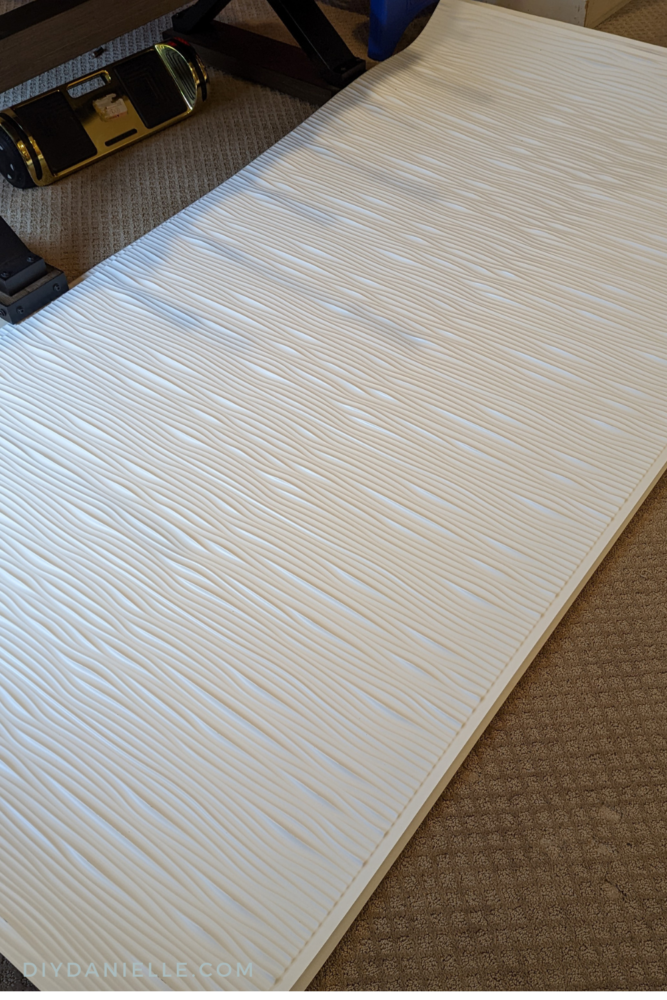
- Fasade Wall Panel in Waves, Matte White
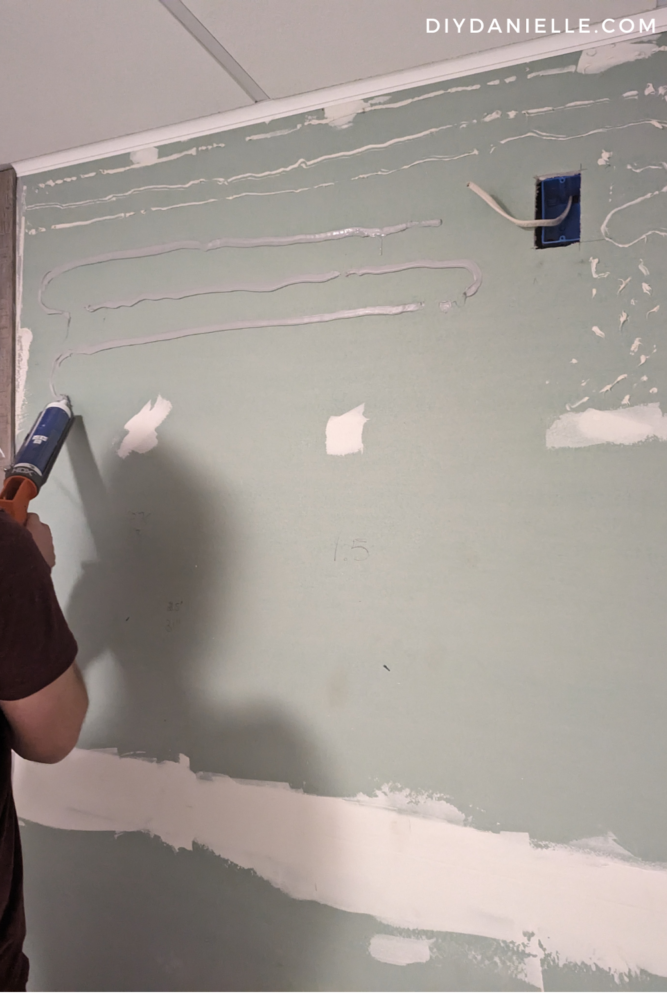
- Construction Adhesive and caulk gun: I’d recommend an electric caulk gun here. I wasted a lot of time because my local store didn’t have an electric caulk gun in stock.
- ISC Trim
- Baseboard
- Ryobi Airstrike: https://homedepot.sjv.io/qn7Zbj
- Tin snips or electric shears
Note: Make sure to lay your panels flat for 24 hours to settle as they’re shipping rolled up.
Step 1: Attach your ISC trim to the top of your wall. You may want to use tin snips to cut this at an angle for the corners to meet (I didn’t).
Note: I wanted to add the ISC trim to the top, but didn’t use any J-Trim for this project.
Step 2: Cut your first white panel so it’s cut to the correct height (my wall isn’t quite 8′).
Step 3: Hold the panel up to the wall and use a pencil to draw a line on the drywall where the panel ends. Remove panel.
Step 4: Add construction adhesive in the area the panel will go (you can use the pencil mark to ensure you don’t go too far). An electric caulk gun comes in really handy here.
Step 5: Attach your panel to the construction adhesive, sliding the top (the thicker lip of the panel should be on the top and on the right side) into the ISC trim. Smooth your panel out, ensuring it sticks to the wall.
Step 6: While the construction adhesive should hold up the panel by itself, I also used my Ryobi Airstrike to attach the panels wherever the nail heads wouldn’t show. In this case, I used the Airstrike to nail along the large lip on the right (where panel #2 will cover), as well as where the baseboard will go.
Step 7: Repeat for the next panel, making sure the small lip side of the panel covers the large lip from Panel #1. This allows for a smooth overlap in panels.
Step 8: Repeat until all of your walls are finished.
Step 9: Attach your baseboard and caulk.
Working around Outlets and Plumbing
For areas where there are outlets or plumbing pipes, you’ll need to carefully measure out where those spots are and cut out the areas for those items to come through the wall.
Cutting Fasade Panels
Panels can be cut with tin snips VERY easily, although electric shears are really helpful to speed up the process. The wave design makes it awkward to cut regardless.
You’ll need the tin snips (if you think of a better tool, leave a comment!) to cut the tiny areas like the areas the plumbing pipes came through and the outlet areas.
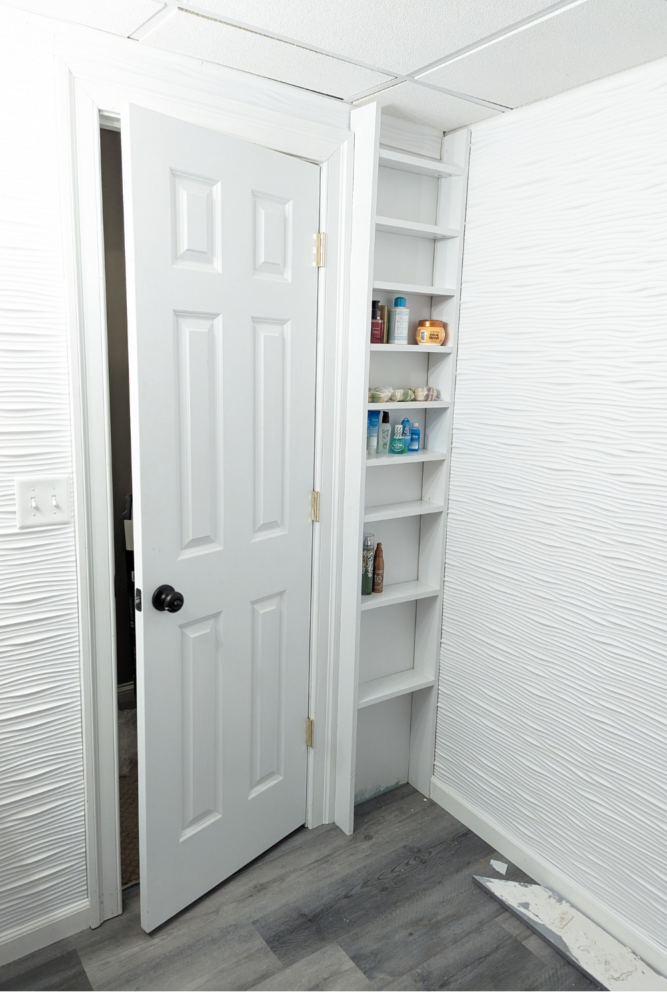
I ran out of panels at the end for this very small space behind the door- but it turned into a happy little accident because I added a behind the door shelf. LOVE how it came out!
Please share and pin this post! You can also post your project and tag the DIYDanielle team on Instagram @doityourselfdanielle!