Everything you need to know about drop ceilings, and how to install Genesis drop ceiling tiles in a basement bathroom.
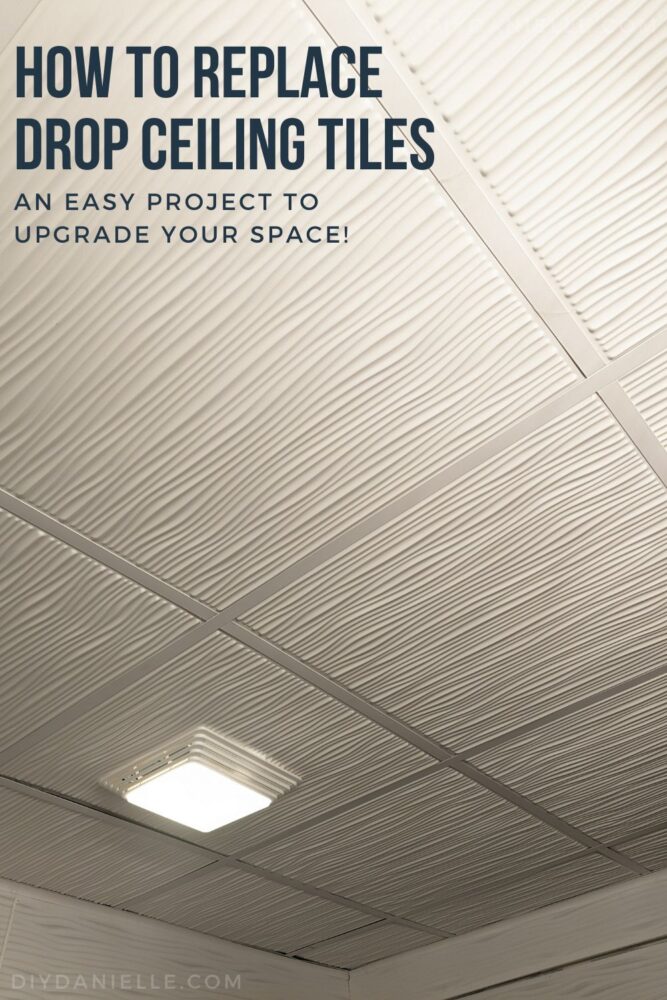
Our basement bathroom renovation project is finally wrapping up. Part of the project was replacing the old drop ceiling tiles in the bathroom with Genesis Drifts Ceiling Tiles which are waterproof and better for an area that may have some moisture from the shower. This was BY FAR the easiest part of the project- including the part that I hired a contractor to do (sigh).
Here’s a little about drop ceilings and their benefits, as well as a tutorial on how to install these.
This post may contain affiliate links which may earn me commissions should you click through them and take certain actions. As an affiliate for Amazon, Cricut, xTool, Home Depot, and other sites, I earn from qualifying purchases. Please DIY carefully. View my full legal disclosures here.
The majority of my content is generated by me, as are 99% of the photos and videos, but I utilize technology for titles, descriptions, video editing out all of my ums, and occasionally for text overlay on images.
Please read the whole post so you don’t miss any important information!
Many thanks to the DIY Decor Store for sponsoring this blog post! I LOVE how they have introduced me to so many easy to use products that make DIY’ing home renovation projects a breeze.
DIY Drop Ceiling Panels for a Basement Bathroom
Looking to upgrade your basement ceiling without shelling out tons of cash for contractors? You can DIY a solution by adding a drop ceiling! It doesn’t take a lot of technical expertise and can be completed in a weekend. Let’s take a look at what a drop ceiling is and how to DIY one for your basement bathroom.
What are Drop Ceilings?
A drop ceiling is exactly what it sounds like – a “dropped” ceiling. It’s a second ceiling, installed lower than the original or main ceiling in a room or structure.
Drop ceilings are typically made of a grid of metal or strong plastic square cells. Each cell is made of thin beams or bars (usually only a few inches wide) that allow a ceiling tile–typically made of vinyl, fiberglass, or a combination of recycled materials–to fit snugly into the grooves, creating the look of a continuous ceiling surface.
This type of ceiling installation is popular for a few reasons: it can improve the look and feel of a space by covering up visible pipes, wires, cables, and beams as well as improve acoustics by absorbing and blocking sound from traveling.
Drop Ceilings vs. Drywall
Drop ceilings aren’t your only option for changing the ceiling, of course, but they may be a more attractive or viable option than other more costly or time consuming alternatives.
An obvious alternative would be to drywall or construct a new ceiling, however, it requires more physical labor overall than a drop ceiling would. Installing a drywall ceiling would entail multiple people holding heavy drywall sheets overhead for hours while attaching them to beams and supports. After the heavy lifting, you’d still have to follow through with the usual process that it takes to finish a drywall job: taping, mudding, sanding, and painting, which can make this project take several days or even a week to finish.
Installing a drop ceiling instead is a much faster and less physically demanding process. The materials are usually very lightweight and dimensionally more manageable than large sheets of drywall. Generally speaking, you’ll just secure the grid, drop the tiles into place, and address any cosmetic imperfections. That’s all!
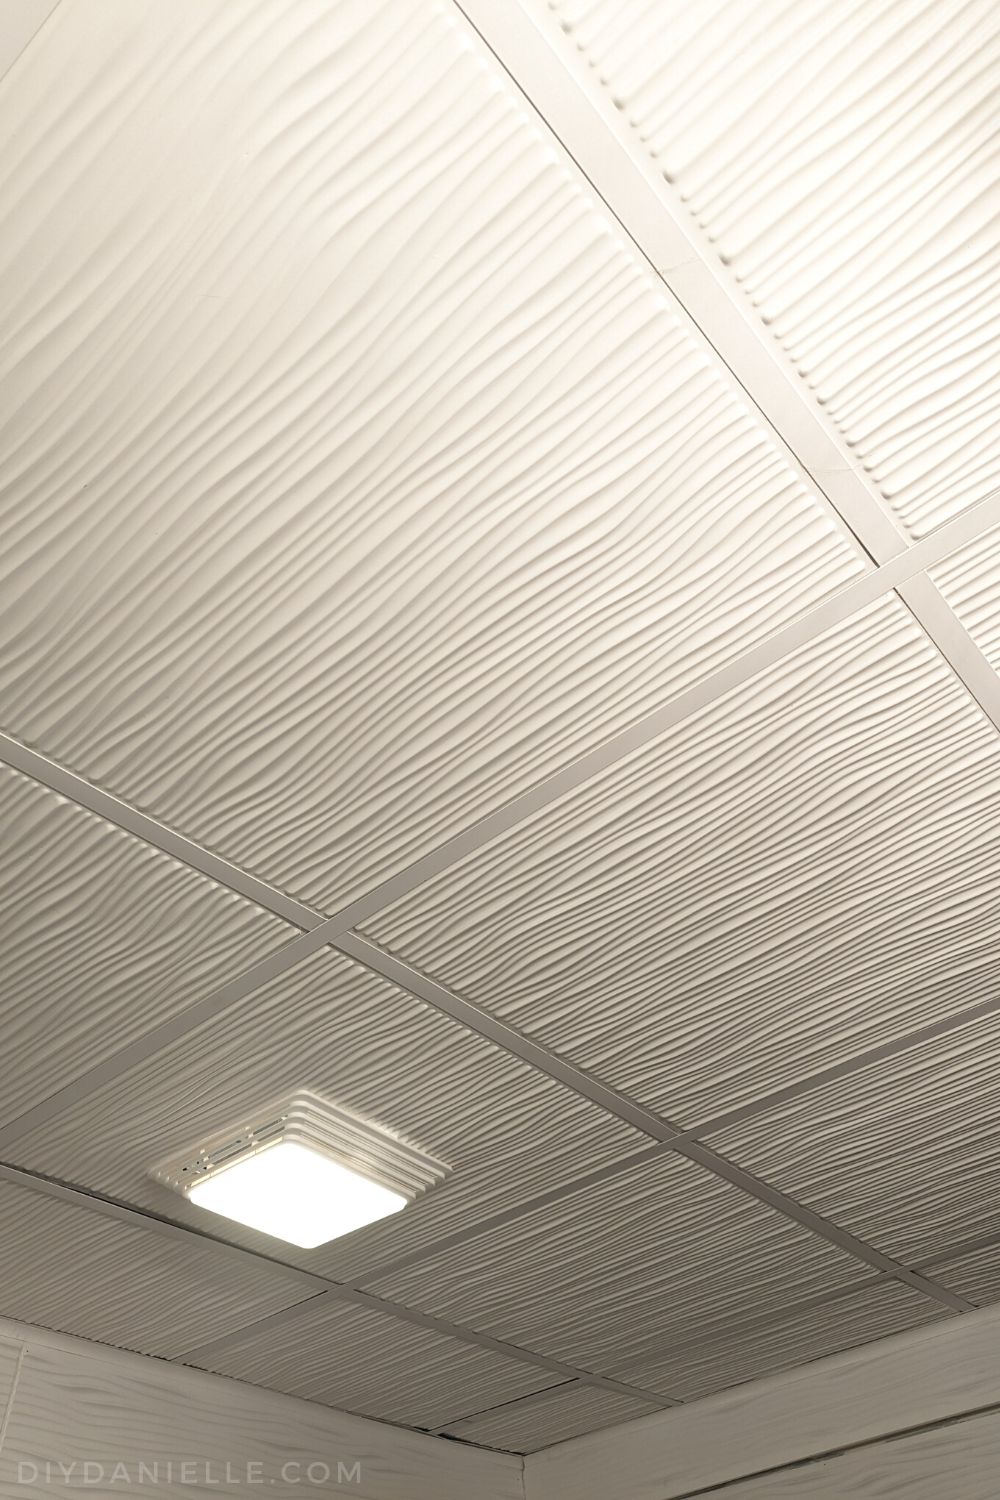
Drop ceiling tiles come in many decorative trims and finishes (for the purpose of this DIY I’ll be using these Genesis Drift Ceiling Tiles) so they require less work overall to customize and achieve your desired aesthetic! Future repairs are as easy as pushing a damaged tile out and swapping it for a fresh one.
Obviously, drop ceilings aren’t a viable option in every basement, depending on how much ceiling height you can stand to lose (average of 4-6 inches but can be even more if your ceilings are extra tall and you can spare the head space).
There also isn’t a ton of cost difference between a drywall ceiling and drop ceiling, on average, but savings (or a lack thereof) can fluctuate depending on the materials you choose just like every other DIY project. It’s a great option for any size space and can be done in one room while leaving the rest as-is. We’ll be DIYing a basement bathroom in this post, but if you wish to do a bigger or smaller space, the installation will follow the same general steps.
Using Drop Ceilings for a Bathroom
Using drop ceilings in a basement bathroom has several advantages over more traditional building options: tiles are available in waterproof, washable finishes and are more resistant to mold and mildew, both common problems in basements and bathrooms. If you don’t use these exact tiles, try to stick with ones with the same or comparable moisture resistance to protect your space from mold. Regularly check your tile for the appearance of mold and thoroughly clean or replace any tiles that sustain water damage.
How to Install Genesis Drop Ceiling Panels
Supplies:
- Genesis Drifts Ceiling Panels
- Tin Snips or a Utility Knife
- Marker/Pencil
Installing drop ceiling panels, assuming your framing is already installed, is easy. I don’t have an unfinished ceiling so I can’t show the process from the beginning, but if we decide to update the storage room, I’ll add that information later!
I think that might be a project for next holiday season (having Christmas guests puts the panic in me to have a guest room space). I casually mentioned this before finishing this bathroom and my husband got that panicky look in his eyes. Haha. He’s lucky I have gotten more handy over the years because I’m able to do a lot more alone now than I used to do!
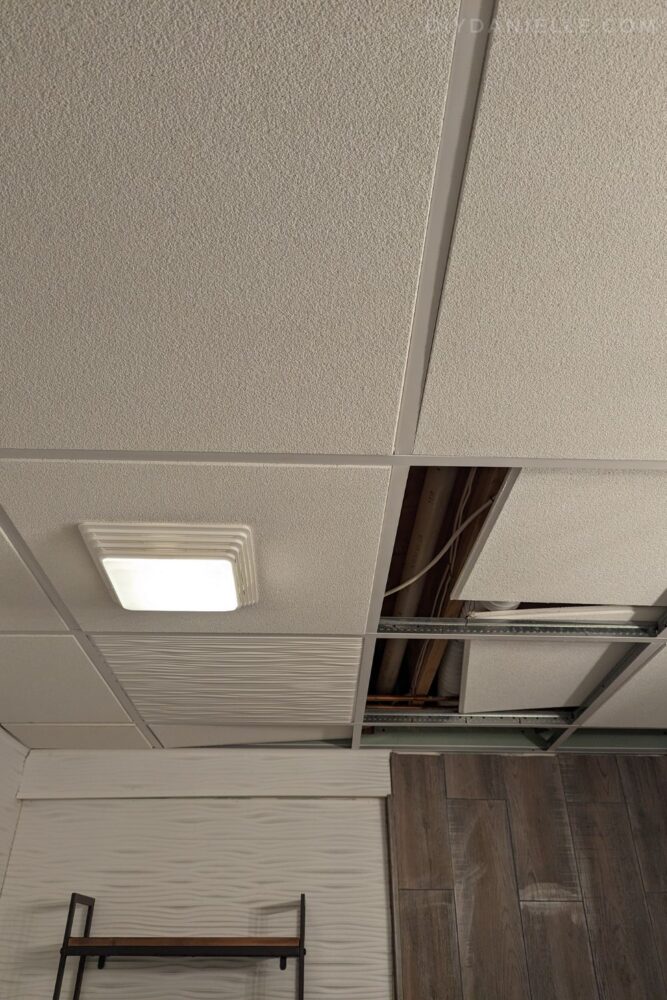
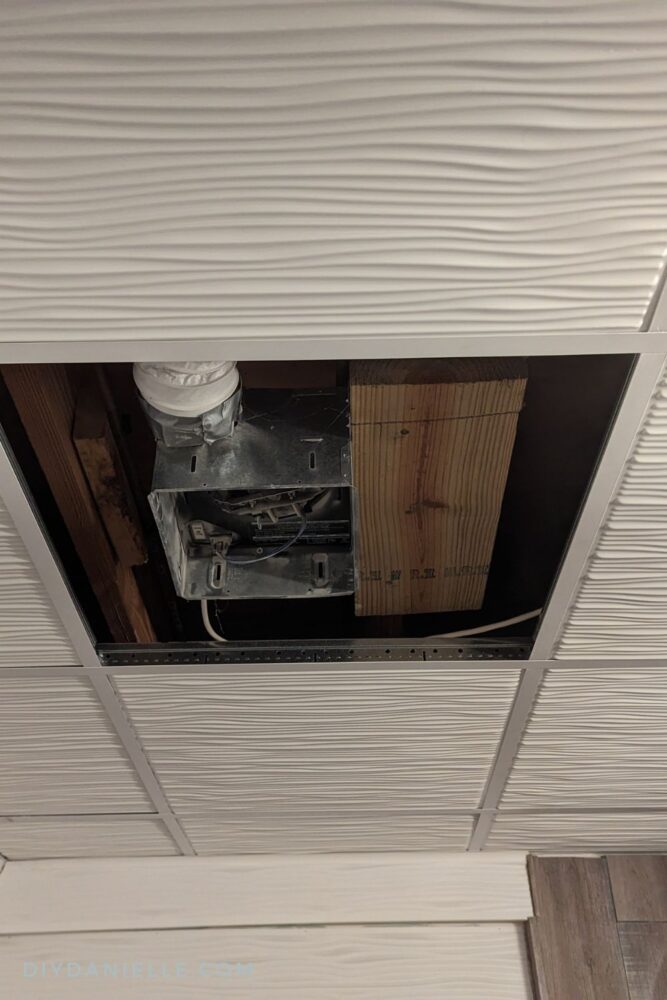
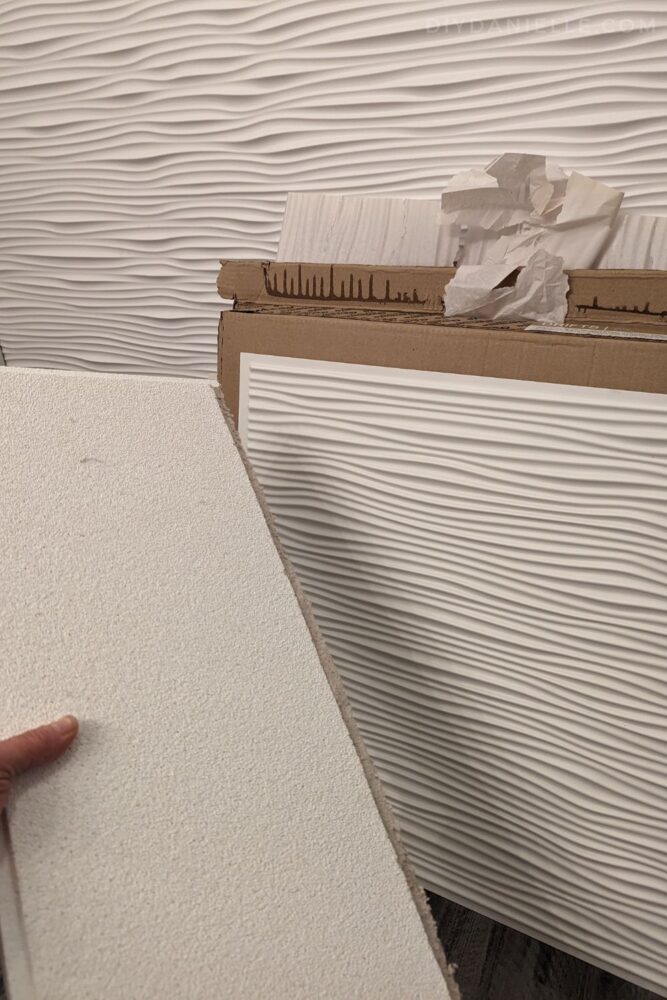
Step 1: Remove the old ceiling panels, but keep track of where each of the cut panels came from. You can trace the cut pieces so you’ll have a template to use for your Genesis panels.
I suggest wearing goggles and a mask for this. Apparently these old drop ceiling panels are made of pressed paper and the amount of dust and YUCK that comes down is gross. I had IMMEDIATE regrets about not wearing protection, but it was such a small job that I was half through by the time I realized my mistake.

Step 2: Start by placing all of your full panels. These are the easiest to swap out. Make sure they all face the same direction (or the correct direction, if you plan to alternate them).
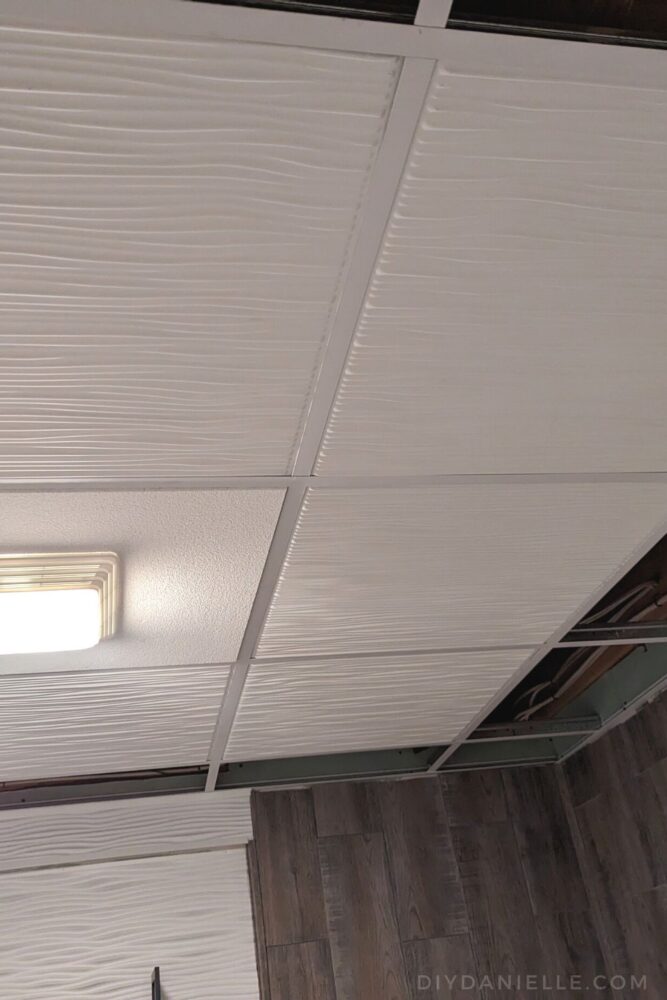
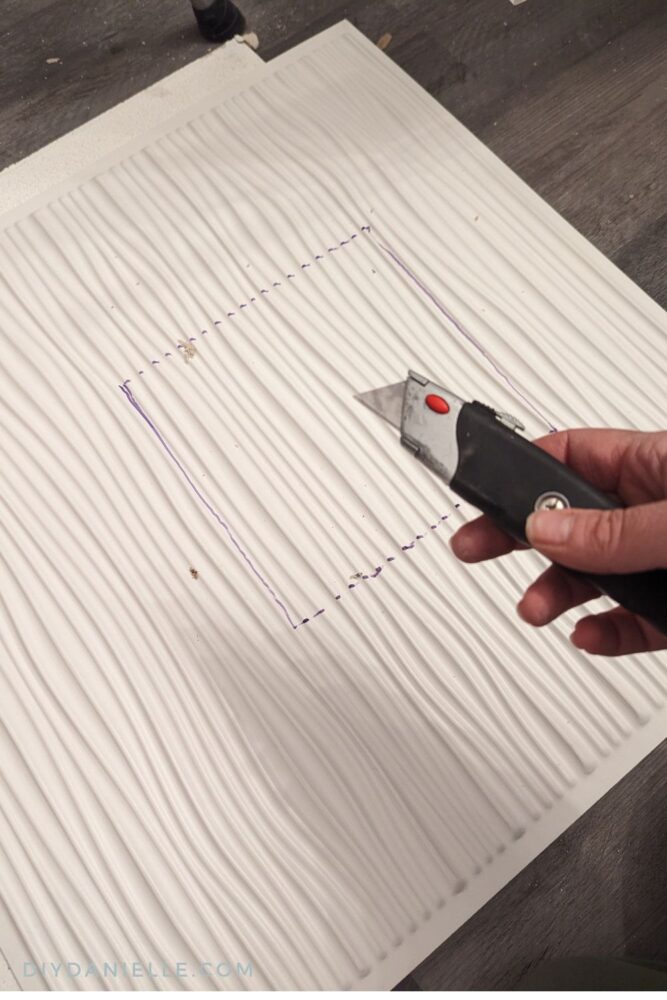
Step 3: For the panels that need to be cut, take the original panels and use them for a template.
I placed my old panel on top of my Genesis panel, traced around it with a dry erase marker (these DO NOT erase so it doesn’t matter what writing utensil you use), and then cut the marking with either a utility knife or tin snips. You can use one of the old full panels underneath the Genesis panel to cut on if you use a utility knife.
MAKE SURE YOU CUT IN THE CORRECT DIRECTION. I show myself making this mistake twice in my video. When you’re cutting the smaller pieces, you need to be aware of what direction the panels go with these wave pattern. If I did this again, I might choose a more forgiving design so I could skip this worry, haha.
Step 4: Place cut panels as you go. It’s easiest if you’ve kept track of which old panel went where, then you cut the new panels based on the old panels, then place as you go.
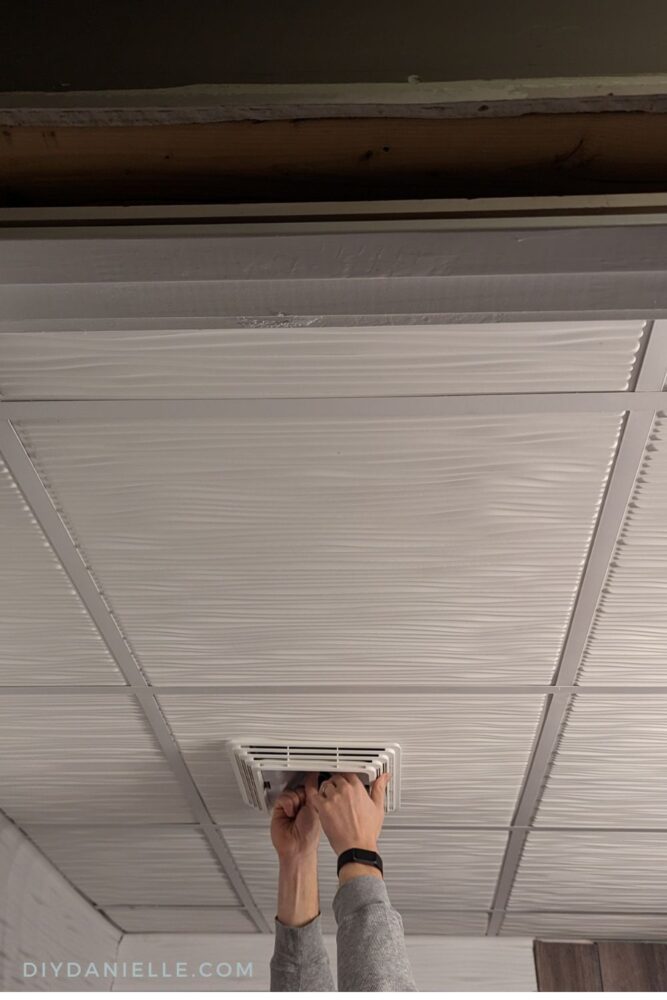
Step 5: Working around the ceiling fan/light.
Start by removing the fan/light. Then remove the old panel.
Cut the panel for the fan/light on it. I used the original panel as a template for the hole.
Then I did my best to make a hole in the middle, and cut around the line that I drew. Once done, I installed the panel, and we reinstalled the fan/light!
Video Tutorial for Installing Genesis Ceiling Panels
Why Use Genesis Drifts Ceiling Panels?
When I started my basement bathroom renovation, I was concerned about moisture as the space doesn’t have a window. I wasn’t sure if the current ceiling panels could handle moisture (they can’t).
Genesis Ceiling Panels are manufactured for spaces with humid or damp conditions. Unlike the original ceiling panels, they aren’t dusty and made of paper. They are simple to install, washable and waterproof, and mold and mildew resistant. The Waves style that I used come in black or white, and while I considered black, I would have had to cover the rails with the trim kit. Given that this bathroom is a small, dark space, I opted for white to make the room look brighter- and it worked.
The Genesis Ceiling panels come in many different styles so check out all of the options before you choose the Drifts. I had a HARD time deciding what to go with because they’re all amazing. If you go with a design that isn’t directional, you won’t have to worry about that during installation.
Swapping my ceiling panels out in that bathroom has me seriously considering swapping out the panels in the rest of our basement. The icky paper ones are SO gross and get damaged easily if you have a leak (we had a dishwasher leak when we first moved in).
I love having access to the plumbing and electrical in the basement via the drop ceilings, but I think these panels are a lot more pleasant to work with. They store smaller than the thicker paper versions if you keep extras in case the originals get damaged.
Please share and pin this post! You can also post your project and tag the DIYDanielle team on Instagram @doityourselfdanielle!