
These easy farm hacks are perfect to make homestead chores a little easier… leaving you more time to do what you love.
This post may contain affiliate links which may earn me commissions should you click through them and take certain actions. As an affiliate for Amazon, Cricut, xTool, Home Depot, and other sites, I earn from qualifying purchases. Please DIY carefully. View my full legal disclosures here.
Please read the whole post so you don’t miss any important information!
I am a HARD worker, like anyone who has a small farm. This lifestyle works for me because I enjoy my animals, gardening, and most of the chores involved. But I refuse to work harder for no reason; I LOVE short cuts that make life easier, provided they won’t cause harm to my animals or create more work long term.
Here are a few farm hacks that have made my life easier, leaving me more time to do other jobs that I love.
Farm Hacks
1. Label Your Thermometer
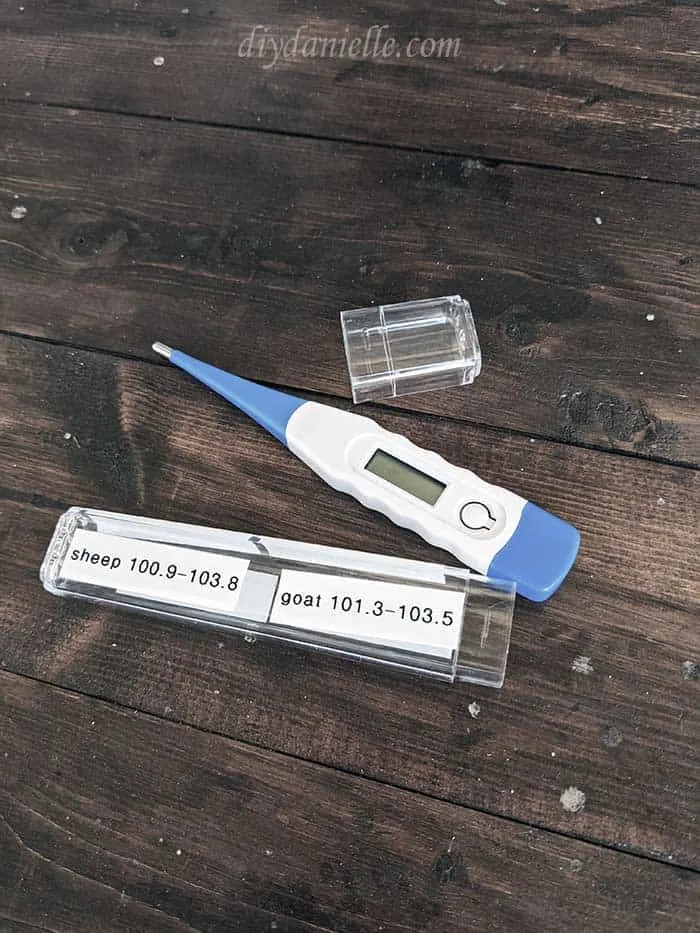
I wish I’d done this sooner. My thermometer for the animals is in a plastic case. Every time I have a sick animal, I rush out and forget to look up what the normal temperature is for them. It’s not easy to Google that information as you’re laying in the field with your arms and legs restraining a goat as you play a game of “Twister” trying to get a rectal temperature on him.
And each type of animal has a different ‘safe zone’ for their temperature. Sheep are 100.9-103.8. Goats are 101.3-103.5. I would have never guessed that two similar types of animals would have different normal temperatures.
I used the smallest font size and decorated the plastic case of the farm thermometer with the normal ranges! Took me 5 minutes and it’s a game changer.
You may also want to label the farm thermometer so you don’t accidentally grab it the next time you have the flu.
—> NOT A MOUTH THERMOMETER <—-
2. Fish in a Trough
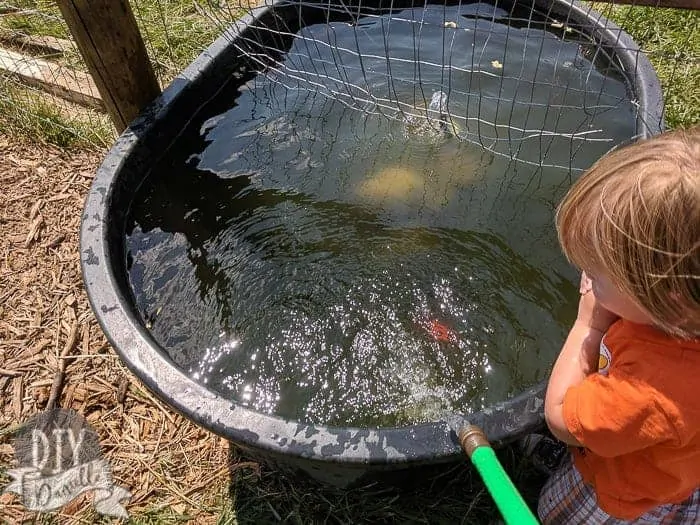
Add a couple of fish to your water trough to limit mold growth. I wrote a bit about my mixed results with this homestead trick on this blog post.
3. Affordable Bedding
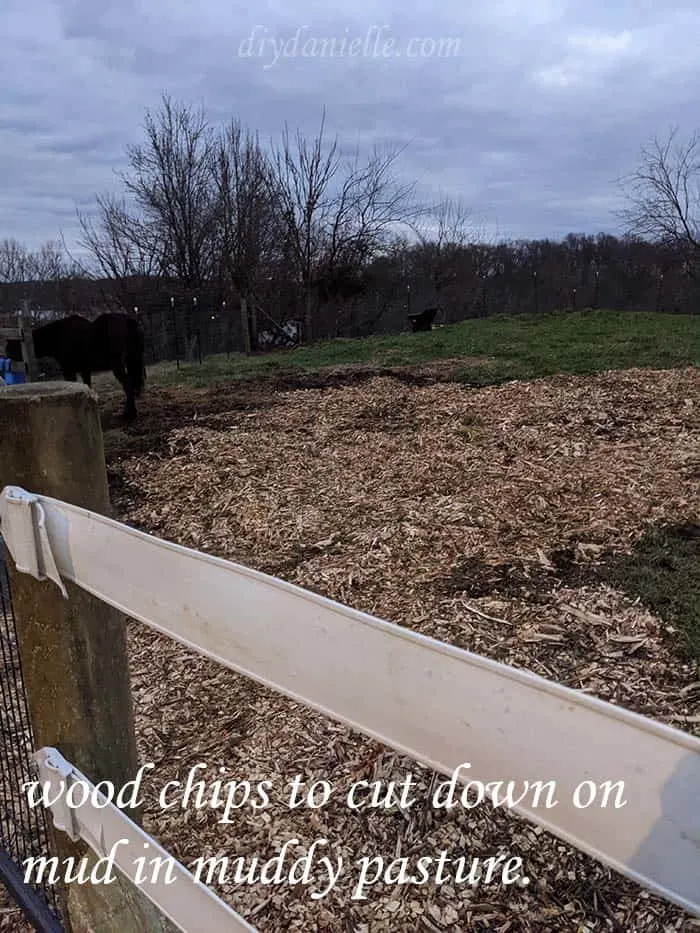
When we first started keeping animals, I realized quickly that bedding could get expensive quick. We decided to try using wood chips that I get free through ChipDrop or local arborists in the area. I’ve had really good luck with wood chips in the goat, sheep, chicken, and duck shelters and runs. I also spread wood chips in the muddy areas of the runs to cover old goat poop, rather than trying to pick it up. The wood chips and manure should compost down over time. Note that this will likely not be grass-friendly… I only do this in the heavy use areas like in front of the gate.
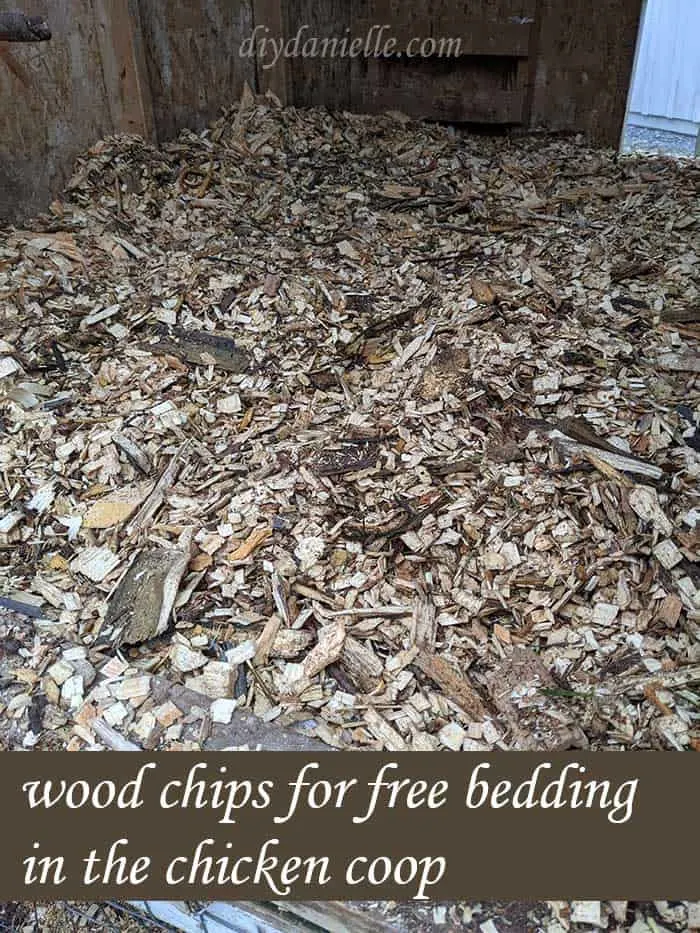
If you make the shelter door wide enough, you can use a tractor to move wood chips into the shelter.
I use the deep litter method with my wood chips, particularly in the winter. Whenever the shelters need cleaning, I just add another level of chips. Every few months I completely clean the shelter out by removing the chips and putting them in a compost bin to go into the garden. I’ll occasionally put the dirty chips from the goats or ducks directly in my garden, but I’ve found that the hay seeds tend to take off and produce lots of weeds. I make sure to compost the chips down a bit first now.
In the chicken run, I just continuously pile new chips up, rather than cleaning out the dirty chips. I made a “window” for the covered run so I can use the bucket on my tractor to scoop some wood chips in… this saves a ton of time.
Here’s a photo of my pasture with wood chips laid to cut down on mud.
4. Get a Head Lamp
In the middle of the night, you’re going to be out with a sick animal or an animal giving birth, and you’ll need a flashlight. Get a head lamp. Seriously. You’ll want your hands free to work with your animal.
You don’t want to ‘cell phone camera’ this… because you WILL drop your cell phone in blood, birthing juices, or manure if you try it.
5. Strategically Plan Out Your Property
There’s not much you can do if someone else has already laid out your property, but if you’re starting from scratch, it will SAVE YOUR DAY to plan your property strategically.
I’ve made a few mistakes with placement. For example, I placed my 60×50′ garden around two apple trees in my front yard. When we started looking at running water to the animal area, I realized I would want to run water underground to the garden too. The two areas are far away from each other so this would have added to the cost. I also realized that the garden is in the perfect place for a riding arena. So I’m holding off on having the water line installed so I can make a more educated decision about placement.
Consider:
- Access to water, electric, and/or plumbing
- Access for trailers and tractors
- Safety
- Convenient
- Shelter from weather, ie. is your shelter faced away from the cold winter wind?
- Water drainage, ie. don’t place your pond at the top of the hill and don’t place your barn in a ditch where water builds up.
- Distance from your house, ie. balance farm fragrance concerns with how many times you want to visit a sick animal when it’s dark and cold (they rarely get sick in nice weather).
- Convenience to do all of your chores, ie. you want to place the compost bin so it’s convenient to the garden and/or the animal manure you add to it.
6. Create a Predator Proof Chicken Run
When we first got ducks and chickens, I loved the idea of letting the birds free range. They had a small fenced area, but the fence was only 4-5′ tall. That was fine until it wasn’t fine. In January of 2019, the local fox discovered he had an entire BUFFET waiting for him in my chicken run.
The LAST thing you want to do is panic build a chicken run in windy, cold weather in the middle of January; my chickens had to remain inside the coop during this time which meant more cleaning for me too.
Having a predator proof chicken run can make life much easier. My chickens and ducks don’t always go into their coop at night; I was spending a lot of time trying to chase them into a safe place every evening. The chicken run allows me to keep the chicken coop door open (into the run) all day and night without the fear that a fox can get in.
This freedom means that I can go on vacation and a pet sitter can visit once a day to fill the water and feed buckets. For a weekend trip, I could possibly leave them with enough food and water for the whole weekend.
The other benefit is that I can keep the water and feed in the run and not inside the coop. That keeps the coop cleaner.
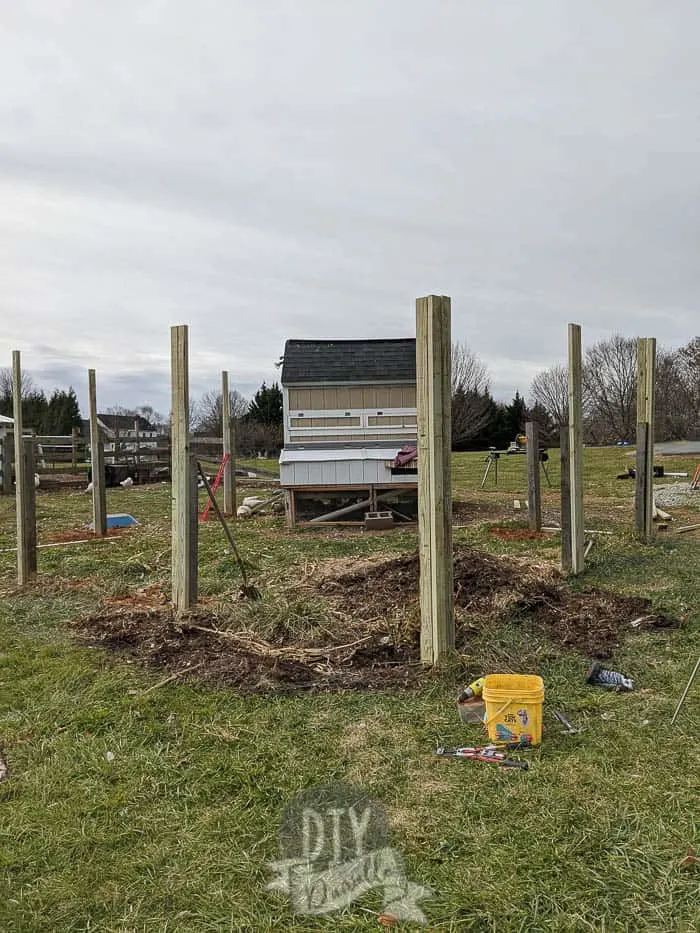
Here’s a tutorial on how to build a chicken run.
7. Use Video Surveillance
Having an exterior video camera is extremely useful. It gives you some peace of mind, allows you to monitor what is going on around the farm, and gives you surveillance footage if you have to deal with any crime on your property.
We live in a fairly safe area, set back from the road, so we don’t use our camera for theft. The camera is, however, fantastic for watching wildlife. We can see if the fox is roaming around, if the goats escaped their pasture, and we can hear voices outside if there’s someone out there.
Before we built the chicken run, we went on a weekend trip. I always keep an eye on the camera to verify that the pet sitter made it to care for the animals. I could see on the camera at 11am that nobody had let out the ducks from the coop. I contacted the pet sitter who had forgotten to come out that morning, but she was far away so a neighborhood friend popped over to let out the ducks for me.
Before you say “I trust my pet sitter,” just remember that we’re all human. We can forget, but we could also be in a car accident and not make it or be unable to contact the pet owner. I am really careful about making sure my animals are safe.
If you don’t have WiFi, there are special trail cameras that could work for you. I prefer the WiFi cameras that give feedback to my phone immediately if they hear sound or ‘see’ motion.
8. Find a Farm Sitter
Whether or not you ever go on vacation, you may need to take an emergency trip. Make sure you know someone who is able to pet sit. Funerals happen. Sick family members that you need to visit happen. You could even need to spend a few days at the hospital yourself. Make sure you have farm care during those times.
9. Get the Right Equipment for the Job
Before starting a job, get some opinions on what equipment works best. When we decided to put in horse fencing, we were planning to get an auger attachment for our tractor. The augers turn and dig into the ground.
I discovered, however, that while the auger is generally the ‘go to’ for digging holes, post pounders are FAST and work really well. When they pound in the post, there’s no loose soil around the post; this results in a sturdier post that doesn’t need concrete to keep it in place.
Renting a fence post pounder is a bit pricey but could potentially save days of work on a large project.
10. Movable Shelters are AMAZING
I LOVE mobile shelters for my animals. We used a DIY chicken tractor this year and it was amazing. You can move it each day or week which means the chickens have fresh “bedding” (the grass) without any of the cost. They mow the grass and eat the bugs in the soil while they’re being moved around.
My only complaint is moving the feed and water separately can be a pain. I need to figure out a better food and water system that attaches to the chicken tractor for next year!
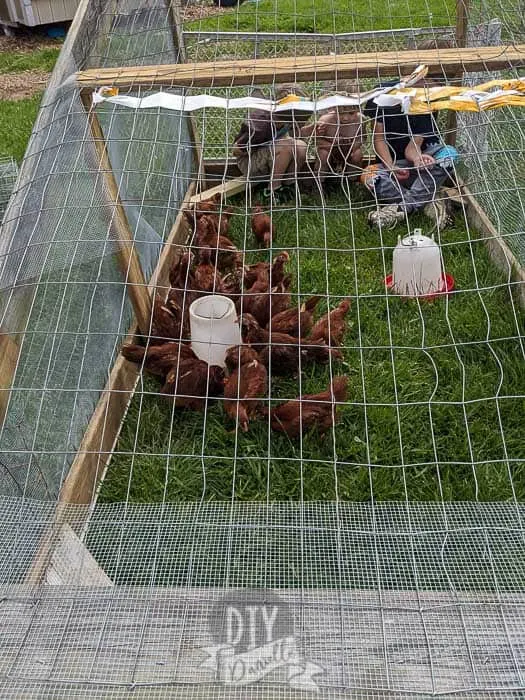
The problem with movable shelters is that, for larger animals, they can be impractical because it’s too hard to move such a large structure. You can probably work out small portable shelters for pigs, chickens, ducks, goats, and sheep. But you’re probably out of luck for cows or horses.
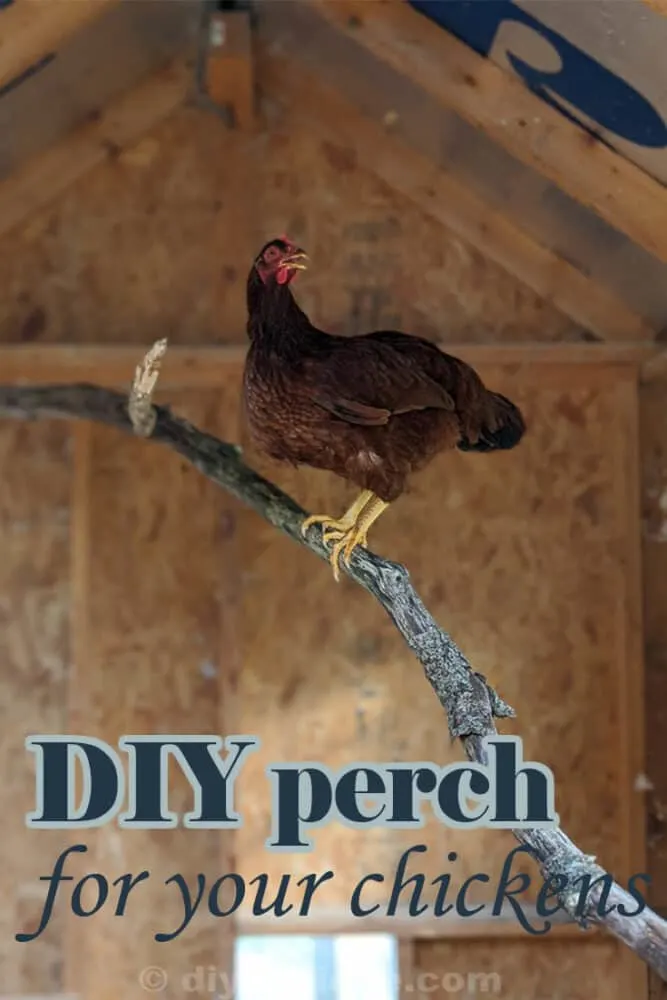
11. Use Branches for Chicken Perches
Learn how to attach branches in your coop to use for a chicken perch. It’s a good idea to sand the branches so bugs can’t hide under the bark of the branches.
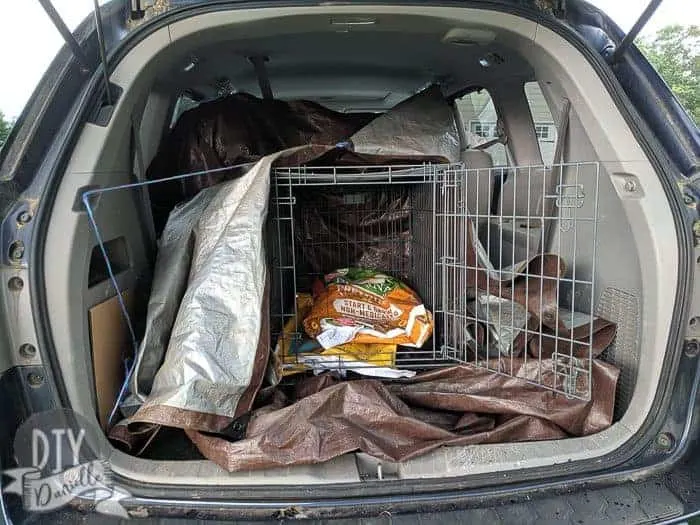
12. Use tarps and a dog crate to transport small animals inside a car
This is how I place tarps and a dog crate to transfer chickens and ducks to the butcher. It keeps feathers and poop from flying everywhere and cuts down on how much mess you have to clean up later.
13. Make your own chicken waterers
If you have a large flock, it’s smart to use a 5 gallon bucket or one of those huge food safe tubs to make your own chicken waterer.
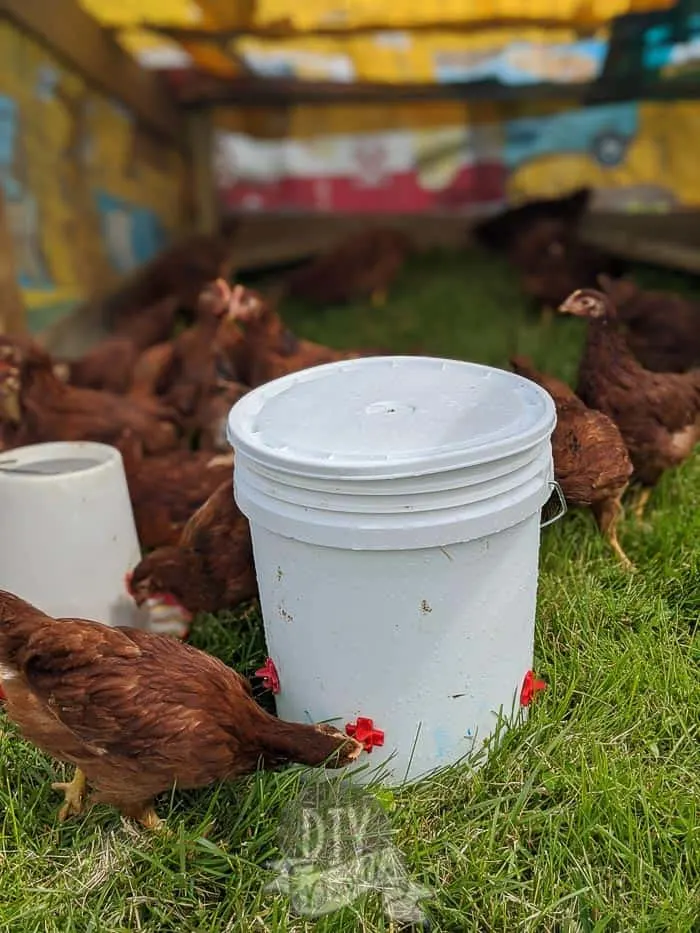
14. Ducks need open water to dunk their bills in.
I make DIY duck waterers too, but ducks need to be able to dunk their bills into the water. Metal concrete mixing pans work well for this, as do heated water buckets, in the winter. In the summer, I use 5 gallon buckets with larger holes cut so the ducks can fit their heads in. Here’s the DIY duck waterer tutorial.
15. Moving Goat Hay Bin
This quick and easy to make goat hay bin is a great way to move an entire bale around a field without breaking your back!
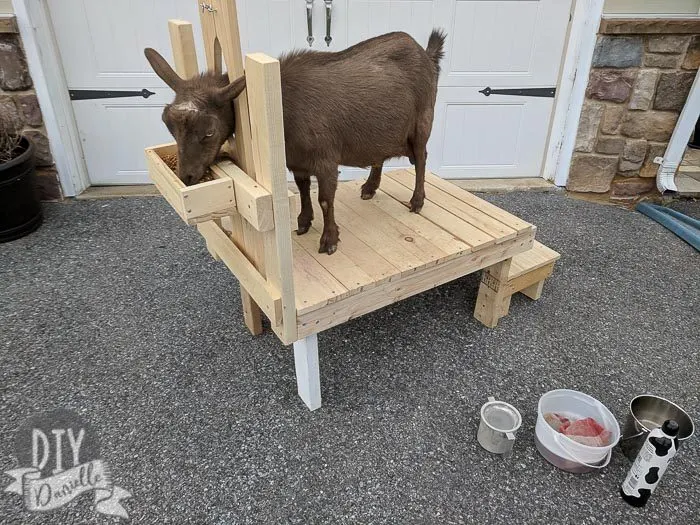
16. Build Your Own Milking Stand
Milking stands are SO helpful if you’re milking goats every day. Build your own with 2x4s CHEAP.
17. Use Cheap Solar Lights in Sheds without Electricity
These cheap solar lights do a decent job providing light in sheds at night when you don’t have electricity in that barn.
18. Save Baling Twine. Buy Duct Tape and Zip Ties
Baling twine, duct tapes, and zip ties are three of my MOST USED items on the farm. I keep a bundle of baling twine and a pair of cheap scissors in my barn in case I need a quick fencing fix. Zip ties are my favorite though because they’re fast and easy.
19. Keep Baggies by the Front Door
Keep a set of plastic bags or booties by the front door so you can slip them over dirty boots if you need to run inside to the bathroom between chores.
20. First Aid Kits for Everyone in the Barn
Speaking of running to the bathroom… keep first aid kits for all of your animals AND yourself inside the barn. It’s hard to run back and forth for every cut, but you also don’t want to get wounds infected.
21. Freeze Eggs for Winter
In the summer, you’ll be rolling in eggs if you have chickens or ducks. In the winter, they often don’t lay for a period of time. Scramble the eggs, then freeze them in ice cube trays or Ziplock bags.
22. Use Feed Bags for Garbage Cans
Save your old feed bags and use them inside garbage cans in your barn. They fit well and they’re perfect for harder to dispose of items such as broken fencing.
23. Plant Feed for Your Animals
If you garden, it’s smart to plan for excess produce to give to your farm animals. We throw the chickens and ducks lots of excess produce, particularly watermelon, pumpkin, and comfrey.
You can also hit up friends and family locally for leftover pumpkins and Christmas trees each year.
24. Seed Swap with Friends
Rather than buy a ton of seeds and only use a few from each packet, organize a seed swap with friends.
25. Use Coolers to Store Medicine and Other Items that Can Freeze
Use an old cooler to store medicine or other items that can freeze in the barn. Add some insulation then store the cooler between hay bales. This should hopefully keep everything warm enough to not freeze, and out of reach of the mice.
26. Get Metal Cans for Feed
Get metal cans for storing animal feed and NEVER leave the lids off. This should protect your feed from mice.
27. Start seeds in toilet paper tubes!
Save money and the environment by upcycling toilet paper tubes or paper towel tubes to use for starting seeds. They’re biodegradable so they can go straight into the ground!
28. Use cardboard as a weed barrier
For a free alternative to the store bought weed barriers, try cardboard or old newspapers. Read more about weed barriers here and learn where I get all of my cardboard!
29. Add paper to line your indoor compost bin
We have an indoor compost bin that we use before transporting the gunk to the compost pile or to the chickens. This can get super icky if you don’t line the bin. I find it is best to rip up an old newspaper or paper bag to use for lining the indoor bin. This will decompose once dumped into the compost pile, but should help keep the bin itself from getting too icky. Here’s some tips on composting.
30. Does mulching break your back? Try pine straw.
While I love the look of mulch, it’s heavy to move. It breaks my back every year to mulch the front garden. Pine straw is a much lighter alternative that works. Read more about using pine straw as mulch.
31. Add gutters to your sheds and barns
Add gutters to divert rain water away from the base of your sheds and barns. If you want and rain water is precious where you’re at, you can divert that rain water into a trough for the animals or into a rain barrel to use on your garden.
32. Rotate compost bins
I don’t mean rotate a compost bin like those specialty bins that can be turned; if you’re on a farm you probably have more compost than one of those bins can feasibly hold. No, I mean keep two or more compost piles. Use one for a while until it’s full, then use compost pile #2. By the time you fill the 2nd pile, hopefully the first will be ready for the garden.
33. Buy the right fence for the job
One of the biggest expenses on my farm is fencing; it’s also the biggest time suck. I’ve wasted a lot of time fixing bad fencing jobs and bad wire fencing types. Here’s a guide to types of wire fencing, and another guide on electric fencing.
34. Buy the right animals for the job
I occasionally buy the wrong animal for the job, sometimes because I let the cuteness factor get in the way. For example, I wanted a milk goat, but I was also hoping they’d eat the brush on my property; a larger breed would have been a smarter decision. Instead I got Nigerian Dwarf goats which are a fairly small breed. They’re easy to handle, but small.
On the same vein, many people get cows for milk, but if you’re just trying to feed your family, buying a milk goat or two is a better choice. A cow makes a lot of milk and eats a lot of feed. One goat with good milk lines can easily provide for my family of 5 without needing the larger pasture that a cow would.
35. Use a mask for cleaning
Use a mask when cleaning out a chicken coop, and it’s probably ideal to wear one for a lot of tasks on the farm that might throw up a lot of dirt or dust. It’s fairly low effort to throw a mask on and it’ll keep your lungs a bit healthier. Breathing in the dust from a chicken coop can cause an asthma attack, histoplasmosis, or/and birders lung
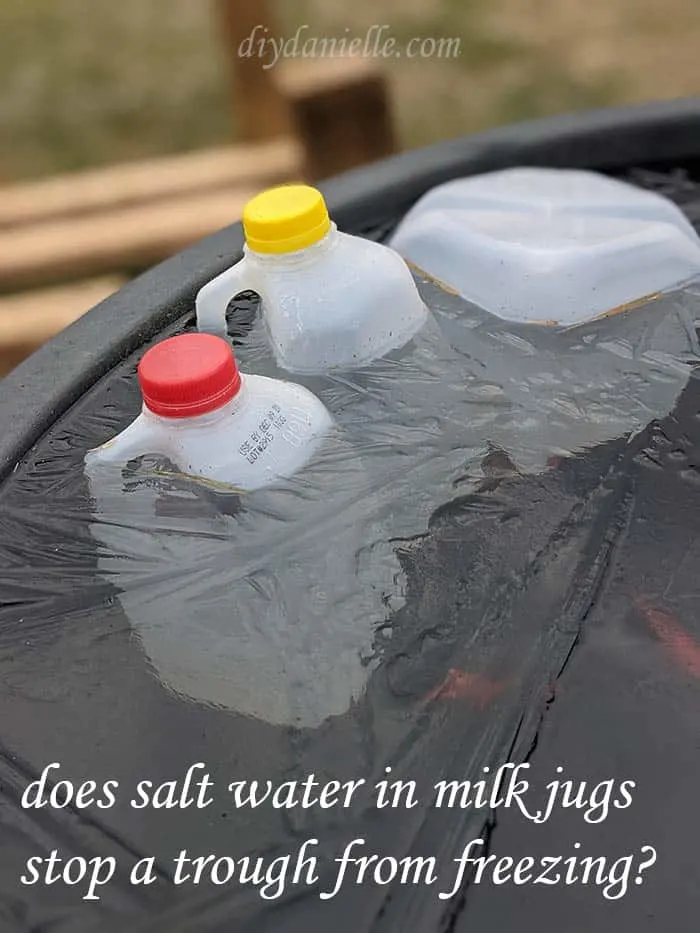
36. Salt water in milk jugs to prevent the trough from freezing
The verdict is still out on this, but theoretically salt water in closed milk jugs inside your water trough can prevent the trough from freezing. Mine has still been freezing, but it’s been a thin layer that’s easy to break so far. I think the trick is to make sure the jugs will bob up and down and move inside the trough.
I hope these were helpful! Drop a comment with your favorite farming hack!
Please share and pin this post! If you make this project, share it in our Stuff Mama Makes Facebook Group. We have regular giveaways for gift cards to craft stores. You can also tag me on Instagram @doityourselfdanielle; I love seeing everything you make!



Jen
Monday 15th of April 2024
Just wanted to add, regarding the compost pails, we use the paper from our shredder to line the bottom of the pail, and add another and full or two between layers of compost. We can go 1-2 weeks without smells or bugs!