

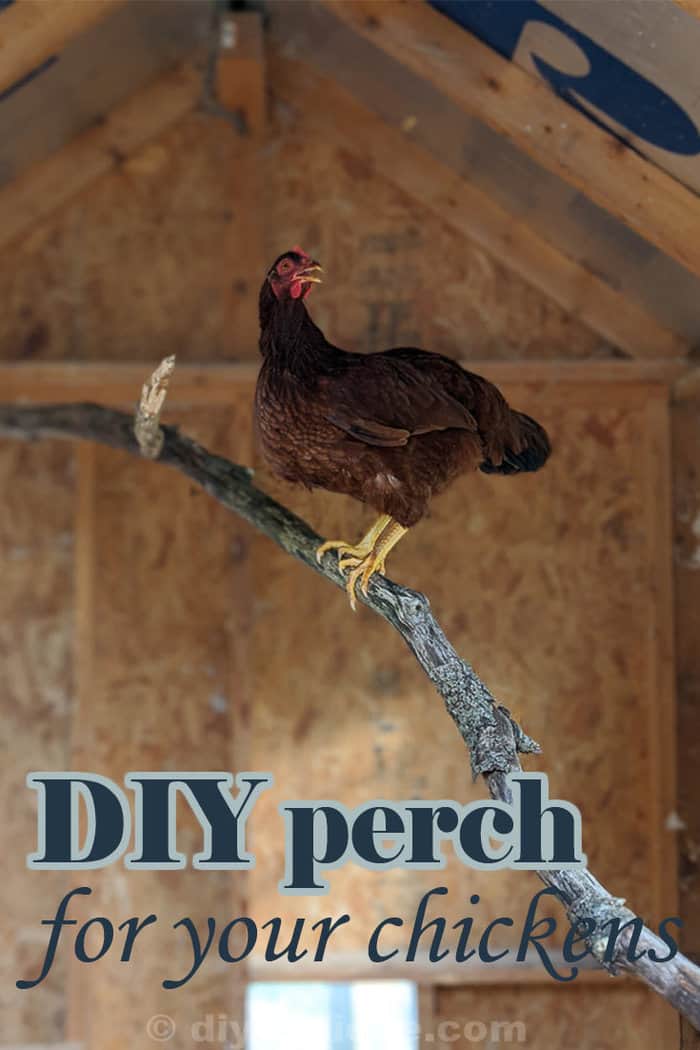
How to make an easy DIY chicken roost with items you may have laying around in your yard! This is a great way to add a natural look to your coop.
This post may contain affiliate links which may earn me commissions should you click through them and take certain actions. As an affiliate for Amazon, Cricut, xTool, Home Depot, and other sites, I earn from qualifying purchases. Please DIY carefully. View my full legal disclosures here.
The majority of my content is generated by me, as are 99% of the photos and videos, but I utilize technology for titles, descriptions, video editing out all of my ums, and occasionally for text overlay on images.
Please read the whole post so you don’t miss any important information!
My ducks like to fly, but they aren’t really into roosting. When I added chickens to our flock, it quickly became apparent that I needed to add a roosting perch for them or they would be falling off the windowsill…
Also I think the ladies want a place to escape the rooster who, I anticipate, is too fat to hop up to a roost. The hens are certainly the only ones who have been climbing up to the roof of our chicken coop.
How to Make a Chicken Roost
So I decided to get on that STAT. I have wood that I could have used, such as 2x4s, but I had to remove the LAST roost from this coop; it was GROSS. They get pooped on a lot so it’s ideal if you can replace the roosting bar easily.
I decided to try a natural look and use tree branches.
Supplies
Selecting Branches
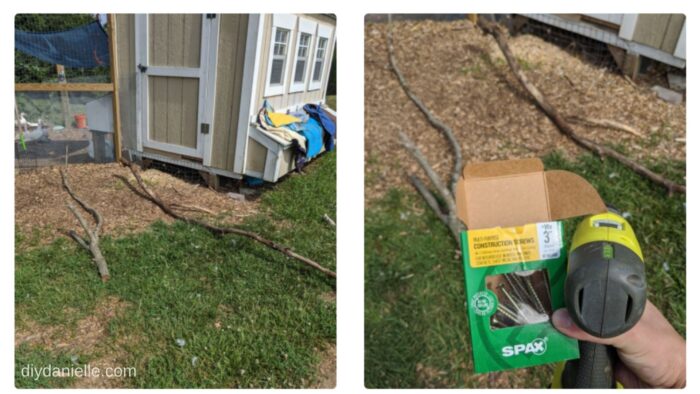
Ideally, you want somewhat thick, freshly cut branches. The ones I choose were pretty brittle, but I didn’t want to get out the chainsaw. It feels like 110 degrees here right now.
The main issue with brittle branches is that they might snap in half when you try to shove them in your coop and screw them in. These aren’t fresh, but they were cut within the past year so they seemed to do the trick.
I figured that, worse case, I’d replace the branches.
You may want to avoid branches that have a lot of sap in them, like you’d get from pine trees, just to avoid a mess.
If you’re extra cautious, you could sand off all of the bark too. I was told bugs and such can be a problem if you leave the bark on, but chickens eat bugs so I’m not sure how big of an issue that is. We haven’t had any problems.
Placement of the Roost Bar
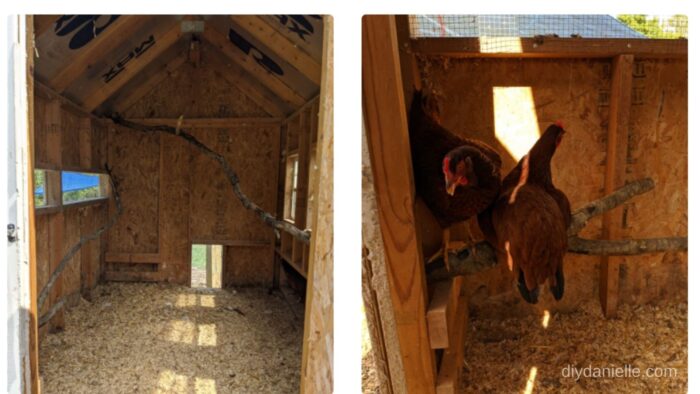
I wanted two roosting perches. The placement needed to give me enough room to walk into the coop to collect eggs and clean.
My branches were so long that I had to finagle them a bit to get them to fit inside. Fortunately, they didn’t break in the process.
I have noticed that my hens like to hop up a little higher than the roosters so I angled the branches so there was a lower roosting area and a higher one. If they want, they can hop to the lower area, then walk up the branch to the higher spots.
Of course, they’re in front of the windows so they can get a bit of a breeze too. It’s hot here!
If they don’t use them like this, I can always move the branches. If they poop on them or they break, I can replace the branches free (and regularly).
Attaching the Branches
To attach the branches for the chicken roost, I used 3″ Spax screws. If you aren’t a woodworker, these screws have a star shaped head. You’re probably familiar with the “x” shaped Phillips head screws, but those are more prone to issues like stripping. Once you switch to a star shaped screw/bit, you will NEVER want to use Phillips head screws again.
Whatever type of screws you use, however, you’ll want a longer screw. 3″ seemed to get through my branches to hit the 2×4 stud in the wall of the coop.

As this is inside the coop, I didn’t bother with a screw rated for outdoors.
Make sure to screw these in carefully if your branches are brittle. I didn’t have an issue, however.
And that’s it! Replace as needed. I recommend placing them low enough that the chickens can’t peck at the insulation in your roof- if your coop has that.
Need an easy shelter and don’t want to DIY? Here’s what you can buy.
Omlet makes a ton of chicken shelters and runs that are movable and have lots of accessories available. You can add wheels and handles to move the run as needed which is nice. The cages look like they’re well predator-proofed, and you can get an attached run up to 13′. They even sell an automatic coop door that opens and closes when the sun rises and sets. The Eglu Go is their easily movable shelter and run. They have perches to add on, swings, treat holders, and even chicken clothing. Totally worth checking out if you like to geek out over your poultry.
Love chicken projects? Check out my DIY Chicken Tractor and Chicken Waterer with Nipples. Learn how to hatch chicken eggs. You can even see my cost analysis of raising meat chickens. And don’t forget to check out these awesome DIY chicken coop ideas!
Please share and pin this post! You can also post your project and tag the DIYDanielle team on Instagram @doityourselfdanielle!
DIY Chicken Roost Idea Using Tree Branches!
This is a quick way to add natural looking perches to your chicken coop that are affordable, easy to swap out, and natural looking.
Materials
- Old branches
- Spax 3" Screws
Tools
- Ryobi Drill
Instructions
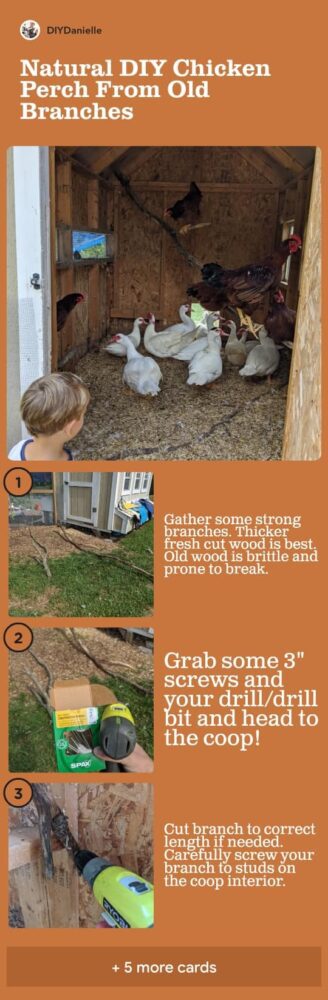
- Gather some strong branches. Thicker fresh cut wood is best. Old wood is brittle and prone to break.
- Grab some 3" screws and your drill/drill bit and head to the coop!
- Cut branch to correct length if needed. Carefully screw your branch to studs on the coop interior.
- All screwed in on one side! Repeat for the other end. I left room to walk and gather eggs.
Notes
The left branch broke as it was pretty brittle, but they like the smaller perch that was left!
Google Web Story: DIY Chicken Roosting Bar