

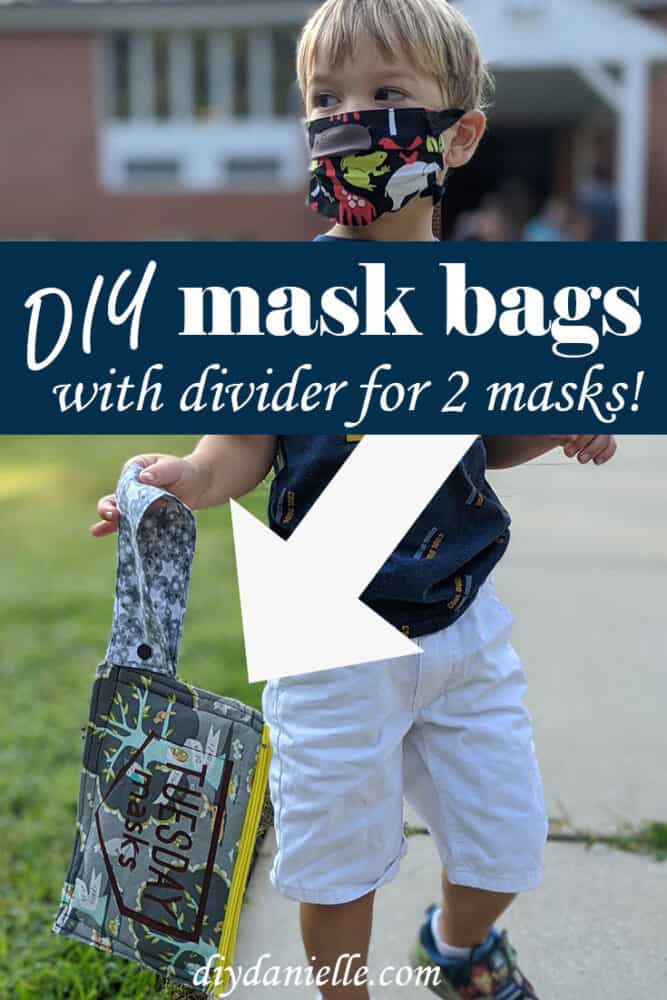
How to make some easy storage bags to hold your masks. Label them with your Cricut! This is great way to keep masks for school or work separate by day!
My youngest son is 3 years old and his preschool reopened this Fall. He’ll be attending twice a week and they’re asking the kids to wear masks. I decided to make a couple of quick mask bags to store his school masks. I’m going to show you how to make these simple bags to help make keeping track of clean and dirty masks easier!
This post may contain affiliate links which may earn me commissions should you click through them and take certain actions. As an affiliate for Amazon, Cricut, xTool, Home Depot, and other sites, I earn from qualifying purchases. Please DIY carefully. View my full legal disclosures here.
The majority of my content is generated by me, as are 99% of the photos and videos, but I utilize technology for titles, descriptions, video editing out all of my ums, and occasionally for text overlay on images.
Please read the whole post so you don’t miss any important information!
The bags are easy to wash and have a divider so I can store two masks per bag. The dirty mask can go inside the bag if they need to swap out for a clean mask…. which is inevitable with a bunch of toddlers.
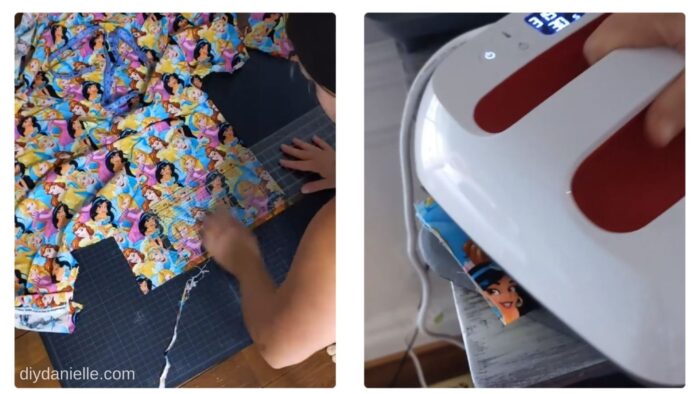
You’ll need some fabric… I used 100% cotton fabric, but you could also consider a wipeable plastic type fabric like polyurethane laminate. Plastic type materials may ‘hold’ the COVID virus longer… and I figured that might apply for plasticy fabric like PUL too. That said, PUL is easier to wipe down than cotton.
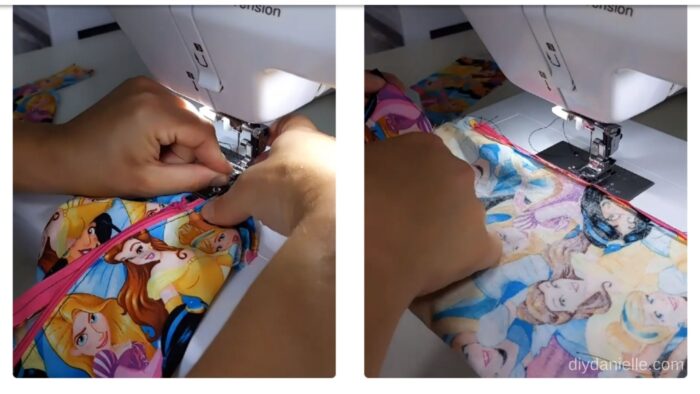
I used a zipper for the closure and snaps for the handle. You can make a closed loop for the handle if you prefer because most schools have coat hooks that kids can hang things from. I like having a snap closure so I can snap it around a bar or other secure areas.
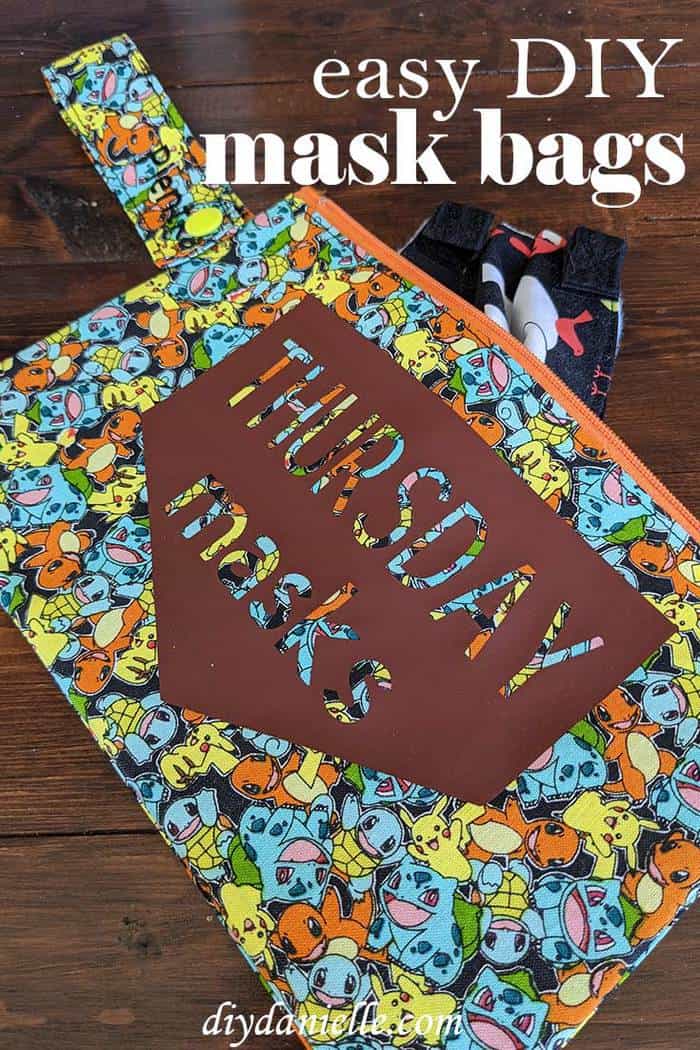
I applied a HTV (heat transfer vinyl) design to the front of my bag to label it, and there’s also a label on the handle with our last name. You can get the Cricut cut file here if you want to use my design. I added a few different days for those whose children attend school on other days of the week.
Fabric cuts:
- (1) Piece of Cotton Fabric: 10″ x 12.5″ (exterior)
- (1) Piece of Cotton Fabric: 10″ x 8″ (interior divider)
- (1) Piece of Cotton Fabric: 14″ x 4.5″ (strap)
The 10″ is across the width of the bag so your 9″ zipper, naturally, goes along one 10″ side (I left plenty of extra room for a seam allowance around the zipper). Make sure the fabric is cut in the right direction!
Here’s the tutorial… if you keep scrolling, there’s a video tutorial too!
Supplies
- Cotton Fabric
- 9″ Nylon Zipper
- Snaps
- Snap Pliers
- Scissors
- Measuring tape
- Pins Or Clips
- Cricut Easy Press 2
- Cricut Maker
Use the Discount Code DIYDANIELLE on cricut.com for 10% off any cutting machine or heatpress (no minimum). Excludes: materials/accessories/mystery boxes/etc. Applies to US/CA only, code expires 12/31/23.
This photo tutorial will make a LOT more sense if you also watch the video tutorial!
Step 1: Cut your fabric.
Step 2: Iron your fabric. I’m using my Cricut Easy Press 2 to iron, but a regular iron is fine too.
Step 3: Make your strap. This should be a 14×4.5″ piece of fabric that you fold in half (it should be thinner, not shorter), right sides together. Sew together along the long edge and one short edge, then turn right sides out. Top stich.
Step 4: Sew your divider. This divider should be 10×8″ and folded right sides together so it’s 10×4″.
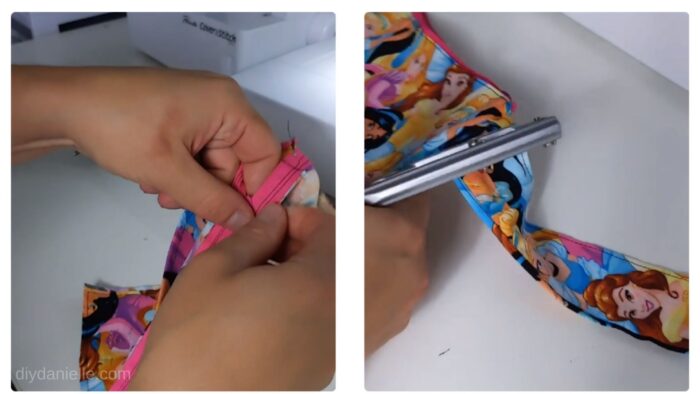
Step 5: Sew on your zipper.
Step 6: Pin strap in place.
Step 7: Pin your divider in place.
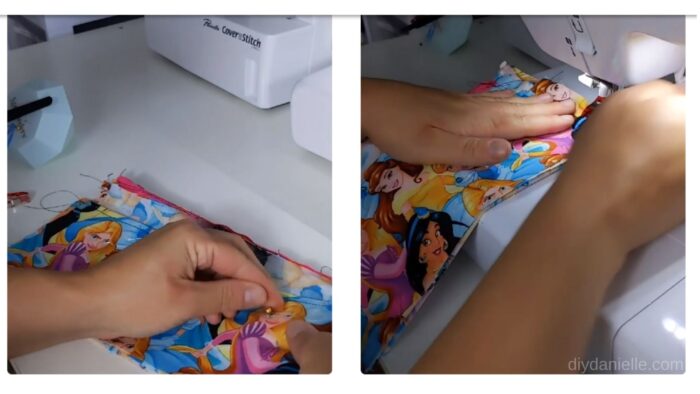
Step 8: Sew the short sides and bottom of the bag, right sides together.
Step 9: Flip right sides out.
Step 10: Add snap to bag handle. Here is a tutorial on how to use snaps and snap pliers.
Step 11, Optional: Iron on HTV design.

Here’s the video tutorial:
I’ve been really impressed with how well the preschool is handling COVID precautions so far. They share photos with us about how the school days have been going and the kids almost always have their masks on, except for lunch. We’ve been working hard to teach our kids the importance of wearing our mask properly so I’m super proud that my kids are ‘getting it.’
Public schools are closed for this semester in our state so my older sons are homeschooling with me this year.
Please share and pin this post! You can also post your project and tag the DIYDanielle team on Instagram @doityourselfdanielle!

DIY Mask Storage Bags with Divider
How to make easy bags for storing masks for school.
Materials
- Cotton Fabric
- 9" Nylon Zipper
- Snaps
- Snap Pliers
- Scissors
- Measuring tape
- Pins Or Clips
- Cricut Easy Press 2
- Cricut Maker
Instructions
1. Cut your fabric.
2. Iron your fabric.
3. Make your strap.
4. Sew your divider.
5. Sew on your zipper.
6. Pin strap in place.
7. Pin your divider in place.
8. Sew the short sides and bottom of the bag, right sides together.
9. Flip right sides out.
10. Add snap to bag handle
11. Iron on HTV design.