
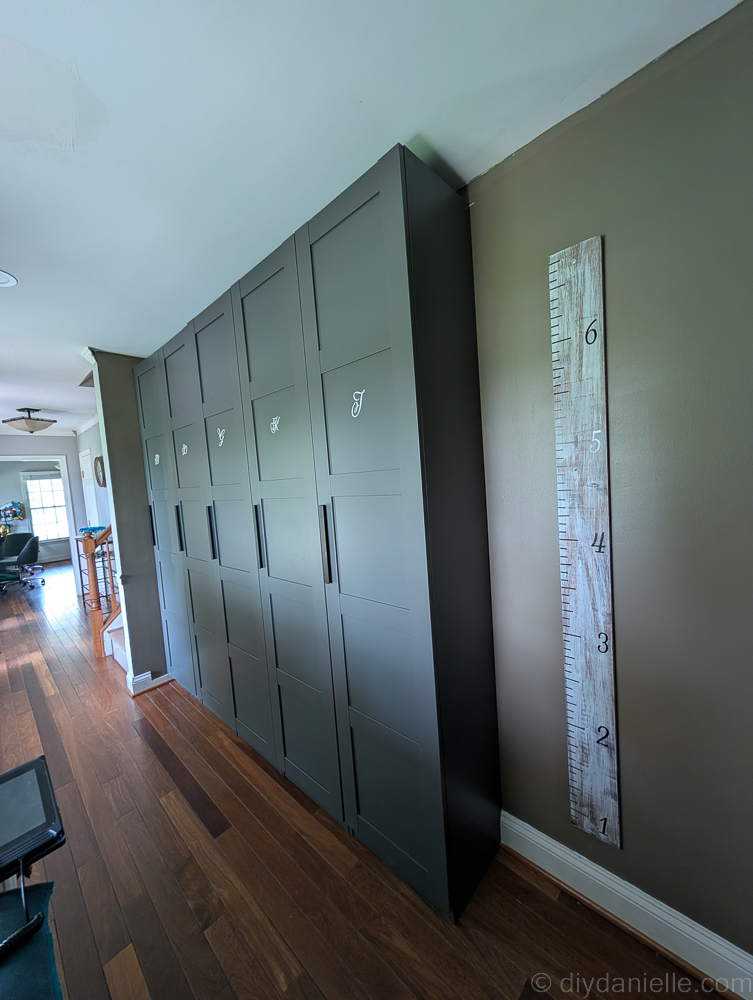
Transform part of your dining room into a practical mudroom and hallway. These IKEA Pax shelves create a clean, locker room feel!
Our dining room wasn’t cutting it so when we decided to renovate our home, we decided to convert the dining room into a pantry and also a mudroom/hallway. This post is about our process for creating the mudroom space.
We wanted closed door lockers to help hide clutter: with a family of five, we have a lot of shoes and coats and backpacks. Having each child responsible for their own cubby was the perfect solution and I can close the doors so I don’t see the mess… sort of like their bedrooms. Poof! Magic!
There’s one unfinished wall still, but that wall will be cut out to create a entrance to the future family room so I didn’t opt to spend hours fixing it in the interim. Hopefully the unfinished look doesn’t make me batty!
This post may contain affiliate links which may earn me commissions should you click through them and take certain actions. As an affiliate for Amazon, Cricut, xTool, Home Depot, and other sites, I earn from qualifying purchases. Please DIY carefully. View my full legal disclosures here.
The majority of my content is generated by me, as are 99% of the photos and videos, but I utilize technology for titles, descriptions, video editing out all of my ums, and occasionally for text overlay on images.
Please read the whole post so you don’t miss any important information!
Mudroom Renovation
Project Supplies
- PAX Wall Mounted Storage Frames x 5 (10 5/8 x 13 3/4 x 92 7/8″, dark gray)
- Komplement Soft Closing Hinges (I should have ordered 3-4 per shelf but got away with two)
- HACKAS Handle 11 13/16 in Anthracite x 5
- Baggmuck Shoe Trays x 10
- Komplement Shelves x 15
- Komplement Clothes Rod x5
- Cricut Removable Vinyl, White for the labels
Step by Step Instructions
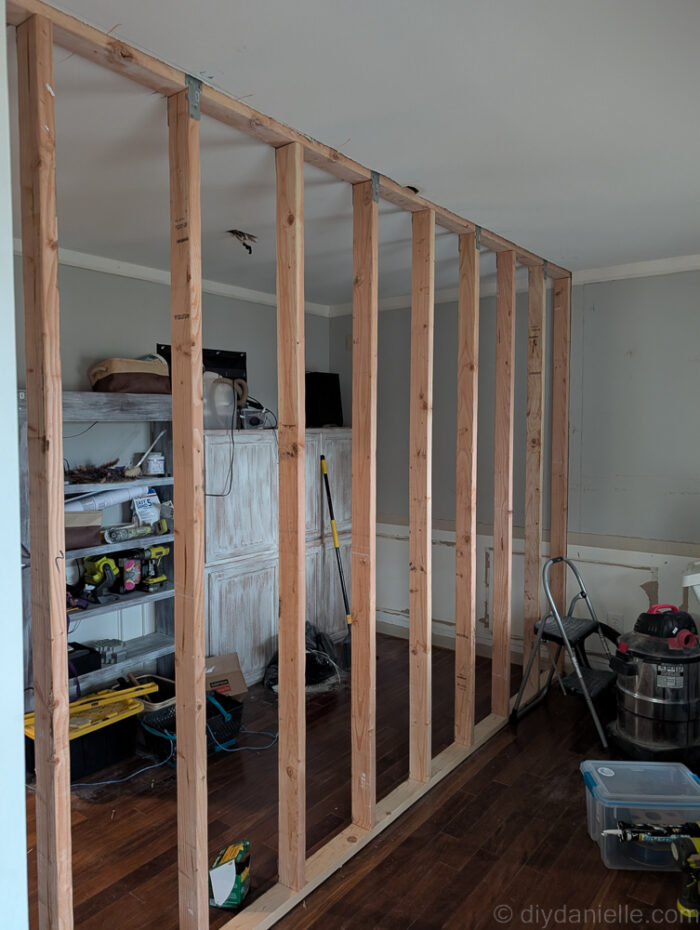
Step 1: Dividing the Dining Room
We started by dividing the dining room. We had already measured everything out to ensure that the space was divided into two rooms that would be sufficient for our purposes. We framed out the whole wall and had an electrician install puck lights as well as electric outlets on the pantry side.
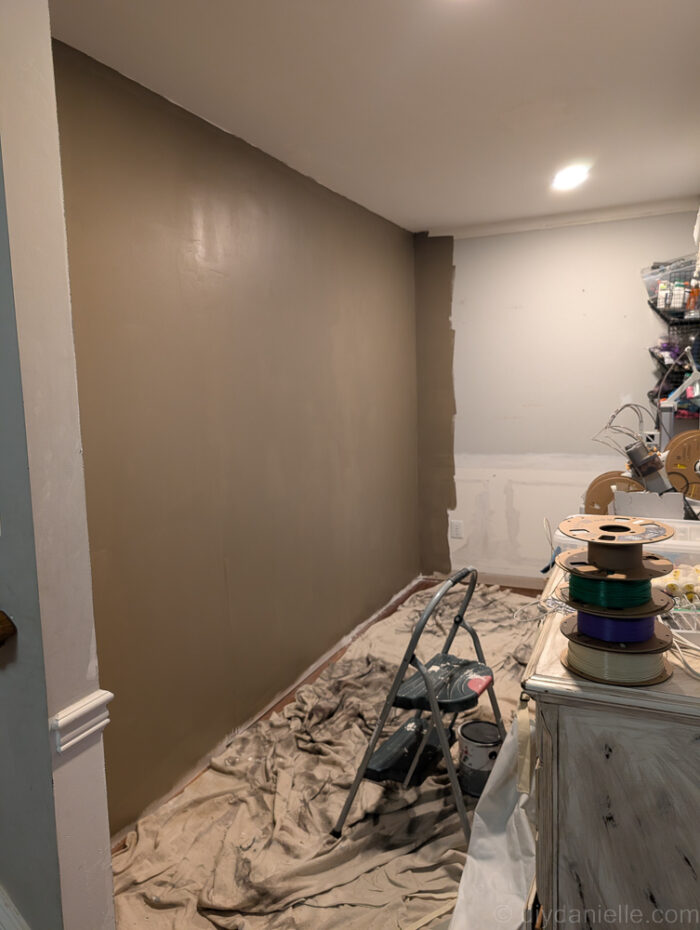
Step 2: Drywall and Drywall Repair

Step 3: Priming and Painting
Step 4: Adding the Cabinets
The cabinets weren’t cheap, but I really like how they installed and look. They ran about $1800 with all of the pieces (April 2025), although I’m not exactly sure because we had to return the original doors we bought to exchange for something else.

Excuse the mess… until we figure out everything with the addition, the end of the wall there will remain unfinished.

I added some removable vinyl lettering with my Cricut to label everyone’s individual locker.

I also labeled drawers in hopes they wouldn’t ignore the symbols and actually properly sort everything.

Step 5: Adding the Trim for a Built-In Look
We ended up skipping this part, at least for now. We were pretty happy with how it looked and we didn’t want to spend money on additional trim at this point. The only tricky part ended up being this section. If we’d either raised the shelves up, or moved the shelves down a tiny bit (with a spacer installed) then we could have avoided the wonky baseboard. I need to fix this as I’m sure it’s feasible to fit.. It’s just been low-ish priority.

Other DIYs related to this project:
Please share and pin this post! You can also post your project and tag the DIYDanielle team on Instagram @doityourselfdanielle!
