

Build custom DIY pantry shelves for can and food storage using plywood, trim, and simple tools. Step-by-step guide with tips for a built-in look.
One of the things we really wanted in our kitchen was a pantry… we didn’t have a lot of space to store extra food for a family of 5, despite having a lovely kitchen. Our old ‘pantry’ was also a mudroom and laundry room… and altogether too small for even a laundry room. We decided to divide our dining room into a pantry (and also a mudroom/closets on the other side).
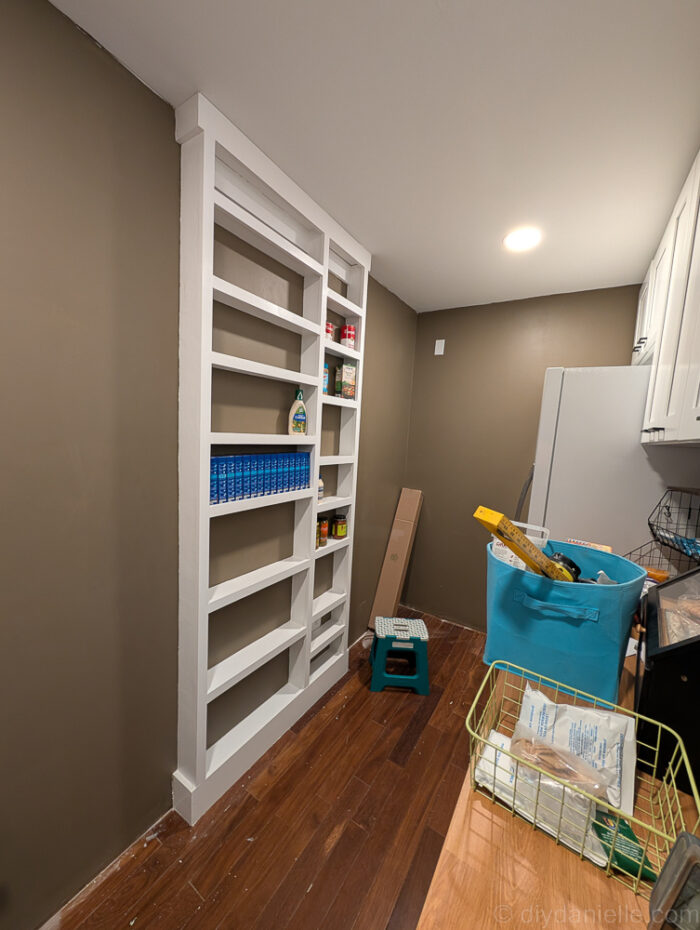
We divided the room, creating a full wall with studs, drywall, and electric. I used cabinets from the RTA Store for one side of the pantry, but I wanted to keep the walkway comfortable so I opted for 4″ shelving on the opposite side.
This post is going to show how I made these shelves- I LOVE them. They are built-in and look like they belong in the space. The shallow shelves are perfect for easily reviewing what we have or don’t have in stock, without needing to move other stuff out of the way. I may eventually build more as I want to start canning more food and there is plenty of wall space here.
This post may contain affiliate links which may earn me commissions should you click through them and take certain actions. As an affiliate for Amazon, Cricut, xTool, Home Depot, and other sites, I earn from qualifying purchases. Please DIY carefully. View my full legal disclosures here.
The majority of my content is generated by me, as are 99% of the photos and videos, but I utilize technology for titles, descriptions, video editing out all of my ums, and occasionally for text overlay on images.
Please read the whole post so you don’t miss any important information!
DIY Can Storage Shelves
Project Supplies
- Top Trim: 3.5″ (1×4)
- Bottom Trim: 5.5″ (1×6)
- Shelf Face: 1x2s
- Shelves: 3/4″ plywood cut into 4″ width: https://homedepot.sjv.io/10eem
- Screws, options: Pocket hole screws (https://homedepot.sjv.io/2rPRxg), 8 x 2-1/2 in. Star Drive Trim Finishing Head Screw (100-per Pack) (homedepot.sjv.io/K0jW97), or regular screws if you so desire.
- Drill bits to predrill holes
- Cabinet screws to mount shelves to the wall (to a stud)
- Wood Glue https://homedepot.sjv.io/5b4JQo
- Ryobi Drill https://homedepot.sjv.io/a1EdkQ
- Sander- Ryobi Cordless CAT Sander https://homedepot.sjv.io/x9xJ4d
- Ryobi Airstrike https://homedepot.sjv.io/qn7Zbj
- Stud finder
- Ryobi Table Saw https://homedepot.sjv.io/JrGdXa
- Miter Saw https://homedepot.sjv.io/BXrdaL
Step by Step Instructions
Step 1: Cut your 3/4″ plywood into 4″ wide pieces. My vertical pieces were the floor to ceiling height (or close) and I cut 3 of these. It’s easiest to cut your 4×8 sheet of plywood into 4″ x 8′ lengths.
You need to plan out how many shelves that you want to cut. I planned my shelves to be 8″, 9″, 10″ or 12″ spacing. I think I could have benefited from more 8″ shelves for normal sized cans, but I was loathe to
I was using scraps from another project so I did a little extra work here to accommodate that.
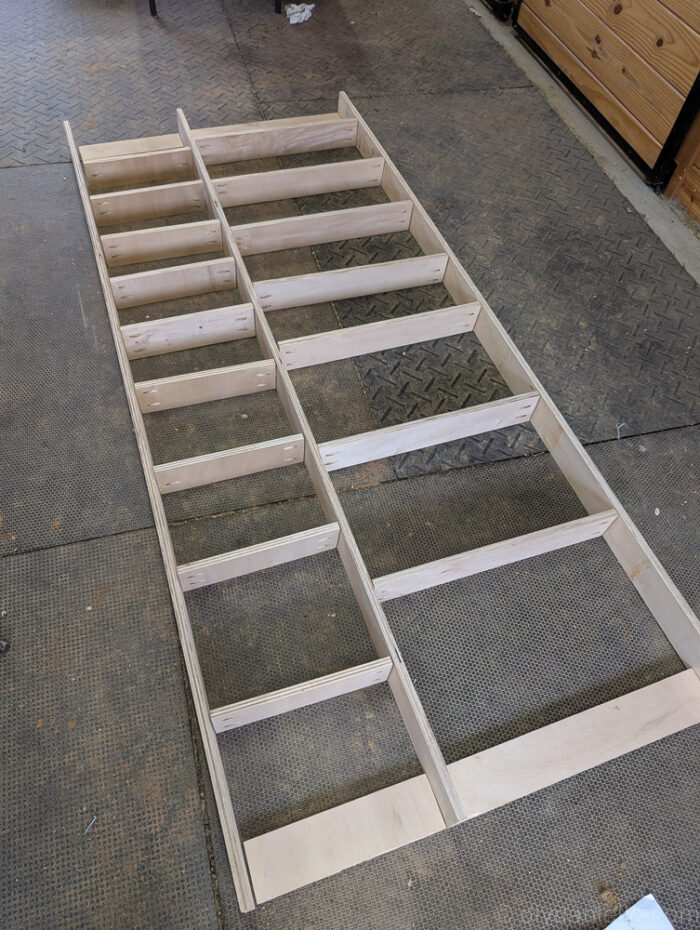
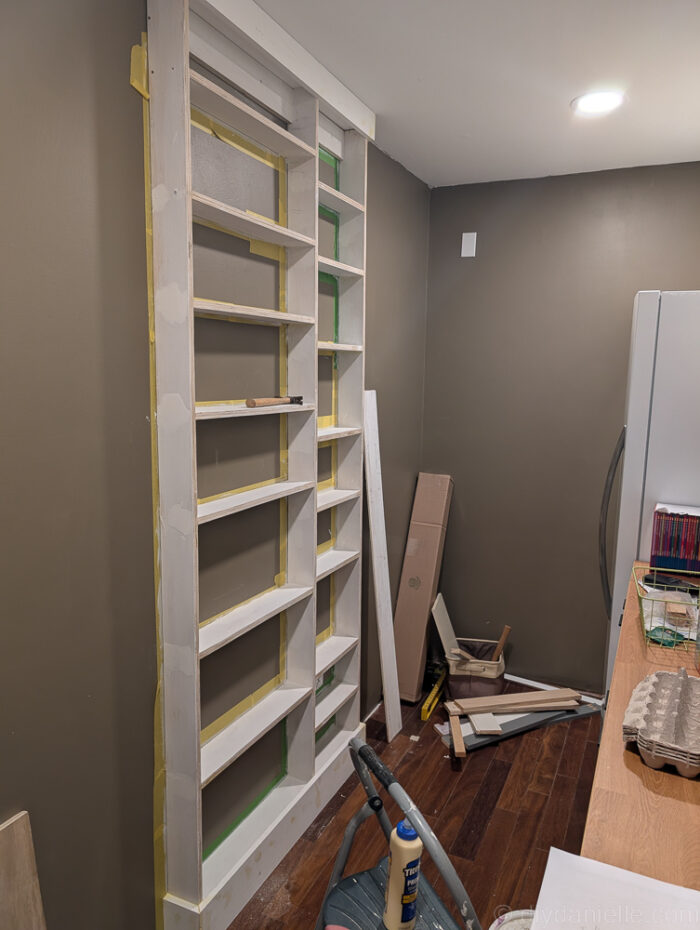
Step 2: Assemble your shelf. I had (3) vertical pieces, multiple shelves at 24″ wide and 14″ wide, and four shelf-sized pieces that were attached to wall (one per shelf at the top and bottom).
Be aware of your pantry doorway as you may need to assemble them inside the pantry as they may not fit through the door. I built the 24″ wide shelf, sanded it, and then moved it into the space. I built the 14″ shelf off it once the 24″ section was assembled.
I spaced the shelves apart at 8″, 9″, 10″, or 12″… make sure to place the shelves at different heights for your 14″ shelf and 24″ shelf.
Make sure to use wood glue as well as screws. I started with pocket holes as I was reusing wood from another project and pretty immediately regretted it… they’re a pain to patch after.
We ended up switching to using a drill bit to predrill the hole, then using screws to attach the shelves. Ensure that the screw head is buried in the wood enough that it can be covered up when patching the wood.
Step 3: Sand shelving.
Step 4: Move shelving into space, if you haven’t already. Use the back pieces that you added to attach the shelves to the studs in the wall… make sure to use cabinet screws for this.
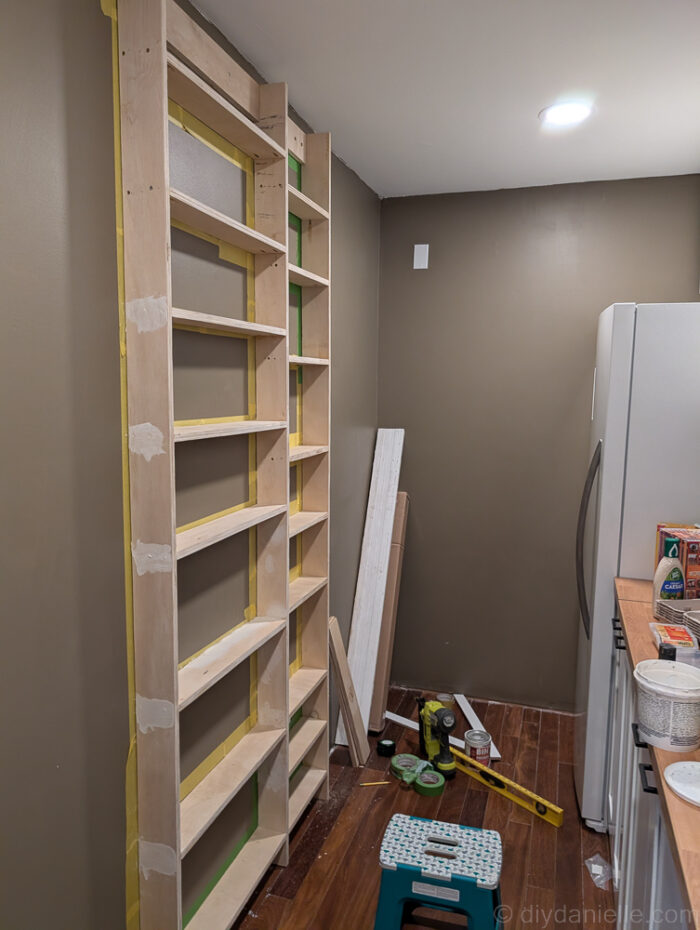
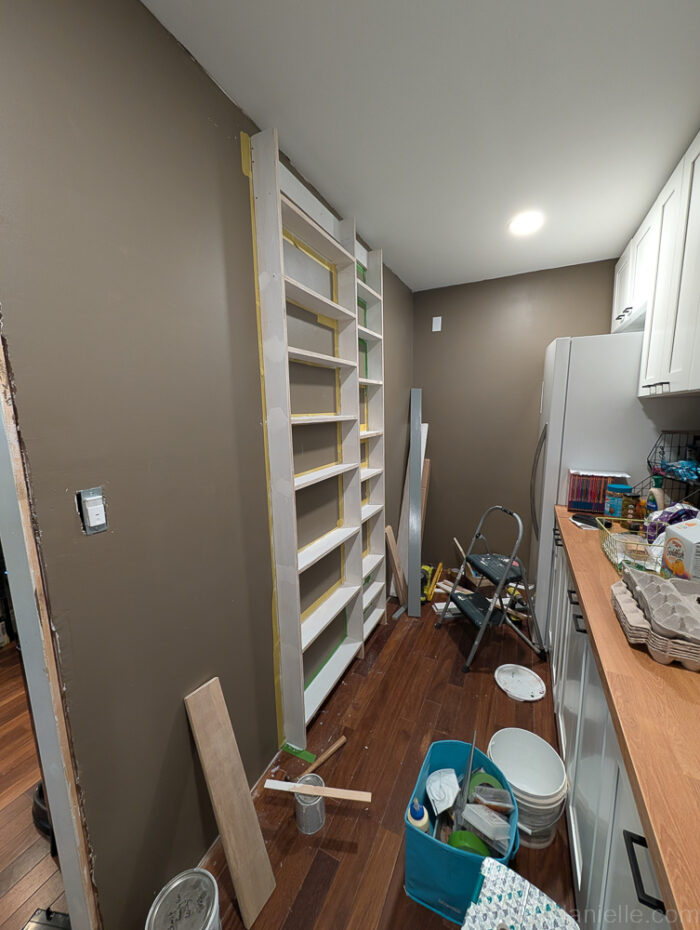
Step 5: I planned to use primed boards for the trim so I taped my walls and primed the shelving.
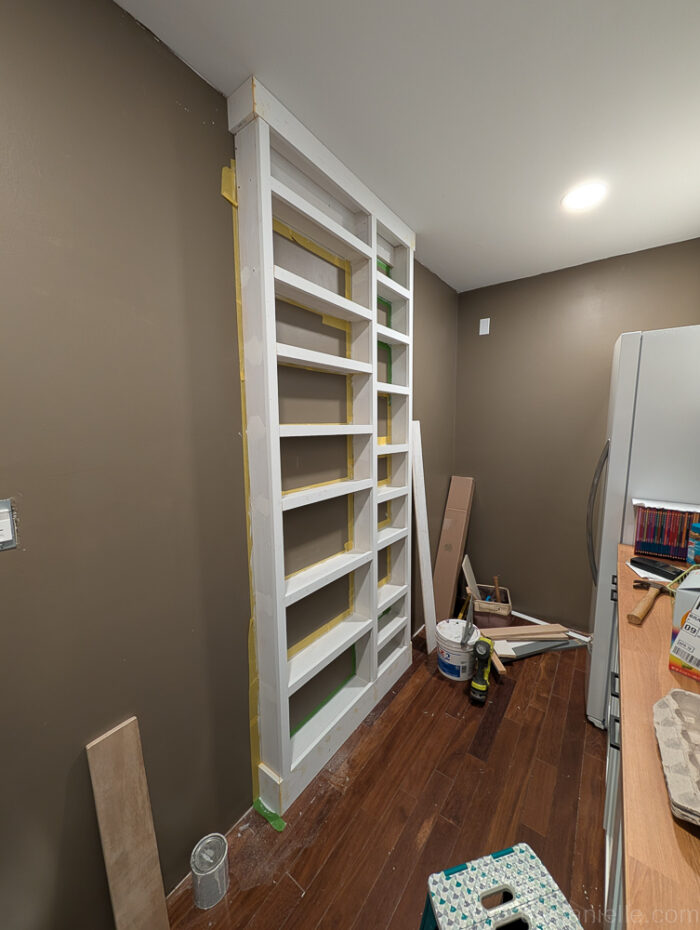
Step 6: Next, I added primed boards for trim around the bottom and top of the shelves. This creates more of a built-in look. The top is 1×4 and the bottom is a 1×6. I used my miter saw to cut the edges at an angle so they fit neatly together.
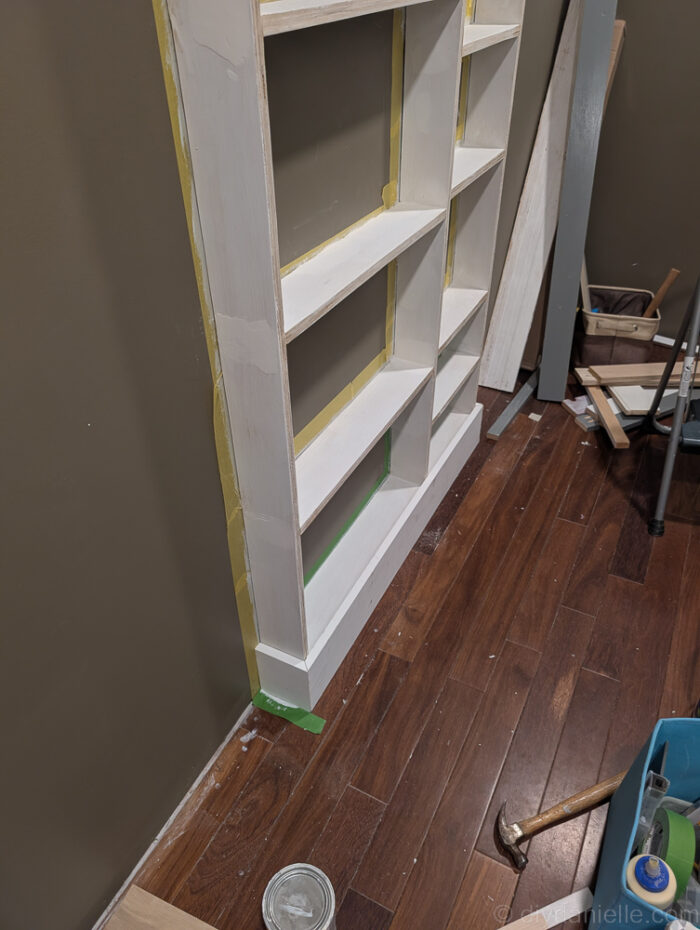
Here is a picture of both the top and bottom with the new trim.
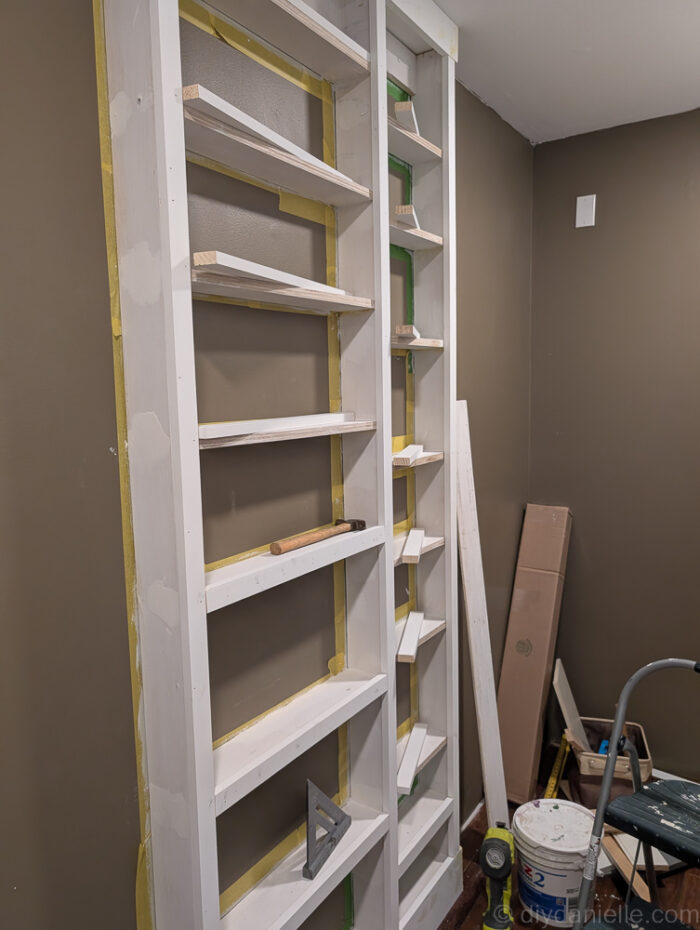
Step 7: I used 1x2s for trim along the rest of the shelving, first adding the (3) vertical pieces, then adding a piece for each shelf. I attached these with my finishing nail gun.
The trim will hopefully keep jars from getting knocked off accidentally… it also covers the raw plywood edges.
Step 8: At this point, I used patching compound to cover all of the screw heads, pockets from the pocket holes, etc. I also used compound to cover the edges where the trim met at an angle.
It is TRULY painful, but it’s also what makes the project look REALLY nice when you’re finished so it’s important to spend time doing this.
Step 9: Once it’s dry, sand the patching compound until it’s smooth and not noticeable. You can prime those spots and paint the shelves now! You’ll likely need one or two layers of paint.
Step 10: Not seen: When you’re all finished, you can use white caulk to caulk around the edges. This will create an even more finished look. We need to caulk another room as well and we are waiting to finish this until we get to that… so in other words, this room is not truly finished. But it’s ‘good enough’ and I LOVE it.
I immediately filled the shelves and questioned if I wanted to build two or three more… yes… but also no.
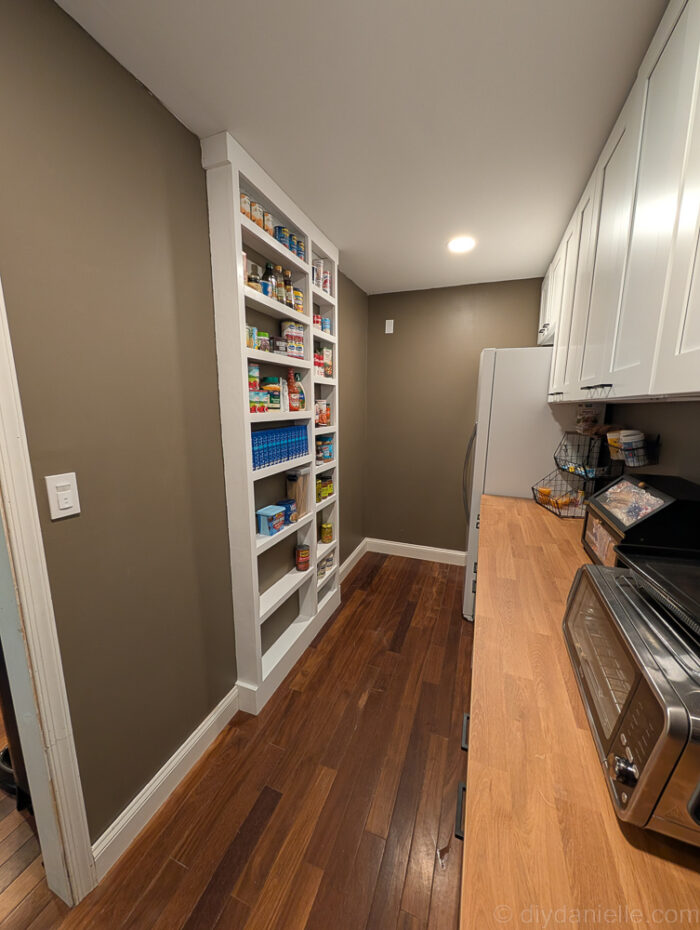
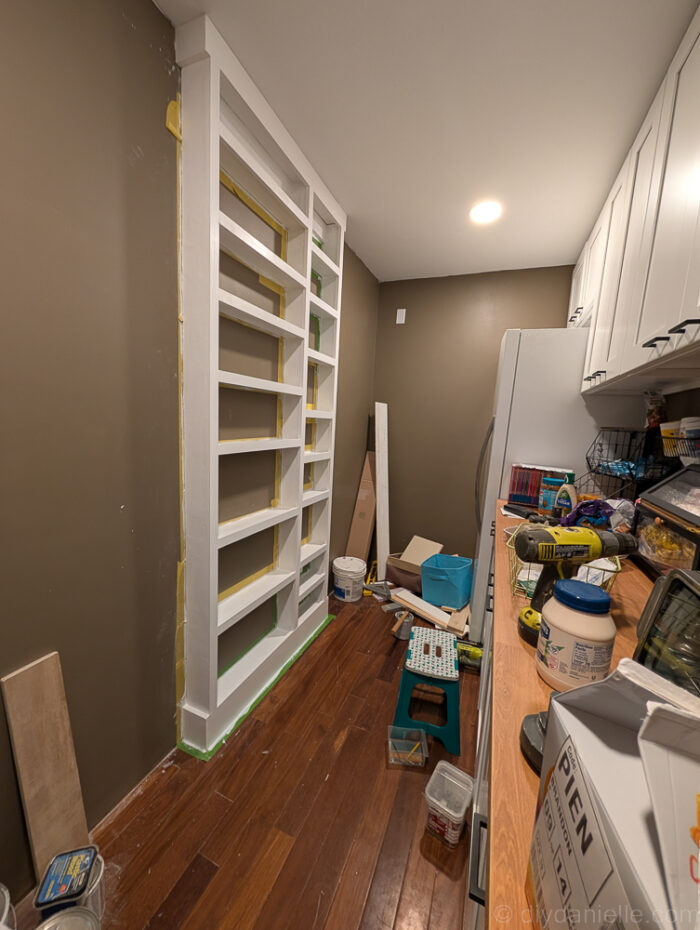
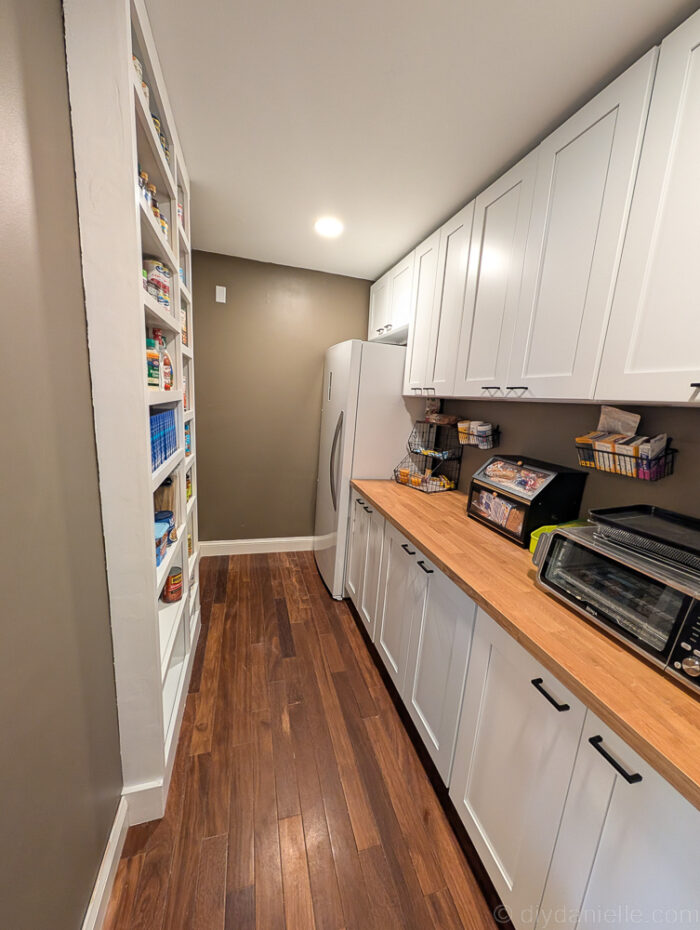
This is the shelving from the other angle.
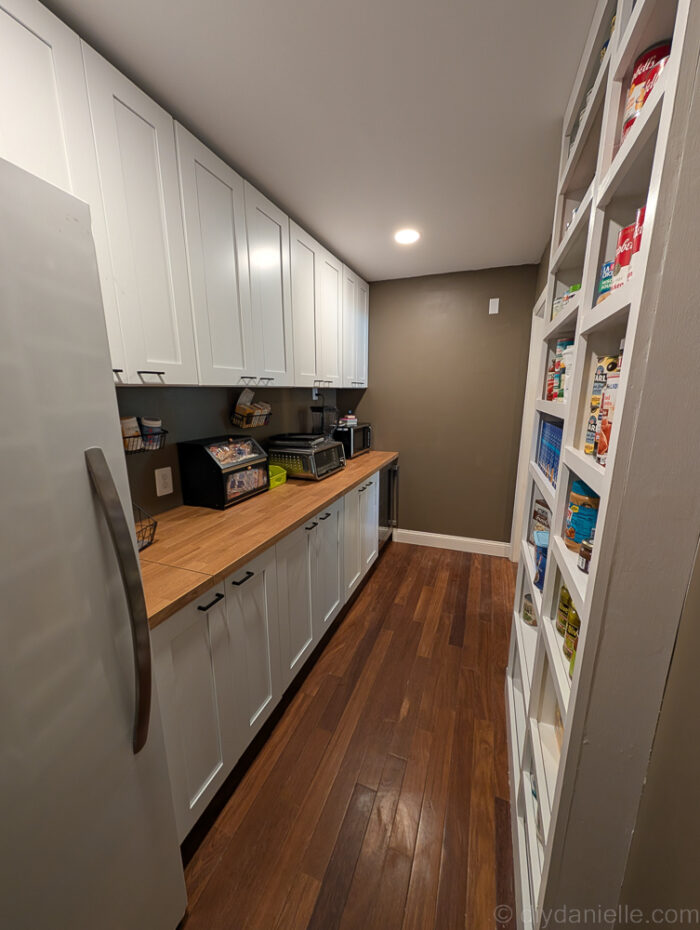
Why yes, we do love us some mac n cheese…
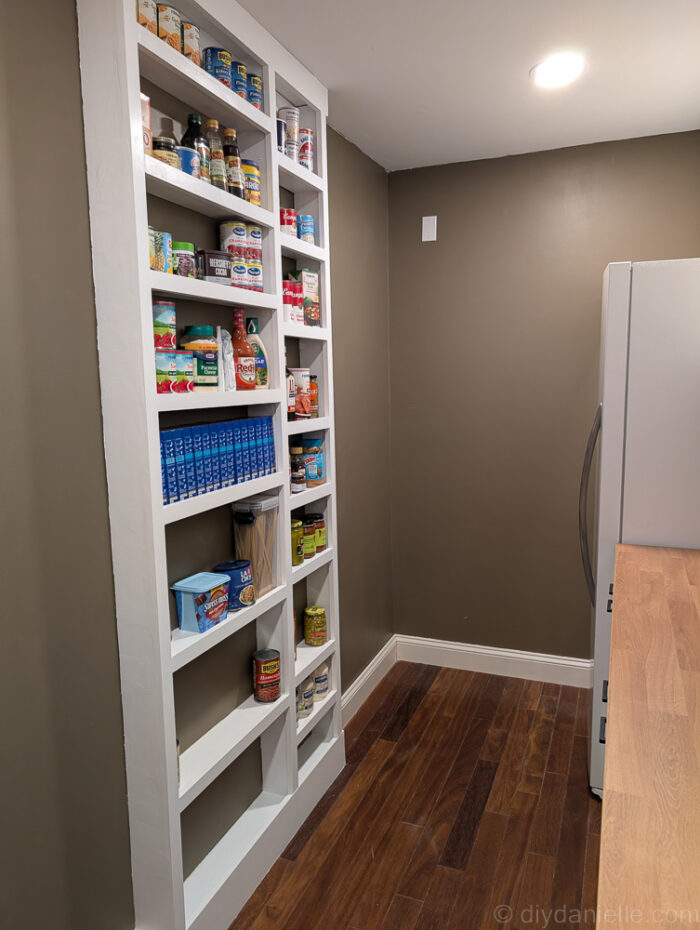
Here is a good picture that shows where the caulk is not… it will make a difference in the finished look here.
Please share and pin this post! You can also post your project and tag the DIYDanielle team on Instagram @doityourselfdanielle!