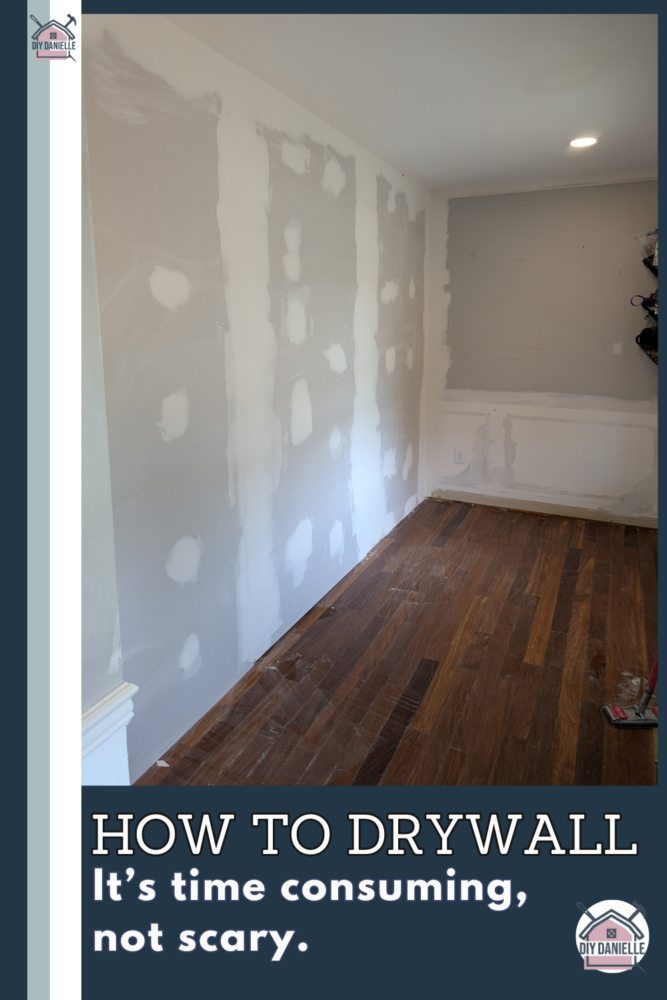
Learn how to drywall with this beginner-friendly guide! Covers the basic steps for hanging, taping, mudding, and sanding drywall like a pro.
This is my first time doing drywall and I did a lot of research, but I’m certainly not a professional drywaller. I will say that it’s worth hiring the job out because it’s messy and time consuming. I think the hardest part for me was waiting for each step to be completed. There’s a lot of dry time involved which is why it’s expensive to have somebody else do it.
But alternatively, it’s really hard to do on your own unless you work from home or want to work after you get home from work.
And it requires patience- something I don’t really have. This doesn’t have the immediate gratification of some projects where you can finish it in the day or at least see more progress in a day.
That all said- I have done some blog posts on avoiding drywalling such as:
- Drywall Alternatives: I spent a lot of time trying to avoid this by researching alternatives.
- Installing Beadboard Panels: My move to avoid drywalling in my she shed.
- How to Finish a Basement Bathroom Rough-In: I avoided mudding in this situation by using thin plastic panels.
I also hired a company to ONLY do the drywall for my barn office conversion (I turned horse stalls into an office). That wasn’t terribly expensive so hiring it out directly (vs. hiring a contractor) isn’t bad.
But overall, drywall is fairly affordable and cheap to do. Let’s get started on the process.
This post may contain affiliate links which may earn me commissions should you click through them and take certain actions. As an affiliate for Amazon, Cricut, xTool, Home Depot, and other sites, I earn from qualifying purchases. Please DIY carefully. View my full legal disclosures here.
The majority of my content is generated by me, as are 99% of the photos and videos, but I utilize technology for titles, descriptions, video editing out all of my ums, and occasionally for text overlay on images.
Please read the whole post so you don’t miss any important information!
Drywall Tips
First… let’s talk about some basic tips…
Safety Tips:
1. Use a respirator when sanding or cleaning up dust because it is quite rough to breathe in.
2. You probably would benefit from some goggles as well so you don’t get dust in your eyes.
3. Ensure that you either turn off your outlets, or don’t hit them with the metal tool. You’ll have shocking results.
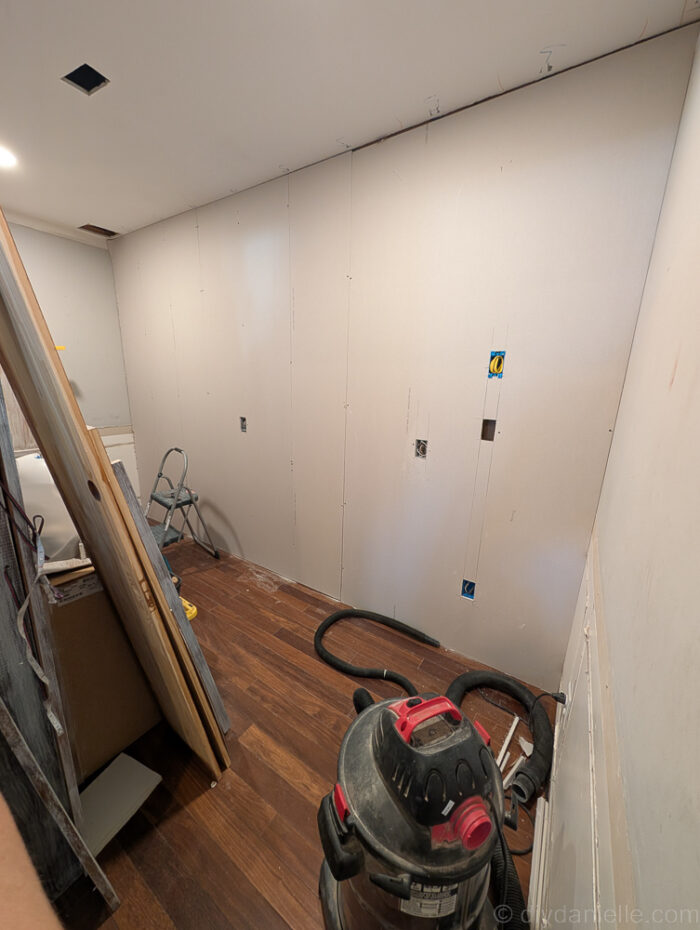
Cutting Drywall Panels
I only needed three drywall panels for each side.
You can cut drywall panels by scoring it with a utility knife and snapping it.
I hung these vertically, which means they use the full 8-ft height of my ceiling. This seemed a lot more convenient, but my brother mentioned it might be beneficial to do it horizontal. I don’t know that I understand why.
Placement of Drywall Panels
You want your drywall panels to overlap along the 2x4s for your wall. So each drywall panel should meet at a 2×4. I started from the wall that was best for this. If I started from my right side then I would have it perfectly at a 2×4. If I had started from the opposite corner, I would have had to cut each panel.
If you can, plan your 2×4 placement accordingly.
Repairing Drywall
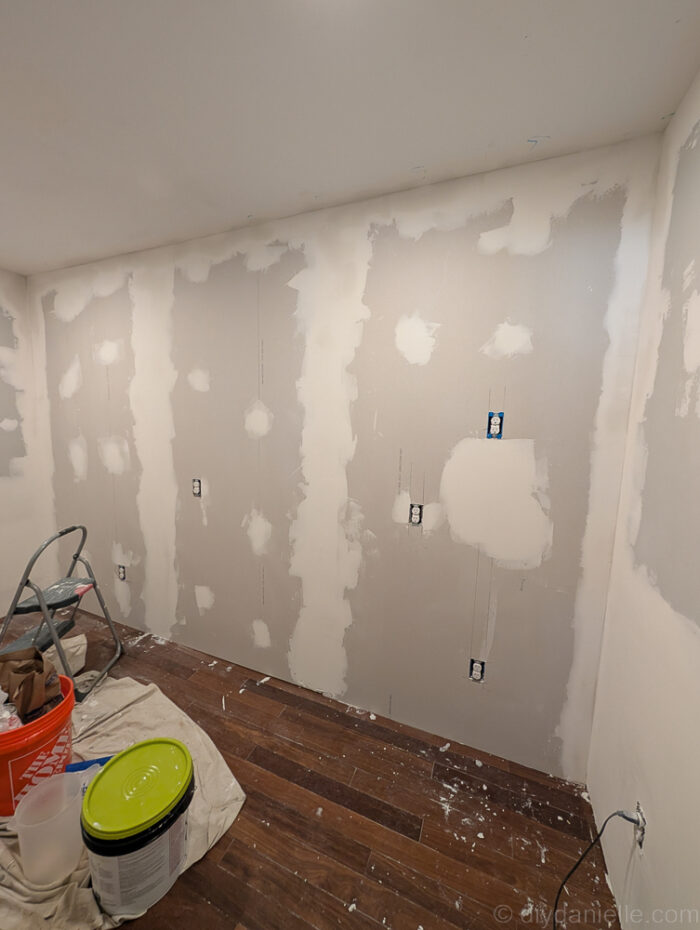
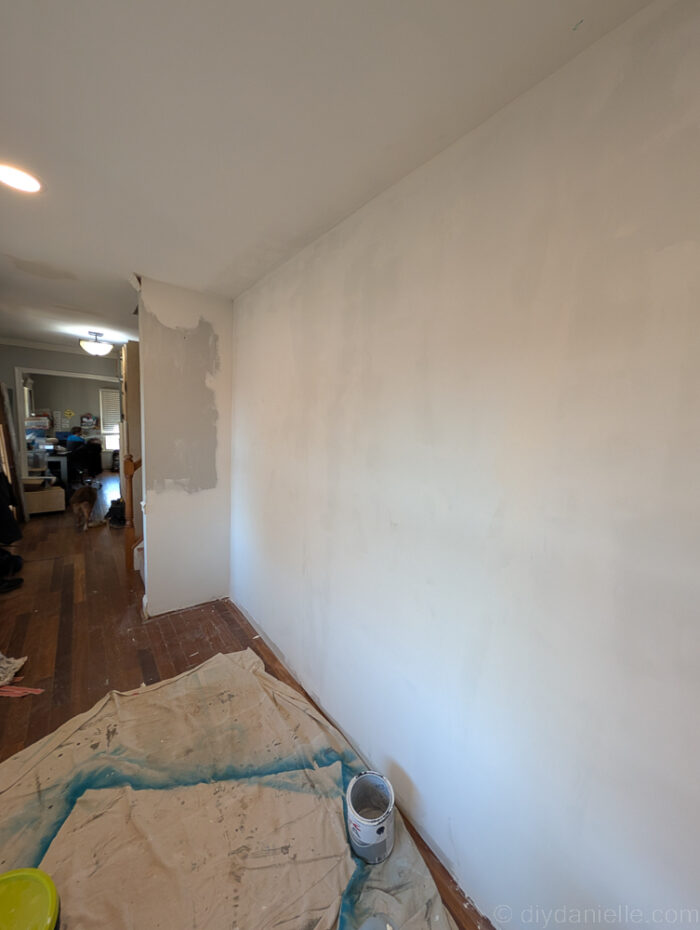
This wall was in the room and already drywalled. I had removed the trim. I needed to repair this… this was NOT for the weak of heart. My husband said after that he thinks it would have been easier to replace the drywall than to fix this all… I think he’s correct. We had to scrape away all of the extra crap, then prime it all and the mudding process was EXTRA time consuming because there was more than just seams to cover. ZERO STARS.
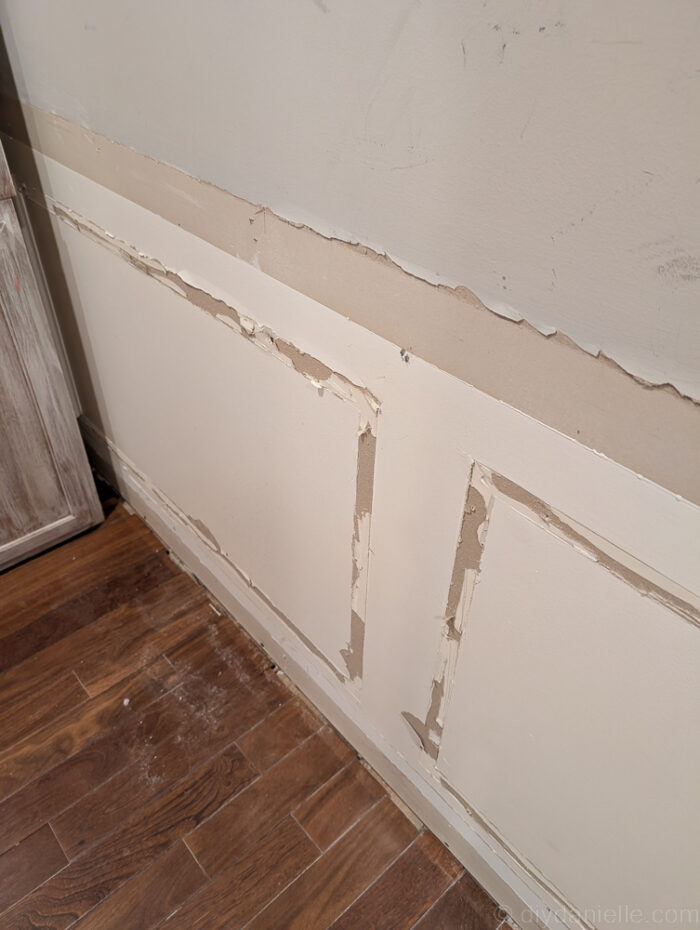
Below is a picture of that wall mid mudding (right side, as well as straight ahead)… if you compare to the new drywall we installed, we spent a LOT more time repairing this wall than the newer drywall panels (sigh).
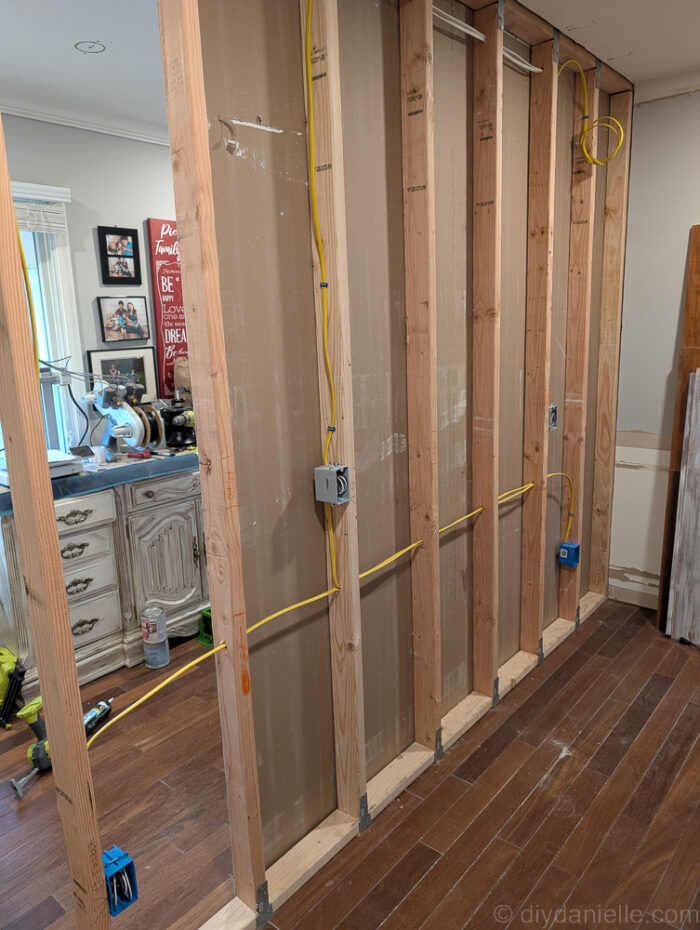
Preparing to Drywall
When you’re building a wall like this, you need to make sure your electrician comes before you start. You want to know where the electrical outlets are and you want the wiring finished.
How to Drywall
Starting the Process of Drywall
For panels where there aren’t any outlets or things interfering with the placement, you just BOOP it in place and attach it to the studs with drywall screws. This is… so easy.
Bring your first piece of drywall in and align it, using drywall screws to attach it to your 2x4s. You want attach it along every 2×4 in several spots. Make sure it’s level and flush.
When working around obstacles such as electrical outlets, you need to measure where your electrical outlets will be and use a knife to score that area and cut out the area for the outlet out of your drywall.
Save those little pieces just in case you messed something up. They’re good for patching.
You’ll repeat, placing each panel until you’re finished.
This all went pretty fast for me. It was definitely the easier part of the process… Mudding was a little more frustrating.
The Mudding Process
What is Mudding?
Mudding is repairing the finish of the drywall and making it look nice as a base so you won’t have bumps or wonky-ness to your painted finish.
You should be repairing any areas that were broken or chipped, adding tape along the seams, etc.
Mud acts like spackling, just to a greater degree.
There are a lot of product choices for mudding and I found this a little confusing.
Different products have different thicknesses and different dry times. Some muds are much harder to sand versus the lightweight ones are easier to sand. If you’re slow (you will be), you don’t want a fast drying mud. If you’re a professional drywaller, I’m guessing you can easily use the quicker drying mud to make the job much more quick to finish.
I get the sense that it’s better to use a thicker mud for the first first step or two and use a lighter weight mud for the last step. You can adjust this to some degree by mixing in more or less water.
You could also get pre-mixed drywall mud or a mix your own that’s powder.
We went with Easy Sand 90 Joint Compound for part of this. This is a powder that requires mixing it with water. The 90 is related to the working time you have once it’s mixed. I recommend a higher working time because you’re not going to be fast if you haven’t done this before (I initially bought a 5).
We completed the project with ultra lightweight joint compound that was pre-mixed.
I found that I did a lot of mixing, even when I bought the pre-mixed stuff, so I don’t know if it’s worth buying pre-mixed, but the price difference wasn’t enormous. For a huge project with a professional, I can see why they’d want to mix themselves to save on cost, but if you’re DIY’ing then the convenience may be worthwhile.
I used a mixer that attached to my drill and it works pretty well, but you want to keep a bucket of warm water next to it so you can rinse it off afterwards.
When mixing, try to remember is that if you’re not careful, pieces of your bucket you’re using to mix it all in will end up in your drywall mud. Aka blue or orange plastic tidbits, depending on your store of choice.
Some products I really liked for this include:
- Several sizes of mudding tools
- Drywall mixing tool
- A couple of 5 gallon buckets
- A metal or plastic drywall mud pan
- Dust mask
- Possibly some goggles or just wear your glasses.
- Pole sander
Step 1: If you have any areas where the paper from the drywall peeled back, you need to use original shellac primer on that spot. You can just paint it on, let it dry, and then add spackling or mud to fill in the hole. You don’t want to mud directly over the area before using primer. I believe this could cause bubbles in the drywall.
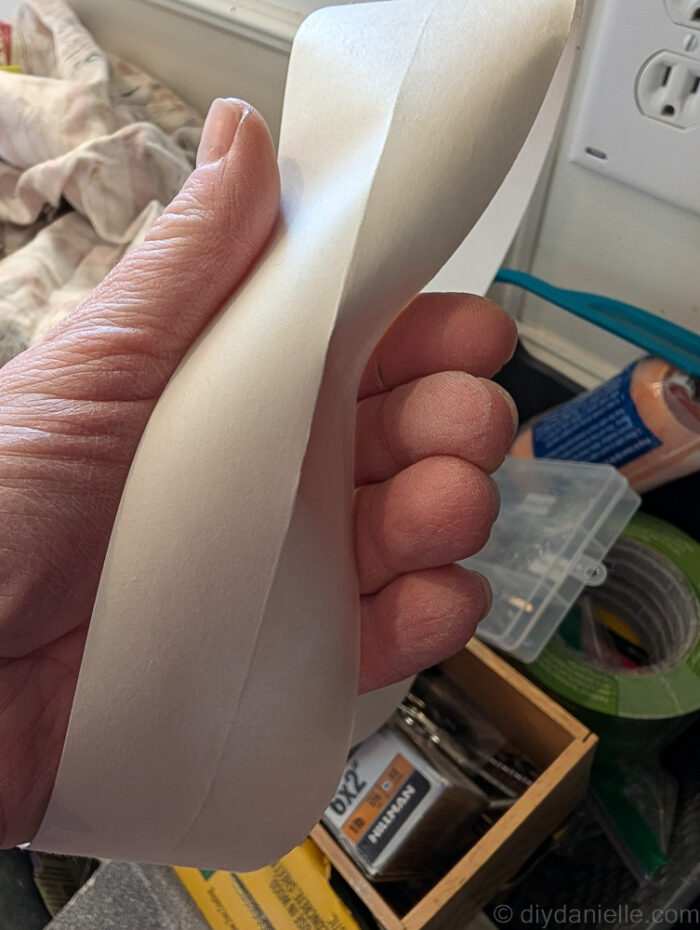
Step 2: After mixing your drywall mud, fill the joints with your drywall mud. These are the areas where your drywall meets the wall or other pieces of drywall. Do one joint at a time and place a piece of tape over the joint.
Once the tape is on, you’re going to use your tool to apply more mud over it and try to push any excess mud out. You want to ensure it is fairly flat and stuck to the wall.
When I researched, one person suggested this order:
- Flat vertical joints
- Horizontal flat joints
- Inside corners (fold the tape so that half goes on each wall)
- Vertical corners
- Outside corners
We didn’t have any outside corners. This looks a lot more complicated and you’re going to look for tutorials on how to do corner beads.
Step 3: Coat any screws that are still showing and weren’t covered by the drywall tape. Make sure the screws are fully buried.
Remember that you’re putting multiple layers of drywall mud on so you don’t want to go too crazy with thickness. This is a game of more layers equals a better finish. It is not my favorite game.
Step 4: Set up some fans to help this dry a little better and quicker.
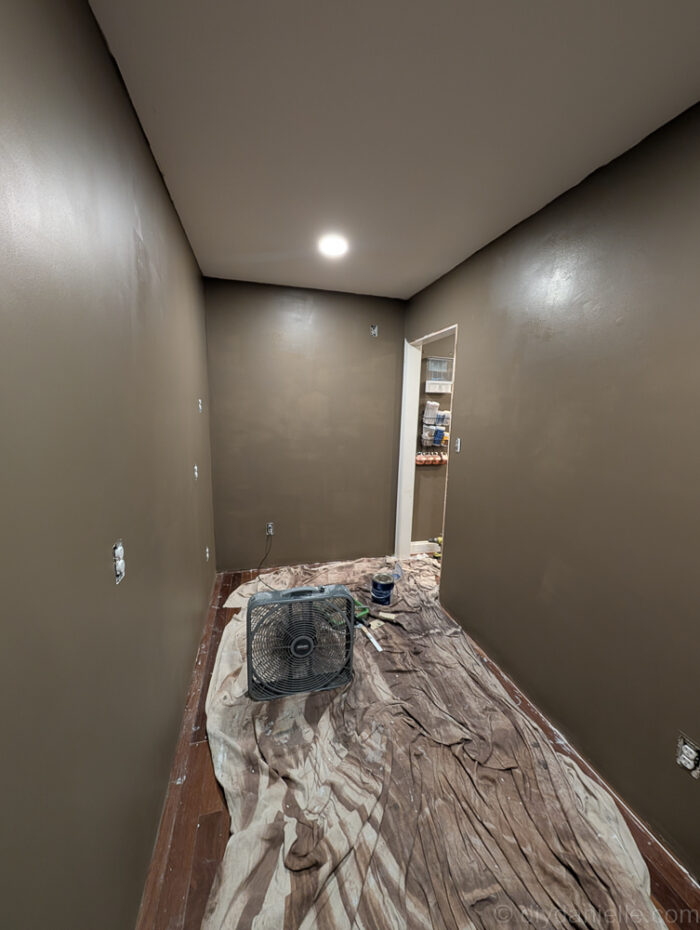
This is the pantry wall after mudding… I’m not sure how many layers this was as the photos didn’t really show a huge difference in my opinion.
This is the mudroom wall. I wasn’t quite as careful with this wall as we planned to mostly cover it with locker cabinets. The short wall will eventually be opened up into a door/hallway into the garage/future living room so I didn’t bother repairing it seeing it will eventually be torn down.

Step 5: WAIT
I waited 24 hours to do the next layer. From what I read this is how long you should wait, but you really just want to make sure it’s fully dry.
We had another project that a contractor worked on and the dry time was slowed because we had electric outage and it was pretty cold in the room. There’s an ideal temperature (listed on your drywall product) and temperature can impact dry time.
Step 6: After the first day, you’re going to be putting on your first coat. Make sure to mix your drywall really well so that it’s creamy. You shouldn’t have any bubbles in it when you’re applying it.
You’re going to take drywall mud with your tool and pass over the flat horizontal joints, swiping back and forth to try to get a good flat finish.
I spent a lot of time trying to make this perfect and I quickly realized that small raised areas were very easy to sand off after. I think I would go faster next time knowing this and aim for less perfection.
Next you’re going to do your flat vertical joints, your outside corners, your inside corners, and then your screws.
You want to add enough of a layer that it seems like you’re adding a little bit extra… Again, we’re trying to add thin layers on top of each other. You could theoretically do 40 thin layers of this I suppose, if you had 40 days and infinite patience. I don’t know that that would be beneficial, but eh.
Again, we’re letting this dry for 24 hours.
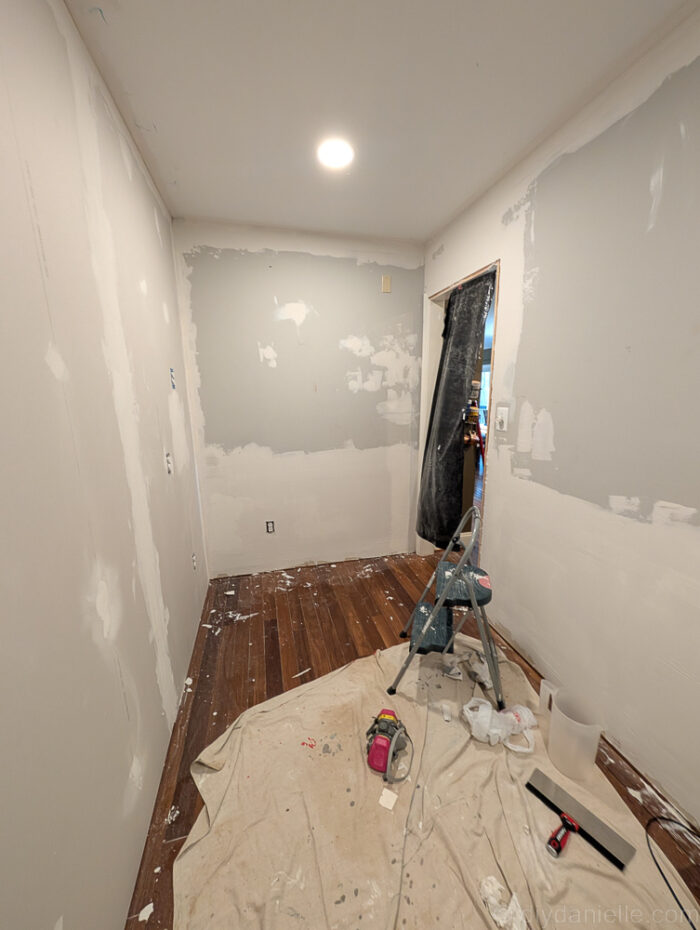
Step 7: The next day, I gently sanded with a good quality respirator. I wanted to get anything that was sticking out or clearly problematic. We’re trying to achieve a flat finish.
Don’t sand the screws much (if at all) or the corners.
Step 8: Make sure to clean up the dust so you don’t have tons of dust when you apply your next layer of drywall.
Step 9: Once you’ve sanded and cleaned up, you want to apply a thinner mud this time. You’re applying it wider than your first day.
You want enough mud on there so you don’t see much light through the mud.
Step 10: Last day! You’re sanding for the perfect finish today. You want to use 150 or 180 sandpaper. I used my pole sander first and then used a small foam sander to finish up any spots that were still rough.
Sand at an angle, not in a straight line. Make sure you have good lighting so you can see everything well.
Step 11: Clean up!
Now you just need clean up which is going to be the worst part of the process. That’s why I paid my son to do it. 😝
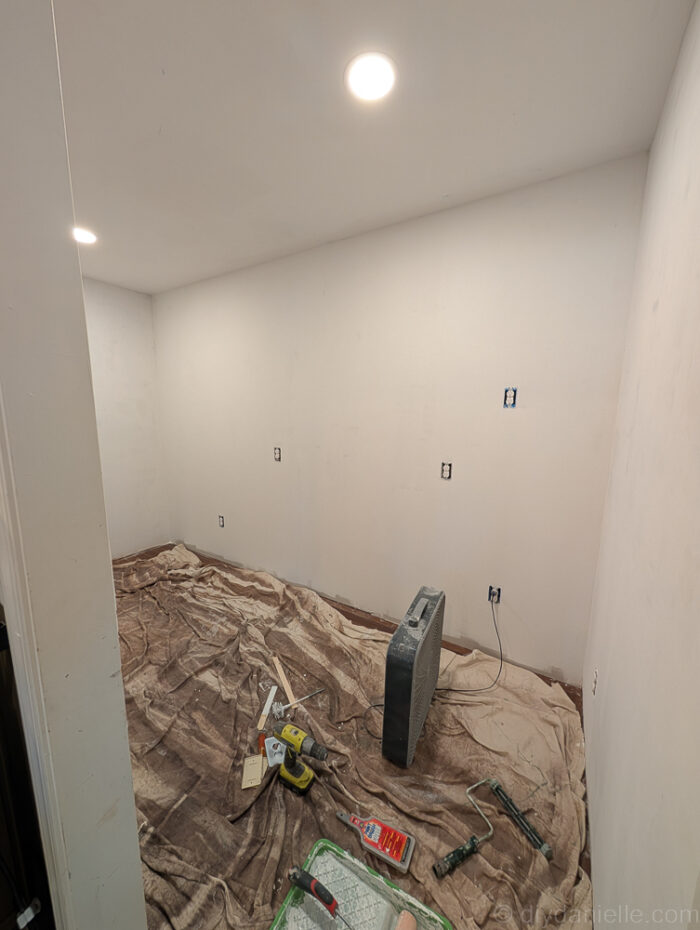
Step 12: At this point, hopefully your walls look pretty awesome. You want to apply PVA primer and sealer. This is different than other types of primer and supposedly cheaper, but I still had sticker shock.
Let that layer dry (2 hrs. according to my can of primer).
Primed pantry:
Primed mudroom/hallway:
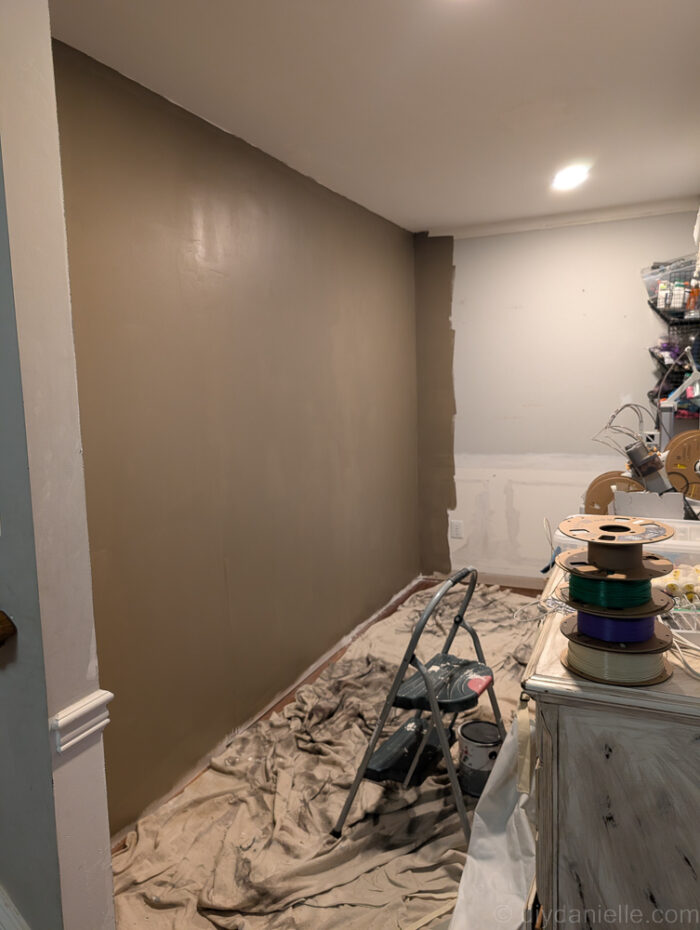
Step 13: Apply your paint. Our paint color is Behr Native Soil. It doesn’t photograph well in the empty space so I’m looking forward to posting the new photos with the cabinets installed. We’re still working on this though a bit more before it’ll be ready to publish.
Painted pantry:
Painted mudroom/hall:
Drywall Finishe
What I didn’t know before starting this project is that there are different levels of finishing drywall.
- Level 0: Drywall is hung, but no mudding has been completed.
- Level 1: Joints and angles are taped with joint compound. No sanding has been done. This is where our basement bathroom rough-in was at when we finished it.
- Level 2: Thin coat of joint compound is applied over joints, angles, and screw heads. Marks and ridges are allowed. Perfect for areas that will be covered by tile or in garages, etc.
- Level 3: Joints, angles, and fasteners get two coats of joint compound, and it’s sanded lightly to remove tool marks and ridges.
- Level 4: Three coats for all fasteners. Joints should have at least two coats. It’s sanded smooth for a uniform finish and it is a common way to finish residential interiors. It works well for flat paint because flat paint is less likely to showcase flaws.
- Level 5: A skim coat is put over the entire surface of the drywall. It works well for high end finishes, particularly as glossy paints and well lit rooms WILL show flaws in the drywall finish.
I’ve hired people who have done level 4 finishes and that’s what I did here. I think in future projects, I will go to level 5 because I think it makes for a better finished look and that extra step is likely worth the effort.
Drywalling costs a lot to hire out because the contractor needs to come back on SEVERAL different days to complete the work. This is why it can be beneficial to DIY, particularly if you have a flexible schedule and work from home.
I can see where DIY’ing all or partially would be extremely helpful on a large scale build (like our addition) if I could finish drywall over the weekend to help speed up the build. I’m 100% that this would drive the contractor nuts, particularly if you want a refund for that, but I do like the idea of helping out on weekends to keep the project from taking FOREVER.
Other DIYs related to this project:
Please share and pin this post! You can also post your project and tag the DIYDanielle team on Instagram @doityourselfdanielle!