

Learn how to convert a small dining room into a functional pantry space with our easy-to-follow guide.
Our dining room wasn’t big enough to be much of a difference between our normal kitchen table area so when we decided to renovate our home, we decided to convert the dining room into a pantry and also a mudroom/hallway.
This post is about our process for creating the pantry. We are really happy with how it came out!
This post may contain affiliate links which may earn me commissions should you click through them and take certain actions. As an affiliate for Amazon, Cricut, xTool, Home Depot, and other sites, I earn from qualifying purchases. Please DIY carefully. View my full legal disclosures here.
The majority of my content is generated by me, as are 99% of the photos and videos, but I utilize technology for titles, descriptions, video editing out all of my ums, and occasionally for text overlay on images.
Please read the whole post so you don’t miss any important information!
DIY Pantry
Project Supplies
- 1- Aspen White Shaker 3×30 Wall Filler
- 1- Aspen White Shaker 3×36 Wall Filler
- 1-Aspen White Shaker Appliance End Panel with a 3″ Return
- 2- Aspen White Shaker 24×36 Wall Cabinet
- 2- Aspen White Shaker 30×36 Wall Cabinet
- 1- Aspen White Shaker 33×18 Wall Cabinet
- 1- Aspen White Shaker 24″ Full Height Door Base Cabinet
- 2- Aspen White Shaker 30″ Full Height Door Base Cabinet
- 3/4″ Plywood, primer, and paint
Step by Step Instructions
Step 1: Dividing the Dining Room
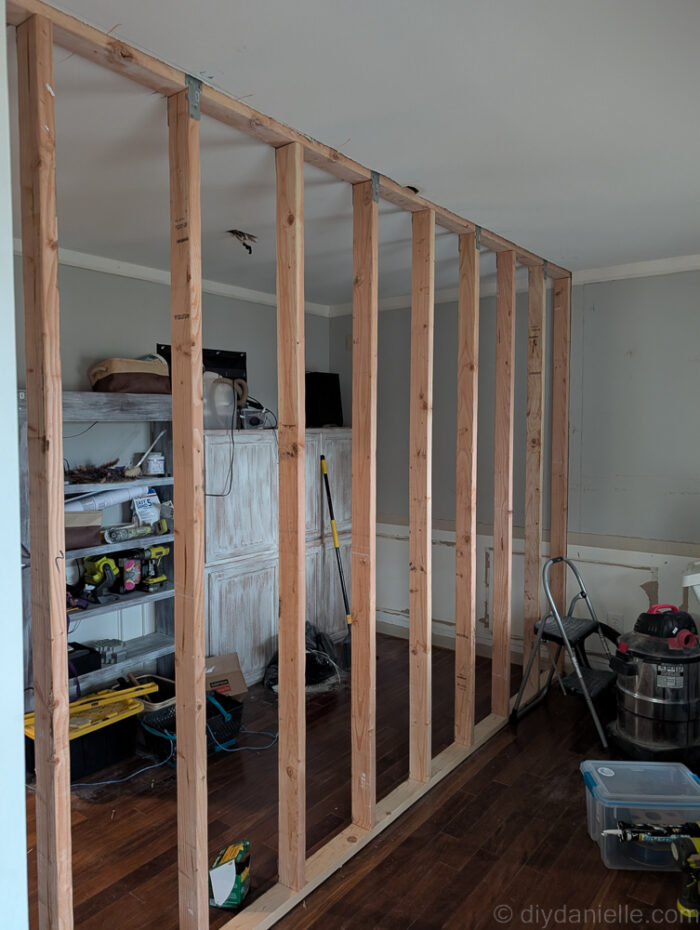
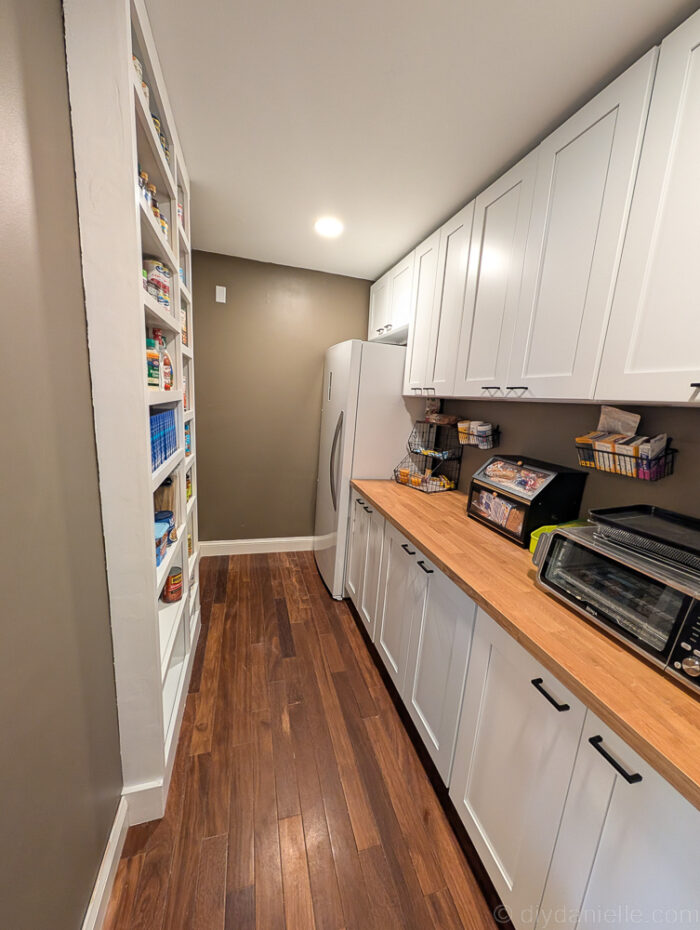
We started by dividing the dining room. We had already measured everything out to ensure that the space was divided into two rooms that would be sufficient for the pantry size that we wanted. We wanted shallow shelves for cans on one side and traditional 24″ deep cabinets on the new wall.
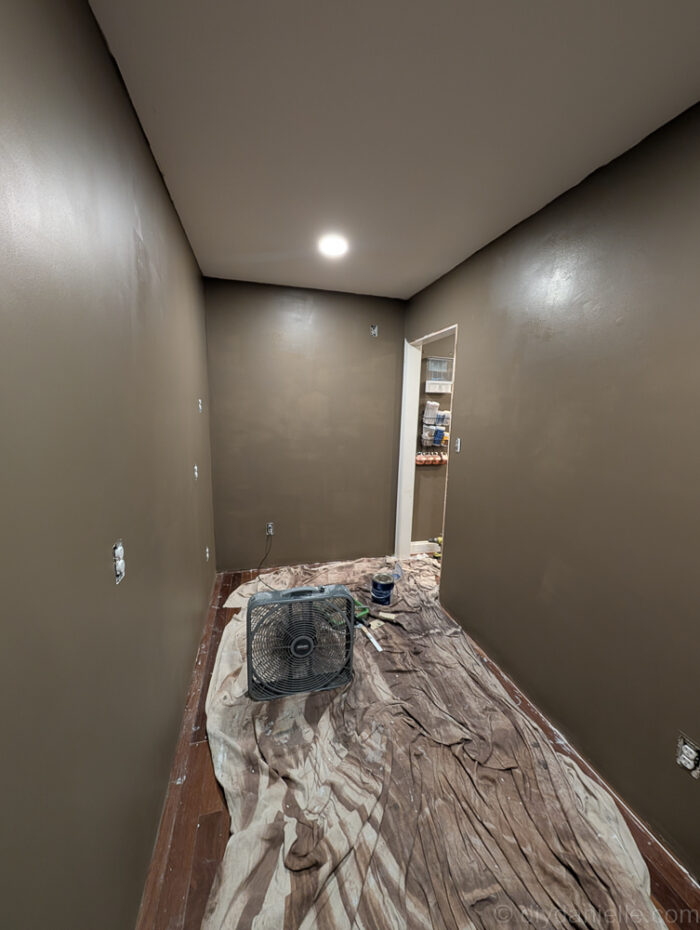
We framed out the whole wall and had an electrician install puck lights as well as electric outlets on the pantry side. This photo was taken from the hallway/mudroom side.
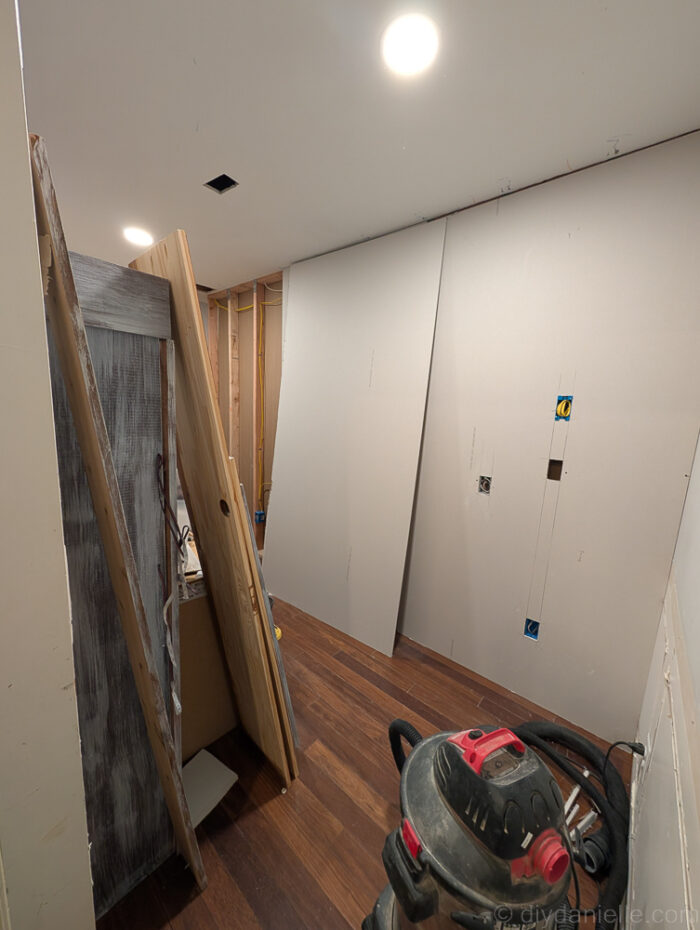
Step 2: Drywall and Drywall Repair
Once the room was divided, we added drywall and electric, then mudded.
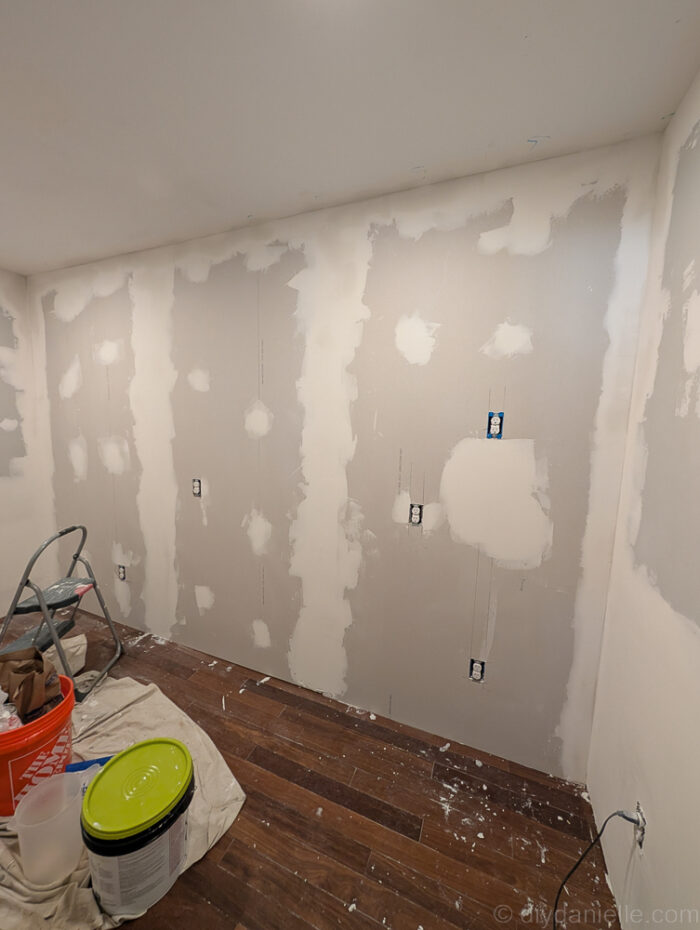
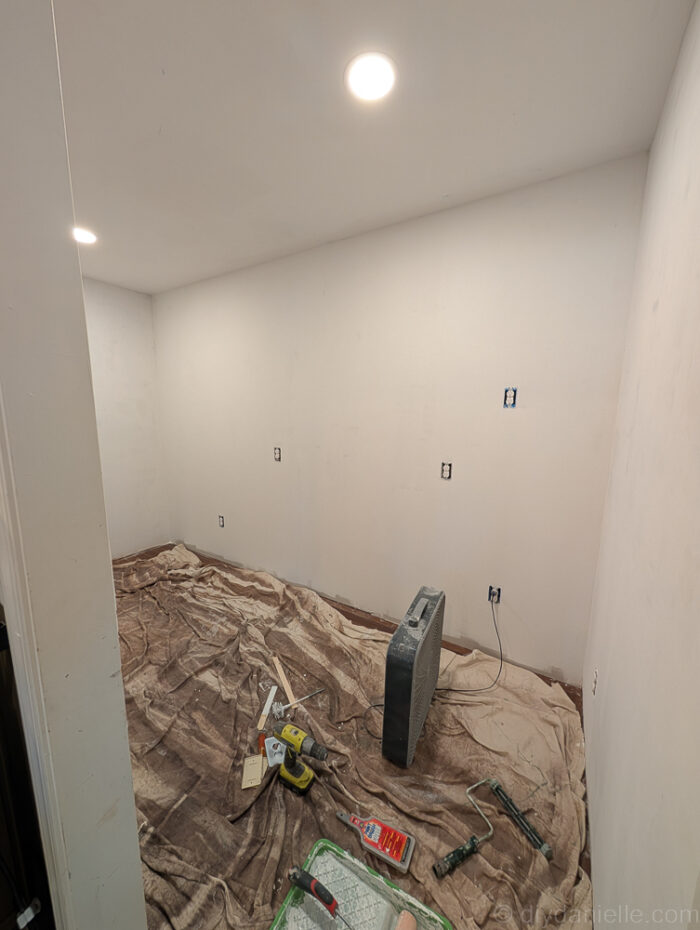
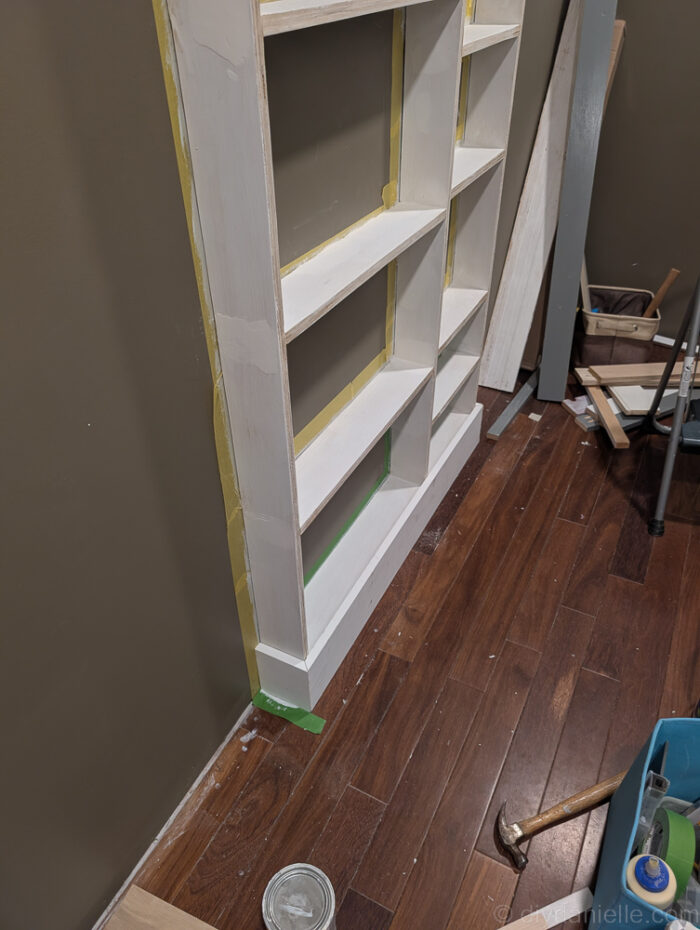
Step 3: Priming and Painting
I primed the drywall (and the repaired opposite wall) first, then painted. Our paint color is Behr Native Soil. It’s hard to get good photos in here with the lighting being so bright and due to the lack of natural light, but you can see the basic idea below.
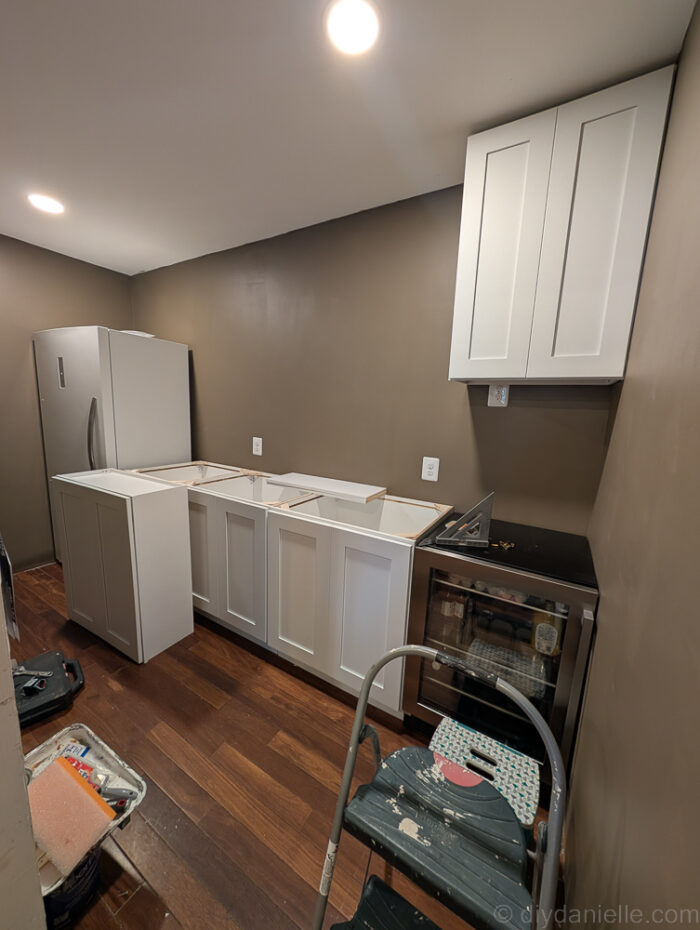
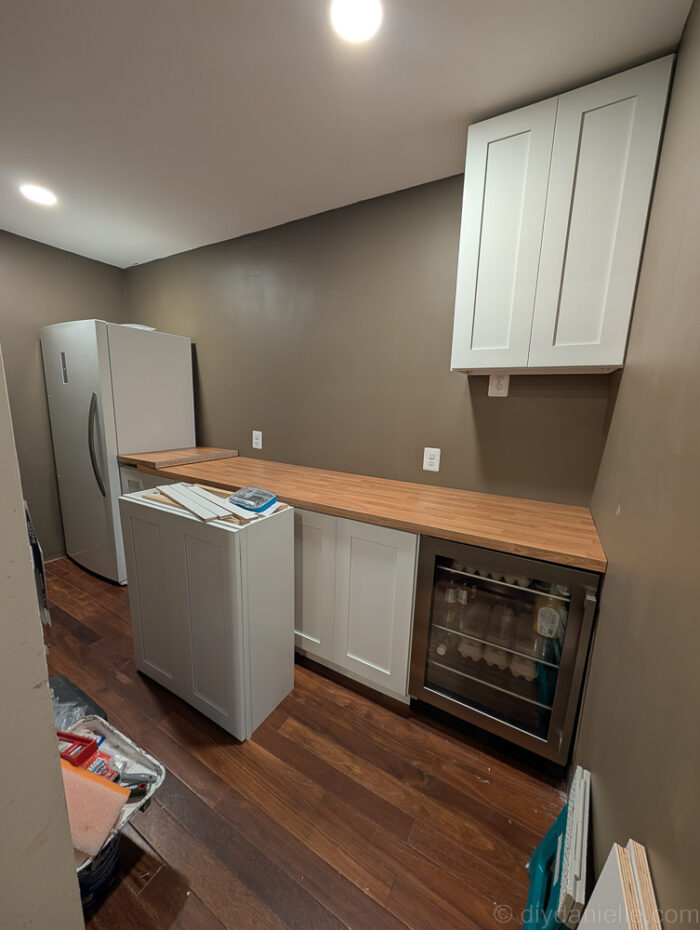
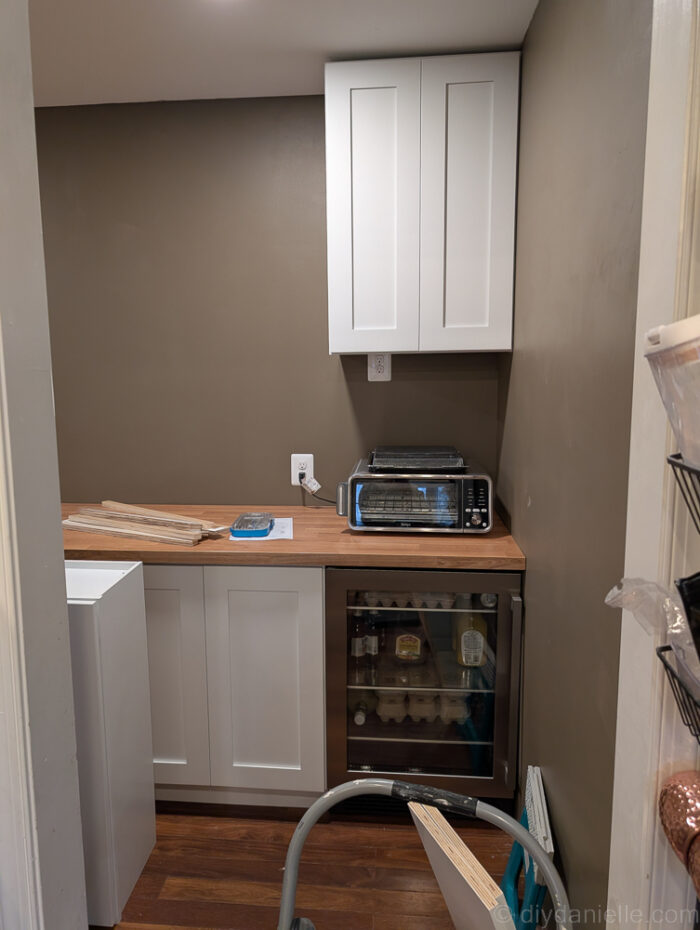
Step 4: Adding the Cabinets
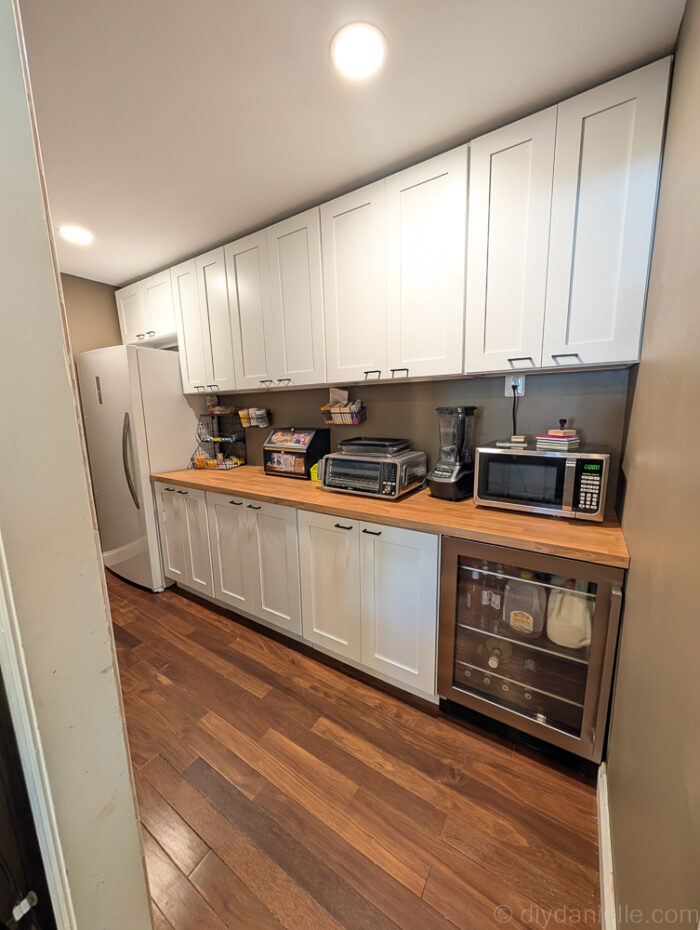
We ordered cabinets from the RTA store for this project. We ordered some trim pieces, but didn’t end up using them. I am not sure if we will go back and try to adjust any of that to add it, but I thought the cabinets looked great as is, and I’m a big fan of work smarter, not harder.
We also added a big freezer, and a small minifridge. The countertop is an IKEA countertop- my only issue was that I changed my plans sometime between ordering the countertop and getting the cabinets so I ended up needing a SLIGHTLY longer piece (sigh). I had a piece leftover from the kids’ bathroom renovation project so I was able to put that in there to extend the countertop, but I haven’t actually gone about attaching the pieces yet… I REALLY love the IKEA wood countertops for use of cleaning and the look, but they don’t have a ton of size options.
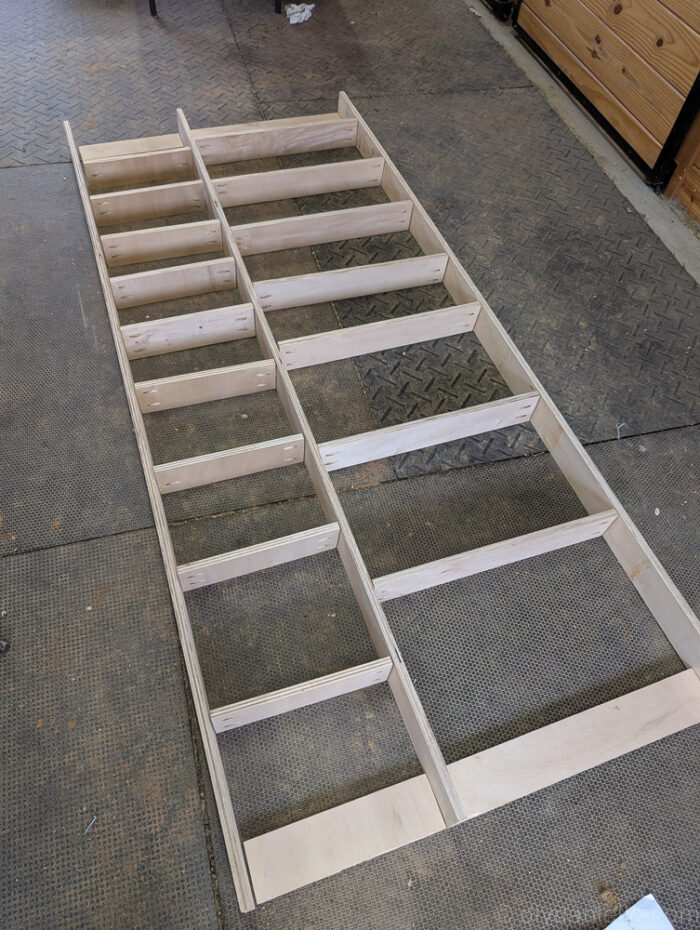
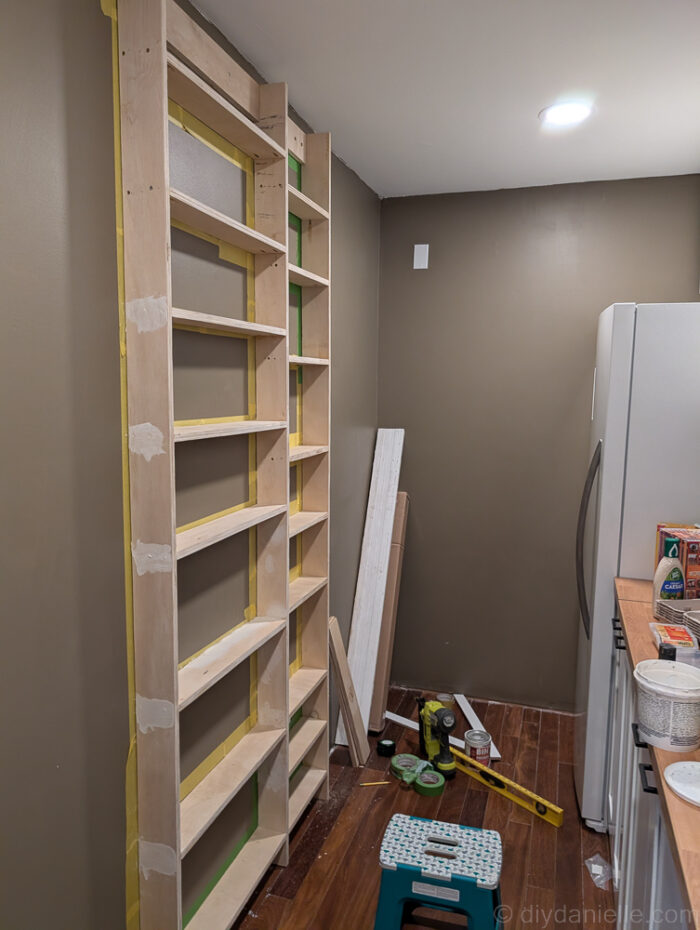
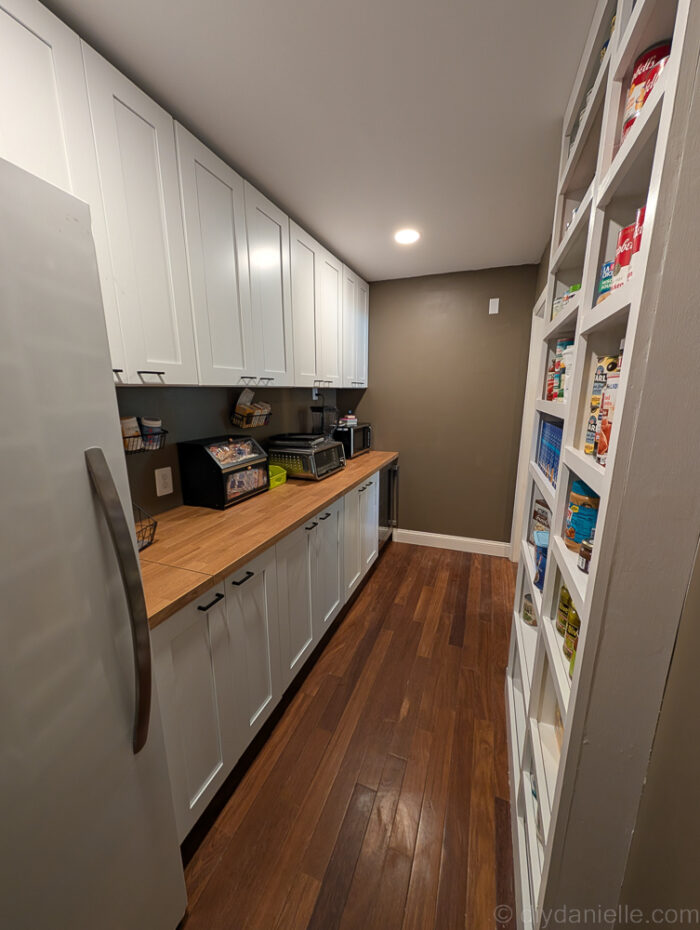
Step 5: DIY Can Shelving
I built this shelving for cans. It’s 4″ deep which left plenty of walkway room and space to open the freezer door. I LOVE this shelving and wish I’d extended it further. I may eventually do more shelving, but I was tired.
This is built with 3/4″ plywood and 1×2 trim, as well as some larger pieces of trim for the top and the bottom. I’ll write up a separate post about how to build your own. I did a LOT of repair to cover holes and such which made a big difference in the final appearance of the shelves. They aren’t perfect, but I was impressed with what a big difference it made… I guess I will put more effort into future projects.
These are some final pictures of the room!

Other DIYs related to this project:
Please share and pin this post! You can also post your project and tag the DIYDanielle team on Instagram @doityourselfdanielle!