

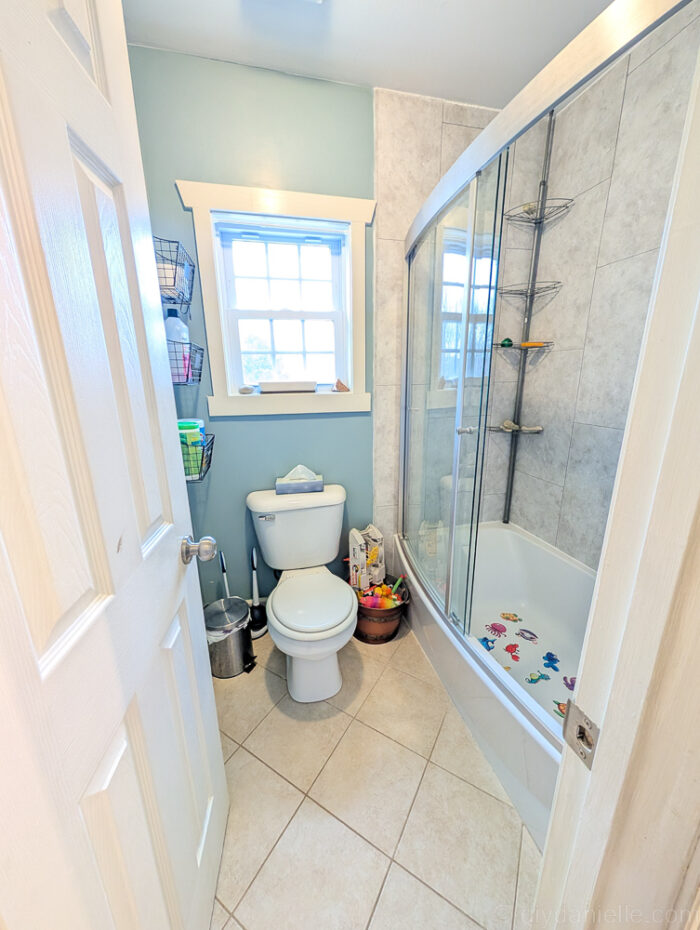
We started our children’s bathroom makeover during the pandemic, but we only completely finished one section. The bathroom is divided into two sections- there’s an area with the toilet and shower, and there’s the first room which is where the sink is. This allows somebody to brush their teeth while someone else is using the shower.
This is pretty convenient for our family because we have three kids that share the same bathroom.
Rather than give a traditional tutorial for this post, I’m going to link to individual steps in this process and give you more of a general idea of the steps taken. This will keep this post from becoming an entire book.
This post may contain affiliate links which may earn me commissions should you click through them and take certain actions. As an affiliate for Amazon, Cricut, xTool, Home Depot, and other sites, I earn from qualifying purchases. Please DIY carefully. View my full legal disclosures here.
The majority of my content is generated by me, as are 99% of the photos and videos, but I utilize technology for titles, descriptions, video editing out all of my ums, and occasionally for text overlay on images.
Please read the whole post so you don’t miss any important information!
Kids Bathroom Makeover: Start to Finish
Tub & Toilet Zone
Step 1: Installation of a Window Above the Toilet
The first thing we tackled was the area with the shower. We had a contractor install a window in the bathroom over the toilet because it was quite dark in the room. This made the space feel much more open.
Step 2: Replacing the tub, fixtures, and tiling.
We replaced the older bathtub and updated the fixtures. We also redid the tiling on the walls using easy to install waterproof tiles.
- Using RedGuard to waterproof the walls before tiling.
- DIY Waterproof Tiles that are Easy to Install: These don’t use grout and you can cut them without a tile saw which was a win for me.
Step 3: Ditched the Shower Curtain and Used a Glass Door
We also ditched the shower curtain and replaced it with a glass door. I like the look of this a lot better. It makes the space look bigger and less gloomy. I love the clear door.
- Installing the glass shower door: Ovation Shower Door
- How to Caulk: Last but not least, we caulked everything.
Step 4: Added Bathroom Storage & Other Details
I added a couple of baskets beside the toilet for storing items. We use open baskets for items that we might forget to use. For example, cleaning products, extra toilet paper, and a bubble bath..
I also replaced the more typical toilet paper holder with one that was easy to load. My kids change the empty toilet paper rolls out now.
And that’s pretty much all we did for that portion.
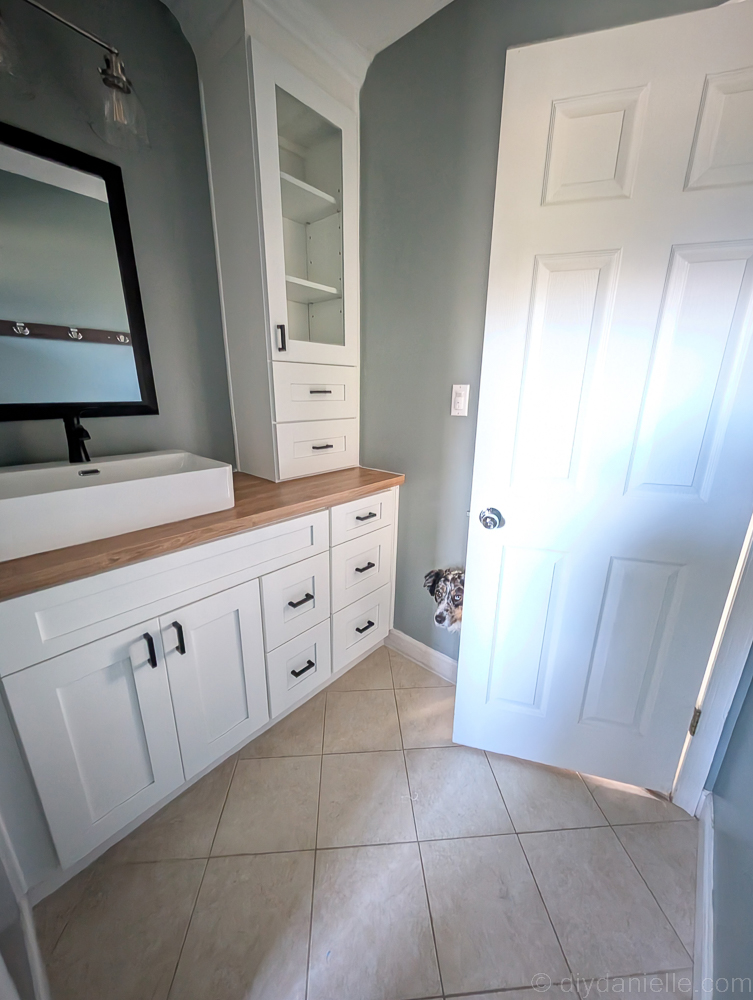
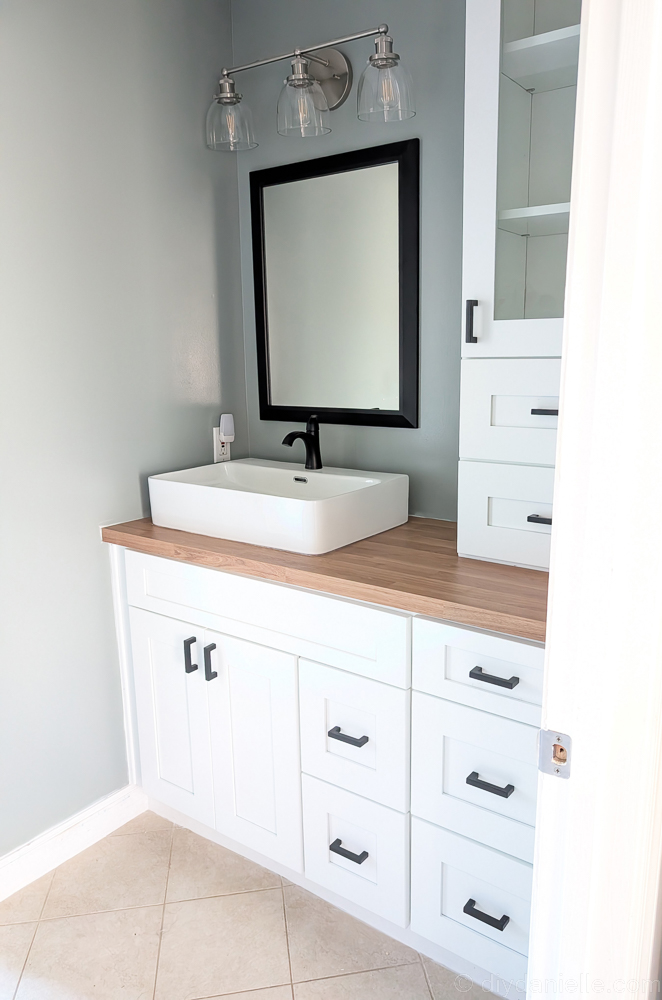
Sink/Cabinets
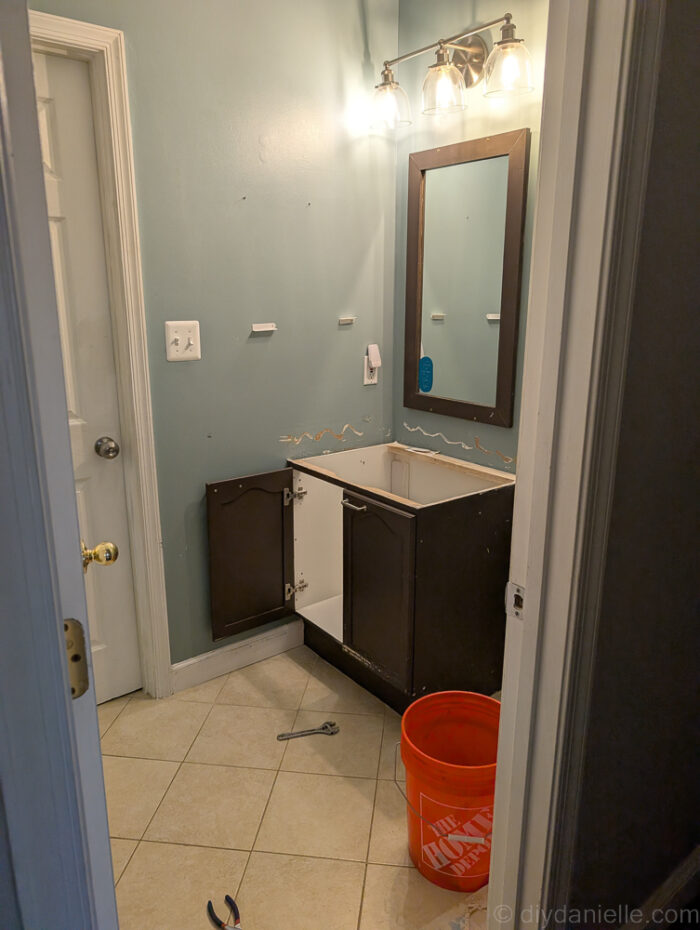
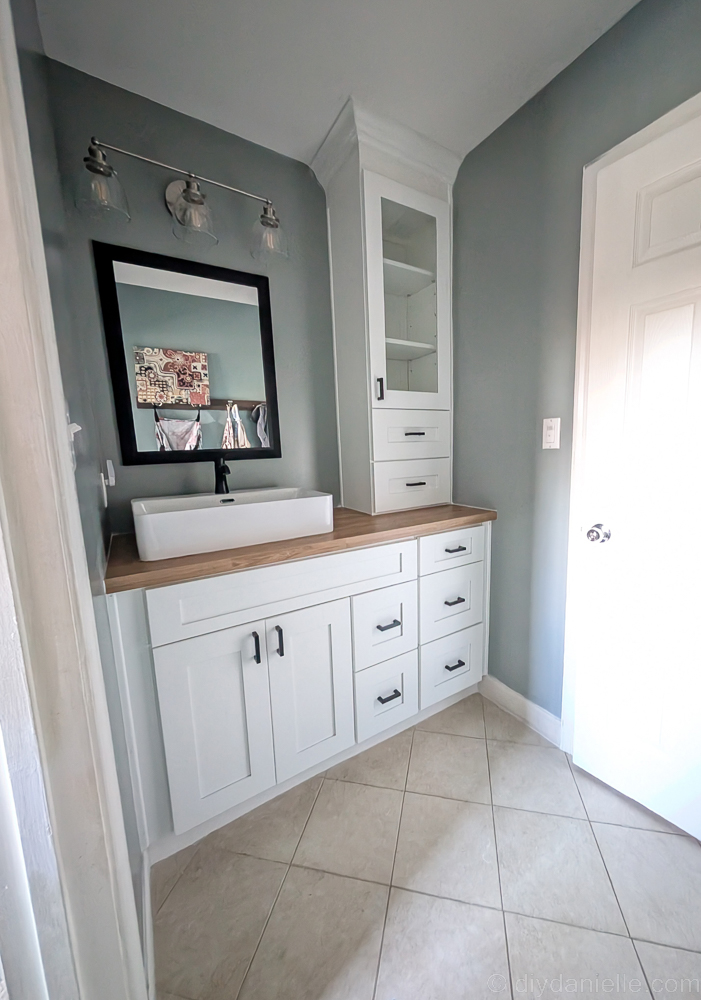
This month I’ve been working on the inner room. This is the room with the sink. We initially had done some quick and easy updates to it, but they really weren’t permanent. I partnered with The RTA Store who provided the cabinets for the project.
Featured Products: Aspen White Shaker Cabinets from The RTA Store
- Aspen White Shaker Wall Filler
- Aspen White Shaker Base Filler
- Aspen White Shaker Crown Molding
- Aspen White Shaker Toe Kick
- Aspen White Shaker Scribe Molding
- Aspen White Shaker Mohawk Touch Up Kit (a little paint pen to fill in dings!)
- Aspen White Shaker 18×54 Wall Cabinet with Drawers (with glass door)
- Aspen White Shaker 36″ Base Cabinet, Vanity
- Aspen White Shaker 15″ Drawer Base Cabinet
I’m leaving this out of the steps, but make sure to clean up (vacuum, etc.) between steps as needed. I prefer not to trap dust under the cabinets.
Step 5: Prep Work
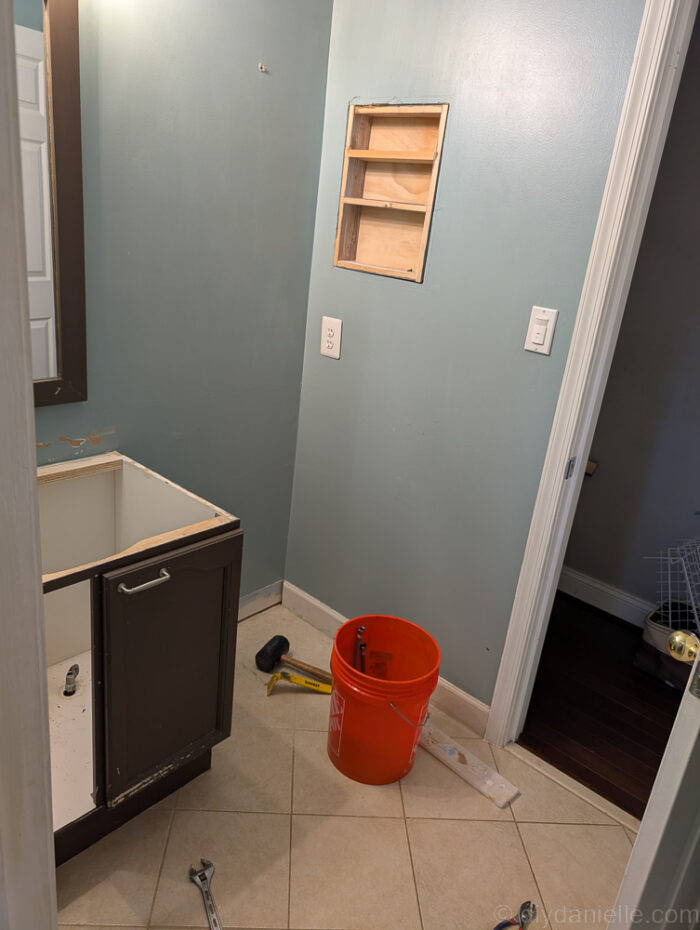
We removed all of the old cabinets, the sink, and removed the baseboards in the sink area. If you’re smart, you’ll do any wall prep and painting at this stage and not somewhere in the middle like I did.
Here’s a look at the sink area before we begin.
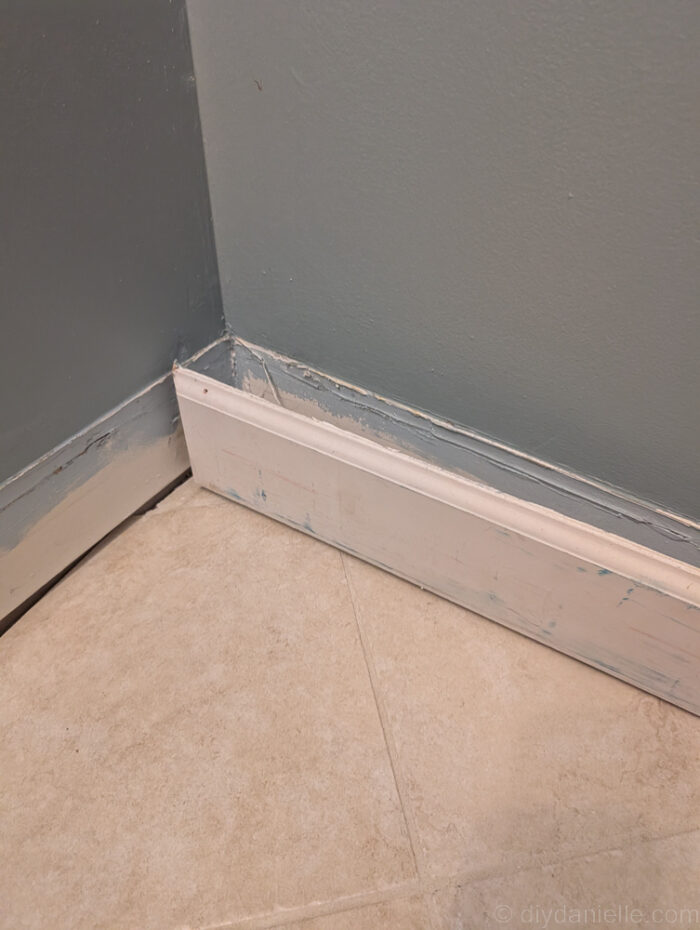
Step 6: Remove the Baseboards
Carefully pry off the baseboards to make room for the new cabinets.
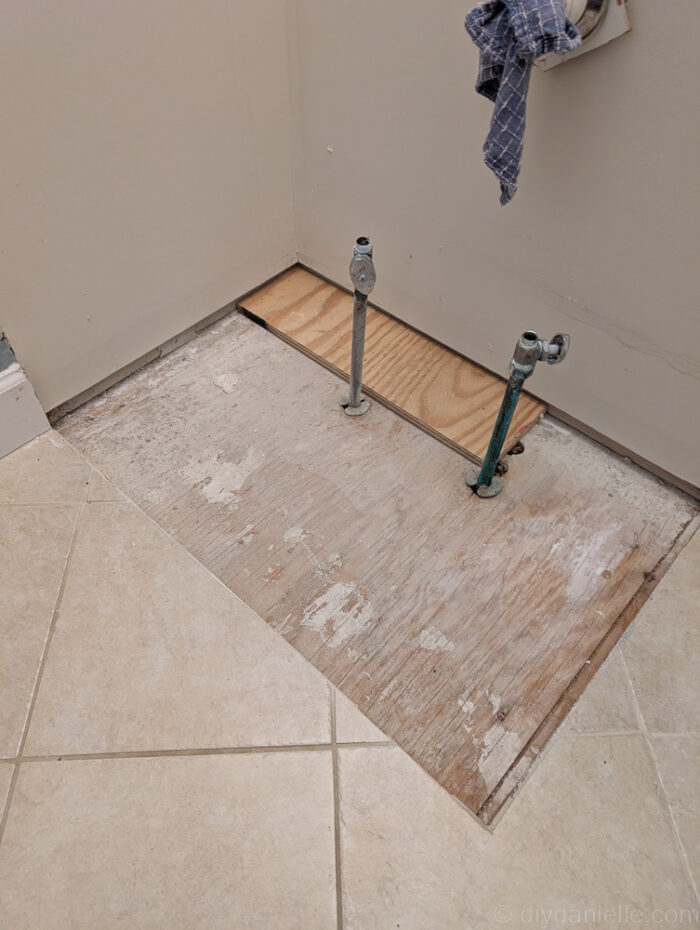
Step 7: Fix the Floor
Make any necessary repairs to the flooring before installation. In this case, we needed to raise the square around the plumbing so the vanity wouldn’t rock and roll when the kids leaned on it.
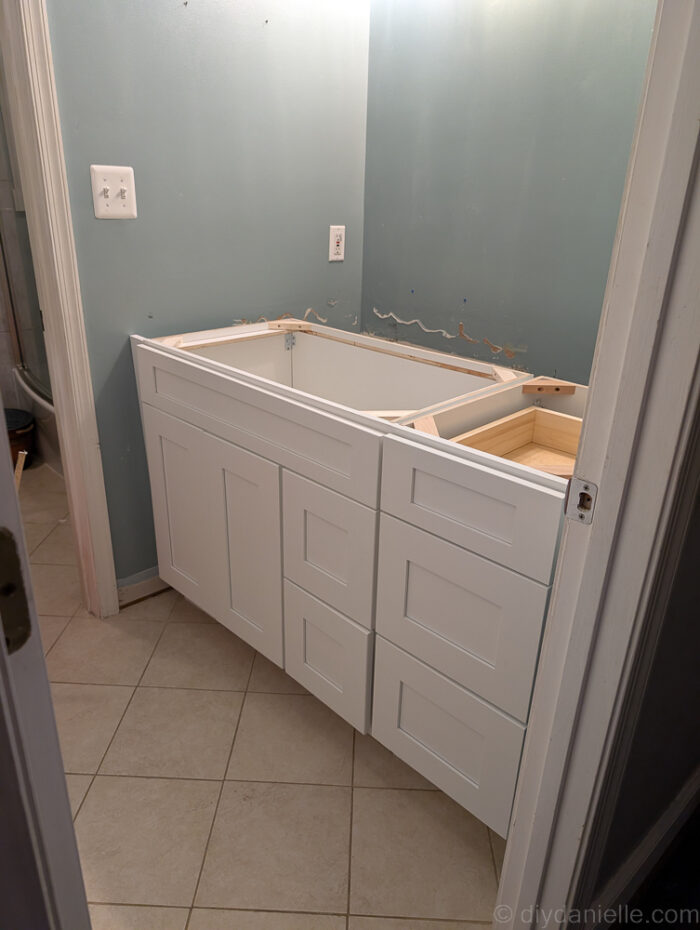
Step 8: Move in the Vanity Cabinet, Measure and Cut for Plumbing and Place.
Carefully bring in the vanity cabinet and check where the drain and water valves will be once installed.
You’ll need to measure carefully and cut out the openings before placing the cabinet. We made our openings quite large to avoid accidentally causing major plumbing issues during the process of moving the vanity in.
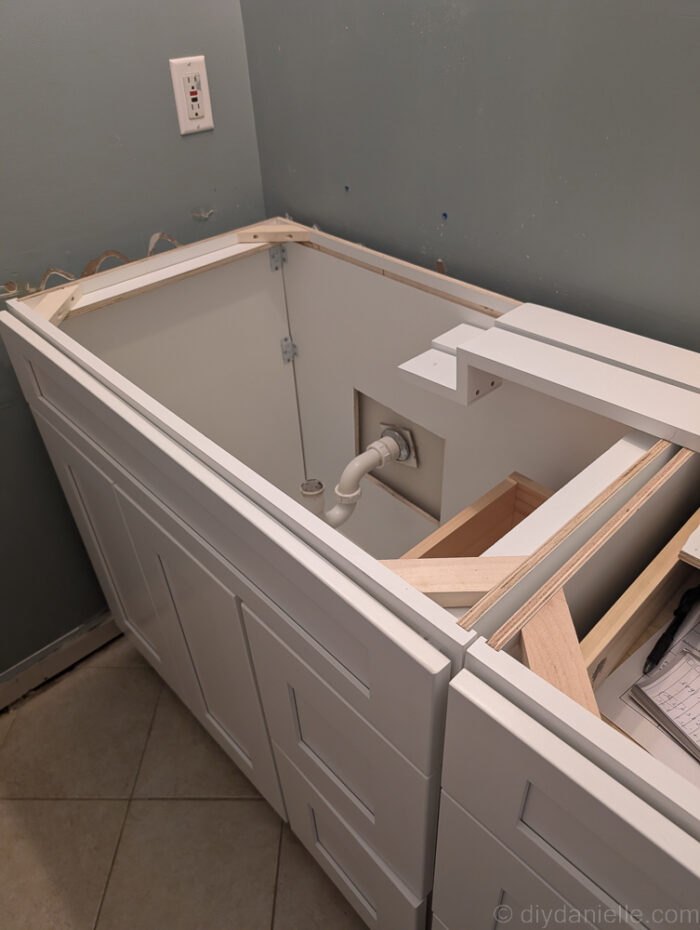
Once you’ve cut everything out, you can place your vanity.
We placed our vanity out a bit, adding blocks behind it and the other base cabinet. This was because our flooring cut off and the new cabinets wouldn’t cover the gap in tile otherwise. It was cheating, but we didn’t need to retile the floors so it was a win.
We did not attach it to the wall yet.
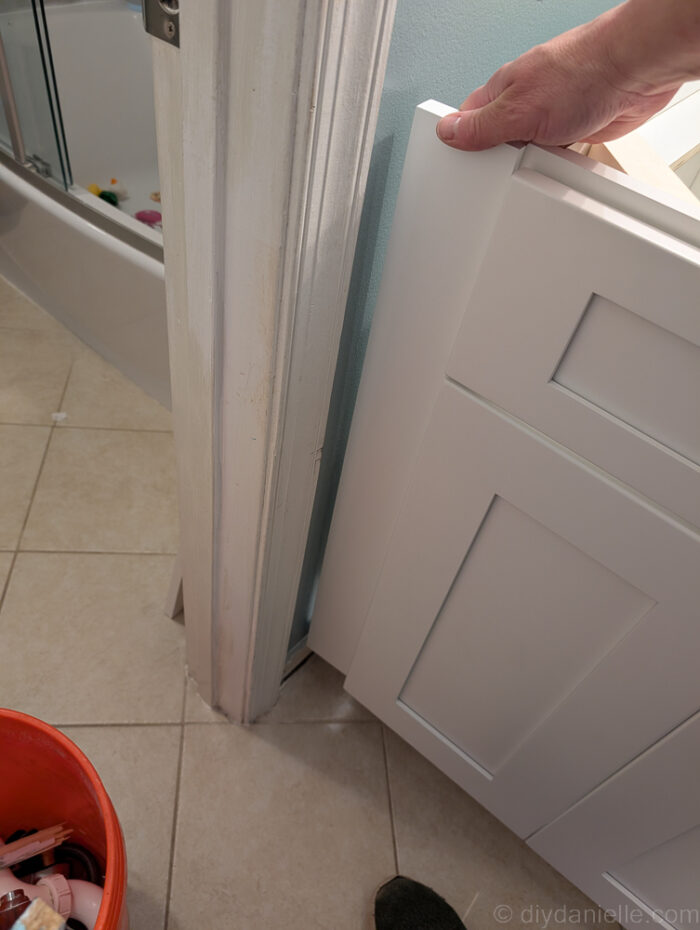
Step 9: Move in the smaller base cabinet.
Step 10: Attach filler trim to either side of the base cabinets.
Fillers help close gaps where you don’t have enough space for an additional cabinet. They’re technically dead zones so ideally you get as much cabinet squeezed in as possible, but these help give a polished look.
You will want to pre-drill and then screw them together and to the wall.
Step 11: Attach the cabinets to the wall studs and to each other.
You will want to pre-drill the holes when you’re screwing them into each other to avoid splitting the wood. It helps to remove the drawers when you’re doing this so they don’t get in the way.
Step 12: Cut your countertop to fit your space and install.
We used 90° brackets on the underneath to attach the countertop to the base cabinets.
We opted for affordable laminate faux wood countertops from IKEA… the maintenance on these was lower key than some of the regular countertop options that I checked out and I love the look of wood. This is the Saljan in Oak.
Step 13: Place your sink and draw where your cutouts need to be for plumbing.
Measure twice and then cut everything out to install your sink on the counter.
- Counter: I bought a counter from IKEA and had it delivered. It was AFFORDABLE, looks like it’s wood, but it’s not… which means less maintenance (yay).
- Sink: https://amzn.to/3QAW9t3
- Faucet:
Step 14: Install your sink
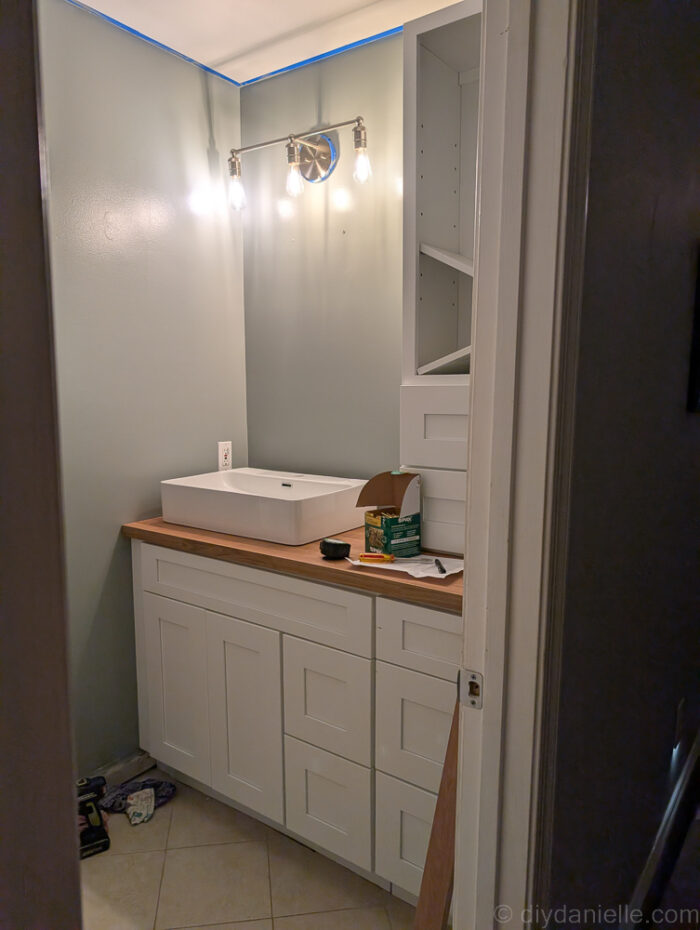
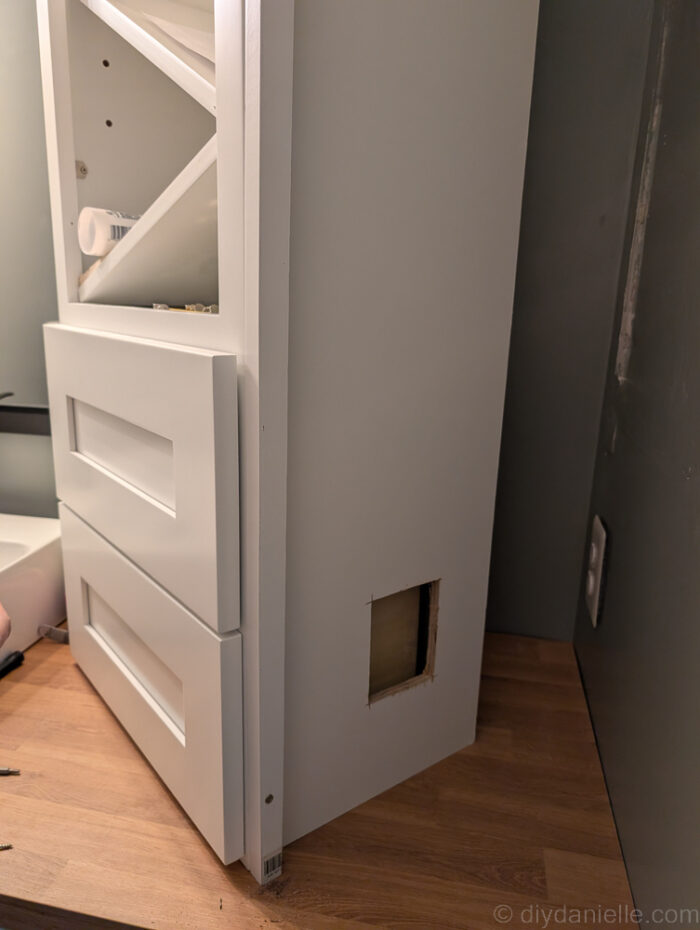
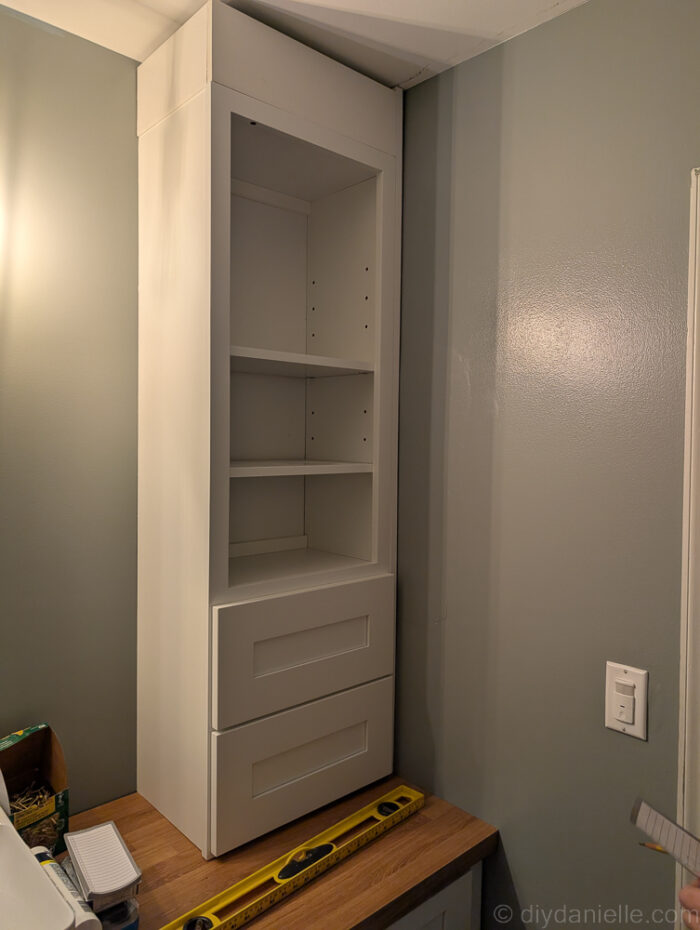
Step 15: Install the upper cabinet and the filler trim that goes with it.
We also needed to install the glass door.
We cut out the side of the cabinet in case we need to access the hidden outlet. This will not be visible unless we remove the drawers.
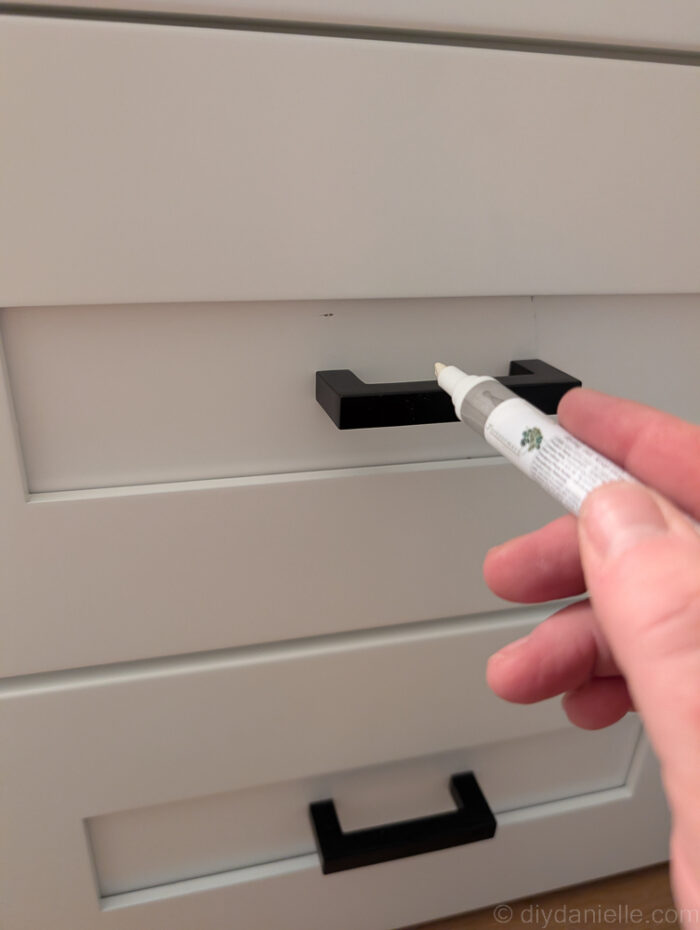
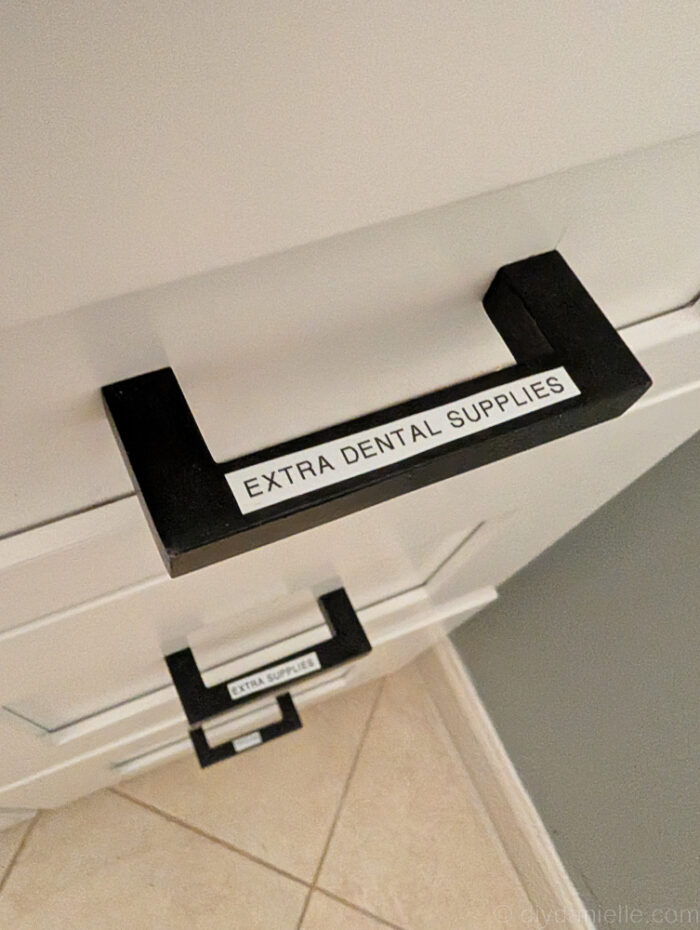
Step 16: Install Handles and Pulls
Install your cabinet handles and/or pulls.
Step 17: Reinstall baseboards and refresh the paint on them.
Step 18: Add your crown molding around the upper cabinet for a polished look.
Due to the extra height, we added some PVC trim to raise the height of the cabinets, then installed the crown molding around it.
Step 19: Install decorative trim
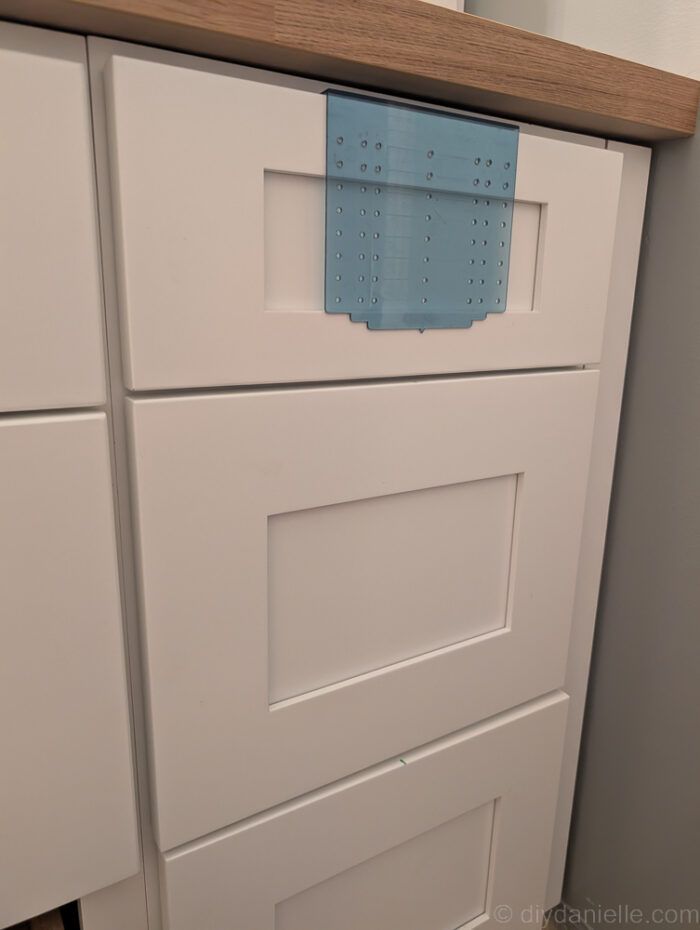
Step 20: Fix any blemishes on the counter, cabinets, or paint. Caulk.
Cover up any blemishes using the paint pen or caulk. You will also want to caulk around any gaps. Do your best and caulk the rest.
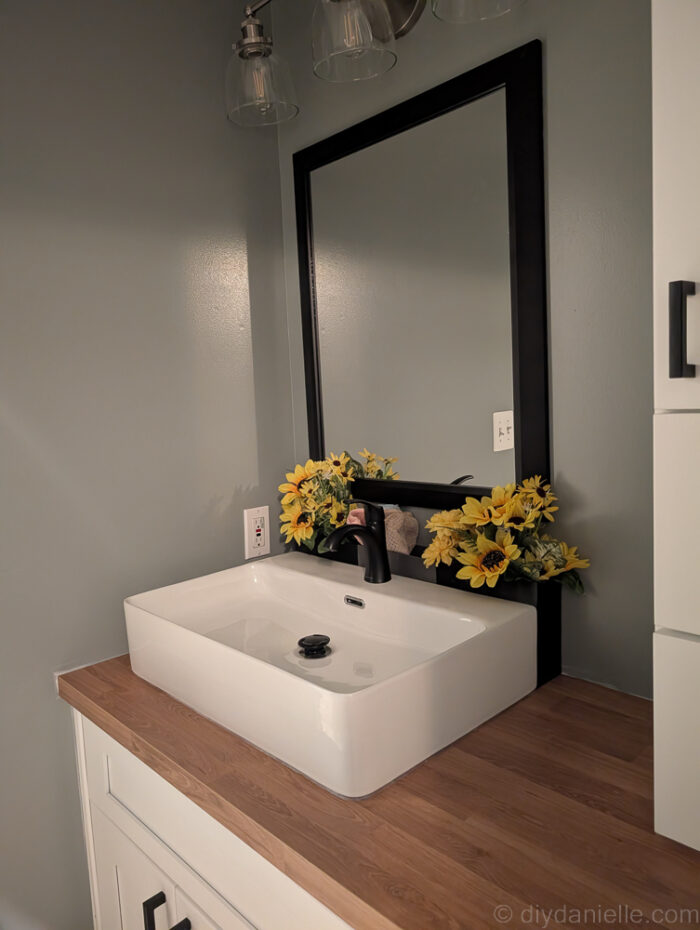
Step 21: Install Mirror
Almost forgot this step! This is the mirror pictured.
Kids Bathroom Organization
Tip #1: Labels Everywhere
Labels on the handles are easier to peel off and less likely to damage the cabinets. I find things go back in the right place more frequently when there are appropriate labels.
Tip #2: 3D Printed Bins for Behind the Sink
The sink had a weird opening in the back, but I didn’t want to put it up against the wall. I opted to 3D print these simple bins for behind the sink. They are an exact fit so they are snug and don’t shift a lot. They’ll be easy to remove and clean, however.
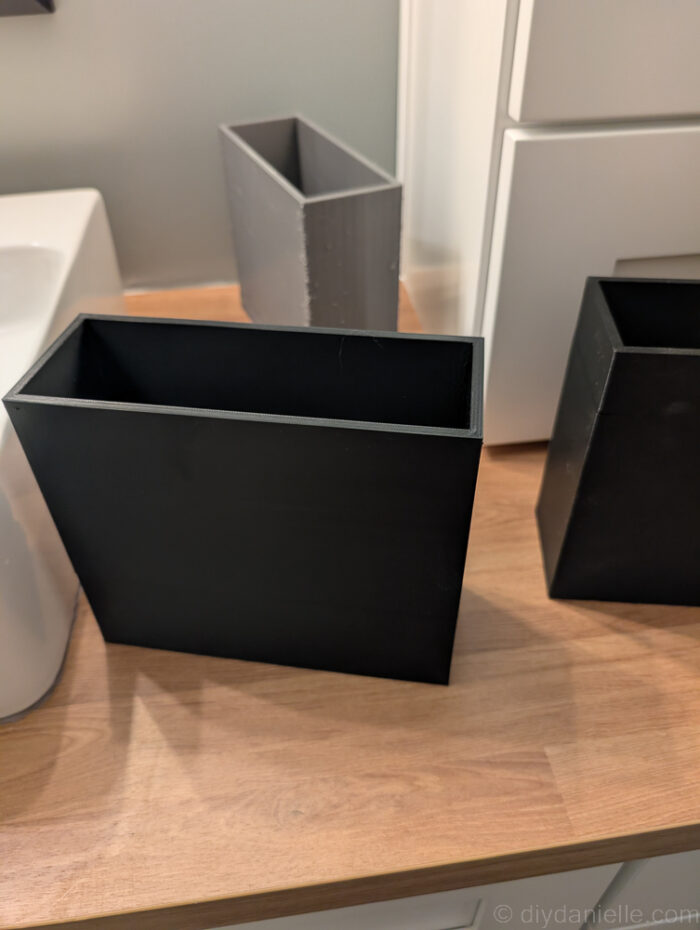
I haven’t decided if we’ll store toothbrushes in these or maybe a real plant or two… but for now, they’re decorative (for the pictures and to give me the dopamine I need to get through the next project that’s on my plate).
Tip #3: Hooks for Towels and a Fabric Laundry Bag
Laundry baskets tend to get mildew and mold on them with wet towels inside so I opted for a washable DIY laundry bag. I made two and they hang off the towel hooks. Each hook is labels for a child, and they can easily hang their towel up after they use it.
Theoretically. I KNOW they wouldn’t hang towels on a bar… so we’re going for the easiest possible option.

Please share and pin this post! You can also post your project and tag the DIYDanielle team on Instagram @doityourselfdanielle!