
Learn how to create multiple holes in Fusion 360. This tutorial shows the step-by-step process to add holes to 3D models.
This post may contain affiliate links which may earn me commissions should you click through them and take certain actions. As an affiliate for Amazon, Cricut, xTool, Home Depot, and other sites, I earn from qualifying purchases. Please DIY carefully. View my full legal disclosures here.
The majority of my content is generated by me, as are 99% of the photos and videos, but I utilize technology for titles, descriptions, video editing out all of my ums, and occasionally for text overlay on images.
Please read the whole post so you don’t miss any important information!
Once you get a 3D printer, you often start delving into making your own designs. There is a lot of room to improve your life using this technology and to print things that might be useful.
However, most of that software is pretty complicated. The one that I ended up settling on is Fusion 360, and I’m finally starting to get the hang of it.
But it’s always a struggle to figure out new features and I don’t use it like a professional would, where I’d be needing to use features 8 hrs a day at work.
Many of the tutorials I saw were really written for people that were in some sort of engineering field.
I wanted to create this post for people like me who will use this feature once or twice a month and need something to reference back to.
To be realistic, I created this for me because in a month when I need to add multiple holes again, I’m going to need a quick memory jog. 😆
So let’s get started.
How to Create Multiple Holes in Fusion 360
Project Supplies
- Fusion 360 software (I use it as a personal version, seeing I don’t make money on 3D print designs)
Step by Step Instructions
Step 1: SKETCH MODE Start by making a sketch. You want to select the face that you’re going to be working on as your plane. I find this easier than trying to figure out which plane is which. So I selected the triangle side that I want my holes on.
Step 2: SKETCH MODE I created a circle and made it 0.2 in.
Step 3: SKETCH MODE Place that circle where you want it.
I ended up placing it next to the corner of the front so I could look and see if it was in the right spot based on my holes that were on the front.
Step 4: SKETCH MODE Once you’ve done this, go back to create and go down to rectangular pattern.
Drag the arrow across to where you want your holes to stop.
You can type in how many holes you want, making sure they’re not so close together that they’ll overlap.
Step 5: SKETCH MODE Click OK.
Step 6: SKETCH MODE Click Finish sketch.
Step 7: Go to the top bar. Click create hole.
Step 8: On the right, you’ll have a little pop-up for the hole feature.
Click multiple holes under placement at the top.
Click all of the dots that you placed as a sketch.
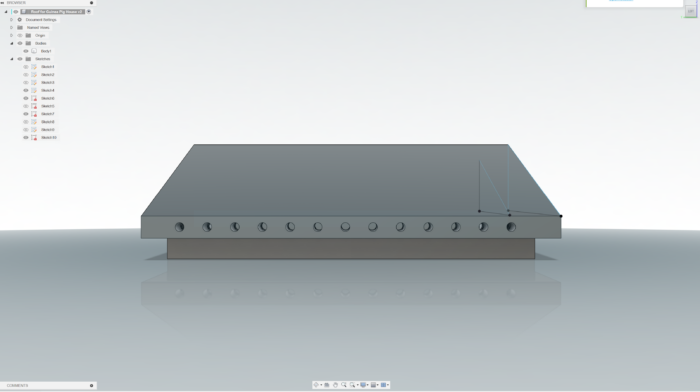
There’s an arrow that you can pull out to make your holes longer or shorter. I dragged mine to go through both sides.
Click ok.
Tada. You’re done.
Please share and pin this post! You can also post your project and tag the DIYDanielle team on Instagram @doityourselfdanielle!