
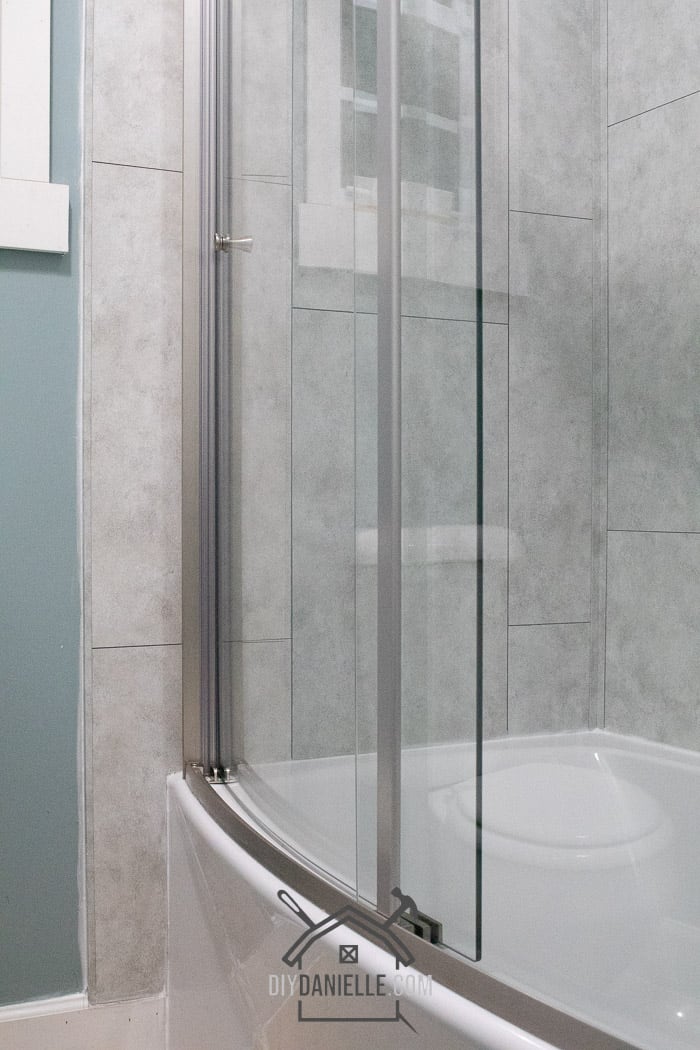
How to Install Dumawall Tiles, now known as Palisades Tiles. These waterproof panels fit snugly on your shower or bathtub walls, preventing water from seeping through.
Many thanks to the DIY Decor Store for sponsoring this post. Their Palisades Panels are easy to install for the DIY’er and waterproof! The product featured in this post is the Palisades Shower and Tub Kit in Rain Cloud. Since writing this post, DIY Decor Store transitioned to producing the product in the USA so the product was rebranded as Palisades Tub and Shower Kits and it comes in some BEAUTIFUL colors! I’m updating the links to go to the new product.
We’ve been working to update our sons’ bathroom, but a $20,000 bathroom update was absolutely out of the question. It’s easier to save money when you’re willing to get your hands dirty and do some of the work yourself. We hired some of the work out, then DIY’ed the rest. This allowed me to learn a few new things, but it wasn’t as overwhelming as tackling the whole project alone.
Tiling can be expensive. If you hire it out, it’s quite a few hours of work, but if you DIY it, you need to rent or buy equipment that you may not have another opportunity to use. We didn’t want to learn how to install tile because we felt it wasn’t a skill we’d use frequently.
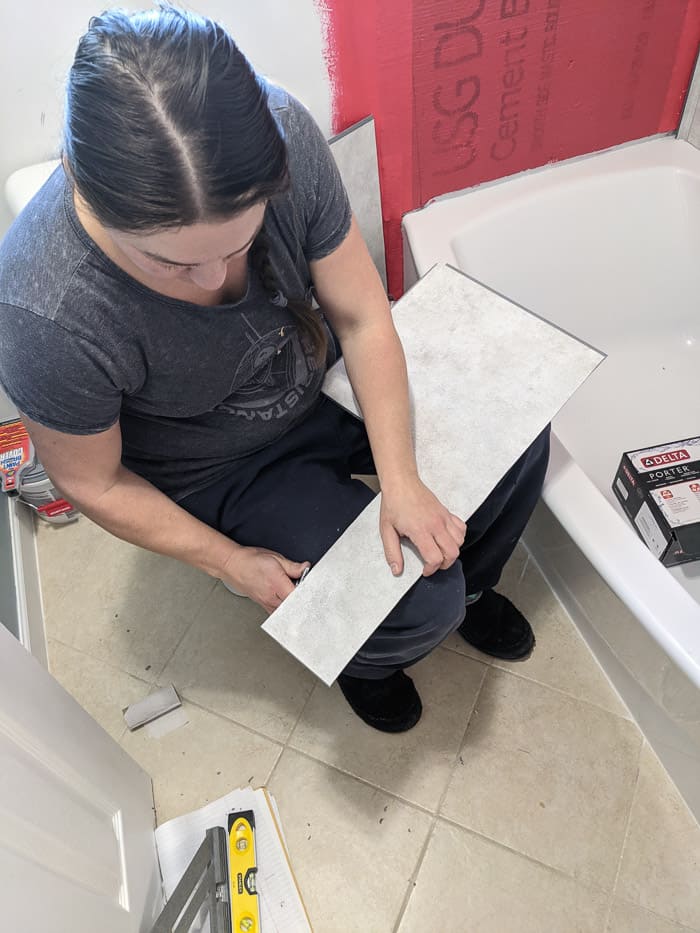
Instead, I decided to use the Palisades Tub and Shower Kits for our shower/bathtub walls. They’re very easy to install and can be cut with a utility knife. This saved us a ton of money and time because we didn’t need to rent equipment or learn a new skill.
This DIY small bathroom remodel was completed in multiple steps so make sure to keep an eye out for the other blog posts. Keep scrolling for more information on how to install these panels!
This post may contain affiliate links which may earn me commissions should you click through them and take certain actions. As an affiliate for Amazon, Cricut, xTool, Home Depot, and other sites, I earn from qualifying purchases. Please DIY carefully. View my full legal disclosures here.
The majority of my content is generated by me, as are 99% of the photos and videos, but I utilize technology for titles, descriptions, video editing out all of my ums, and occasionally for text overlay on images.
Please read the whole post so you don’t miss any important information!
Quick Tips for Installing Waterproof Wall Panels
Before I get into the step by step tutorial, I want to break down some basic things that you need to be aware of before installing your Palisades Panels.
When properly installed, the panels are waterproof. You must use caulking in the seams of the panels, however, and ensure that the panels are installed properly.
These panels can be scored with a utility knife, then snapped apart. You can also use a circular saw with a 60 tooth blade or higher; higher tooth blade ratings make for a smoother edge.
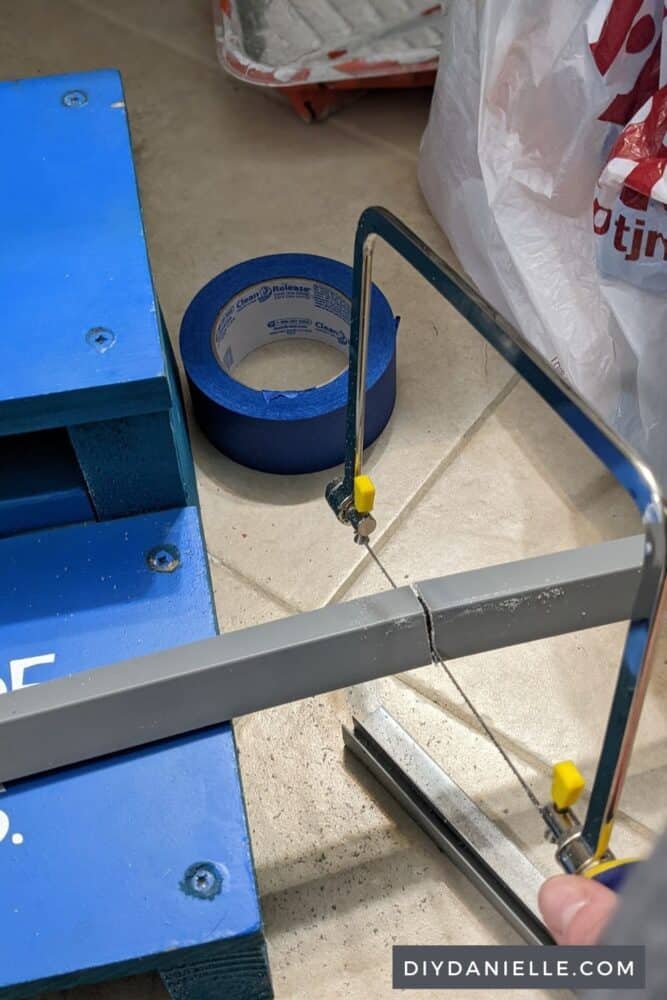
A small hand saw is helpful for cutting the trim. While the utility might work for the trim as well, we found the hand saw faster.
While these panels can be installed on wall studs for the rest of the bathroom, you want Cement Board such as Durock behind the panels for use inside a shower or bathtub.
Cement board is installed similar to drywall, but won’t break down if exposed to water like drywall does.
Keep the flanges in place in all areas except where the tiles sit on the tub and the ceiling; you’ll be using caulk around this area so you don’t want the flanges visible.
You can cut the flange off easily with a utility knife. Look through your box for scraps without a flange to use fewer tiles.
While theoretically you might need to cut the flanges off where the J Trim is installed, in those instances we already had cut off that side of the panel to fit. The raw edge was covered by the J Trim.
These accessories can be installed after you install your tiles and let the adhesive dry for 24 hours. You will drill holes for the hardware through the tiles, using the appropriate anchors to attach them to the wall. Once the accessory is installed, you need to caulk around the accessories so water can’t leak through to the wall behind the panels.
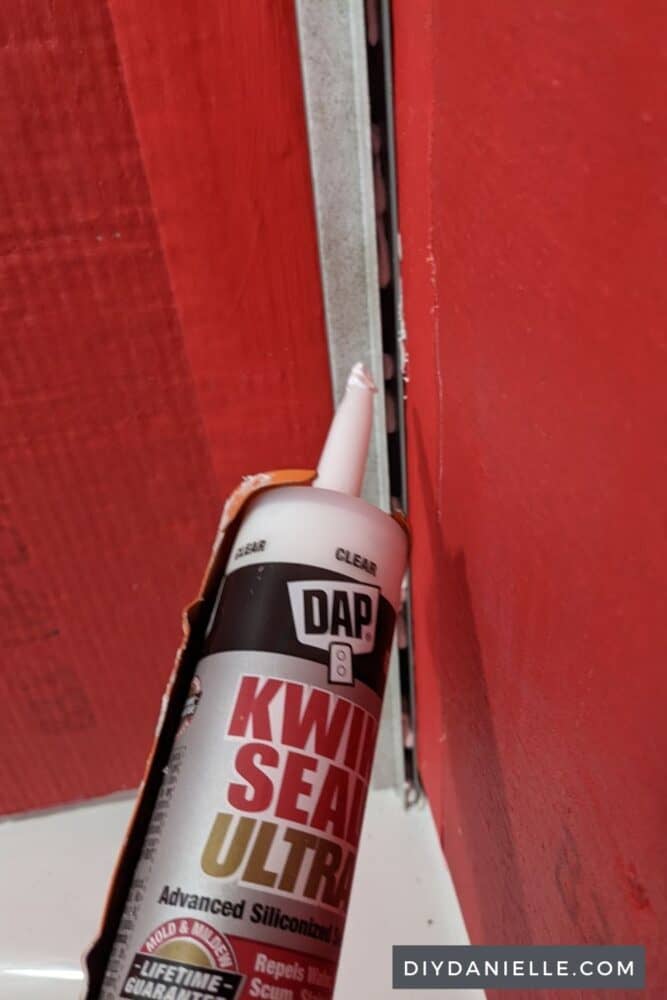
YES! Getting the caulking placed inside the gaps of the corner trim, J trim, and onto the large flanges is extremely important. Make sure there’s clear caulk in all of those areas to prevent water from seeping through to the wall. Learn how to caulk.
How are Palisades Tiles Waterproof without Grout?
I wanted to show how these work so I grabbed a few scrap panels to demo with.
This picture shows two tiles, side by side. The left panel has the large flange on the right… and the right panel has the small flange on the left. The small flange tucks into the large flange, sitting on top of it, then there’s a small gap the smaller flange inserts into (which you can’t see).
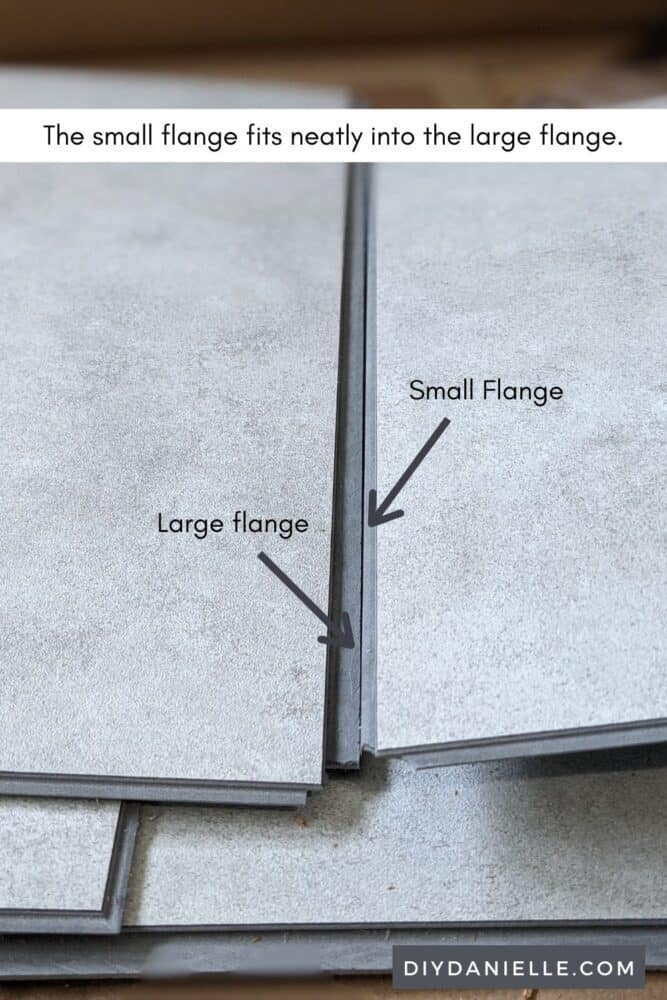
Here it is, tucked in further…

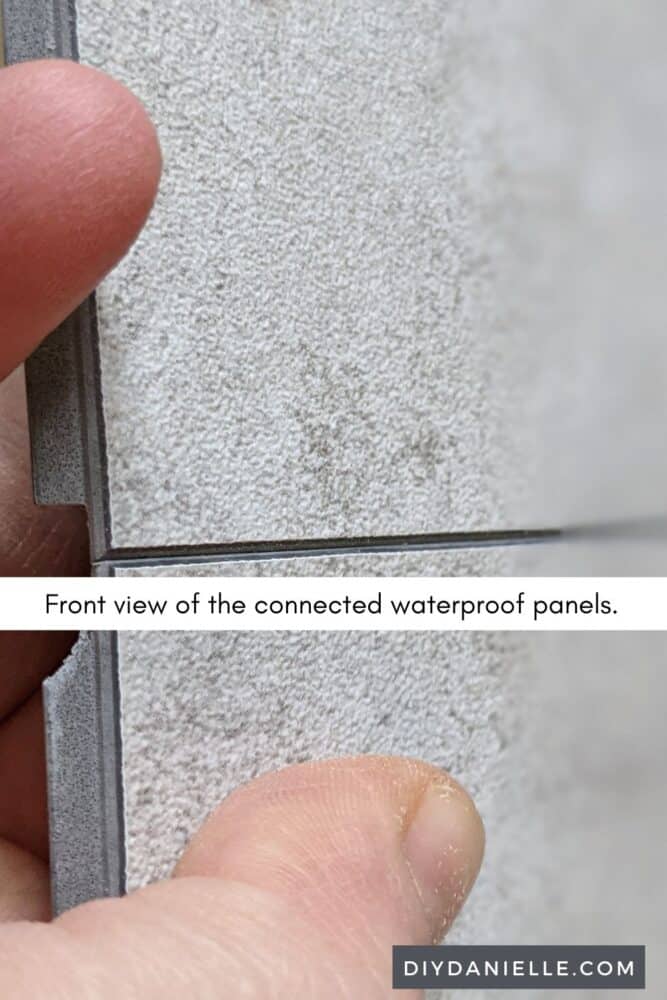
When installing these, you apply silicone caulk to the large flange for additional waterproofing. The photo below shows the front of the panels, fit snuggly together.
Here’s the view from the side.
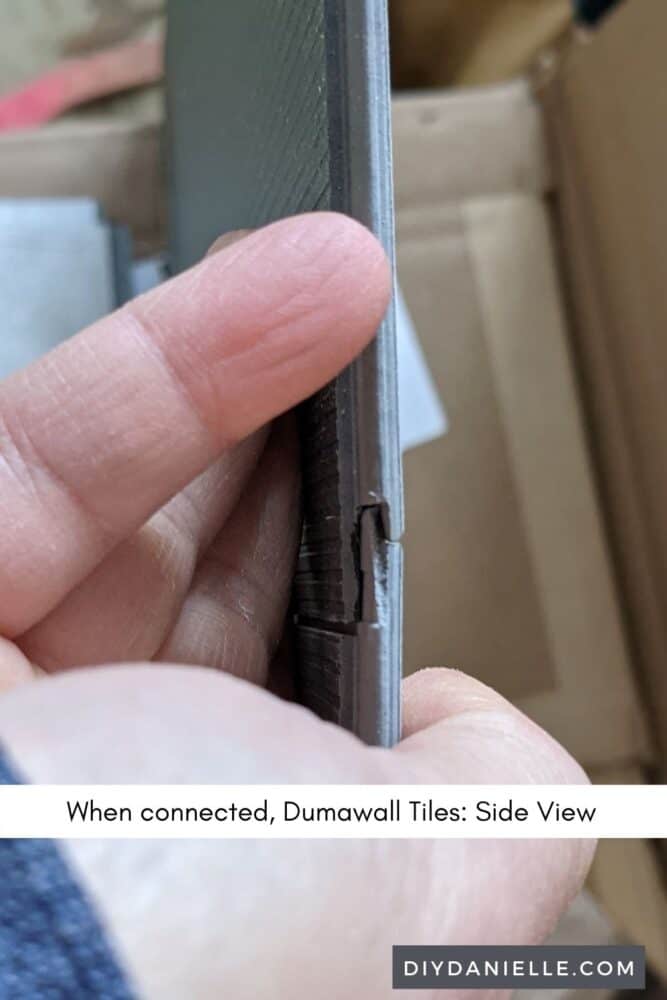
And here’s what the back looks like.
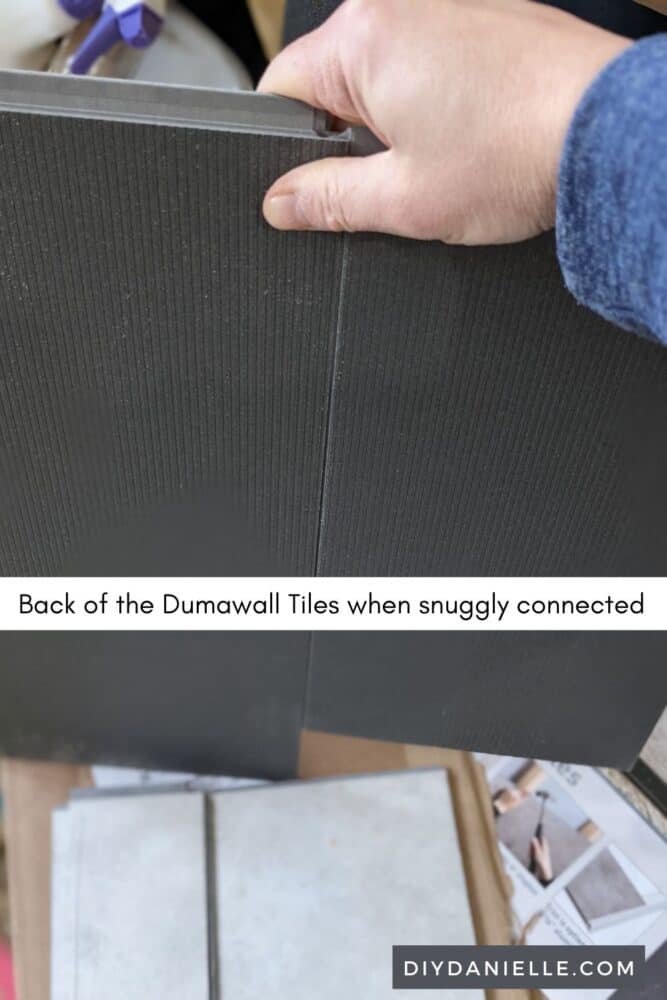
Hopefully that gives you a good visual on how these work!
How to Install Palisades Waterproof Tiles with Trim
Supplies:
- Level
- Caulk Gun: I recommend two so you can do both the adhesive and the caulking at the same time. It saves a lot of time for this project.
- Respirator
- Measuring Tape
- Utility Knife
- Disposable gloves
- Kwik Seal Ultra For The Kitchen And Bath, Clear
- Loctite Power Grab Ultimate
- Palisades Tub and Shower Kits
I’ll show you my tutorial video first, but if you keep scrolling, I have more info below on planning and a photo tutorial.
Video Tutorial: How to Install Palisades Shower Panels
How to Plan Your Wall Layout
Planning the wall is more time consuming than actually installing the panels- assuming you don’t mess up during the installation process. It’s important to plan this out in advance.
Get Accurate Measurements
Make sure to get accurate measurements and decide how high you want the wall to be. The shower and tub kit is not necessarily meant to go floor to ceiling so if you plan to do your tub like we did, you may need additional tiles. We were able to do some planning so we could use scraps here and there, but we did get an additional box.
Decide on the Style. This Impacts your Process.
The tiles have a large flange on the top, and a large flange, depending on your placement, on either the right or the left side.
If you want to do vertical tiles like I did, the position of the large flange requires you work left to right (as the large flange is on the right side).
If you do horizontal tiles, you will be working right to left. This makes a HUGE difference with how you install your tiles.
Your tiles can be installed as:
- Horizontal Subway
- Horizontal Stacked
- Vertical Subway
- Vertical Stacked
I decided to use the vertical subway style in hopes that the tiles would make the shower appear taller.
Planning around Plumbing Fixtures
I started by planning the hardest wall: the short side with the faucet and shower head. We used a column of full width panels up the middle of that wall, centering it over where the faucet and the shower head would be placed. We cut out the holes for the faucet and shower head, then dry fit the panels in place.
Note that we used a half panel in the center on the bottom, then a whole panel above it. This is to avoid needing to cut an awkward hole in two panels to fit around the plumbing fixtures. It also helps create the subway style.
Dry Fit the Center Panels around Fixtures
With the panels dry fit, we could measure the gap on the left side of the center panels. This allowed us to get our measurement for the left column. We wanted approximately the same size to the right as well.
We duplicated this planning on the other short side of the bathtub so the two sides match.
Sketch Your Plan
Pull out a piece of paper and sketch out your plan.
Once you’ve figured out the approximate layout, don’t cut your tiles yet! You’ll have a basic idea how big each tile will need to be, but I prefer to cut as I work in case I run into technical difficulties (aka math problems). I also dry fit the panels to ensure that they were placed correctly before starting to glue them on.
Installing the Panels
I’m going to walk you through the process for installing the panels with the vertical subway layout with the tub fixtures on the right side (this will be slightly different for horizontal or stacked designs).
Prior to installation, Durock was installed.
There’s a video tutorial at the end of the post if you prefer.
Step 1: Install the Corner Trim
Cut the corner trim to the desired height, then glue the trim into place.
When looking at the trim, you’ll notice that one side is deeper. The deeper side should face the direction of the long wall of your bathtub or shower.
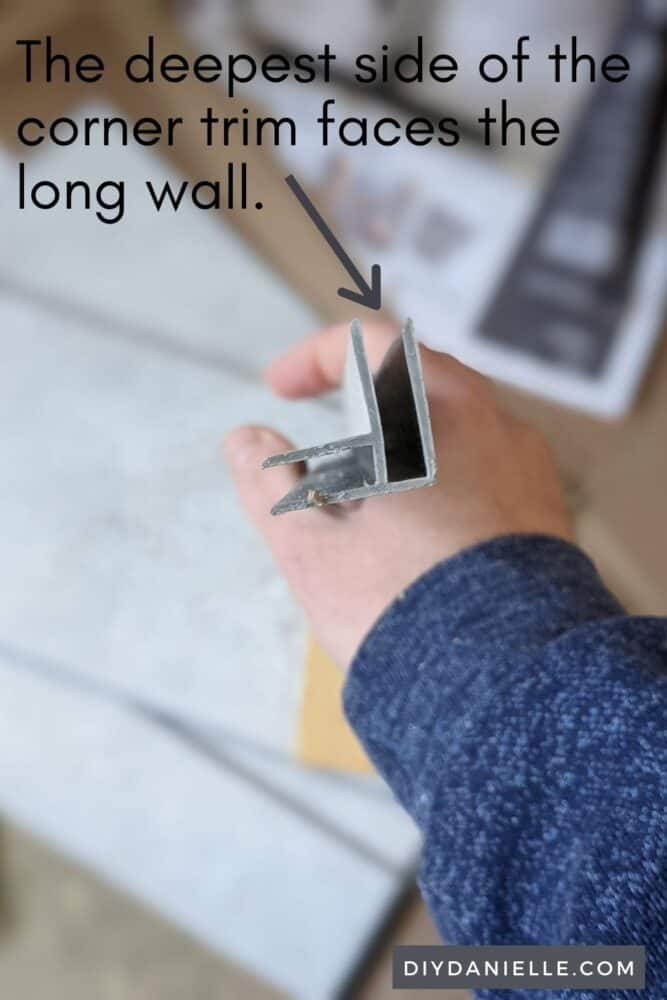
Repeat for the other corner trim piece.
Let the glue dry for 24 hours before installing the panels.
Step 2: Cut the panels that will go over your plumbing fixtures.
Cut a full size panel in half. This will be your center bottom piece, directly under your plumbing fixtures. Dry fit (don’t glue it in place), making sure the side with no flange is sitting on the your tub. This will get caulked later.
Note that with the vertical style, the big flanges should be on the top and the right side. You work bottom to top and left to right, because you’re meant to tuck the small flange into a big flange that is already glued to the wall.
Dry fit another full size panel directly over it, fitting it snuggly in place. Measure and mark where you need to make the cuts for the plumbing fixtures to fit through. Continue dry fitting pieces upward until you’ve marked all of the tiles for the plumbing fixtures on that side.
Cut the holes for the plumbing fixtures. Try to keep the cuts as small as necessary so the trim of the fixtures will cover the hole (you’ll caulk around the fixture’s trim). You can use a spade bit or a hole saw attachment to cut a perfect hole. Place a block of scrap wood behind the area you’re cutting; this helps make the cut cleaner.
Once the holes for the plumbing are cut, dry fit again to make sure it will fit. DO NOT GLUE ANYTHING ON YET.
Step 3: Measure the area to the left of the center panels.
If everything is set from step 2, you can proceed to measure the area to the left of the center panels. That measurement is how wide the panel needs to be to fit between the center panel and the corner trim.
Step 4: Cut your panels for the left side of the short plumbing wall.
Use the measurement from step 3 to cut your panels for the left side of the wall. You’re cutting the vertical panels vertically to make them thinner. You need to use a full panel for your bottom left piece, which will create the subway look (as the center panel is a half piece).
Cut the small flange off the bottom of the panel.
Just cut one piece. Dry fit to make sure it fits well next to your dry fit center panels. If it fits, remove the center panels and store nearby for installation later. You need to install the bottom left panel first.
Step 5: Install your first panel.
Your first panel to install will be the left bottom panel. We actually worked on the long wall (without the faucets) first, but I’m going to talk about doing the shorter plumbing side first… it’s the most complicated wall. Just repeat the process, minus the plumbing piece, when you do your long wall.
Apply caulk into the gap of the corner trim on the side you’re working on.
Apply the included adhesive to the back of your panel.
Slide the panel into the corner trim, making sure your large flanges are on the top and the right side. Check to make sure your first panel is level and plumb (level in the vertical direction).
Wipe off any excess caulk that leaks out of the gap (continue this throughout the installation of the panels).
Step 6: Repeat bottom to top, until you’ve completed your column of tiles to your stopping point.
Cut your next vertical piece to the same width as the panel you just installed.
Apply the clear caulk to the top of the large flange of the panel you installed. Apply adhesive to your second panel. Fit snuggly over Panel #1 and into your trim.
The panels fit together snugly.
Again, make sure Panel #2 is level and plumb.
Repeat these steps to the ceiling or wherever your stopping point is (we stopped at the ceiling, but you may want to stop your tiles right above or below the shower head). You may end up needing to cut the top panel to fit. Remove the top flange if not.
This completes Column #1.
Step 6: Install the center column where the plumbing fixtures will go.
Find the center panels that you set aside.
Run caulk up the large flanges of Column 1. Apply glue and install the bottom piece, which is a half piece. Make sure the panel is level and plumb.
Add caulk to the large flange. Add adhesive to your next tile and place the tile, making sure to fit it snuggly into the bottom tile AND the left tile. You’ll feel the tiles lock together.
Repeat to all the way to the ceiling.
Step 7: Install your right column.
You’ll want the right column to be around the same width of column 1 (hopefully your plumbing isn’t weird, but this should put you outside of the tub/shower zone).
Install bottom to top, just like you did the last two columns (remember to cut the flange on the bottom piece). If you plan to use the J Trim, DO NOT place adhesive on the last 1″ of the right side of the panels. Once the column is installed, you’ll want to cut the J Trim to the height of your column, apply caulk into the gap, and slide the J Trim under the panels so it is snug.
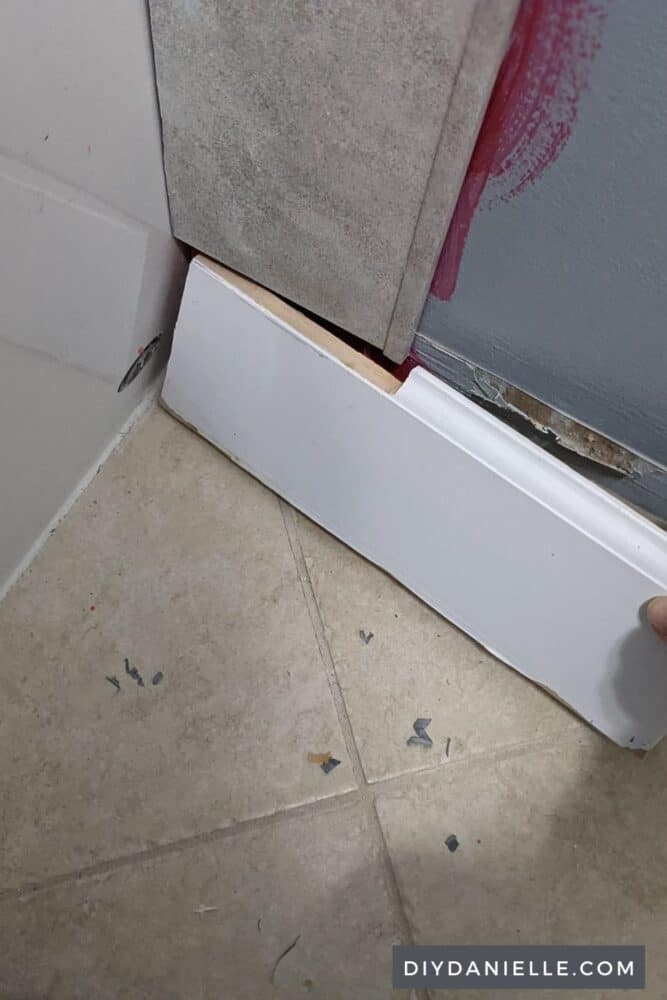
As you can see in the photo below, I needed to cut an L shape out of my panels to fit around the exterior of the tub. I did this on both sides. I was doing some light trimming with my utility knife here because it didn’t fit as snuggly as I wanted.
We had baseboard toward the bottom of the tub so we cut away a piece of baseboard so the panels would fit snuggly. If we’d cut the panel to fit against the uncut baseboard, it would have been thicker than the top of the baseboard.
Step 8: Repeat the process for the long wall, working left to right.
As you can see in the photo below, we actually did the long wall first. I hope this isn’t too confusing.
The last column is tricky on the long wall and on the left side wall because you need to fit the panels into the trim.
Measure the gap and cut your first panel to fit. You want the right panels to be wide enough so they will fit into the corner trim, but you don’t want them to fit all the way into the corner trim. There should be a little wiggle room. Dry fit to see if it works.
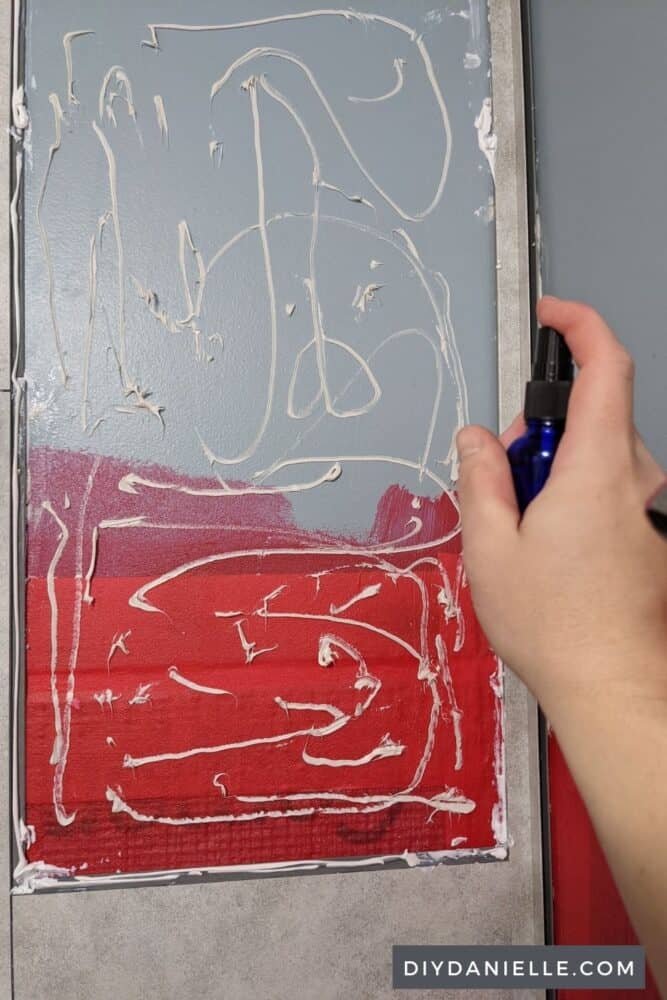
If all is good, you’re going to apply your caulking to inside the gap of the corner trim and to the large flange on the left column. You will apply your adhesive DIRECTLY TO THE WALL. Take a spray bottle of water and lightly spritz the adhesive. This allows the panel to slip and slide into place.
Take your bottom panel and slip it into the corner trim, push it down to the tub, then wiggle it to the left to snuggly fit into the center panel. Repeat with the panel above it, until you reach the top of the column.
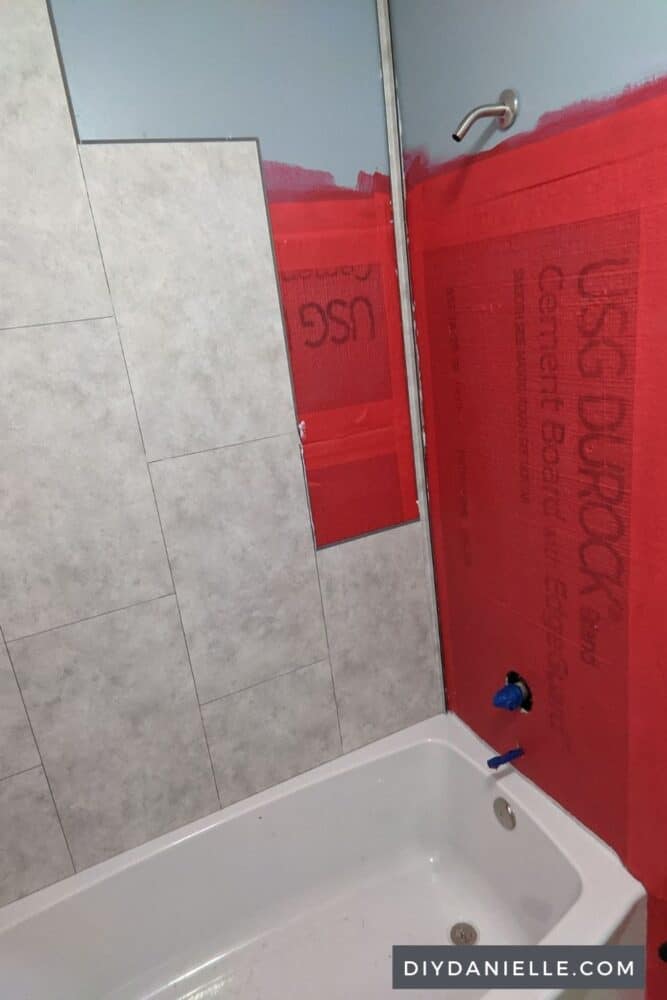
This is what it looked like when we’d finished those two walls.

Step 9: Install the panels for the left wall.
Before you think you can repeat steps 2-6 exactly the same with the short left side- it actually requires the opposite installation (working from the far side into the corner). Again, we are working left to right. Again, make sure each panel is level and plumb.
I wanted my left and right tub walls to be similar so I used a full piece in the middle and the shorter pieces on either side.
It is helpful to draw the level/plumb line for your first column (on the left side) on the wall. This gives you something to line your tiles up against. We actually glued the J Trim down first, let it dry, then installed our first column into the J trim.
Now install the left and center columns, similar to the right wall installation.
You install the last column just like you did with the long wall (spritz the adhesive on the wall with water and wiggle your last column into place).
Step 9: Install your plumbing fixtures and any accessories.
Install any plumbing fixtures such as the shower head, etc, as well as any accessories that attach to the wall.
Step 10: Caulk around the bottom where the tiles meet the tub, and any other necessary areas.
Apply your caulk along the bottom of the tiles where they meet the tub. You can also apply caulk around accessories and plumbing fixtures, as appropriate. You want to make sure you don’t leave any gaps where water can seep through to the wall.
Here’s a tutorial on how to apply caulk.
Please share and pin this post! You can also post your project and tag the DIYDanielle team on Instagram @doityourselfdanielle!


How to Install Dumawall Shower Panels
How to install Dumawall Shower Panels. These are easy to install. This card explains the basics, but make sure to read the full post for ALL of the information.
Materials
- Kwik Seal Ultra For The Kitchen And Bath, Clear
- Loctite Power Grab Ultimate
- Dumawall Waterproof Wall Tile Shower/Bath Kit
Tools
- Level
- Caulk Gun
- Respirator
- Measuring Tape
- Utility Knife
- Disposable gloves
Instructions
- Plan your walls. If you choose vertical orientation, you'll apply the panels left to right. Horizontal orientation is placed right to left.
- Measure and cut your corner trim.
- Attach corner trim with adhesive provided. Let dry 24 hrs.
- Add silicone sealant into your corner trim for the side you are starting on.
- Cut and dry fit your panels. Ensure they're level.
- Add silicone sealant to each flange and adhesive to the back of the panel.
- Place panel. Make sure it is level and plumb.
- Repeat for each row/column.
- For the very last panels, it's harder to fit them in there. You'll put the adhesive directly on the wall. Cut your tile wider than the gap, but not as wide as the gap + the inside of corner trim. Spritz adhesive with water. This allows you to more easily slide the last panel into place.
- For the side with the faucet, you'll want to start by cutting out faucet hole.
- When finished with all of the sides, cut your edge trim, apply adhesive to back, and slide it behind the last panel.
- Caulk where the tiles meet the tub and ceiling.
Notes
Please read the full post and watch the video because you'll have better results if you fully plan this project before starting it. It's VERY simple to install, but could be messed up pretty easily if you're not careful.
Hi, curious how this shower is holding up over time? Still look good?
@Patrick, Yes! It still looks great with no issues a year later.
Great article! DIY waterproof wall panels for the bathroom can be a cost-effective and practical solution to enhance the look and functionality of a bathroom. However, it is important to note that proper installation is crucial to ensure the panels are truly waterproof and durable. It may be helpful to seek guidance from a professional or online resources to ensure proper installation. Additionally, it is important to choose materials that are safe for use in the bathroom and do not emit harmful chemicals. Overall, DIY waterproof wall panels can be a great option for those looking to upgrade their bathroom, but it is important to do so with caution and care.