
This is a sponsored post written by me on behalf of The Duck Brand. All opinions are 100% mine. They provided me with Duck Max Strength Roll-On Window Kit to install in my home for this post.

Tips for keeping cold air from coming through glass doors. Keep your house warm and your electric bills down this winter- without breaking the bank.
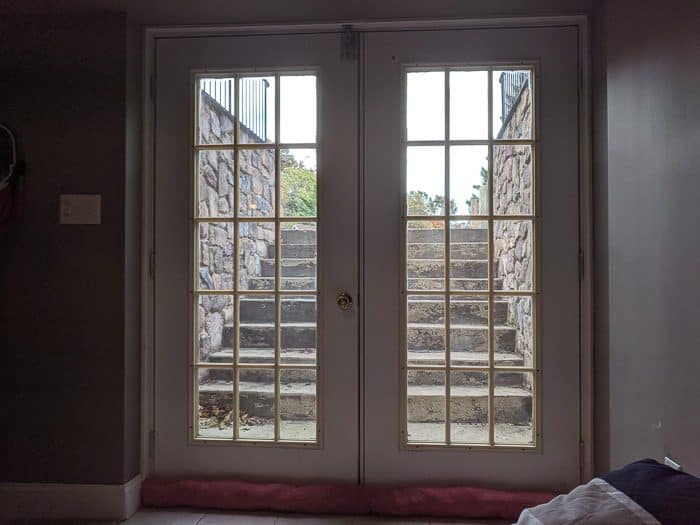
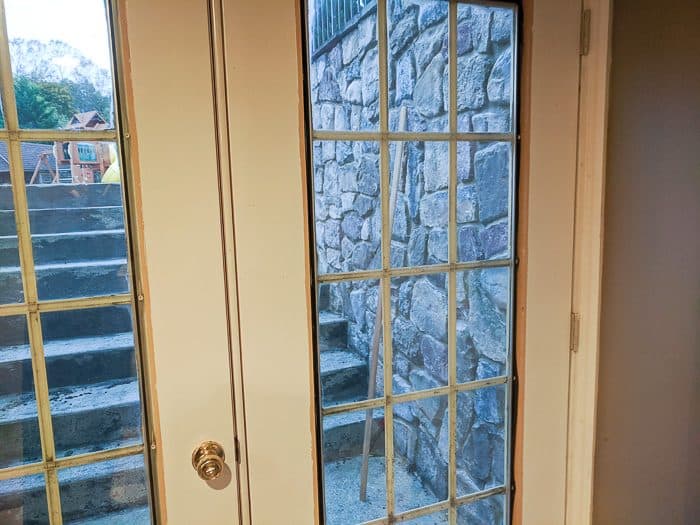
We moved our home last November. While the insulation is FANTASTIC on the front of the house, we had a lot of drafts coming in from the beautiful glass doors. While the windows are also a little bit of a trouble area, we found that the doors are the biggest issue.
We have two glass doors in the basement that walk out to our backyard. This makes the playroom really chilly in the colder months.
Yes, we could buy new doors, but that would be expensive. And we LIKE the doors. So we decided to fix them and use inexpensive methods of solving the problem.
By insulating and fixing any issues with our doors, we are able to reduce our electric bill AND be warmer all winter. It’s ideal to work on those cheap and easy fixes before throwing a lot of money on home repairs.
These repairs each cost under $25 to make and they made a huge difference in the temperature of our basement!
These are the doors before…
Here’s what we’re doing this year and a bit of what we worked on last year!
Replace Weather Stripping
Our first step was to replace the weather stripping on the doors, something that was mentioned during our home inspection. It’s an affordable option and easy to DIY.
This is a great resource from Energy.gov on finding the right weather stripping.
It was amazing how much of a difference good weather stripping makes to prevent drafts. You can feel the difference immediately.
We did this over the winter last year.
Looking for Structural Issues
Our back basement doors were a mess. We removed the mullion on each door- the mullion is the plastic frame around the glass portion with all the rectangles to it.
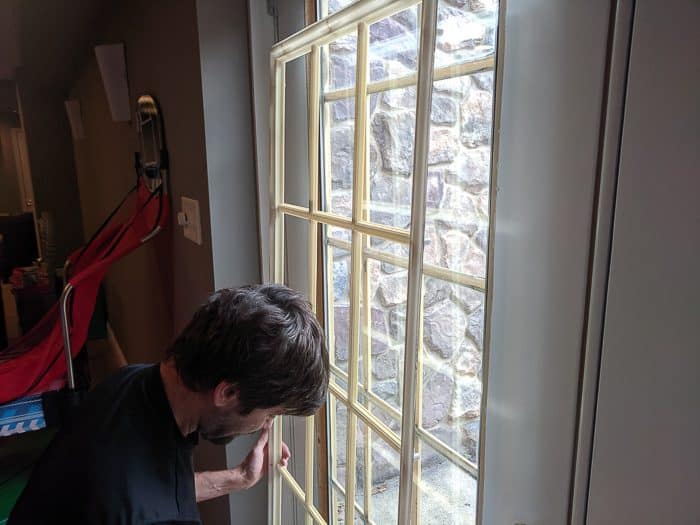
WHERE IS THE INSULATION!?
I sent my husband to the store to get backer rod to stuff in there. We should have gotten a bigger size, but it’ll have to work for now. It literally cannot make this worse.
You can see the black stuff stuff in the gaps in this picture…
In the meantime, I spray painted the mullions granite color with my favorite plastic spray paint. I let them dry for a few hours, then screwed them back on.
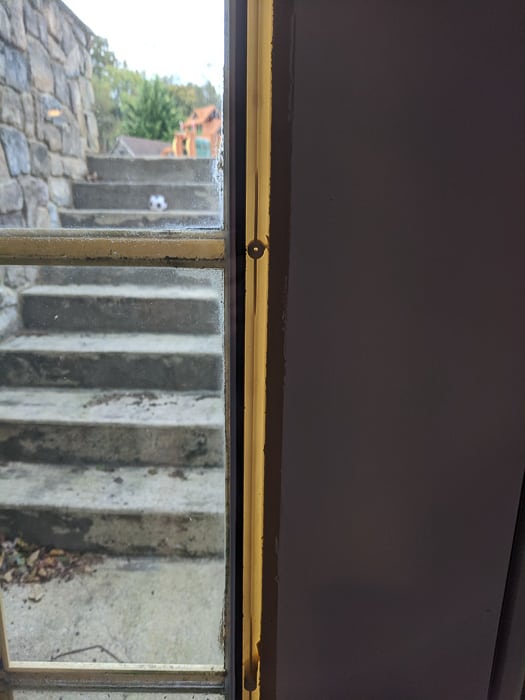
The area under the door jam was rotted. There were wood chunks flaking out and a big gap. We’ll clean out under the door and replace it soon. I anticipate that this area had previously flooded because they let leaves clog up the exterior drain. Over time the wood rotted as a result. ALWAYS keep an eye on those drains and clear them of debris.

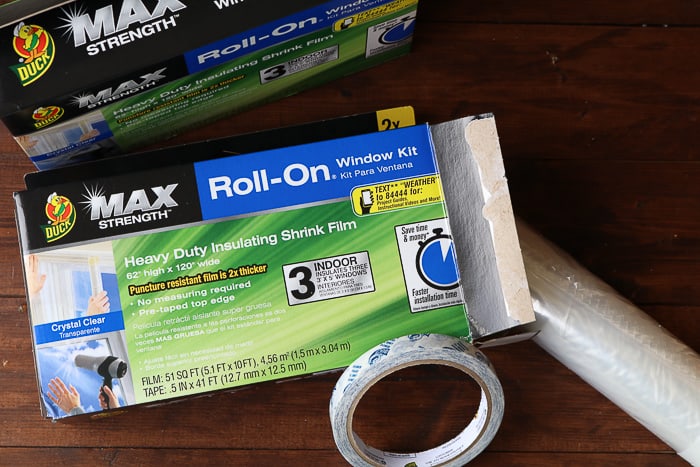
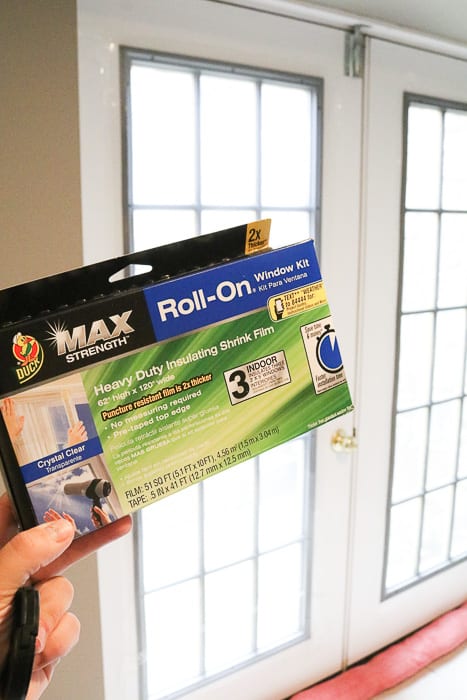
Use Duck Max the Window/Door
This year, The Duck Brand sent us the Duck Max Strength Roll-On Window Kit to try on the doors. This special window film helps insulate glass and keep cold air out. They come in a 62″ long version and an 84″ long version: If you have long doors like me, get the 84″ one! You’ll save yourself some time and aggravation. I made the 62″ work, but it wasn’t ideal.
The benefit to this type of insulation for your doors is that it’s:
- Affordable
- Easy to install
- Easy to remove in the Spring
- Puncture Resistant (which means hopefully my dog and kids won’t puncture it at some point)
I wonder if it would do the trick, even without the fixes I made in the mullions, but I prefer to repair issues when I find them so I don’t forget.
This was SO easy (and satisfying) to install.
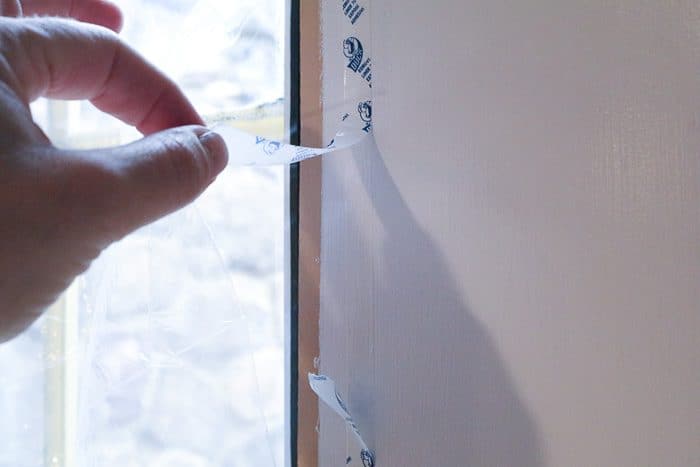
First you make a U around your window with the double sided tape…

You cut your plastic to 4″ wider than the door (the glass)… this leaves 2″ on each side of the glass. There’s a thick piece of plastic at the top of the plastic that sticks to the top of the door.
The other side of the double sided tape peels off so you can seal the plastic pieces to it.
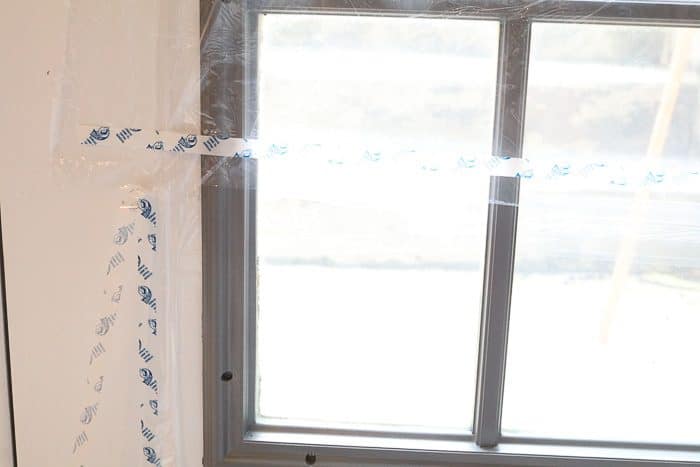
The length of this went ALMOST to the bottom of my door. If I’d gotten the 84″ long package, I would have been finished. Whoops! Next year I know!
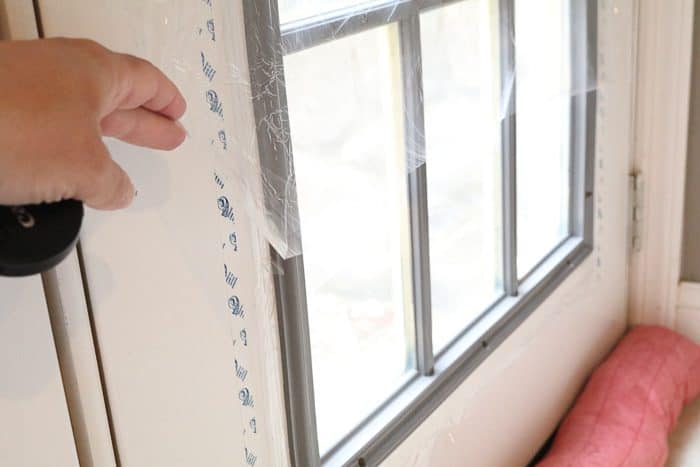
I had to overlap it at the bottom, using the double sided tape.
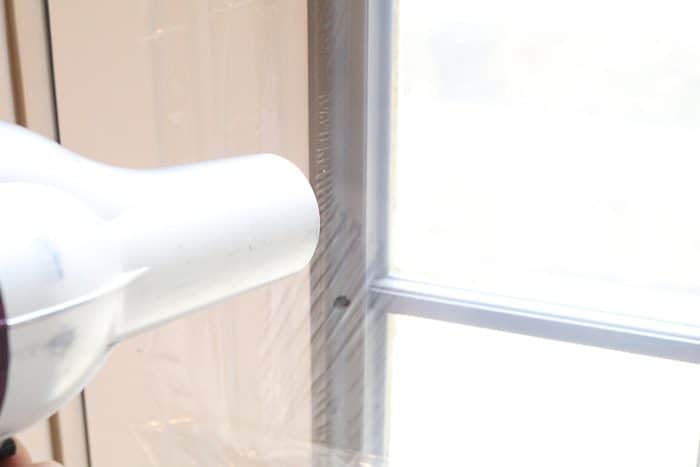
We used our hair dryer to shrink wrap the plastic… this was EVERYTHING (possibly the only thing) I miss about working retail! I heart me some shrink wrapping… so satisfying.
If you’re not familiar with the process, you blow dry on hot until the wrinkles disappear!
We did both doors with only one box of this stuff so we have plenty left for another glass door and some windows!
When we initially installed this, we made the mistake of applying it under the mullions and it shrink wrapped to the windows. In my opinion, it still helped. I realized the mistake and added the second layer OVER the mullions.
My basement is actually warm now which is a huge relief because we just moved our guinea pigs from their outdoor cage to their indoor cage, and I wanted to make sure that door area was draft-free so I could put the cage right in front of it.
When it warms up in the Spring, I can remove this and install a new layer in the Fall.
Here’s a quick video from the brand showing you how to install it.
Make sure to pick up your own Duck Max Strength Roll-On Window Kit at Walmart before it gets cold!
Don’t forget to sew up a quick door snake too! These are super easy to make and a great use for scrap fabric. I like to stuff them with scrap fabric that would otherwise get tossed because the fabric weighs them down.
These should help prevent any additional drafts from coming in under the door- particularly until we fix the bottom portion of the door!
Home Maintenance Reminder: Don’t forget to clean your dryer ducts to prevent fires.
Please share and pin this post! You can also post your project and tag the DIYDanielle team on Instagram @doityourselfdanielle!
Drafty Glass Door
Google Web Story: How to Winterize a Glass Door