

Learn how to make a galaxy effect with wax crayon art! Use old crayons, a canvas, a glue gun, and a heat gun. Melted crayon art is SO easy to make!
This post may contain affiliate links which may earn me commissions should you click through them and take certain actions. As an affiliate for Amazon, Cricut, xTool, Home Depot, and other sites, I earn from qualifying purchases. Please DIY carefully. View my full legal disclosures here.
The majority of my content is generated by me, as are 99% of the photos and videos, but I utilize technology for titles, descriptions, video editing out all of my ums, and occasionally for text overlay on images.
Please read the whole post so you don’t miss any important information!
It’s been a rough few months and I haven’t been able to tackle many projects recently. I’m not sure about you, but finishing a craft or DIY project is extremely calming for me. I get a lot of joy from making things. But those big projects just aren’t feasible right now.
We’ve been working on updating our home office, however, and I keep staring at the bin of old crayons. I knew this crayon art project would be SUPER quick and satisfying. Plus the kids could help too! It was a great way to get fast and furious crafty joy without a ton of work or a huge time commitment.
What is Wax Crayon Art?
Wax crayon art is a great way to recycle crayons. Crayons can be melted down to be reshaped and reused, or you can melt them to make artwork.
To create the art, you glue crayons (with or without the label, depending on how much you plan to melt them) to your canvas. I used my Ryobi Glue Gun.
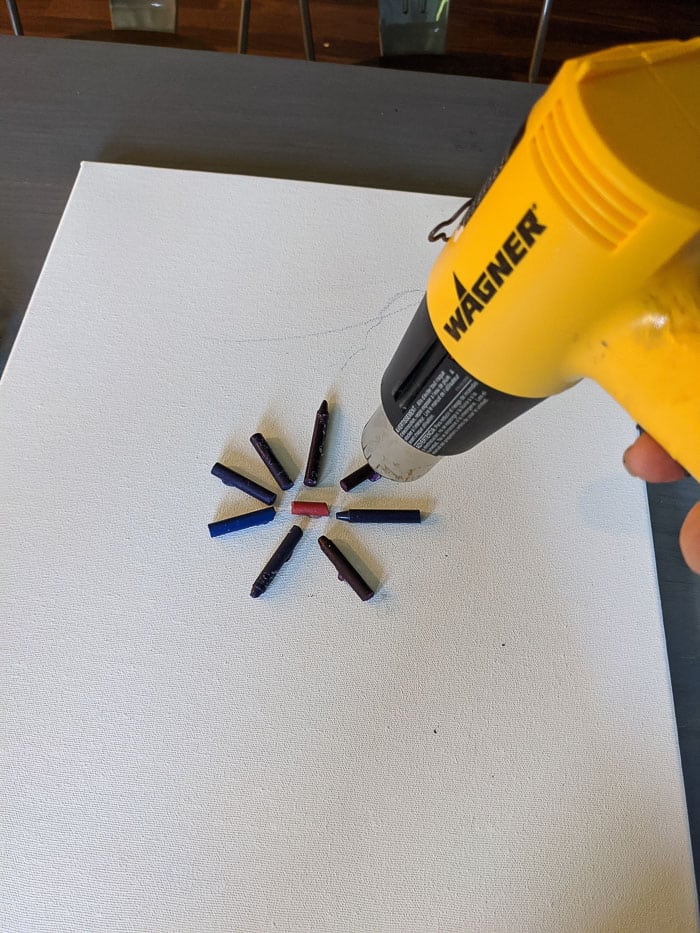
Once they’re stuck on there, you can use your Wagner Heat Gun to melt the wax. You can use the heat gun to push the wax around on your canvas.
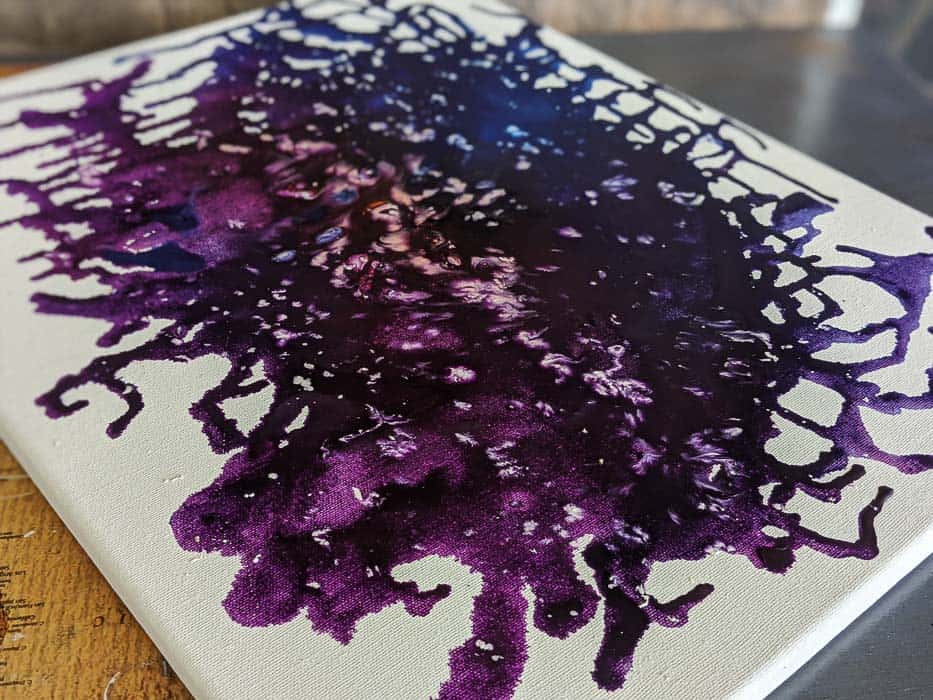
Many people use acrylic paint or resin to create galaxy art, but the benefit to wax is that it can add a lot of texture to your canvas. It’s also safe for the kids to help with and won’t send off any fumes like resin would. Plus it’s a great use for old crayons so they don’t go to waste!
Melted Crayon Art: Supply List
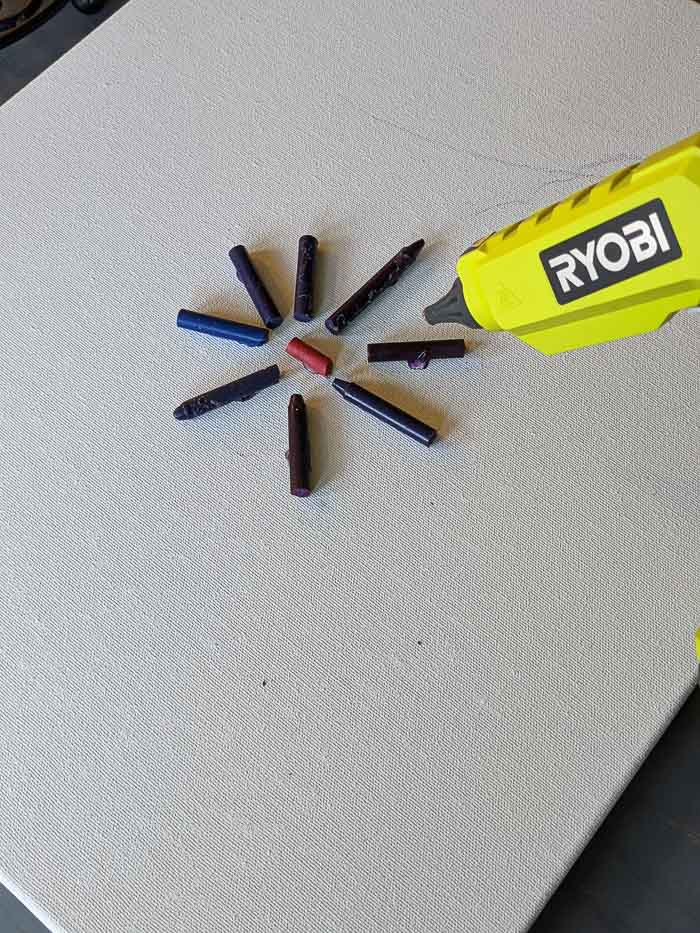
- Old crayons: For a galaxy effect, I used a few shades of purple, blue, red, and white crayons
- Canvas
- Ryobi Glue Gun
- Wagner Heat Gun
- Drop cloth
I love to use broken crayons for this. It’s much better than tossing them. And you don’t really need high quality crayons either.
I’m not sure the hot glue was necessary. You may be able to skip it, but the glue seems to help keep the crayon from getting blown off the canvas.
The heat gun gets VERY hot so make sure to be careful, particularly if you’re letting kids help. I didn’t let my kids use the heat gun. It’s too easy to accidentally set something on fire. In fact, this is probably a great outdoor project.
How to Create a Galaxy Effect with Melted Wax
If desired, paint your canvas black and let dry. I kept my canvas white.
Next I removed the labels on my crayons because I planned to melt the entire crayon down. I used predominately different shades of purple and dark blue, and a tiny piece of red.
I glued the crayons down like flower petals around the red crayon in the center.
The glue is to keep the crayons from getting blown around by your heat gun. A heat gun looks similar to a blow dryer, it just gets a lot hotter. It has a low and “high” blow rate, and even though high isn’t very strong, Crayons are pretty light so they can get blown around a bit.
Protect your surface with a drop cloth for easier cleanup!
Once your crayons are laid out, turn your heat gun on and start melting the crayons.
You can use the heat gun’s air pressure to force the melted wax to go in different directions on your canvas. I opted not to cover my whole canvas with wax, but I tried to spread the wax out as much as possible. I wanted the colors to mix.
After I was satisfied with the purple, blue and red mix, I used some children’s scissors to lay shavings of white crayon on top of the wax.
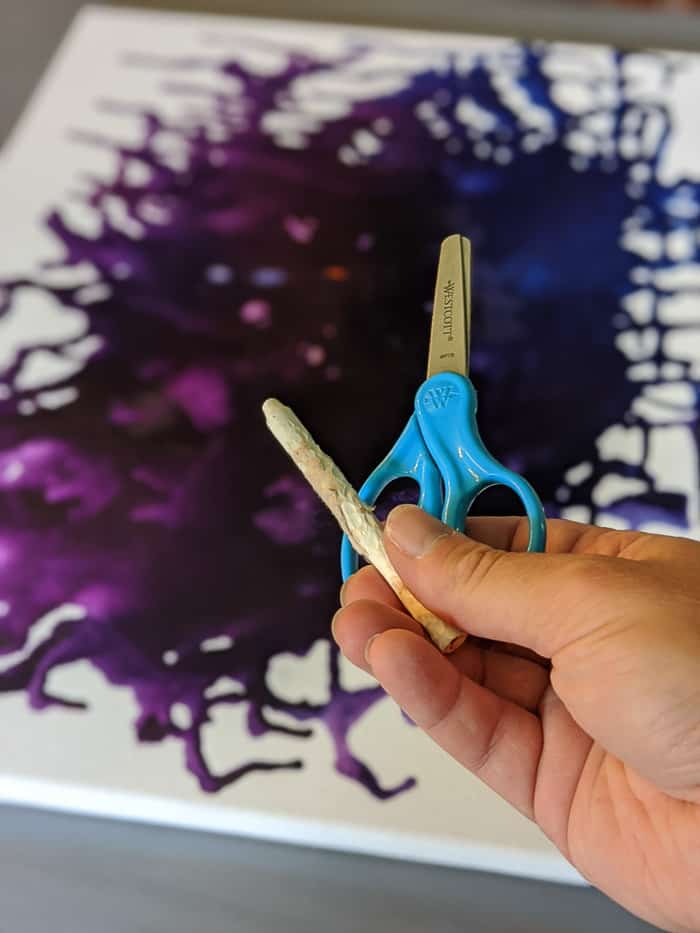
Ideally, you want the shavings to go on before the blue/purple wax solidifies. This will let the white shavings stick in there a bit so they don’t blow around when you turn the heat gun on again.
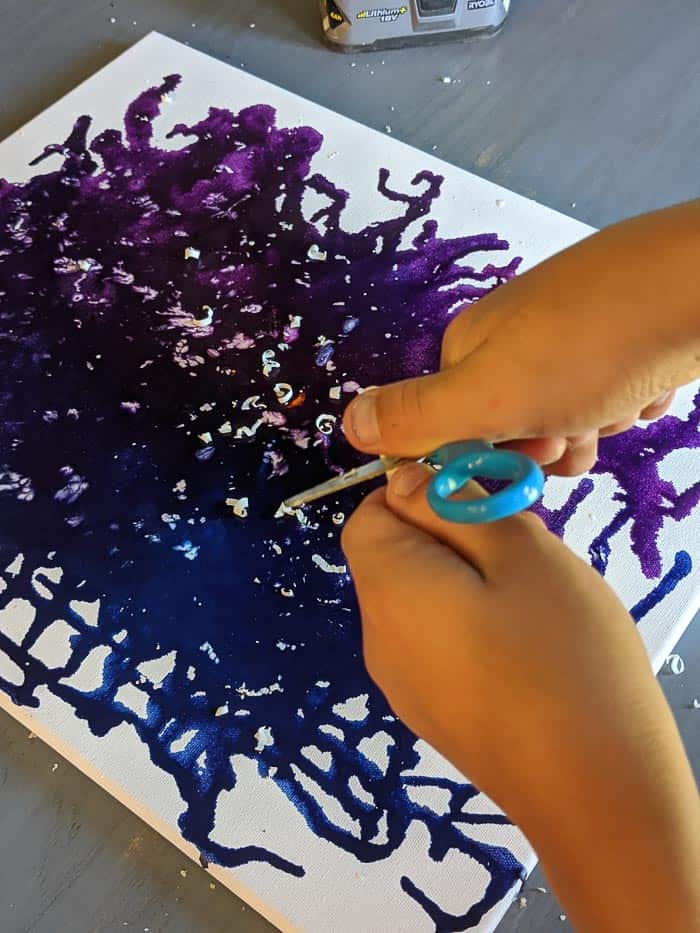
Once you’re happy with the amount of white wax shavings, hit them with your heat gun from directly above…. this helps keep them from blowing off the canvas as easily. You’ll probably still lose some, but it worked pretty well for me.
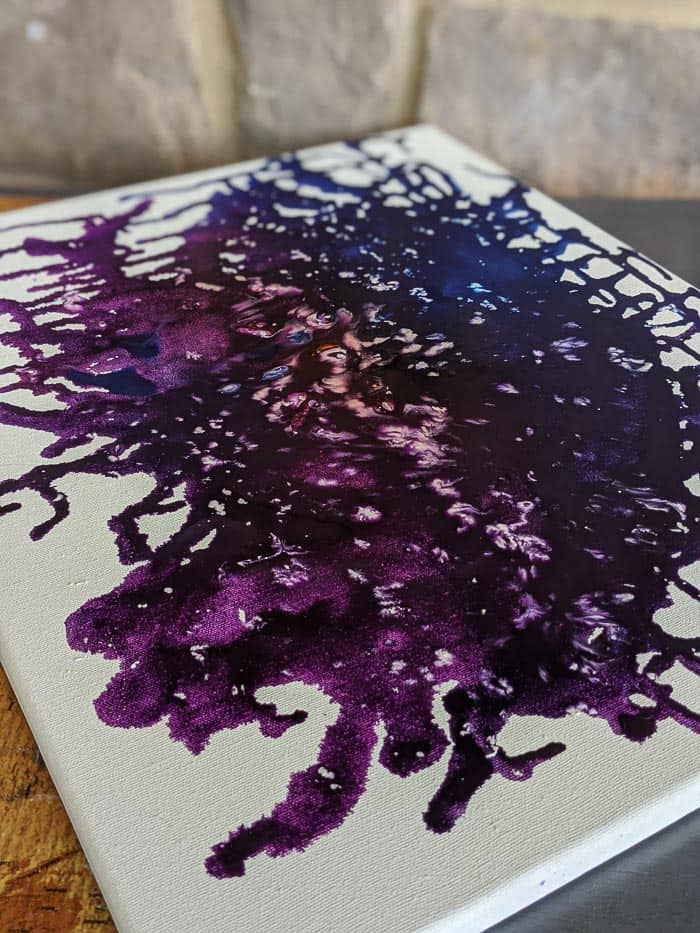
Melt your white wax, letting it pop out to look like stars in your galaxy.
Tweak your art as much as you’d like… you can continue to melt the wax and move it around until you’re satisfied. My kids were pretty excited about how easy this project was! If I’d had a good drop cloth down, I probably would have let it spill over the edges. Next time!
You could also use a Cricut or Silhouette machine to cut out an image, stick it to the mat, then put your crayon art down over it. After melted the wax, you can peel the vinyl off to leave a blank white spot.
Love showcasing your child’s art? Learn how to make a SIMPLE Children’s Art Display!
Other Canvas Art Ideas:
- Projector + Black Acrylic Paint + Watercolors: Fantastic Watercolor Art
- Woodland Themed Animal Art
- Father’s Day Silhouette on Canvas
- Upcycled Book Jackets to Canvas Art
Please share and pin this post! You can also post your project and tag the DIYDanielle team on Instagram @doityourselfdanielle!
Melted Crayon Art
Google Web Story: How to Melt Crayons to Make Art