

How to paint a ride on car. Repainting a plastic toy car is an easy way to update it.
This product is in no way affiliated or sponsored by DC Comics, their subsidiaries, or affiliates. This tutorial is intended for personal use only. This post contains affiliate links. If you make a purchase using these links, I receive a small commission. Thank you!
We received this toy car free off Freecycle and I wanted to update it because I saw all these cool paint jobs on Pinterest and got excited. My son didn’t care what it looked like until I told him I was going to make him a “Superman car” by painting it, then he got mad every time I wouldn’t immediately go paint this (I was still waiting on red paint- which I ended up canceling as I realized it wasn’t necessary). He’d see the blue paint sitting out of reach and say “SUPERMAN CAR!?” Glad I finally finished this. Haha.
So I purchased some special spray paint for plastic, got out my drop cloth and my painter’s tape, and got to work. I did take some of the stuff off to paint to make it easier, as possible. My toddler helped me remove all of the old stickers from it. Very easy and quick to do this project.
Want to make the cape? Check out how to make a superhero cape without sewing.
Supplies for a Superhero Car DIY
Here are the supplies that I bought from Amazon, if you want to make it really easy. Both items below are the exact ones I used. The car was already red in places so I didn’t need to paint those areas. Order two of the stickers if you want one on each side. Ordering using the affiliate links below help support my blog, thank you!
I have found that I prefer Rustoleum 2x spray paint for plastic as I think it lasts a bit better. The ink blue might do the trick. I wrote a blog post about painting plastic and the best tips for being successful at it, if you’re interested.
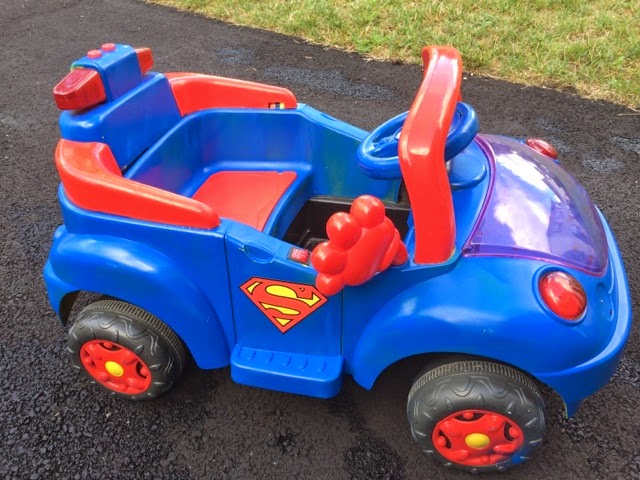
Before Photos of the Ride On Car

How to Paint a Ride On Car
Repainting a plastic toy car is fairly easy. We took apart the car first so the electronics wouldn’t get painted too. We took off the stickers on the ride on car too.

Then we taped off the areas we didn’t want painted. Instead of buying red paint, I used the current red pieces. There’s two ways plastic toys are made- you can dye the plastic before it’s made into the product which makes for a longer lasting paint job. Or you can paint the plastic after it’s made. This never lasts quite as well, even on store bought products. If you look closely at old kid toys, you can actually see what the base color is… it’s interesting!
Needless to say, using the red that was already there was a good way to make my job easier and also to make the ‘paint job’ last longer. So I just covered the red pieces with painters tape.

Once the red was taped up, I spray painted the rest blue. I used a couple coats of paint.

I made sure to spray paint some of the removable accessories separate.

Now we just removed the tape and put the whole thing back together. This was really the hardest part, haha.

Final Product

Please pin this!

good work. a nice car by painting.
Thanks!