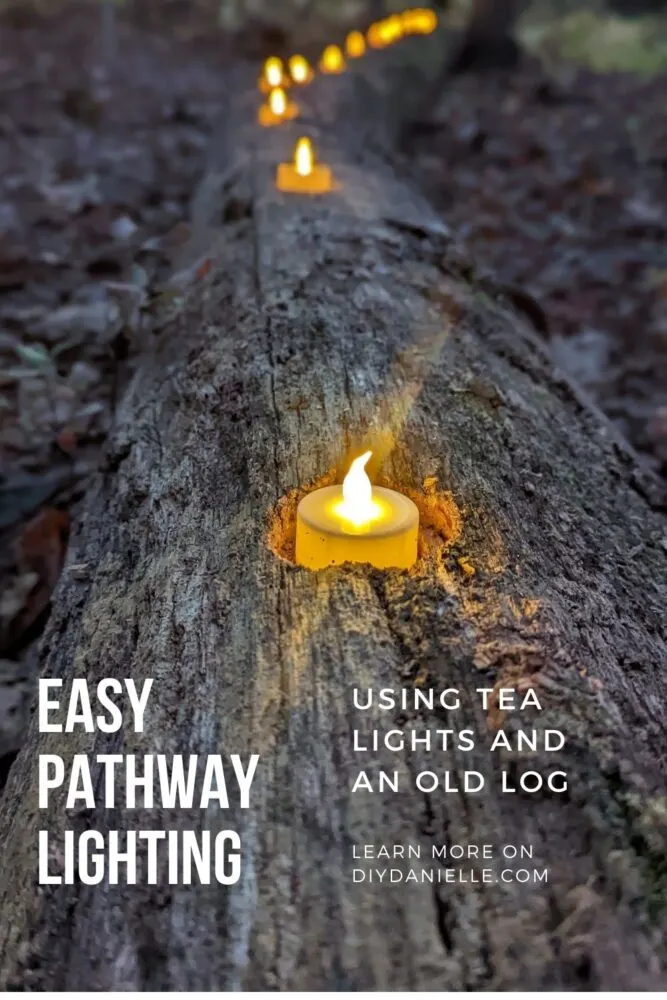
How to create pathway lighting on an old log with some tea lights. This is SUCH an easy and affordable project.
One of the things we needed for our path this year was lighting. We wanted the lighting low enough that you still have that spooky feel, but not so dark that kids were tripping on things or wandering off the path. We used CAUTION tape to mark out the path clearly, but we also rolled dead trees along the sides of the path. I decided using these to hold tea lights would make for beautiful, spooky, and also romantic lighting. I LOVE LOVE LOVE how these came out!
How to Make Tea Light Pathway Lighting
Supplies
- 1.5″ spade bit
- Tea lights, Warm Yellow
- An old log
- Power screwdriver (I was using a hammer drill but a regular powered screwdriver would work fine).
Video Tutorial
Step By Step Instructions
Step 1: Make sure your spade bit is the correct size for your tea light size. My tea lights fit perfectly in the hole a 1.5″ spade bit makes.
Step 2: Mark where you want your tea lights to go on the log.
Step 3: Use your spade bit to drill a hole on each spot. You want it deep enough that your tea lights won’t slip off the log, but you don’t need to drill very deep for this!
Step 4: Insert tea lights!
Step 5: Turn on the tea lights at night.
I’d love this project for along a pathway for normal use as well, but I’d need an easier way to turn on the tea lights each day- and some tea lights meant for outdoor use. I am not sure if that exists, but this is SO PRETTY!
Projects from the Haunted Halloween Trail:
- Witch Totems
- Fake Swinging Axe
- DIY Cardboard Guillotine
- Skeleton in Chains: Pallet Project
- Skeleton Unicorns for a Halloween Scavenger Hunt
- Skeleton Cages from Laundry Baskets
- Creepy Doll Face Pathway Lights
Please share and pin this post! If you make this project, share it in our Stuff Mama Makes Facebook Group. We have regular giveaways for gift cards to craft stores. You can also tag me on Instagram @doityourselfdanielle; I love seeing everything you make!

