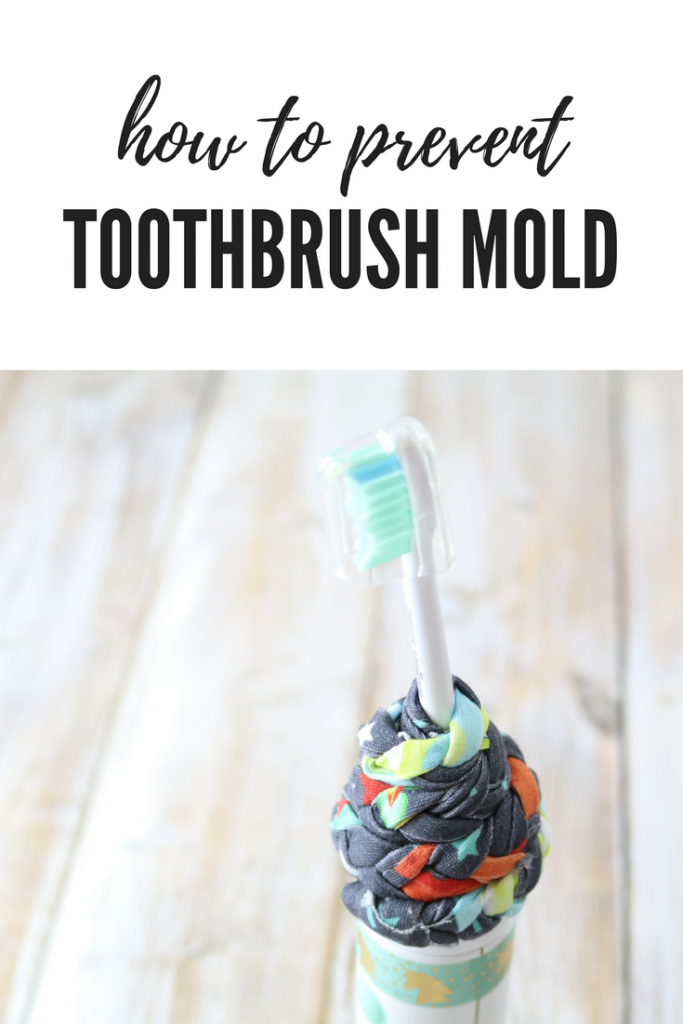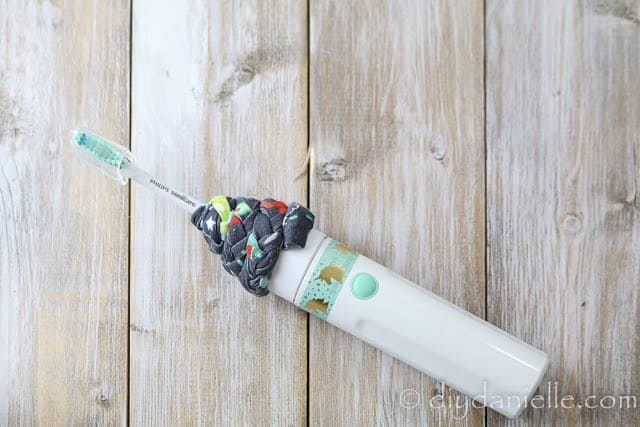
How to prevent toothbrush mold on your electric toothbrush by blocking the crevices with a toothbrush cover or scarf.
This post may contain affiliate links which may earn me commissions should you click through them and take certain actions. As an affiliate for Amazon, Cricut, xTool, Home Depot, and other sites, I earn from qualifying purchases. Please DIY carefully. View my full legal disclosures here.
The majority of my content is generated by me, as are 99% of the photos and videos, but I utilize technology for titles, descriptions, video editing out all of my ums, and occasionally for text overlay on images.
Please read the whole post so you don’t miss any important information!
If you’ve noticed that your electric toothbrush gets mold or gunk inside the hole in the base, you aren’t alone. I’ve been struggling for a solution since 2011 and 2012.
In the past, I’ve made a toothbrush cover and a toothbrush scarf. Both help. I wanted to update everyone with better photos and a video of the scarf making process today.
It’s super easy and you don’t need a lot of supplies to make them. It’s also a great scrap buster. Prevention is a great way to make your toothbrush last longer and to cut down on costs of a new electric toothbrush.
If you already have toothbrush mold, make sure to check out my tips on how to clean the gunk out of your toothbrush. This is an important step- you can’t skip it unless you plan to toss the icky toothbrush and start with a fresh one.
Supplies
- Scrap fabric
- Glue or a glue gun
- Electric Toothbrush
How to Prevent Toothbrush Mold
To prevent mold, you need to prevent water and gunk from building up in the crevices of the toothbrush.
You can do this by:
- Storing your toothbrush head separately
- Turning your toothbrush upside down for regular storage
- Create a covering to prevent water from leaking into the crevices
Creating a Scarf for Your Toothbrush
Start by taking a strip of fabric. This one is 16″ long. You may want to go a bit longer if you wish the cover to the area where the head separates from the base. Cut the piece into three strips, connected at the top.
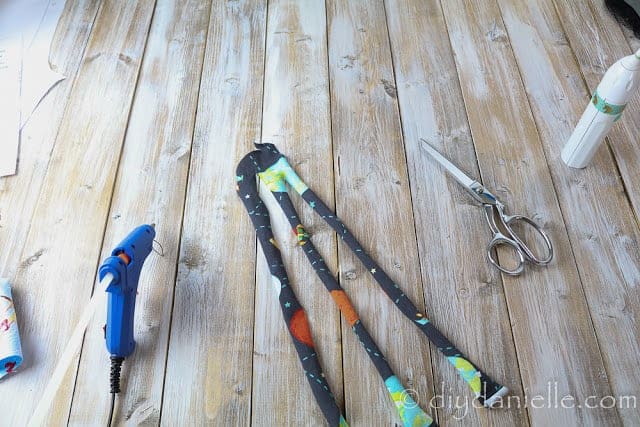
I cut a small hole, then slipped the toothbrush head through it, then braided the strips. I added a drop of hot glue to the end to close the braid.
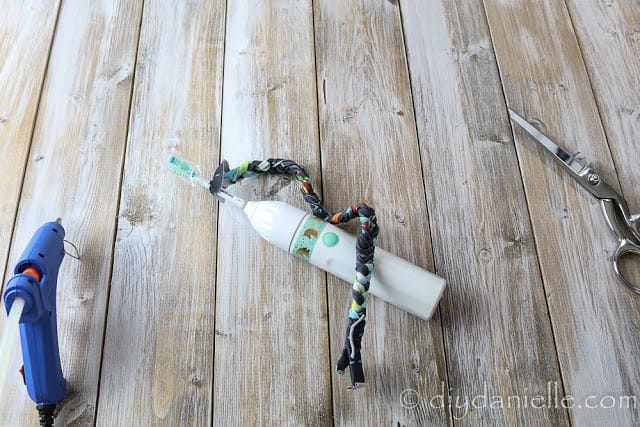
After, I just added a dab of hot glue to the top to hold the top of the braid in place, wrapping the braid around the toothbrush head as I used glue to hold it down.
And that’s all there is to it!
Love it? Please consider pinning it. It really helps get this tutorial seen by others!