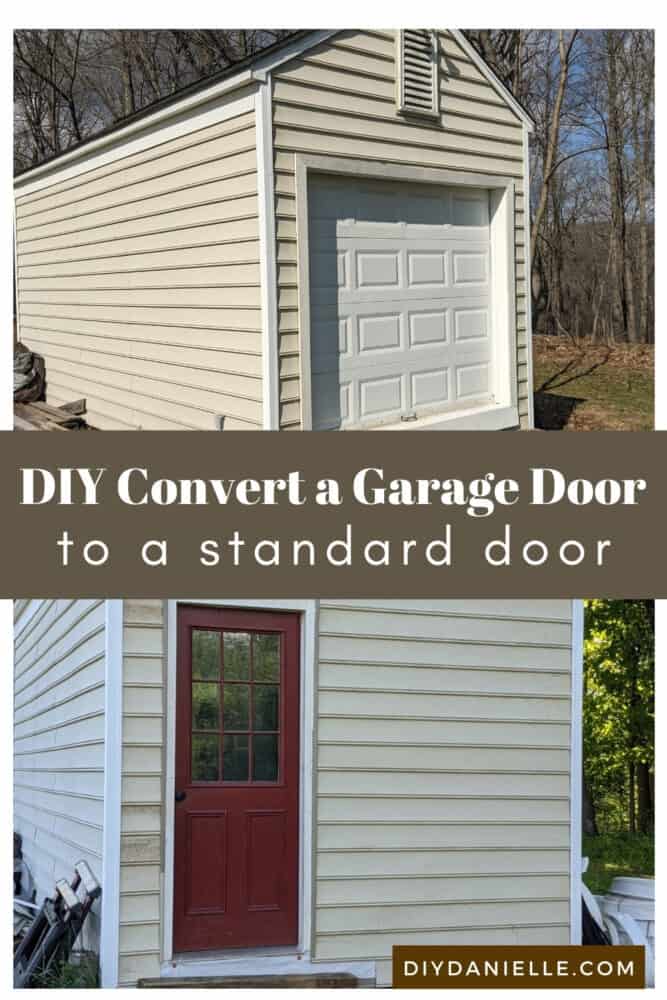
Want to remove a garage door and close it off? Add a new entrance? Here’s how we converted our garage door into a standard exterior door.
We’ve been converting an old shed into a she shed and office space for me. This has been quite the project, but it’s been a GREAT learning experience. I stated researching what I wanted in a she shed last year. With the price of wood right now, it was not in the budget to buy a brand new shed. We have a 10×20 shed in the backyard that I decided to update and use. I’ve been documenting my journey and the related updates on my Shed Repairs Page. Today’s project was to remove the garage door and frame out the space into a wall with a standard entry door.
I am not a builder. We are DIY’ers and we like to figure out how things work. This is NOT the correct way to do this, but it certainly worked for us. To do it correctly, you’d want to build the frame, leaving your space for a door to be installed. You’d install the frame, then install the door into the frame.
But let me explain how we did it… it’s working for us.
This post may contain affiliate links which may earn me commissions should you click through them and take certain actions. As an affiliate for Amazon, Cricut, xTool, Home Depot, and other sites, I earn from qualifying purchases. Please DIY carefully. View my full legal disclosures here.
The majority of my content is generated by me, as are 99% of the photos and videos, but I utilize technology for titles, descriptions, video editing out all of my ums, and occasionally for text overlay on images.
Please read the whole post so you don’t miss any important information!
We cut some corners to make the project easier. It’s pretty easy to get measurements wrong and we were working around rotten wood and poorly installed siding (no house wrap, hence the rotten wood). The garage door was initially installed correctly (and has supported the rest of the structure and roof for many years) so we knew that the area didn’t truly need the support of the frame, but we opted to add that frame anyways. I’d rather over build than under build and have everything fall apart.
To begin, we removed the garage door, the siding, on either side of the garage door, and cut away rotten wood. We hadn’t anticipated that the wood would be rotten so this was quite the shock; fortunately, we had plenty of osb and we were able to repair the bad areas. I recommend adding house wrap under siding, even for a shed, to prevent this type of issue in the future. Water CAN get under siding and damage the wood behind it.
Rather than build the frame, then add the door, we attached the door to the side of the garage door opening. This allowed us to build the frame around it.
Here’s a video of the process. For the photos and breakdown, keep scrolling.
Because I purchased the door used, I had to install a new door knob. Learn how to change out a door knob. I made DIY acrylic keychains for my new she shed keys!
Once the frame was built, we installed OSB for the walls, then added house wrap. Finally we wrapped things up by installing siding; the previous owner left lots of scrap siding under the shed which was PERFECT for this.
Supplies:
- Siding Nails
- Keyed Entry Door Knob
- Siding
- OSB
- Entry Door with Framing
- House Wrap (usually known as Tyvek)
- 2x4s
- J Trim for Siding
- Hammer
- Silicone Sealant
- Level
- Caulk Gun
Tutorial
Remove old garage door. Prior to starting the framing, we repaired the rotten floor near the entrance; the garage door had been leaking and caused some damage. It was important to repair that damage before framing over it.
- We screwed in the framed door to the left side of the entrance. I wish I’d bought a new door instead of buying one used. Given the expense of the project, it was a stupid way to save money. But here we are anyways.
2. Add a 2×4 above the door and all the way across the open entrance.
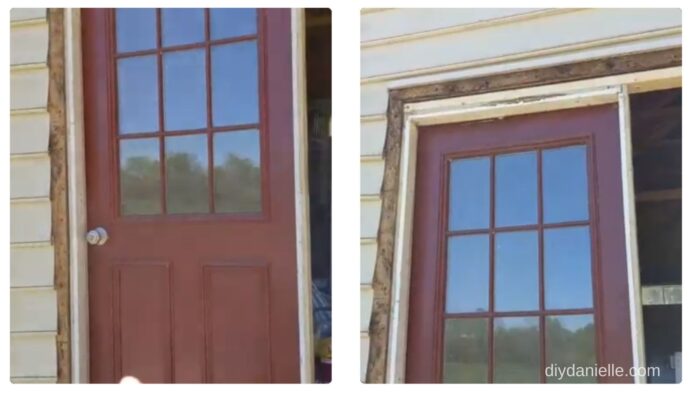
3. While the top 2×4 went above the door frame, we did not add a 2×4 below it. Instead we added a 2×4 to the bottom right. The video will show this a little better.
4. We added (2) vertical 2x4s: One beside the door and one on the opposite side of the opening… Essentially we created the frame in place.
5. Check to make sure the door will open and close properly.

6. We added studs every 16″ on center.
“On center” means that the middle of the 2×4 on one side lines up with the middle of the 2×4 for the next column. See left photo below. Unless your wall is perfectly 16 x X then you will probably have one area that is slightly less than 16″.
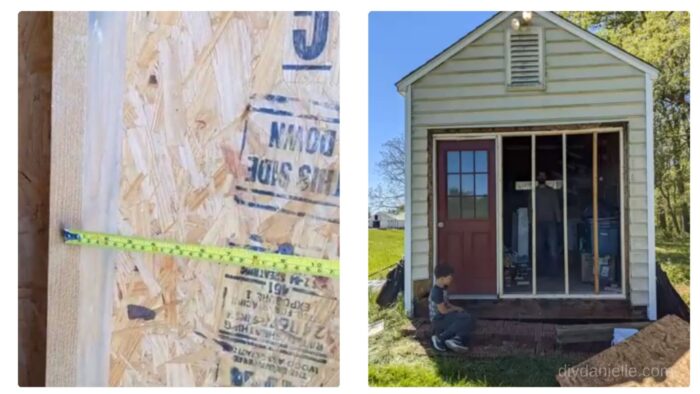
Right: Photo of the finished framing of the garage space.
7. To attach the studs, we needed to screw them in at an angle. Normally you would build a frame, THEN place it… this would allow you to screw down from the top of the frame.
8. Cut OSB to size if needed. Attach your OSB to the studs.
9. Removing the siding pieces from the garage door install. These will need to be replaced with bigger pieces.
10. Adding the 2nd piece of OSB.

11. We Installed House Wrap. This helps prevent any water that gets behind the siding from damaging the OSB.
In the left photo below, my husband is using gloves to rip off the rotten OSB that was there prior. The garage door installation wasn’t well done and there was no house wrap installed. As a result, water got behind the siding and the wood rotted. This probably isn’t a huge issue on a storage shed, but when you’re updating a shed into an office space, you want to do it right so the space won’t fall apart.
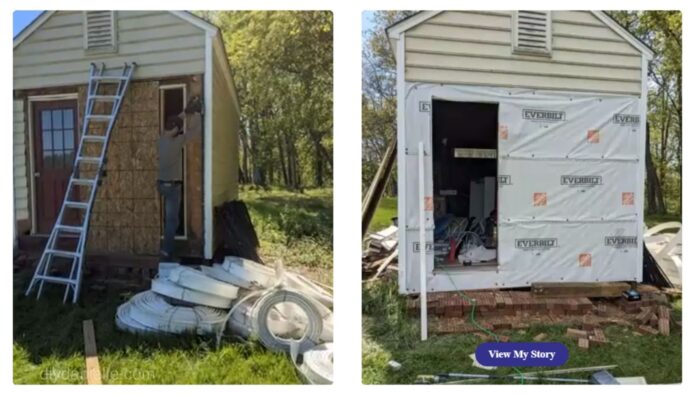
Right: Adding house wrap over the OSB.
12. Last, we attached siding. Here’s a tutorial on how to install siding. We used scraps and it worked out pretty well.
I’m not suggesting that this is the BEST way to do this project. But I wanted to share as it’s part of the steps we took to update the shed and I’m hoping it will inspire others to reuse and update older sheds rather than just junking them. DIY’ing this project meant I could AFFORD this project.
Please share and pin this post! You can also post your project and tag the DIYDanielle team on Instagram @doityourselfdanielle!