
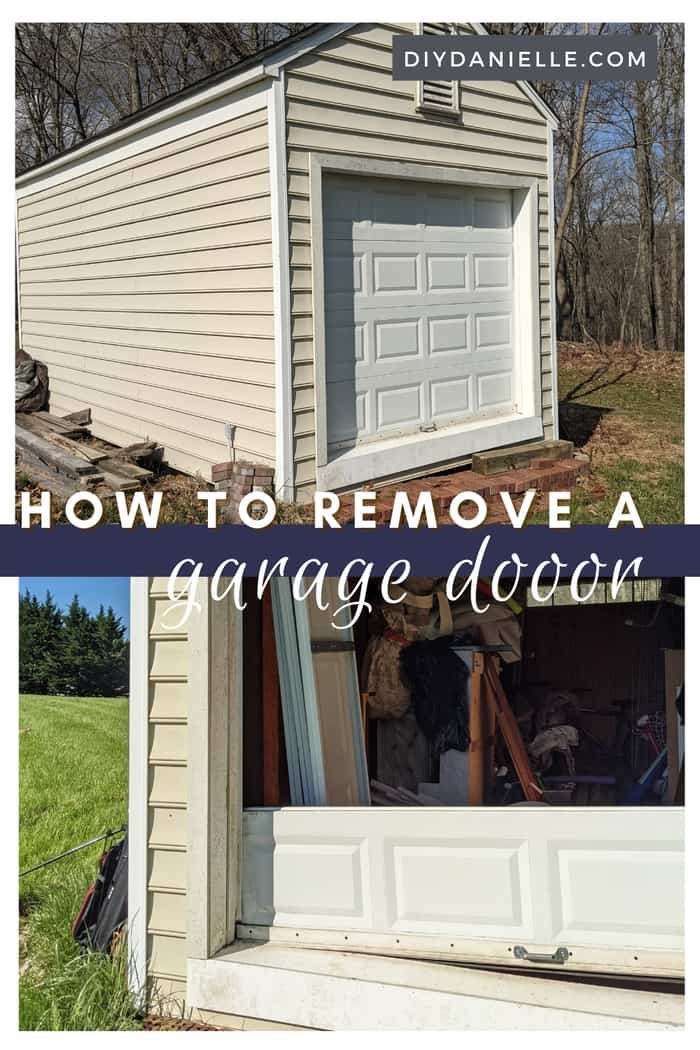
How to remove a garage door from a shed. This was our first step towards framing that wall and adding a standard entry door.
When I was contemplating converting our shed into an office space and sewing room, I really, realllllly wanted double glass doors to let light in. I love natural light. But we couldn’t fit a framed double door in the back of the minivan and I’ve been trying to cut costs; I couldn’t find double doors used either. I decided to opt for a $45 framed entry door with a glass window that I found on Marketplace.
With wood prices right now, saving money was important. I don’t have $20,000 to update the shed, nor did I think that would be a good use of my money. Buying a new shed wouldn’t be any cheaper and it seemed a bit wasteful. Needless to say, we decided to DIY as much as we could. I like to “work until I burn out” then hire the rest of the work out. Ha.
First step in converting the shed though was to remove the garage door. That’s what I’m going to talk about today.
This post may contain affiliate links which may earn me commissions should you click through them and take certain actions. As an affiliate for Amazon, Cricut, xTool, Home Depot, and other sites, I earn from qualifying purchases. Please DIY carefully. View my full legal disclosures here.
The majority of my content is generated by me, as are 99% of the photos and videos, but I utilize technology for titles, descriptions, video editing out all of my ums, and occasionally for text overlay on images.
Please read the whole post so you don’t miss any important information!
The garage door on the front of the shed was heavy and leaked. We had water damage on the floor that I need to fix thanks to this. There was nothing wrong with the door itself, but it would have let a lot of hot/cool air out, possibly caused continued problems with leaking, and it didn’t let any light it. I didn’t want to come out to my shed to work and have to haul the door up and down all the time. I also didn’t want to insulate the door.
Removing the garage door was simple. We started by undoing the spring while the door was open. Then we carefully lowered the door (it’s heavy once the spring is removed). At this point, we started with the top panel and removed all of the bolts. Each panel can be removed one by one.
Once all of the panels are out, we were able to remove the tracks and finally the springs. I kept all of the pieces together and listed the garage door on Marketplace to sell- I had several people interested and had the door sold and picked up before we even finished framing the door. Piece of cake!
Here’s how to remove a garage door that does NOT have an automatic door opener attached.
How to Remove a Garage Door
Here’s a video of the process.
Tutorial:
1.Remove the spring.
2. Lower door carefully.
3. Unscrew the individual pieces of your door. They should come apart. You’re working with a LOT of hex screws so having an electric drill with the right size bit is VERY helpful, and considerably faster than doing it with a manual screwdriver.
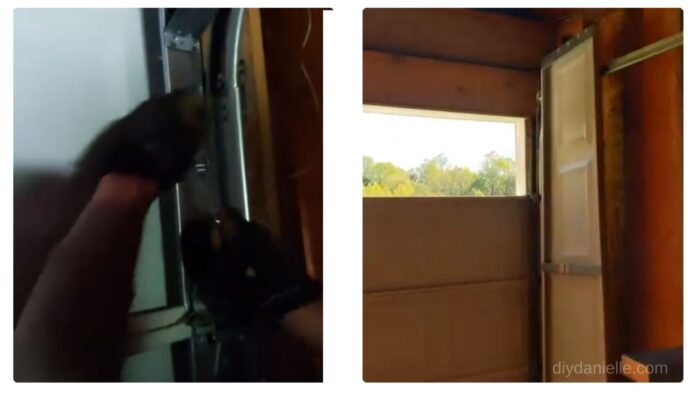
4. Work from the top down.
5. Removing the tracks.
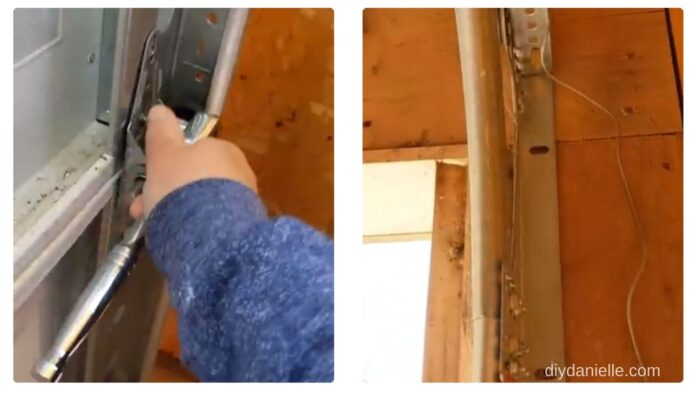
6. Remove the extra wood and springs.
All done! Next we framed the front of the shed and repaired the rotten wood floor.
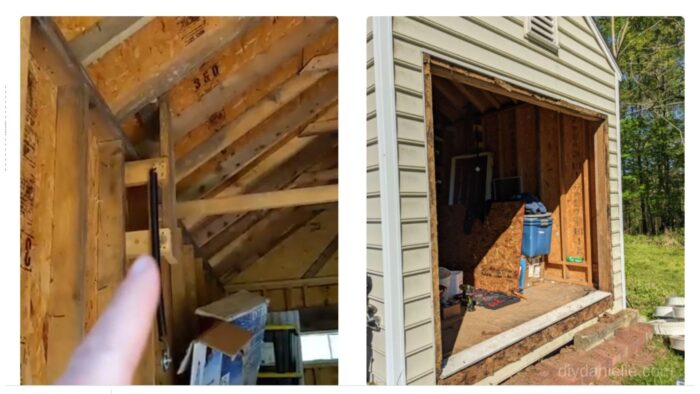
Right: Garage door area after the garage door was removed.
Please share and pin this post! You can also post your project and tag the DIYDanielle team on Instagram @doityourselfdanielle!
