
How to make the perfect cabinet to hold all of your board games. Add some vinyl to decorate it and you’re ready for game night!
This cabinet was a happy mistake. We started out using the Ana White Barn Door Bookcase woodworking plan to make a cabinet for the kids’ bathroom. My husband adjusted the measurements for our space… but forgot to take into account the lip of the countertop. The cabinet ended up being a hair too wide and it was NOT worth pulling everything apart to cut it down and rebuild.
We decided to start new for the bathroom cabinet and use this for board games. It ended up being the perfect depth and we desperately needed something to store them on. While we originally wanted to make the barn door, we are holding off on that for now. With wood prices and the inconvenience of hauling the wood home, it didn’t seem worth going back again for more wood.
This post may contain affiliate links which may earn me commissions should you click through them and take certain actions. As an affiliate for Amazon, Cricut, xTool, Home Depot, and other sites, I earn from qualifying purchases. Please DIY carefully. View my full legal disclosures here.
The majority of my content is generated by me, as are 99% of the photos and videos, but I utilize technology for titles, descriptions, video editing out all of my ums, and occasionally for text overlay on images.
Please read the whole post so you don’t miss any important information!
So while the process to build this cabinet is the same as the Ana White plan, and we want to send you her way for the actual instructions, I’m going to give you the adjustments that we made. The wood cuts are completely different.
Shelf Dimensions
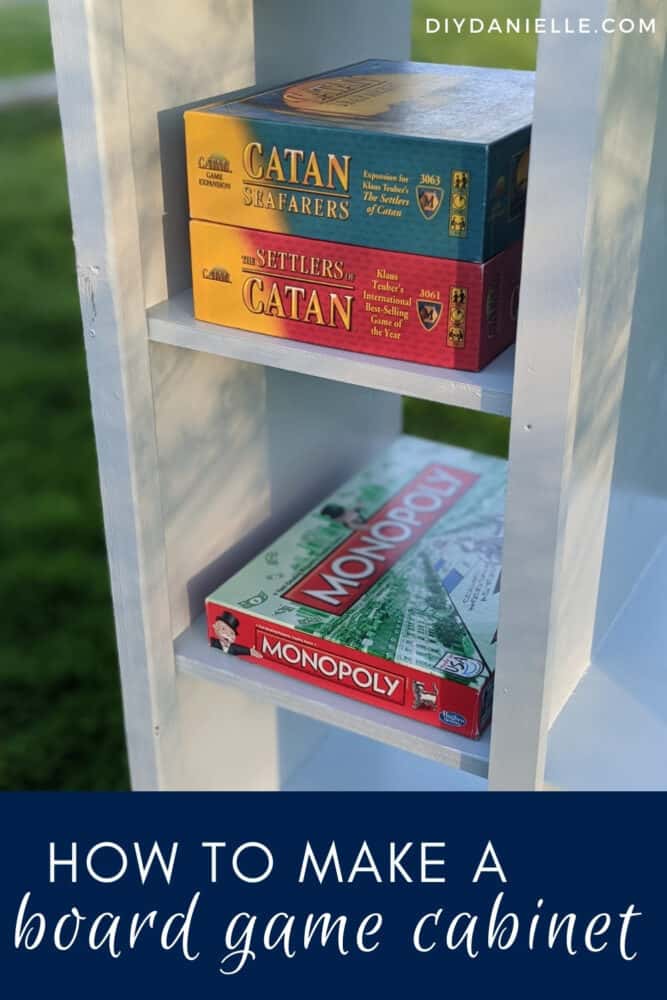
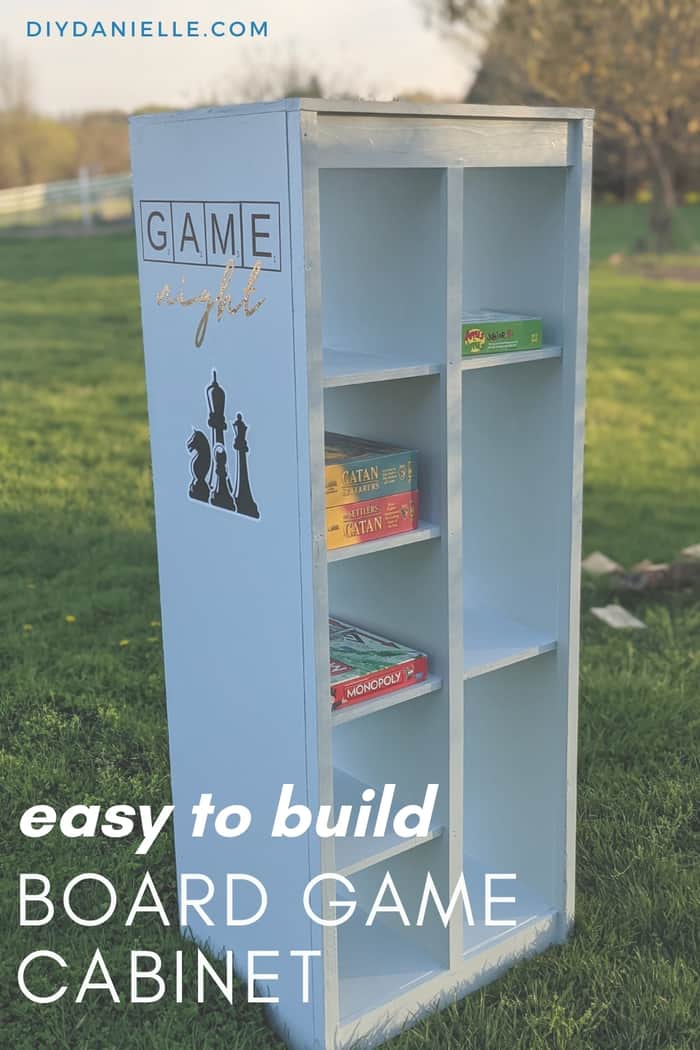
The final shelf dimensions are 28″ wide x 20″ deep x 72 3/4″ tall. The shelf width was 13 1/4″ and the top width (depending on the overhang) was 28 3/4″.
Shopping List
- Kreg Jig K4: We upgraded our Kreg Jig for this project and it was 100% worth it!
- (2) 4×8 sheets of 3/4″ plywood
- (1) 4×8 sheet of 1/4″ plywood
- (2) 6′ 2x2s
- (2) 8′ 1x2s
- (1) 8′ 1×3
- (4) 8′ 1×4
- 1-1/4″ pocket screws (100)
- 2″ trim screws
- 3/4″ and 1-1/4″ brad nails
- Primer
- Behr Premium Interior Semi-Gloss Cabinet and Trim Enamel (Paint): Dayflower, 1 Qt (barely enough)
I prefer to use Purebond plywood because it’s furniture quality and doesn’t require a ton of prep work. You will need to prime the wood first. I keep a large bin of primer on hand because I do a lot of projects that need it. Raw wood always needs primer first before paint.
I recommend preordering the paint because it looks like they don’t typically carry it on their website. I had 1 qt which was barely enough… it took two coats, on top of the primer.
Use the Discount Code DIYDANIELLE on cricut.com for 10% off any cutting machine or heatpress (no minimum). Excludes: materials/accessories/mystery boxes/etc. Applies to US/CA only, code expires 12/31/23.
Cuts List
- (3) 3/4″ plywood x 20″ @ 72
- (4) 1x2s @ 13 1/4″
- (6) 3/4″ plywood x 20″ @ 13 1/4
- (1) 3/4″ plywood x 22″ @ 28 3/4
- (2) 2×2 @ 72″
- (2) 1×4 @ 25″
- (2) 1×2 @ 65″
- (2) 1×4 @ 66″
- (2) 1×4 @ 6 3/4″
- (3) 1×4 @ unknown- angled pieces
- (1) 1/4″ plywood @ 13 3/4 x 66
This is the really basic tutorial on how we made the board game cabinet. I’ll talk a little more about our process when I write up my blog post about the kids’ bathroom cabinet, but Ana White has a full tutorial that we followed with our adjusted wood sizes.
DIY Board Game Cabinet
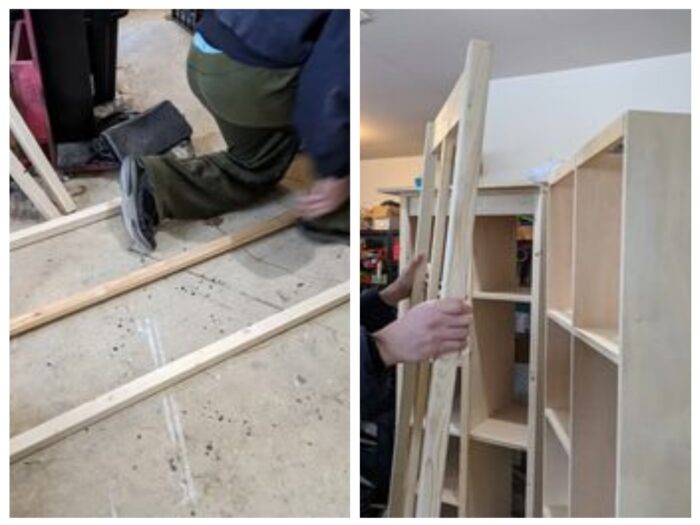
- Start by building your cabinet.
- We added all of our pocket holes to our wood in advance.
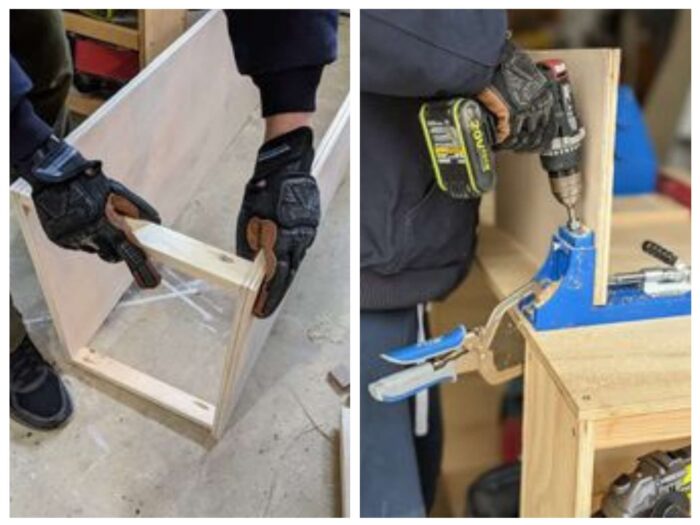
3. Build the frame or trim for the front of your cabinet
4. Attach the trim frame to the front of your cabinet.
5. Prime and paint your cabinet. This is Dayflower.
6. Use your Cricut Maker to cut Permanent Cricut Vinyl of your SVG designs. Apply using Cricut Transfer Tape.
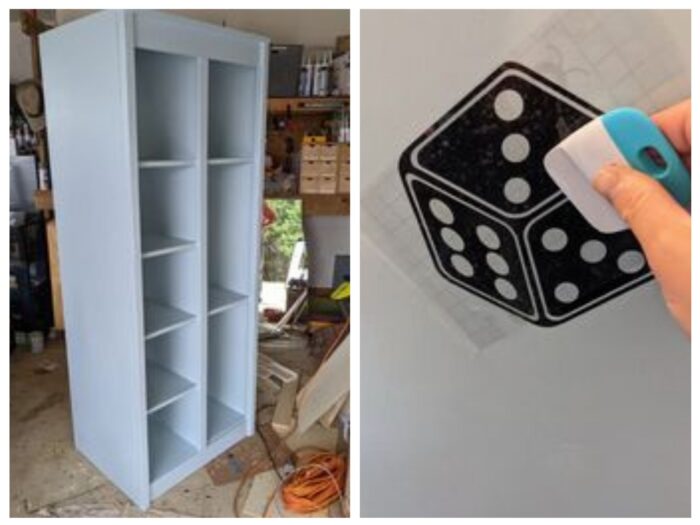
Check out Layering Cricut Vinyl on Wood: Chess SVG for more info on applying vinyl to wood.
7. Add your board games! (Photos outside but this lives in our basement)
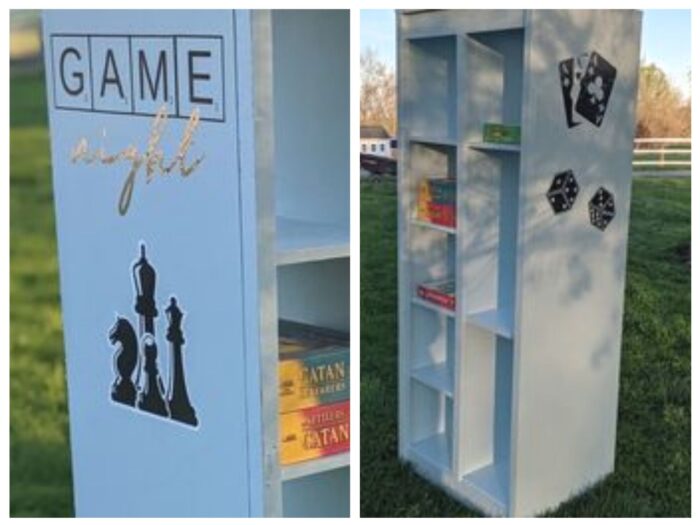
I made my own SVGs in Canva, then layered the designs on my wood cabinet.
Here’s the video:
Do you love to play games with your kids? Check out these DIY card holders! They make playing games with cards SO much easier.
You might like my post: How to Install an Outlet in a Nightstand Drawer
Please share and pin this post! You can also post your project and tag the DIYDanielle team on Instagram @doityourselfdanielle!
Google Web Story: Board Game Cabinet DIY

DIY Board Game Cabinet
Make a simple diy board game cabinet that is the perfect spot to keep all your board games in one location for easy use.
Materials
- (2) 4×8 sheets of 3/4″ plywood
- (1) 4×8 sheet of 1/4″ plywood
- (2) 6′ 2x2s
- (2) 8′ 1x2s
- (1) 8′ 1×3
- (4) 8′ 1×4
- 1-1/4″ pocket screws (100)
- 2″ trim screws
- 3/4″ and 1-1/4″ brad nails
- Primer
- Behr Premium Interior Semi-Gloss Cabinet and Trim Enamel (Paint)
Tools
- Kreg Jig K4
Instructions
Cuts List
- (3) 3/4″ plywood x 20″ @ 72″
- (4) 1x2s @ 13 1/4″
- (6) 3/4″ plywood x 20″ @ 13 1/4″
- (1) 3/4″ plywood x 22″ @ 28 3/4″
- (2) 2×2 @ 72″
- (2) 1×4 @ 25″
- (2) 1×2 @ 65″
- (2) 1×4 @ 66″
- (2) 1×4 @ 6 3/4″
- (3) 1×4 @ unknown- angled pieces
- (1) 1/4″ plywood @ 13 3/4 x 66″
Steps:
- Start by building your cabinet.
- Cut your pocket holes to our wood in advance.
- Build the frame of trim for the front of your cabinet.
- Attach the trim frame to the front of your cabinet.
- Prime and paint your cabinet.
- Use your Cricut Maker to cut Permanent Cricut Vinyl of your SVG designs.
- Apply using Cricut Transfer Tape.
- Add your board games!