

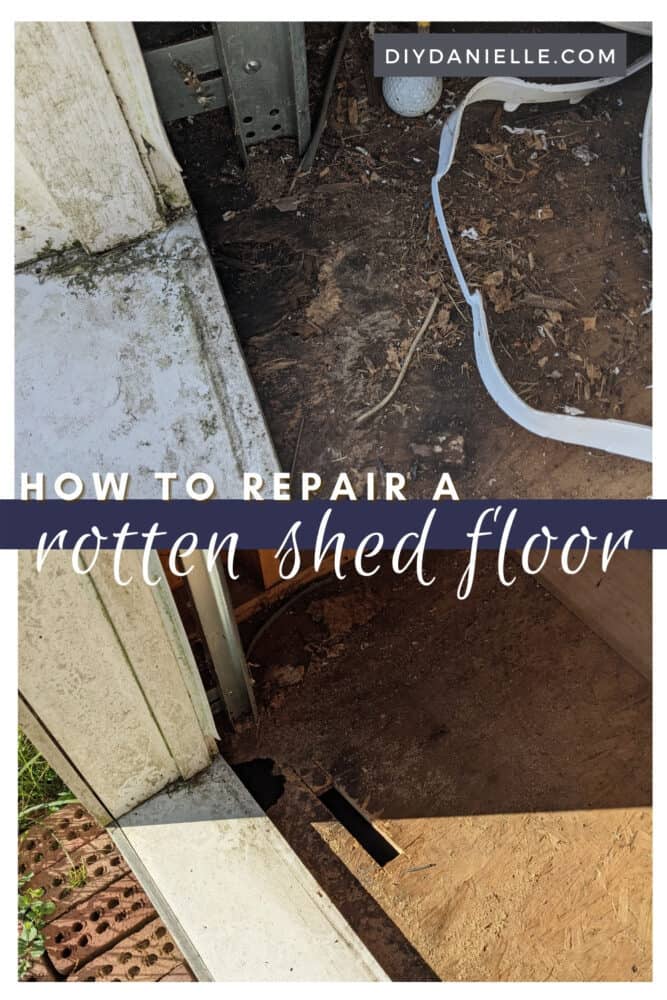
Learn how to repair a shed floor that has rotted. When we updated this she shed, we needed to fix this floor that was rotten. It wasn’t hard!
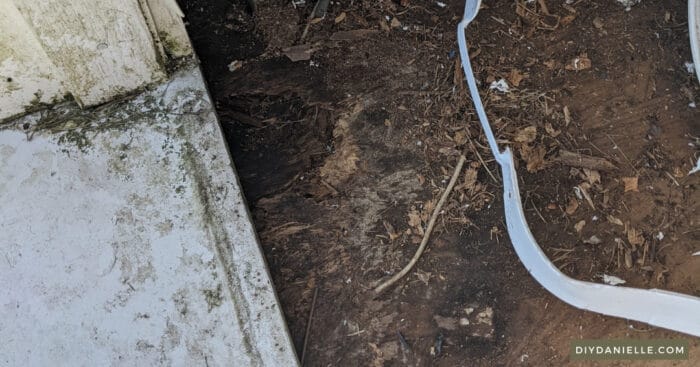
One of the first steps to creating my she shed was to start by repairing the floor. The shed was built in 2005 or 2006, and it’s raised up off the ground so there’s no ground contract with the shed’s floor. The entrance of the shed was a garage door and the broken seal along the edges allowed water to get into the shed. Over time, the flooring began to rot and eventually we were left with moldy, rotten wood.
The floor looked like this…
This post may contain affiliate links which may earn me commissions should you click through them and take certain actions. As an affiliate for Amazon, Cricut, xTool, Home Depot, and other sites, I earn from qualifying purchases. Please DIY carefully. View my full legal disclosures here.
The majority of my content is generated by me, as are 99% of the photos and videos, but I utilize technology for titles, descriptions, video editing out all of my ums, and occasionally for text overlay on images.
Please read the whole post so you don’t miss any important information!
We had to cut a section of the rotted wood away to determine what thickness wood to buy for the floor. It was 3/4″. Per the recommendation of our local lumber company, I purchased (1) 4×8 3/4″ Treated CDX plywood (Home Depot seems to call this RTD Sheathing) for this project.
CDX is commonly used for subflooring. CDX is treated so it’s a bit more resistant to water, but it’s not waterproof; it will expand when exposed to moisture, but dry fast. Prices of wood are high right now so the panel cost me $80. Ugh. Fortunately, we only needed one piece as the rest of the flooring was fine.
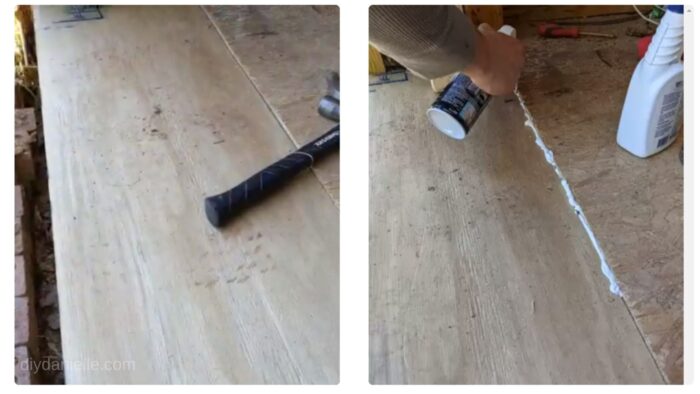
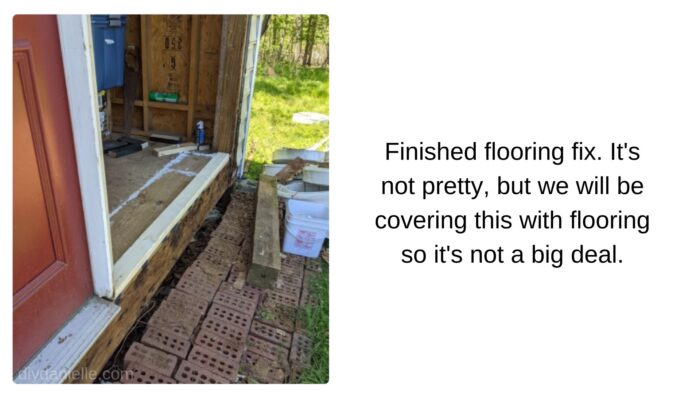
This was a pretty basic job. We cut away the damaged flooring with our circular saw, added scrap pieces of 2x4s for supports, then attached the new pieces of plywood flooring. There was some smaller gaps where the old floor and new floor met, but we used spray insulation foam. NOT the best option probably. Looking into it now, it looks like one option is polyurethane subfloor caulk. It doesn’t look perfect, but once I install real flooring over the CDX, it should look fine!
Here’s a video of the process. For the breakdown, keep scrolling.
How to Repair a Rotten Shed Floor
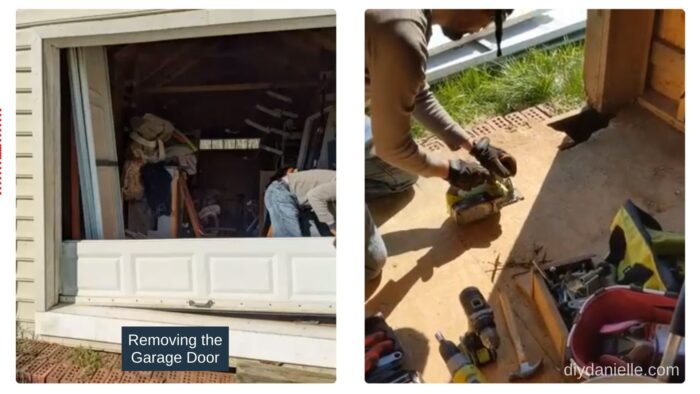
Step 1: Remove anything that’s in the way. We needed to remove the garage door (which we will be replacing).
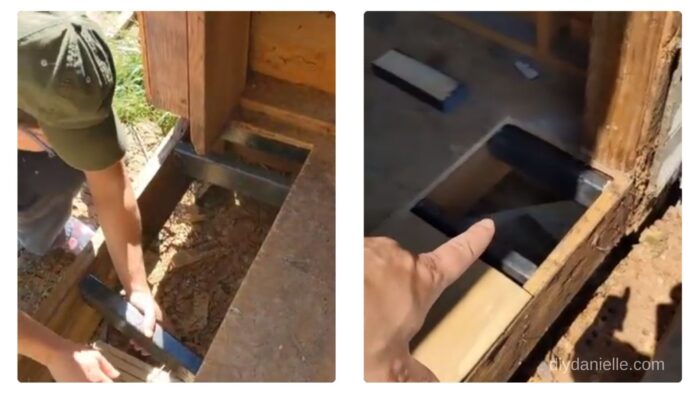
Step 2: Cut away your rotten wood. Do not hit floor joists.
Step 3: Add 2x4s perpendicular to the joists. These will provide support for your new floor.
Add extra supports as needed.
Step 4: Cut your new floor boards to the correct size.
Step 5: Install new plywood.
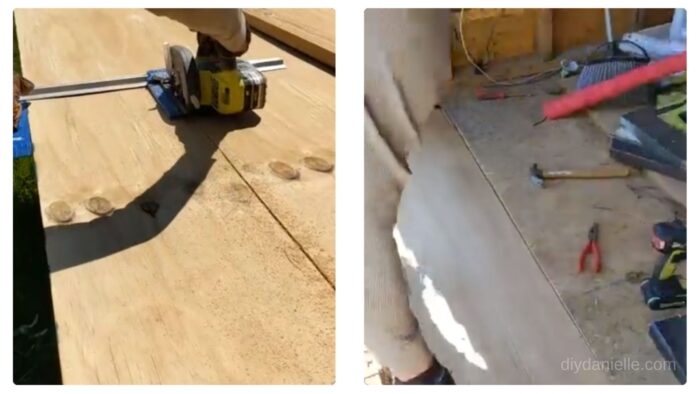
Step 6: Attach flooring to your supports and joists. We used 1 1/4″ Spax screws.
Step 7: Caulk or spray foam where the wood meets.
We will add flooring over it once the rest of the shed is finished.
Please share and pin this post! You can also post your project and tag the DIYDanielle team on Instagram @doityourselfdanielle!

Google Web Story: How to Fix a Rotten Floor