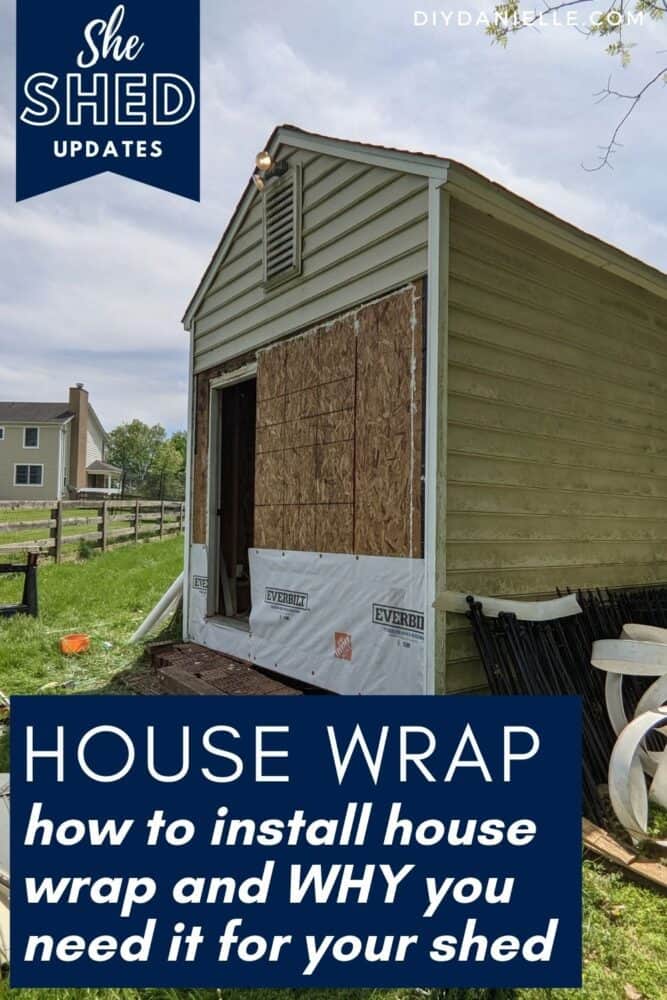
How to install house wrap (such as Tyvek) under vinyl siding on a shed. This is a great way to increase the life of your shed.
When we removed the garage door on our shed to replace it with a standard door (and framing), we discovered a lot of rotting siding. Fortunately, we had plenty of wood to replace it with, but it was a huge mess to clean up. When the shed was built, the builder didn’t install a house wrap, such as Tyvek, to protect this side of the shed. It appears that some type of protection was added to the other sides, but we didn’t remove the siding to find out.
As I plan to use this as an office and hope that the shed will last many years, adding a house wrap was a necessity. Most people are familiar with the name brand product, Tyvek, but I ended up using the slightly less expensive option by Everbilt. I’m going to explain why you need the house wrap and how to install it.
This post may contain affiliate links which may earn me commissions should you click through them and take certain actions. As an affiliate for Amazon, Cricut, xTool, Home Depot, and other sites, I earn from qualifying purchases. Please DIY carefully. View my full legal disclosures here.
The majority of my content is generated by me, as are 99% of the photos and videos, but I utilize technology for titles, descriptions, video editing out all of my ums, and occasionally for text overlay on images.
Please read the whole post so you don’t miss any important information!
What is House Wrap?
House wrap is a material used under vinyl siding. It helps prevent moisture, such as water, from getting onto your wood walls under the siding. This prevents the siding from decaying or molding. Rain water CAN get under your vinyl siding so it’s important to have the extra protection. You need to install the house wrap with the writing facing out as that is the side meant to repel moisture.
The other thing that house wrap does is allow moisture to escape from the home. The opposite side of the wrap is intended to allow this.
How to Install House Wrap on a Shed
I’m going to exclusively discuss how WE installed house wrap on one side of our shed. You’ll install it slightly differently if you’re installing it for an entire home (or shed). You generally want as few seams as possible. Around windows and doors, if you’re installing this on a new structure before they’re installed, you wrap the house wrap around the openings. Here we were working with a door that was already installed.
Here’s the video of the process.
Supplies:
Tutorial:
- Install the bottom layer of your house wrap first.
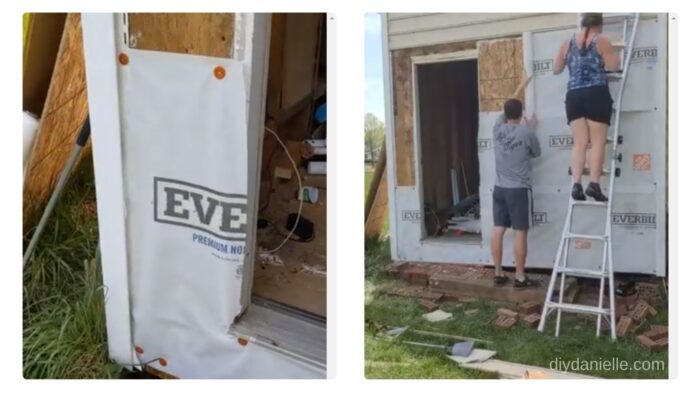
2. We worked around the door for Row 1 and Row 3.
3. Work your way up, layering the sections so the top overlaps the bottom.
4. Add tape along seams.
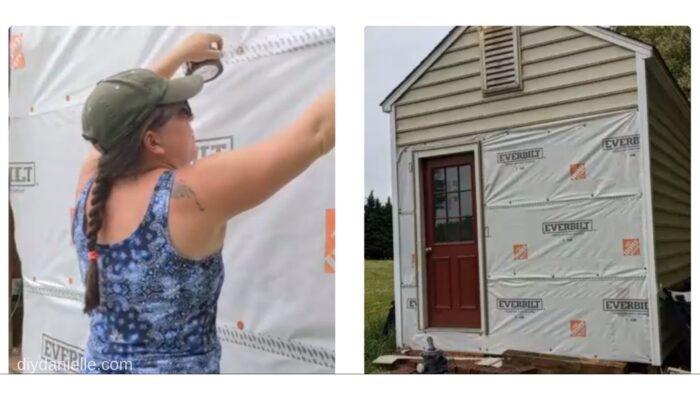
Finished! We added our vinyl siding next.
Google Web Story: https://diydanielle.com/web-stories/install-house-wrap-on-a-shed/
Please share and pin this post! You can also post your project and tag the DIYDanielle team on Instagram @doityourselfdanielle!