
How to build your own box spring from a kit in 30 minutes or less! This is a great way to save money instead of spending a lot of money on a boxspring.
This post may contain affiliate links which may earn me commissions should you click through them and take certain actions. As an affiliate for Amazon, Cricut, xTool, Home Depot, and other sites, I earn from qualifying purchases. Please DIY carefully. View my full legal disclosures here.
The majority of my content is generated by me, as are 99% of the photos and videos, but I utilize technology for titles, descriptions, video editing out all of my ums, and occasionally for text overlay on images.
Please read the whole post so you don’t miss any important information!
My dad gifted us a new bedroom set when we moved to our new house, but we needed to pick up a box spring and mattress. I didn’t want to spend a lot of money so I decided to opt for a box spring kit on Amazon.com that could be shipped and had good ratings. I did not want to make a trip to the store with a toddler just to deal with sales people. There’s something about the combination of a wiggly toddler and a sale person pressuring me that really breaks my day.
The kit required building the box spring ourselves, but cost less than purchasing an assembled box spring. This was a super easy DIY project so it was definitely worth it.

Assembling the Box Spring
So I got the box of parts in the mail and haul it up to our bedroom. These are fairly heavy- my mail people probably dread our deliveries.
I open it and…. no instructions. I have this lovely bag of screws. A tool to install it. And… my brain.
Okay so here’s how I built the box spring (hopefully correctly, if you get this item then I recommend reading the instructions if you get them). I had to build mine on top of the bed because I didn’t have enough floor space to set up a king size box spring.
This is what I got in the kit:
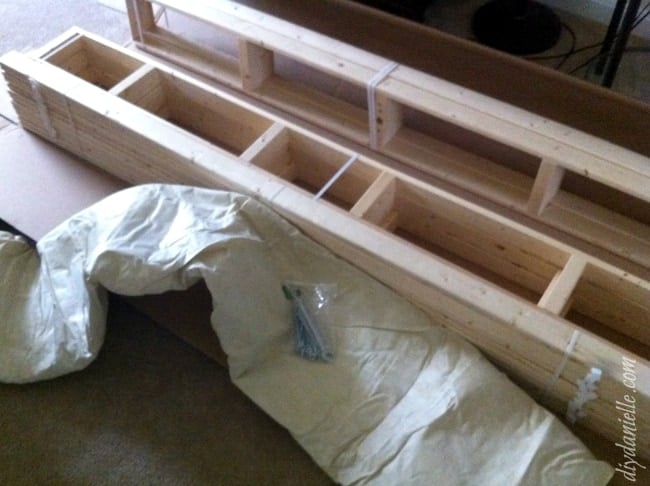
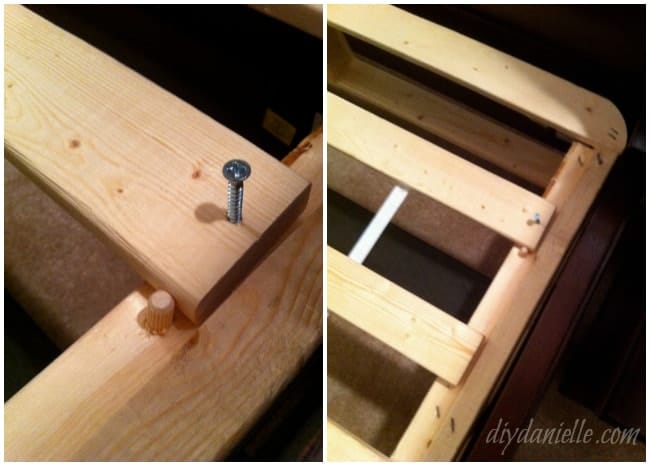
1) Take out your large pieces of wood. There are two pieces with rounded edges. Those are for the top and bottom of the box spring. The two pieces with a “lip” go on the outsides and the last piece goes in the middle (this piece looks different depending on what side is up… Make sure its even with the outside pieces). They come with those dowel pieces in them already so you can just snap them in place.
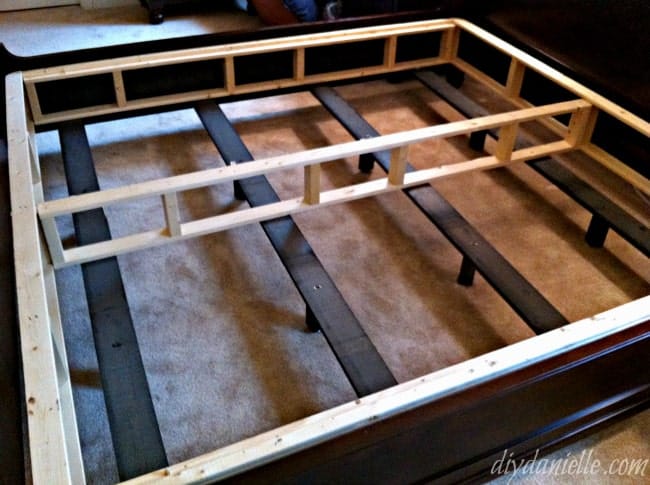
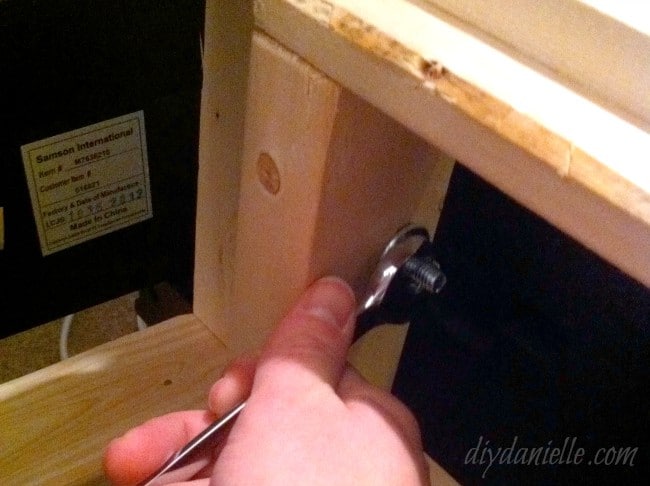
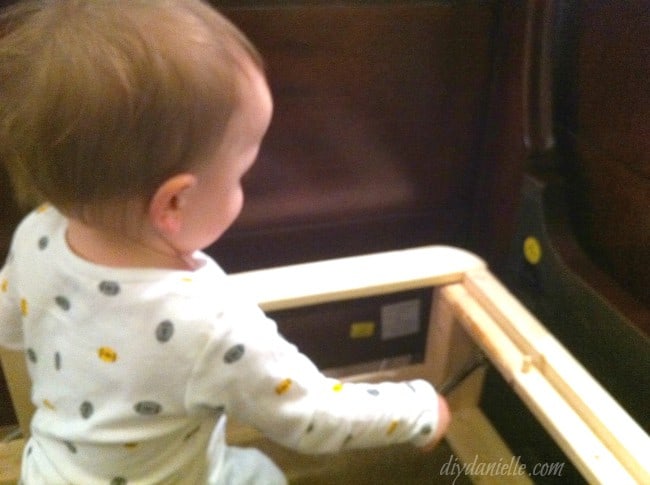
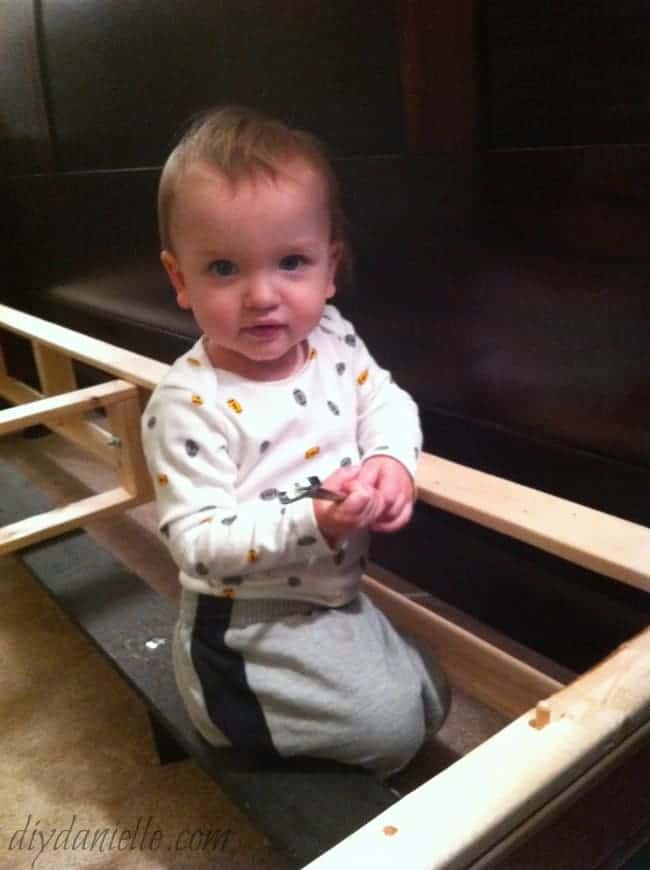
2) You should have 6 really long bolts. Use three on each side, one for each long board. Then use a washer and the nut on the other side of the wood and tighten them so the pieces are all secure. As you can see, my big helper was with me the whole time which made this take 4x as long…
3) Lay out the long mat of thin wood pieces that are connected via the “tape”… I put the tape side down. There were four pegs on my base that seemed to have no purpose but I decided that they were there to hold the very end wood pieces in place… The “mat” was just long enough to reach the pegs so that one wood piece was over the two pegs on each end.
4) You have 6 normal screws and there are 6 screw holes in those wood pieces you just laid down. There were no holes in the base so I assumed I had to make my own. Use a manual screwdriver so you don’t accidentally split the wood with the electric ones.
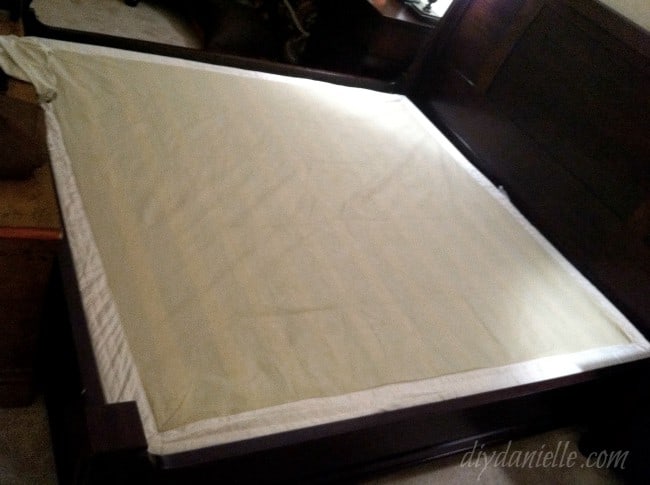
5) Pull the included cover over it all and you’re done.
Yep, that easy. It probably would’ve taken about 30 min without instructions if I hadn’t had a toddler “helper” or 15 min if I’d had instructions and no helper. Instead it took me a couple hours because Baby G would scream and freak out whenever I took the wrench from him. Good times!
I think this looks really good and just as solid as the ones you buy. Some reviews for similar products said the wood wasn’t very high quality, but I thought this one was pretty decent. I don’t think box springs typically use the best wood, primarily because nobody ever sees it. But maybe I’m wrong.
Mattress Selection
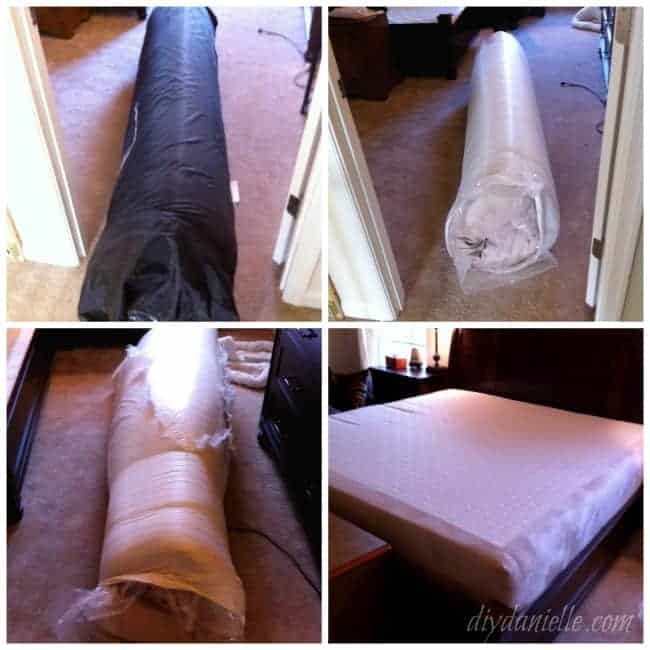
We ordered our mattress online from Overstock. We spent a ton of money before Baby G was born on a Temper-Pedic and while I love it, we just need way too much for the new house to drop that much money on a mattress again. The mattress we ordered was a memory foam with gel and had good ratings so we risked it.
Update September 4, 2018: We definitely found that the mattress didn’t last as well as our Temper-Pedic did. If I didn’t have back problems, it might not have been an issue, but I probably should have invested the money at the time. Instead we had to buy a new mattress a few years down the line.
If you’re interested in a Temper-Pedic mattress, you can Save $550 when you purchase a Tempur Breeze, Elite, or Luxe mattress using my link.
Here’s the King Size Memory Foam that I ordered online from Overstock. in its stages of unwrapping. This was a 91 lb bag of mattress. The mattress was the 11″ Body Flex King-Size Memory Foam mattress which at the time was priced at $440. It was an interesting experience to order this online and have it delivered all rolled up!
Not the best picture ever, but my beautiful bed all set up! I’m so proud and it’s actually pretty comfortable too!

Please share and pin this post!

Love furniture? Here are some other furniture projects we’ve done: Distressed Lego Desk | Easy Living Room Storage Cabinets | Built In Entertainment Center | Quick and Easy Drawer Stoppers | Gaming Table | DIY Rustic Outdoor Chairs

DIY Box Spring
Learn how to build your own box spring from a kit in 30 minutes or less! This is a great way to save money too.
Materials
- Box Spring Kit
- 2 Large Wood Pieces With Rounded Edges
- 2 Large Wood Pieces With A Lip
- Dowels
- 6 Bolts, washers and nuts
- 4 Pegs
- 6 Screws
Instructions
- Remove all the pieces of the box spring kit from the box.
- Place the two large wood pieces with rounded edges at the top and bottom of the box spring.
- Place the two pieces with a “lip” on the outside.
- The final wood piece goes in the middle of the box spring.
- Use three bolts on each side, with a washer and nut on the other side of the wood.
- Tighten so they are secure.
- Lay out the long mat of thin wood pieces with the tape side down.
- Use the four pegs to hold the wood pieces in place.
- With a manual screwdriver, secure the wood pieces using the included screws.
- Pull on the included cover.
Recommended Products
As an Amazon Associate and member of other affiliate programs, I earn from qualifying purchases.

I savor, cause I found exactly what I used
to be looking for. You have ended my 4 day long hunt!
God Bless you man. Have a nice day. Bye